Table of Contents
Advertisement
Advertisement
Table of Contents

Related Manuals for Millenium HD-100


Summary of Contents for Millenium HD-100
- Page 1 HD-100 ’ wner anual DIGITal DruM seT...
-
Page 2: Important Safety Instructions
Children should be supervised to ensure that they do not play with the appliance. • Provide a stable location for the device. • Do not operate the device if it has sustained a fall or is damaged. Have the device checked or, if necessary, repaired by qualified technicians. HD-100... -
Page 3: Features
• Important! Never play the drums with high volume level. Listening to music with high sound pressure level, especially when using headphones, may cause permanent damage to your hearing! Handling the unit • Never apply excessive force to the controls, connectors or other parts of the instrument. •... -
Page 4: Table Of Contents
Select a click sound .................... 15 Adjust the click volume ..................16 Factory reset ....................... 16 Hi-Hat control ....................16 Specifications ......................17 Voice list ........................18 Pattern list ........................19 Percussion set list ....................... 20 MIDI implementation chart ..................21 Disposal ........................22 HD-100... -
Page 5: The Operating Elements
The operating elements ..on the top panel q VOLUME: i PATTERN: Volume control for the headphones output. to select the pattern and for choosing the midi Turn it clockwise to increase the volume, turn it output format. -
Page 6: On The Rear Panel
Use this socket to connect the unit to a computer (MIDI in/out via USB). e OUTPUT: You can connect an audio system or drum y Trigger input jacks: monitor to this stereo output. Connect the individual pads to these terminals. HD-100... -
Page 7: Setup The Drum Set
Setup the drum set CAUTION! To prevent electric shock and damage to the device, make sure the power is switched OFF on the drum module and all related device before making any connection. Connect the pads and the pedal Connect with kick, snare, tom1~tom3, ride, crash, hi-hat, hi-hat control triggers using the cables provided. The snare drum features a stereo input and supports double triggering (increase edge triggering);... -
Page 8: Connect The Power Supply Jack
3. The drum module sends the MIDI data by hitting pads or stepping pedal through USB port. But the data of the click and song playing is not included. USB port only sends and receives MIDI information. Note: Channel 11 is set as default percussion channel. HD-100... -
Page 9: Midi-Out Format
MIDI-Out format One of the two different MIDI output formats can be selected for the drum module: the internal format (default setting) and the GM format. The internal format is used when the drum module works as a sound source (drum module must be connected to a computer or other module with USB host device by USB, and send midi data to another drum module. -
Page 10: Functions
+/– buttons. (0-16, not in cycle). Then press the KIT button again to enter the KIT selecting mode. The volume indicator goes out. Please note that in recording waiting mode, the KIT volume value can be shown on the display but it can not be adjusted. HD-100... -
Page 11: Select A Pad Voice
Select a pad voice The drum module provides 108 built-in drum voices in total to choose from. Press the VOICE button to enter pad voice selecting mode. The 3-digit LED displays the current pad voice number and the voice indicator lights up. In the pad voice selecting mode, press +/–... -
Page 12: Select A Pattern
Please note that in recording waiting mode, the pattern volume value could be shown on the display but it could not be adjusted. Note: Pattern volume only controls the accompaniment part volume of the pattern. HD-100... -
Page 13: Recording
Recording Enter the recording waiting mode Press and hold the SAVE button for about 2 seconds, to enter user pattern recording waiting mode. The 3-digit LED displays the KIT number and the REC indicator flashes. In recording waiting mode the correspondent parameter can be adjusted. -
Page 14: Drum Off
Press the DRUM OFF button to mute on/off the drum part. If “drum off” is activated, the drum sound of the currently playing pattern will be muted and the “drum off” indicator lights up. This function is convenient for user practise. HD-100... -
Page 15: Adjust The Pattern Tempo
Adjust the pattern tempo Press the TEMPO button to enter tempo adjustment mode. The 3-digit LED then temporarily displays TEMPO value. Press the +/– buttons to change the tempo of click and pattern playing (30-280, not in cycle). Press + and – button at the same time, to reset to the default value (the current pattern default tempo). -
Page 16: Adjust The Click Volume
Open hi-hat: Strike the hi-hat without stepping the pedal. Closed hi-hat: Strike the hi-hat with the pedal stepped. Foot closed: Completely step down the pedal. Splash: play the hi-hat with the pedal fully stepped and then instantly releasing it. HD-100... -
Page 17: Specifications
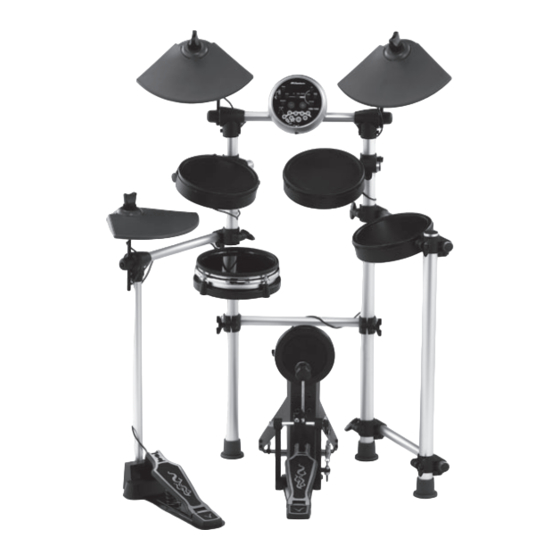
Specifications Drum Pads: 3 tom pads 2 cymbal pads 1 snare pad (dual trigger) 1 hi-hat control pedal 1 hi-hat 1 kick Voices: 108 voices Drum kits: 10 preset kits 5 user kits Patterns: 40 preset songs and 1 user pattern Display: LED display Connections:... -
Page 18: Voice List
Preset kits and default user kits NAME NAME Standard TR606 Rock User kit1 (Standard) Funk User kit2 (Rock) Brush User kit3 (Pop) Jazz User kit4 (Funk) Table User kit5 (Brush) Latin Note: Number 001~010 are preset kits, number 011~015 are users kits. HD-100... -
Page 19: Pattern List
Pattern list PATTERN PATTERN Fusion1 Fusion2 Latin Jazz1 Jazz1 Funk1 Guitar Bossa Latin Pop1 Break Beat 60‘s Rock World1 Big Band1 Funk3 Drum N‘Bass Latin Jazz3 Ballad Latin Pop2 Swing Reggae1 Pop1 World2 Funk2 Latin Latin Jazz2 Bossa Pop Funk1 Samba2 Latin Rock1 3/4Pop... -
Page 20: Percussion Set List
< – < – < – < – < – < – < – 86 Mute Surdo < – < – < – < – < – < – < – 87 Open Surdo <-:Same as the left one. HD-100... -
Page 21: Midi Implementation Chart
MIDI implementation chart Function Transmitted Recognised Remarks Basic Default 10 ch 1 - 16 Channel Changed Default Mode Messages Altered *********** *********** Note 0 - 127 0 - 127 Number: True voice *********** 0 - 127 Velocity Note on O 99H, V=1-127 Note off (99H, V=0) After... -
Page 22: Disposal
Dispose of the device through an approved disposal centre or at your community waste facility. Observe the current existing regulations. In case of doubt contact your disposal facility. The packaging is certified via a dual system. Take all packaging materials to an environmentally friendly disposal facility in compliance with the local regulations. HD-100... - Page 23 www.thomann.de...
- Page 24 © 2010 • Musikhaus Thomann e. K. • Treppendorf 30 • 96138 Burgebrach • Germany • www.thomann.de...