Table of Contents
Advertisement
Quick Links
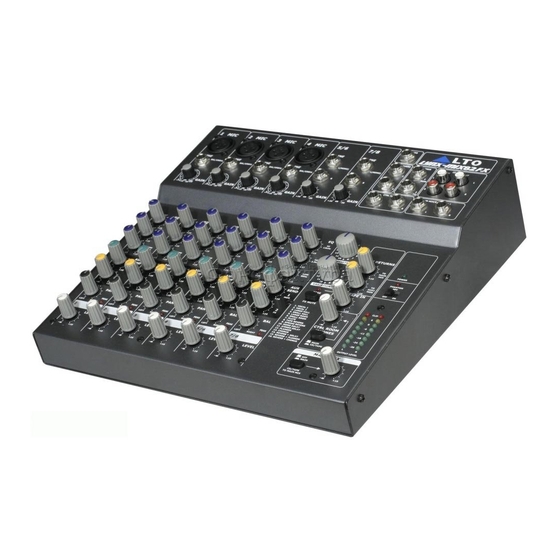
LYNX-MIX82/
LYNX-MIX82FX
8-CHANNEL MIXING CONSOLE
WITH DIGITAL EFFECTS
1
MIC
2
MIC
J.T.
J.T.
J.T.
2
1
2
1
3
3
LINE
LINE
BAL/UNBAL
BAL/UNBAL
LINE
LINE
GAIN
GAIN
0
dB
50
0
dB
50
+15
-35
+15
-35
EQ
EQ
HI
HI
12kHz
12kHz
-15
+15
-15
+15
MID
MID
2.5kHz
2.5kHz
-15
+15
-15
+15
LOW
LOW
80Hz
80Hz
-15
+15
-15
+15
AUX
AUX
SEND
SEND
1
1
MON
MON
-
+10
-
+10
2
2
FX
FX
-
+10
-
+10
PAN
PAN
PEAK
PEAK
LEFT
RIGHT
LEFT
RIGHT
1
2
LEVEL
LEVEL
-
+10
-
+10
1
MIC
2
MIC
3
MIC
J.T.
J.T.
J.T.
J.T.
2
1
2
1
2
1
3
3
3
LINE
LINE
LINE
BAL/UNBAL
BAL/UNBAL
BAL/UNBAL
3
MIC
4
MIC
5/6
7/8
LINE
LINE
LINE
LINE
LINE
J.T.
J.T.
J.T.
2
1
2
1
3
3
GAIN
GAIN
GAIN
0
dB
50
0
dB
50
0
dB
50
+15
-35
+15
-35
+15
-35
L(MONO)
L(MONO)
LINE
LINE
BAL/UNBAL
BAL/UNBAL
R
R
LINE
LINE
EQ
EQ
EQ
HI
HI
HI
GAIN
GAIN
GAIN
GAIN
12kHz
12kHz
12kHz
0
dB
50
0
dB
50
dB
dB
+20
-20
+20
-20
+15
-35
+15
-35
-15
+15
-15
+15
-15
+15
MID
MID
MID
2.5kHz
2.5kHz
2.5kHz
-15
+15
-15
+15
-15
+15
LOW
LOW
LOW
80Hz
80Hz
80Hz
EQ
EQ
EQ
EQ
HI
HI
HI
HI
-15
+15
-15
+15
-15
+15
12kHz
12kHz
12kHz
12kHz
AUX
AUX
AUX
-15
+15
-15
+15
SEND
-15
+15
SEND
-15
+15
SEND
1
1
MID
MID
MID
MID
MON
MON
MON
2.5kHz
2.5kHz
2.5kHz
2.5kHz
-
+10
-
+10
-
+10
-15
+15
-15
+15
-15
+15
-15
+15
2
2
2
LOW
LOW
LOW
LOW
FX
FX
FX
80Hz
80Hz
80Hz
80Hz
-
+10
-
+10
-
+10
-15
+15
-15
+15
-15
+15
-15
+15
PAN
PAN
PAN
AUX
AUX
AUX
AUX
SEND
SEND
SEND
SEND
PEAK
PEAK
1
1
1
1
LEFT
RIGHT
LEFT
RIGHT
LEFT
RIGHT
MON
MON
MON
MON
1
2
3
-
+10
-
+10
-
+10
-
+10
LEVEL
LEVEL
LEVEL
2
2
2
2
FX
FX
FX
FX
-
+10
-
+10
-
+10
-
+10
-
+10
-
+10
-
+10
PAN
PAN
BAL
BAL
PEAK
PEAK
PEAK
PEAK
LEFT
RIGHT
LEFT
RIGHT
LEFT
RIGHT
LEFT
RIGHT
3
4
5/6
7/8
LEVEL
LEVEL
LEVEL
LEVEL
-
+10
-
+10
-
+10
-
+10
User's Manual
PHONES
4
MIC
5/6
7/8
LINE
LINE
J.T.
J.T.
2
1
AUX RETURNS
3
L(MONO)
L(MONO)
LINE
BAL/UNBAL
PHONES
R
R
X- IX 82
CTRL ROOM
LINE
CD/TAPE
AUX RETURNS
AUX SENDS
IN
OUT
GAIN
GAIN
GAIN
L
L
0
dB
50
dB
dB
+20
-20
+20
-20
+15
-35
L
1
MON
R
R
2
R
FX
CTRL ROOM
MAIN MIX(BAL/UNBAL)
1
16
EQ
EQ
EQ
15
14
HI
HI
HI
L
R
L
R
13
12kHz
12kHz
12kHz
12
11
-15
+15
-15
+15
-15
+15
10
9
PRESETS
MID
MID
MID
2.5kHz
2.5kHz
2.5kHz
1
16
15
14
-15
+15
-15
+15
-15
+15
13
12
LOW
LOW
LOW
80Hz
80Hz
80Hz
11
10
9
VARIATIONS
-15
+15
-15
+15
-15
+15
AUX
AUX
AUX
PEAK
AUX RETURNS
SEND
SEND
SEND
1
1
1
1
MON
MON
MON
FX MUTE
TO
-
+10
-
+10
-
+10
MAIN
POWER
MIX
1. VOCAL 1
2. VOCAL 2
-
+10
3. LARGE HALL
4. SMALL HALL
2
2
PHANTON
2
48V
5. LARGE ROOM
FX
FX
FX
6. SMALL ROOM
TO
-
+10
-
+10
-
+10
7. PLATE
AUX1
8. TAPE REVERB
MON
OFF
ON
9. SPRING REVERB
-
+10
PAN
BAL
BAL
10. MONO DELAY
CD/TAPE IN
11. STEREO DELAY
12. FLANGER
13. CHORUS
14. REVERB + DELAY
PEAK
PEAK
PEAK
PEAK
15. REVERB + FLANGER
LEFT
RIGHT
LEFT
RIGHT
LEFT
RIGHT
16. REVERB + CHORUS
CLIP
4
-
5/6
+10
7/8
6
LEVEL
LEVEL
LEVEL
0
-6
-
+10
-12
CTRL ROOM
-
+10
-
+10
-
+10
/PHONES
-18
-24
-30
MAIN
L
R
CD/TAPE
OUTPUT LEVEL
MAIN MIX
OFF
MAIN
CD/TAPE
TO MAIN MIX
-
+10
X- IX
82
X
AUX SENDS
CD/TAPE
IN
OUT
L
L
L
1
MON
R
R
2
R
FX
MAIN MIX(BAL/UNBAL)
L
R
L
R
2
3
4
5
6
AUX RETURNS
7
8
TO
2
MAIN
POWER
3
MIX
4
-
+10
5
PHANTON
6
48V
7
TO
8
AUX1
MON
OFF
ON
-
+10
CD/TAPE IN
CLIP
-
+10
6
0
-6
-
+10
-12
CTRL ROOM
-18
/PHONES
-24
-30
MAIN
L
R
CD/TAPE
OUTPUT LEVEL
MAIN MIX
OFF
MAIN
CD/TAPE
TO MAIN MIX
-
+10
www.altoproaudio.com
Version 1.0 Fer. 2009
English
Advertisement
Table of Contents

Related Manuals for Alto LYNX-MIX82


Summary of Contents for Alto LYNX-MIX82
- Page 1 User's Manual LYNX-MIX82/ LYNX-MIX82FX 8-CHANNEL MIXING CONSOLE WITH DIGITAL EFFECTS PHONES X- IX LINE LINE J.T. J.T. J.T. J.T. J.T. J.T. AUX RETURNS AUX SENDS CD/TAPE L(MONO) L(MONO) LINE LINE LINE LINE BAL/UNBAL BAL/UNBAL BAL/UNBAL BAL/UNBAL PHONES X- IX 82...
-
Page 2: Important Safety Instruction
IMPORTANT SAFETY INSTRUCTION CAUTION WARNING To reduce the risk of electric shock RISK OF ELECTRIC SHOCK and fire, do not expose this equipment DO NOT OPEN to moisture or rain. TO REDUCE THE RISK OF ELECTRIC SHOCK PLEASE DO NOT REMOVE THE COVER OR Dispose of this product should THE BACK PANEL OF THIS EQUIPMENT. -
Page 3: In This Manual
1. INTRODUCTION Thank you for purchasing the LTO L YNX-MIX82(FX) 8-channel mixing console with 24-bit digital multi-effect. It is just one of the many Alto products that a talented, multinational Team of Audio Engineers and Musicians have developed with their great passion for music. -
Page 4: Quick Start
3. QUICK START This is the fastest way to get something out from your L YNX-MIX82(FX), if you have a keyboard and a microphone. a. With the Main switch in OFF position, connect the supplied AC Adapter to your L YNX-MIX82(FX) first and then into the AC outlet, making sure that the available voltage is the same with your L YNX-MIX82(FX) - Page 5 3. QUICK START SMALL GIG STAGE MONITOR STAGE MONITOR MIC 1 MIC 1 MIC 2 MIC 2 MIC 3 MIC 3 DIGITAL EFFECT UNIT DIGITAL EFFECT UNIT MIC 4 MIC 4 CD PLAYER CD PLAYER PHONES X- IX LINE LINE J.T.
- Page 6 LYNX-MIX82(FX) PHONES X- IX LINE LINE J.T. J.T. J.T. J.T. J.T. J.T. AUX RETURNS AUX SENDS CD/TAPE L(MONO) L(MONO) LINE LINE LINE LINE BAL/UNBAL BAL/UNBAL BAL/UNBAL BAL/UNBAL CTRL ROOM MAIN MIX(BAL/UNBAL) LINE LINE LINE LINE GAIN GAIN GAIN GAIN GAIN...
-
Page 7: Control Elements
4. CONTROL ELEMENTS PHONES X- IX LINE LINE J.T. J.T. J.T. J.T. J.T. J.T. CD/TAPE AUX RETURNS AUX SENDS L(MONO) L(MONO) LINE LINE LINE LINE BAL/UNBAL BAL/UNBAL BAL/UNBAL BAL/UNBAL CTRL ROOM MAIN MIX(BAL/UNBAL) LINE LINE LINE LINE GAIN GAIN GAIN GAIN GAIN GAIN... -
Page 8: Channel Strip
4. CONTROL ELEMENTS 4 AUX SENDS For AUX1(MON) jack, use this to connect the input of an external amplifier or active monitor speaker. For AUX2(FX) jack, use this to output the line level signal of the AUX2 post fader bus. You can use it to feed the inputs of a stereo multi-effects (you will need a Y-type cable ). - Page 9 4. CONTROL ELEMENTS 13 PAN/BAL This is the PANORAMA control, or balance control. You can adjust the stereo image of the signal via this control. Keep this control in center position and your 12kHz signal will be positioned in the middle of stage. Turn this control fully counter clockwise and the signal 2.5kHz will be present only on the left speaker and vice-versa.
-
Page 10: Master Section
4. CONTROL ELEMENTS 17 LOW If you turn this control up, you will boost all frequencies below 80 Hz. You will give more punch to bass drums and bass guitar; and you will make the male vocalist more "macho". Turn it down and you will cut all the frequencies below 80 Hz. - Page 11 4. CONTROL ELEMENTS 22 AUX RETURNS TO MAIN MIX, This control is used to control the volume of the processed signal sent to Main Mix bus, which can be varied from - to+10 dB. TO AUX1 MON, This control is used to control the volume of the processed signal sent to Monitor Mix, which can be varied from - to +10 dB.
-
Page 12: Rear Panel
4. CONTROL ELEMENTS PEAK This LED lights up when the input signal is too strong. FX MUTE Switch This switch is used to activate/deactivate the effect facility. REAR PANEL MODEL SERIAL DESIGNED IN ITALY CAUTION 18VAC~ POWER CAUTION: RATED POWER RISK OF ELECTRIC SHOCK CONSUMPTION 27W DO NOT OPEN... -
Page 13: Installation And Connection
5. INSTALLATION AND CONNECTION Ok, you have got to this point and you are now in the position to successfully operate your L YNX-MIX82(FX) . However, we advise you to read carefully the following section to be the real master of your own mix. Not paying attention enough to the input signal level, to the routing of the signal and the assignment of the signal will result in unwanted distortion, a corrupted signal or no sound at all. - Page 14 5. INSTALLATION AND CONNECTION 2=Hot(+) 2=Hot(+) 1=Ground/Screen 1=Ground/Screen 3=Cold(-) 3=Cold(-) Use for Balanced Mic Inputs Use for Main output (For unbalanced use, leave pin3 unconnected) (For unbalanced use, connect pin 1 to 3) 3-pin XLR Male Plug 3-pin XLR Line Socket (seen from soldering side) (seen from soldering side) 6.
-
Page 15: Preset List
7. PRESET LIST Controllable Parameter Preset Description Parameter Variable range Decay time 0.8~1.1s VOCAL1 Simulate a room with small delay time. Pre-delay 0~79ms Decay time 0.8~2.5s VOCAL2 Simulate a small space with slight decay time Pre-delay 0~79ms Decay time 3.6~5.4s LARGE HALL Simulate a large acoustic space of the sound. -
Page 16: Block Diagram
8.BLOCK DIAGRAM... -
Page 17: Technical Specifications
9. TECHNICAL SPECIFICATIONS Input channels electronically balanced, discrete input configuration Microphone input Frequency response 20 Hz to 22 kHz, +/ 1 dB Distortion (THD & N) <0.005% at +4 dBu, 1 kHz 0 dB to 50 dB (MIC) Gain range 115dB SNR (Signal to Noise Ratio) Line input... -
Page 18: Warranty Registration Card
10.WARRANTY 1. WARRANTY REGISTRATION CARD To obtain Warranty Service, the buyer should first fill out and return the encl- osed Warranty Registration Card within 10 days of the Purchase Date. All the information presented in this Warranty Registration Card gives the manufacturer a better understanding of the sales status, so as to purport a more effective and efficient after-sales warranty service. - Page 19 SEIKAKU TECHNICAL GROUP LIMITED NO. 1, Lane 17, Sec. 2, Han Shi West Road, Taichung 40151, Taiwan www.altoproaudio.com Tel: 886-4-22313737 email: info@altoproaudio.com Fax: 886-4-22346757 All rights reserved to ALTO. All features and content might be changed without prior notice. Any photocopy, translation, or reproduction of part of this manual without written permission is forbidden.