Table of Contents
Advertisement
Advertisement
Table of Contents

Related Manuals for Grizzly G1017


Summary of Contents for Grizzly G1017
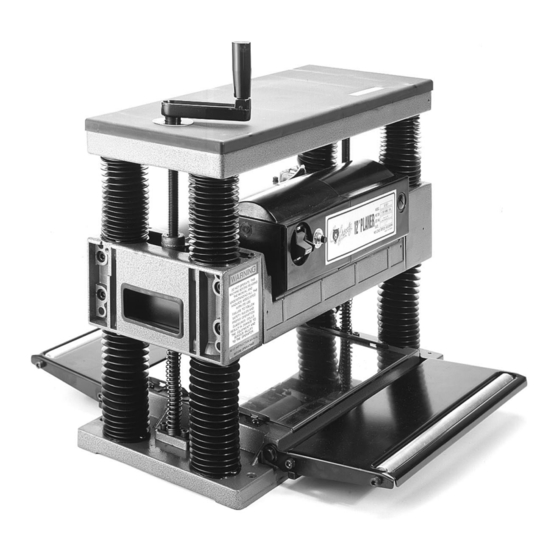
- Page 1 12'' PORTABLE PLANER MODEL G1017 INSTRUCTION MANUAL COPYRIGHT © 1991 BY GRIZZLY INDUSTRIAL, INC. WARNING: NO PORTION OF THIS MANUAL MAY BE REPRODUCED IN ANY SHAPE OR FORM WITHOUT THE WRITTEN APPROVAL OF GRIZZLY INDUSTRIAL, INC. REVISED APRIL, 1999 PRINTED IN U.S.A.
-
Page 2: Table Of Contents
FEED ROLLERS...12 PARALLELISM...13-14 KNIFE SETTING ...14-15 OPERATIONS TEST RUN ...16 PLANING TIPS ...16 WOOD TYPES ...17 WOOD CHARACTERISTICS ...17-18 MAINTENANCE GENERAL...19 LUBRICATION ...19 KNIFE SHARPENING ...19 MOTOR...20 V-BELT ...20 FEED ROLLERS...21 CLOSURE ...22 Table Of Contents PAGE G1017 12'' Portable Planer... -
Page 3: Safety
Keep work area well lighted. G1017 12'' Portable Planer Indicates an imminently hazardous situation which, if not avoided, WILL result in death or serious injury. Indicates a potentially hazardous situation which, if not avoid- ed, COULD result in death or serious injury. - Page 4 A guard or other part that is damaged should be properly repaired or replaced. 19. NEVER LEAVE TOOL RUNNING UNAT- TENDED. TURN POWER OFF. Don’t leave tool until it comes to a complete stop. G1017 12'' Portable Planer...
-
Page 5: Additional Safety Instructions For Portable Planers
Like all power tools, there is danger associ- ated with the Model G1017 Portable Planer. Accidents are frequently caused by lack of familiarity or failure to pay attention. Use this tool with respect and caution to lessen the possibility of operator injury. -
Page 6: Circuit Requirements
SECTION 2: CIRCUIT REQUIREMENTS 110V Operation The G1017 planer operates on 110 volts. Under normal use, the motor draws approximately 16 amps at 110V. We recommend a 20 amp circuit breaker for 110V. This should be satisfactory for normal use, while providing enough protection against motor damage caused by power surges. -
Page 7: General Information
SECTION 3: GENERAL INFORMATION Commentary Grizzly Industrial, Inc. is proud to offer the Model G1017 12" Portable Planer. This planer is a part of Grizzly’s growing family of fine machinery. When used according to the guidelines described in this manual, you can expect years of trouble- free, enjoyable operation and proof of Grizzly’s... -
Page 8: Unpacking
Unpacking The Model G1017 12'' Planer is shipped from the manufacturer in a carefully packed carton. If you discover the machine is damaged after you’ve signed for delivery, please call Customer Service immediately for advice. Save the containers and all packing materials for possible inspection by the carrier or its agent. -
Page 9: Clean Up
G1017 12'' Portable Planer Site Considerations The Model G1017 is designed to be portable. There are handles on both sides of the planer to aid in lifting and moving. Before moving the plan- er, fold the depth control handle down, the exten- sion wings up and ensure that the power cord is disconnected. -
Page 10: Assembly
Figure 2. Chip deflector mounting screws. Handle Assembly Attach the handle assembly to the shaft protrud- ing out of the top of the planer. Align the handle with the notch, and tighten the M6-1 x 10mm cap screw. Do not over tighten. -
Page 11: Controls
Figure 4. Location of switch and reset button. Reset Button The G1017 Planer comes equipped with a ther- mal overload protection switch inside the motor. To reset the switch, turn off the on-off switch, wait a few seconds and then depress the reset button. -
Page 12: Adjustments
Wear thick gloves anytime it is nec- essary to manually rotate the cutterhead assembly. Make sure the G1017 is unplugged or dis- connected from the power source and mov- ing parts have come to a complete stop before investigating any problems or per- forming any maintenance or adjustments. -
Page 13: Parallelism
⁄ ⁄ ⁄ Figure 7. Hardwood gauge dimensions. The cutterhead knives on the G1017 planer are extremely sharp. Merely brushing your finger along the edge can result in a severe cut. Take extreme caution when doing any of the adjustments involving the cutterhead knives. -
Page 14: Knife Setting
-14- Knife Setting The G1017 Planer is equipped with a 2 blade cut- terhead. The blades are set by adjustable screws and are locked in position by wedge type gibs. Disconnect the power cord from the power source before adjusting or removing the knives. - Page 15 The cutterhead knives on the G1017 planer are extremely sharp. Merely brushing your finger along the edge can result in a severe cut. Take extreme caution when doing any of the adjustments involving the cutterhead knives. Wear thick gloves anytime it is nec- essary to manually rotate the cutterhead assembly.
-
Page 16: Operations
If you cannot easily locate the source of an unusual noise or vibration, feel free to contact our service department for help. Make sure the G1017 is unplugged or dis- connected from the power source and mov- ing parts have come to a complete stop before investigating any problems or per- forming any maintenance or adjustments. -
Page 17: Wood Types
Red Cedar White Pine Balsam Fir Figure 13. Common softwood shear strengths. G1017 12'' Portable Planer Wood Characteristics The species of wood, as well as condition, will affect planing ability. The harder the wood, the more difficult it will be to plane. We’ve included below, a list of wood characteristics you may encounter when planing. - Page 18 4. Remove less material per pass. 5. Use a smaller cutting angle or a double bevel grind (consult a reputable knife grinder). -18- Notes G1017 12'' Portable Planer...
-
Page 19: Maintenance
SECTION 8: MAINTENANCE General Regular periodic maintenance on your Model G1017 Planer will ensure its optimum perfor- mance. Make a habit of inspecting your planer each time you use it. Check for the following con- ditions and repair or replace when necessary. -
Page 20: Motor
"vees" of the belt are in alignment with the "vees" on the pulley. 6. Replace the belt guard. G1017 12'' Portable Planer ⁄ '' to the table. -
Page 21: Feed Rollers
Remove trapped sawdust from between the bushing block and the bracket Figure 15. Location of potential trapped sawdust. G1017 12'' Portable Planer Routinely check and clean chips and sawdust from between the bushing blocks and brackets. To depress the rollers so that chips and sawdust can be easily removed: 1. -
Page 22: Closure
Washington location using the address in the General Information section. The specifications, drawings, and photographs illustrated in this man- ual represent the Model G1017 as supplied when the manual was prepared. However, due to Grizzly’s policy of continuous improvement, changes may be made at any time with no oblig- ation on the part of Grizzly.