Table of Contents
Advertisement
Advertisement
Table of Contents

Related Manuals for Grizzly G1037


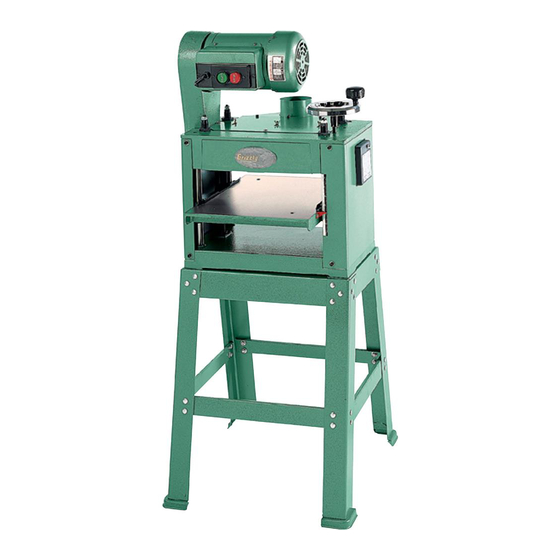
Summary of Contents for Grizzly G1037
- Page 1 13'' PLANER MOULDER MODEL G1037 INSTRUCTION MANUAL COPYRIGHT © 1996 BY GRIZZLY INDUSTRIAL, INC. WARNING: NO PORTION OF THIS MANUAL MAY BE REPRODUCED IN ANY SHAPE OR FORM WITHOUT THE WRITTEN APPROVAL OF GRIZZLY INDUSTRIAL, INC. SEPTEMBER, 1997 PRINTED IN TAIWAN...
-
Page 3: Table Of Contents
BELT TENSION ...18 OPERATIONS ...19 TEST RUN ...19 THICKNESS PLANING ...19-20 PLANING FOR FINISH...20 MAINTENANCE ...21 GENERAL...21 LUBRICATION ...21 CLOSURE ...22 MACHINE DATA...23 PARTS DIAGRAM AND LIST ...24-30 TROUBLESHOOTING GUIDE ...31-32 WARRANTY AND RETURNS ...33 G1037 Planer / Moulder Table of Contents... -
Page 4: Safety
Everyday eyeglasses only have impact resistant lenses, they are NOT safety glasses. 12. SECURE WORK. Use clamps or a vise to hold work when practical. It’s safer than using your hand and frees both hands to operate tool. G1037 Planer / Moulder... -
Page 5: Additional Safety Instructions For Planer-Moulders
Use sound lumber with no loose knots and with as few tight knots as possible. G1037 Planer / Moulder 18. CHECK DAMAGED PARTS. Before further use of the tool, a guard or other part that is damaged should be carefully checked to... -
Page 6: Circuit Requirements
SECTION 2: CIRCUIT REQUIREMENTS 110V Operation The motor supplied with the G1037 is a dual volt- age motor, prewired for 110V. Under normal use, the motor draws approximately 17 amps @ 110V, 8.5 @ 220V. We recommend using a 20 amp cir- cuit breaker or a 30 amp slow blow fuse for 110V or 220V operation. -
Page 7: Grounding
Prongs Grounding Blade Is Longest Of the Three Blades Figure 2. G1037 Planer / Moulder Improper connections of the electrical-grounding conductor can result in risk of electric shock. The conductor with green or green and yellow striped insulation is the electrical-grounding conductor. If... -
Page 8: General Information
The time you invest before you begin to use your Model G1037 will be time well spent. DO NOT operate this machine until you are com- pletely familiar with the contents of this manual. -
Page 9: Unpacking
Save the containers and all packing materials for possible inspection by the carrier or its agent. Otherwise filing a freight claim can be difficult. Caution: The G1037 is a heavy machine (ship- ping weight-240 lbs). DO NOT over-exert yourself while unpacking or moving your machine – get assistance. -
Page 10: Clean Up
Clean up The column and other unpainted parts of the Model G1037 are coated with a waxy oil that pro- tects them from corrosion during shipment. Remove the protective coating with mineral spir- its and paper towels. Do not use gasoline or other petroleum based solvents because of their extremely low flash points. -
Page 11: Assembly
Please examine the edges of all die- cut metal parts before handling them. Figure 3. Overview of stand parts. G1037 Planer / Moulder Locate the four legs and the long upper and lower stand braces. The square mounting holes on either side of the legs are not the same. -
Page 12: Mounting To Stand
M8-1.25 x 50mm Cap Screws. Of course, you will need assistance to do this step. Do not attempt to do this alone. Figure 6. Mounting to stand. Figure 5. Assembled stand. -10- G1037 Planer / Moulder... -
Page 13: Adjustments
3. Mark the gib and matching slot to be sure that the gib is replaced in its original position. 4. Clean the knife and cutterhead slot to remove all pitch and gum residue. 5. Repeat this procedure for the other two knives. G1037 Planer / Moulder Figure 7. -11-... -
Page 14: Knife Setting
CAUTION: The end of the knife is very suscepti- ble to chipping. Therefore, use caution when han- dling the gauge near the knives or you will dam- age the blades. G1037 Planer / Moulder... -
Page 15: Bedboard
Adjust accordingly on the infeed and outfeed side until the moulding knife and stock are lined up. When properly adjusted, firmly tighten the clamps securing the bed guides. G1037 Planer / Moulder Figure 10. Figure 11. Figure 12. -
Page 16: Moulding Knives
Now tighten the gibs in 4-5 stages to assure that the clamping pressures are evenly distributed through all the gibs. Do not over tighten the setscrews to prevent stripping the threads in the gibs. G1037 Planer / Moulder... -
Page 17: Chip Chute
Figure 15. Figure 16. G1037 Planer / Moulder Chip Chute A chip chute is included for convenient connec- tion to a dust collector. The dust collector chip chute mounts to the knife cover. It has a fitting for attaching a 4" dust col- lection hose. -
Page 18: Chip Deflector
1. Remove the nut that secures the gearbox cover and remove the cover. 2. Loosen the cap screw that holds the gears onto their shafts. 3. Remove the gears. 4. Put the new gears on. Feed Speed Figure 19. Setup for 24 F.P.M. G1037 Planer / Moulder... -
Page 19: Feed Roller Adjustment
Failure to observe this final step may create a potentially serious kick back hazard. Figure 20. Figure 21. G1037 Planer / Moulder Stock Pre-sizing It is extremely important to pre-cut all material so that it is not more than ⁄... -
Page 20: Adjusting Scale
3. Use a wood plank as a lever to shift the motor until a proper belt tension is achieved, about a ⁄ '' deflection when belt is pressed with a fin- ger. 4. Tighten down the three motor lock screws. Figure 22. G1037 Planer / Moulder... -
Page 21: Operations
If noises occur that cannot be found by visual inspection, feel free to contact our service depart- ment for help. G1037 Planer / Moulder Thickness Planing Thickness planing is the sizing of material to a desired thickness, while creating a smooth sur- face parallel to the opposite side of the board. -
Page 22: Planing For Finish
Always feed the board in a direction that allows the planer knives to cut with the run-out of the grain. This aids the knife in severing the wood fibers rather than lifting and tearing the fibers. -
Page 23: Maintenance
4. Periodically check all the chains and sprock- ets for wear. When worn, replace as a set. G1037 Planer / Moulder Lubrication 1. The recommended lubrication for roller chains used in medium to slow speed operation is to simply wipe the chain clean. -
Page 24: Closure
Washington location using the address in the Introduction. The specifications, drawings, and photographs illustrated in this manual represent the Model G1037 as supplied when the manual was prepared. However, due to Grizzly’s policy of continuous improvement, changes may be made at any time with no obligation on the part of Grizzly. -
Page 25: Machine Data
GRIZZLY MODEL G1037 PLANER/MOULDER Design Type ...Combination Planer/Moulder Overall Dimensions: Table Size ...13'' x 19'' Height ...40'' Overall Width ...21 Overall Depth ...21'' Shipping Weight ...200 lbs. Weight in Place ...185 lbs. Motor: Type ...TEFC Capacitor Start Induction Horsepower ...1 Phase/Cycle ...Single Phase/60 Hz... -
Page 26: Parts Diagram And List
-24- G1037 Planer / Moulder... - Page 27 SNAP RING P1037011 WASHER P1037012 GEAR P1037013 SNAP RING P1037014 BUSHING P1037015 CHAIN SPROCKET SHAFT P1037016 P1037017 CHAIN SPROCKET G1037 Planer / Moulder PART # DESCRIPTION P1037018 CHAIN SPROCKET P1037019 SPACER P1037020 GEAR 20A P1037020A GEAR P1037021 WASHER P1037022 CAP SCREW...
- Page 28 -26- G1037 Planer / Moulder...
- Page 29 P1037112 CAP SCREW P1037113 FENCE, LEFT P1037114 SCREW P1037115 FENCE, RIGHT P1037116 POINTER P1037117 SCREW P1037118 TRANSMISSION SHAFT G1037 Planer / Moulder PART # DESCRIPTION P1037119 ROLL PIN P1037120 PLATE P1037121 SPROCKET P1037122 SETSCREW P1037123 IDLE GEAR BRACKET P1037124 SPROCKET...
- Page 30 -28- G1037 Planer / Moulder...
- Page 31 SCREW P1037231 MOTOR P1037232 P1037233 SWITCH COVER P1037234 SPECIAL WASHER P1037235 SCREW P1037236 SWITCH P1037237 COVER P1037238 WASHER G1037 Planer / Moulder PART # DESCRIPTION P1037239 SCREW P1037240 CLAMP P1037241 ROLLER P1037242 SPRING P1037243 ROLLER BRACKET P1037244 CHAIN SPROCKET P1037245...
- Page 32 UPPER PLATE, R & L P1037302 UPPER PLATE, F & B P1037303 P1037304 P1037305 BRACE, R & L P1037306 BRACE, F & B -30- PART # DESCRIPTION P1037307 CARRIAGE BOLT P1037308 WASHER P1037309 WASHER P1037310 HEX NUT P1037311 CAP SCREW G1037 Planer / Moulder...
-
Page 33: Troubleshooting Guide
Rough/Raised grain Wavering moulding pattern Tear-out at end of moulding Uneven depth of cut side to side G1037 Planer / Moulder TROUBLESHOOTING Probable Cause 1. Dull knives 2. Inadequate support of long pieces 3. Uneven feed roll pressure front to back 4. - Page 34 3. Have motor checked 4. Have motor checked by qualified electrician 5. Allow machine to cool down and restart 6. Have motor starter checked by qualified electrician 1. Take lighter cuts 2. Divert power usage to other breakers G1037 Planer / Moulder...
-
Page 35: Warranty And Returns
WARRANTY AND RETURNS Grizzly Industrial, Inc. warrants every product it sells for a period of 1 year to the original purchaser from the date of purchase. This warranty does not apply to defects due directly or indirectly to misuse, abuse, negligence, accidents, repairs or alterations or lack of maintenance.