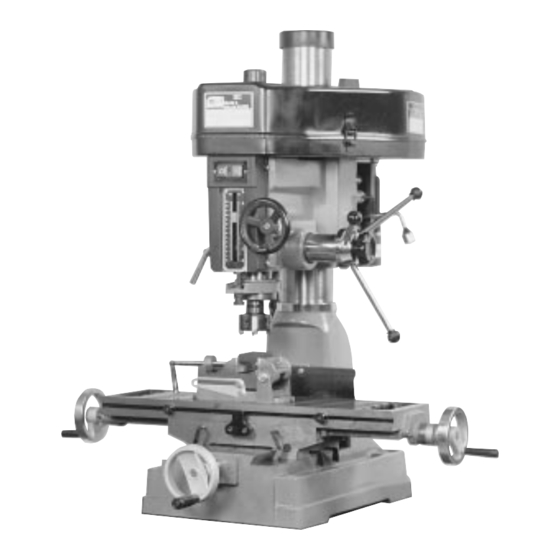
Grizzly G1006 Instruction Manual
Grizzly heavy-duty mill/drill instruction manual g1006, g1007
Hide thumbs
Also See for G1006:
- Parts list (7 pages) ,
- Owner's manual (48 pages) ,
- Owner's manual (52 pages)
Table of Contents
Advertisement
Quick Links
Download this manual
See also:
Owner's Manual
Advertisement
Table of Contents

Related Manuals for Grizzly G1006


Summary of Contents for Grizzly G1006
- Page 1 HEAVY-DUTY MILL/DRILL MODEL G1006/G1007 INSTRUCTION MANUAL COPYRIGHT © 1999 BY GRIZZLY INDUSTRIAL, INC. WARNING: NO PORTION OF THIS MANUAL MAY BE REPRODUCED IN ANY SHAPE OR FORM WITHOUT THE WRITTEN APPROVAL OF GRIZZLY INDUSTRIAL, INC. OCTOBER, 1999 PRINTED IN U.S.A.
-
Page 2: Table Of Contents
HEAD HEIGHT ...16 OPERATIONS POWER FEED...17 TABLE MOVEMENT...17 TEST RUN ...18 MAINTENANCE GENERAL ...19 GIBS ...19 LUBRICATION ...20 QUILL ...20 V-BELTS ...20 RETURN SPRING TENSION ...21 TABLE LEADSCREWS ...21 CLOSURE ...22 WARRANTY AND RETURNS ...23 G1006/G1007 Mill/Drill Table Of Contents PAGE... -
Page 3: Safety
G1006/G1007 Mill/Drill VISITORS... - Page 4 12. SECURE WORK. Use clamps, fixtures or vise to hold work. Never use hands to hold workpiece for any operation. G1006/G1007 Mill/Drill 13. DON’T OVERREACH. Keep proper foot- ing and balance at all times. 14. MAINTAIN TOOLS WITH CARE. Keep tools sharp and clean for best and safest performance.
-
Page 5: Additional Safety Instructions For Mill/Drills
Like all power tools, there is danger asso- ciated with the Model G1006 and G1007 Milling/Drilling Machines. Accidents are frequently caused by lack of familiarity or failure to pay attention. Use this tool with respect and caution to lessen the possibili- ty of operator injury. -
Page 6: Circuit Requirements
SECTION 2: CIRCUIT REQUIREMENTS 110V Operation The Model G1006/G1007 is wired for 110V, sin- gle phase operation. The 2 HP motor will draw 22 amps at 110V at maximum load. If you operate this Mill/Drill on any circuit that is already close to its capacity, it may blow a fuse or trip a circuit breaker. -
Page 7: 220V Operation
220V Operation The Model G1006/G1007 can be wired for 220V single phase operation (see Wiring Diagram, page 23). The motor will safely draw about 11 amps at 220V under load. If you operate the Mill/Drill on any circuit that is already close to its capacity, it might blow a fuse or trip a circuit breaker. -
Page 8: Introduction
Commentary We are proud to offer the Grizzly Models G1006/G1007 Milling/Drilling Machine. These machines are part of a growing Grizzly family of fine metalworking machinery. When used according to the guidelines set forth in this man- ual, you can expect years of trouble-free, enjoy- able operation, proof of Grizzly’s commitment to... -
Page 9: Unpacking
Customer Service. The G1006/G1007 is a heavy machine (670 lbs. shipping weight). DO NOT over-exert yourself while unpacking or moving your machine –... -
Page 10: Clean Up
If you question the strength of your workbench, you can opt to reinforce it, or consider placing the Mill/Drill on a freestanding bench like Grizzly’s G5944 Stand for Mill/Drills. WORKING CLEARANCES... -
Page 11: Assembly
SECTION 4: ASSEMBLY Beginning Assembly Most of your G1006/G1007 has been assembled at the factory, but some parts must be assembled or installed after delivery. We have organized the assembly process into steps. Please follow along in the order presented here. -
Page 12: Power Feed
Mark the points on the table’s trough where the mounting bolts contact the table. Remove the clamping bracket assembly and spot drill to give the mounting bolts a small lip to “bite” without slipping on the rough cast surface. Set the... -
Page 13: Handwheels
-13- Collet/Arbor The Models G1006/G1007 feature an R-8 spindle which accepts many industrial collets and arbors. To install a collet or an arbor: 1. Release the latches on the head cover and open it. -
Page 14: Drill Chuck/Arbor
Drill Chuck/Arbor Your Mill/Drill has been pre-fitted with a drill chuck arbor that has an R-8 shank and a Jacob’s Taper. It is ready to accept the standard drill chuck provided with this machine. To install the drill chuck: 1. Clean the grease off the drill chuck. Pay... -
Page 15: Adjustments Graduated Dials
Each dial can be reset or locked with the set- screw or thumbscrew provided. Example: Suppose you want to drill a series of holes in a workpiece at 0.625" centers. After locating the first hole’s placement and drilling, you can set the dial of the appropriate axis to zero while holding the handwheel. -
Page 16: Speed Changes
Speed Changes The G1006/G1007 is capable of twelve different speed settings. Different types of cuts and types of materials require varying speeds. Consult out- side sources for information about appropriate speeds for different applications. To change speeds: 1. Loosen the motor locking lever. It is located on the right side of the machine, near the back. -
Page 17: Operations Power Feed
Table Movement Movement: The Mill/Drill table can be moved in the X-Y plane only. The handwheel(s) on the side(s) of the table move the table either left or right. The handwheel in the front of the table will move the table back and forth. -
Page 18: Test Run
Mill/Drill is running. Ensure that the switch is off, power is disconnected and moving parts have stopped before making adjust- ments. If you cannot easily locate the source of an unusual noise or vibration, contact our Service Department for help. (See Introduction) G1006/G1007 Mill/Drill Notes -18-... -
Page 19: Maintenance
SECTION 7: MAINTENANCE General Your Model G1006/G1007 Mill/Drill requires very little maintenance. A thorough cleaning, now and again, will increase the machine’s durability and efficiency by removing chips and grime that can gum up moving parts. It is best of course, to do this after each use. -
Page 20: Lubrication
The apron slide can be oiled directly. Make sure to carefully clean chips and dirt off of this slide before oiling. G1006/G1007 Mill/Drill Quill The internal quill pin is a setscrew and has been pre-adjusted at the factory. It should not need adjustment under normal circum- stances. -
Page 21: Return Spring Tension
You should detect less than 0.010" of play. These adjusters may require you to fabricate extensions for your hex wrenches. Make adjust- ments in small increments. Over-tightening can add unnecessary wear to both the leadscrews and the adjusters. G1006/G1007 Mill/Drill ®... -
Page 22: Closure
Washington location using the address in Section 3 Introduction. The specifications, drawings, and photographs illustrated in this manual represent the Model G1006/G1007 as supplied when the manual was prepared. However, due to Grizzly’s policy of continuous improvement, changes may be made at any time with no obligation on the part of Grizzly. -
Page 23: Warranty And Returns
WARRANTY AND RETURNS Grizzly Industrial, Inc. warrants every product it sells for a period of 1 year to the original purchaser from the date of purchase. This warranty does not apply to defects due directly or indirectly to misuse, abuse, negligence, accidents, repairs or alterations or lack of maintenance.