Table of Contents
Advertisement
Advertisement
Table of Contents

Related Manuals for Edimax PS-901


Summary of Contents for Edimax PS-901
-
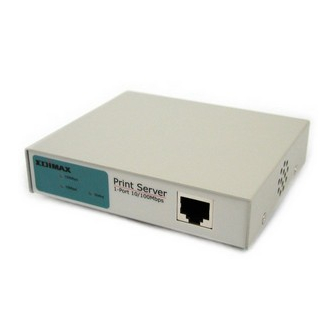
Page 1: Print Server
User's Manual Print Server User’s Manual... -
Page 2: Table Of Contents
User's Manual 1. INTRODUCTION 1.1 Product Introduction 1.2 Product Models 1.3 Product Package 1.4 Network Printing Architecture 1.5 Network Printing Environment 1.6 Contents of the User’s Manual 1.7 Firmware & Printing Function 2. HARDWARE INSTALLATION 3. WINDOWS PEER-TO-PEER NETWORK 3.1 System Architecture 3.2 Administrator Installation and Setup 3.3 Administrator Utilities 3.4 Client Installation and Setup... -
Page 3: Netware Network
User's Manual 4.2 Windows NT/2000 Server Installation and Setup 4.3 User Installation and Setup 5. NETWARE NETWORK 5.1 System Architecture 5.2 NetWare 3.x Installation & Setup 5.3 NetWare 4.x/5.x Installation & Setup 6. UNIX SYSTEM NETWORK 6.1 Introduction 6.2 Enable PrintSir’s TCP/IP Support 6.3 Setup PrintSir’s IP Address 6.4 Verify PrintSir’s IP Address 6.5 Configure Remote lpd Printing on the Host... -
Page 4: Web Management
User's Manual 7.12 DHCP Cfg - DHCP Server Configure 7.13 DHCP Information - DHCP Information 7.14 Mail Print Cfg - Email Printing Setting 7.15 SNMP Cfg - SNMP Parameter Setting 8. WEB MANAGEMENT 8.1 Introduction 8.2 WebDESK Utility 8.3 Web Management of PrintSir 9. -
Page 5: Product Introduction
1 . I n t r o d u c t i o n 1.1 Product Introduction Thank you for purchasing and using Edimax's PrintSir series print server. PrintSir allows your printer to become a shar ed device on the network. - Page 6 User's Manual Network UTP/BNC Connector Bi-Directional Yes Flash Memory 512K 512K 512K 512K 512K 512K 512K Size Network LED Yes Status LED Firmware Upgrade Power-On- Self-Test Network Protocol Support IPX/SPX TCP/IP NetBEUI Network Environment Windows Peer-to-Peer Printing Windows Server-Based Printing NetWare Bindary Mode Printing...
-
Page 7: Product Package
User's Manual Email Printing Yes Direct Print Logical Printer Yes Language EnglishChinese EnglishChinese EnglishChinese EnglishChinese EnglishChinese EnglishChinese EnglishChinese CD-ROM 1.3 Product Package This package contains the following components: PrintSir Print Server x 1 Power Adapter x 1 CD x 1 Quick Installation Guide x 1 1.4 Network Printing Architecture This section illustrates how PrintSir functions and operates on the... -
Page 8: Print Server Network Functions
User's Manual Network Printing Environment Print Server Network Server Client User Unix PrintSir Windows NT Server NetWare Server Windows NT Windows 2000 Windows 98 Workstation D e t a i l e d e x a m p l e s w i l l t h e n b e i l l u s t r a t e d t h r o u g h a c t u a l n e t w o r k environment. -
Page 9: Network Printing Functions For Clients
User's Manual Workstation 1.4.2 Network Printing Functions for Clients Client User Unix PrintSir Windows NT Server NetWare Server Windows NT Windows 2000 Windows 98 Workstation Common operating systems for clients are classified as following: Windows 95/98/Me/NT/2000 Our print server system provides PTPP (Peer-to-Peer Printing) driver and utilities for Windows 95/98/NT/2000 u s e r s . -
Page 10: Network Printing Functions For Network Server
User's Manual In the client installation procedure, after PTPP (Peer-to- P e e r P r i n t i n g D r i v e r ) i s i n s t a l l e d i n t o W i n d o w s , t h e system will automatically (manual configuration is also allowed) search through all the PrintSir print servers on t h e n e t w o r k , a n d t h e n a d d t h e i r p r i n t i n g p o r t s i n t o... -
Page 11: Network Printing Environment
User's Manual Windows NT/2000 Our print server system provides PTPP (Peer-to-Peer Printing) driver and utilities for Windows NT/2000. After PTPP is installed, the server can directly print to PrintSir. Adding this printing function into Windows NT/2000 Server allows print queue, user authority management, and many other advanced features to be used. -
Page 12: Windows Nt/2000 Network
User's Manual Windows NT/2000 Network Network printing function will become available after PTPP driver is installed into Windows NT/2000. Adding this printing function into Windows NT/2000 Server allows print queue, user authority management, and many other advanced features to be used. Print Queue * TCP/IP... -
Page 13: Contents Of The User's Manual
User's Manual Windows 2000 1.6 Contents of the User’s Manual Chapter 2 explains PrintSir’s hardware installation and configuration. It is strongly recommended for you to read. The following chapters 3, 4, 5, and 6 introduces: Chapter 3. Windows Peer-to-Peer Network Chapter 4. -
Page 14: Firmware & Printing Function
User's Manual 1.7 Firmware & Printing Function In order to provide a complete network printing solution, PrintSir supports Multiple Feature Sets function for users to select the appropriate P r i n t i n g F e a t u r e S e t t o u s e d e p e n d i n g o n i n d i v i d u a l ’ s p r i n t i n g requirement. - Page 15 User's Manual NetWare NDS / Remote Printer and other printing functions; however, it will not support NetBEUI, Email Printing and other Standard Feature Set’s special functions.
- Page 16 User's Manual 2 . H a r d w a r e I n s t a l l a t i o n 1. Unpack the print server package and check all the items listed in section 1.3. 2. Connect the print server to the printer you want to share on the network For direct attach models, plug the print server directly to the printer’s centronics port.
-
Page 17: System Architecture
User's Manual 3 . W i n d o w s P e e r - t o - P e e r N e t w o r k 3.1 System Architecture PrintSir supports Windows Peer-to-Peer network printing mode, w h i c h i s s u i t ab l e f o r mo s t med i u m and small network environments. -
Page 18: Administrator Installation And Setup
User's Manual 2. Client Installation and Configuration (refer to section 3 for more detailed information). Client users must install Windows PTPP driver (Peer-to-Peer Printing) for network printing. I n a d d i t i o n , a f t e r P T P P i s i n s t a l l e d , t h e s y s t e m w i l l automatically search for all print servers on the network, and add all printing ports (P1/P2/P3) of the print servers into Windows’... - Page 19 User's Manual 3. Click “Administrator Installation” and the “Utilities Setup” window will be displayed. 4. Click “Next”, and specify the destination folder where the utilities will be installed. 5. Click “Next”, and select the components you want to install. It is highly recommended to install all provided components.
- Page 20 User's Manual 6. Click “Next”, and specify the program folder where the program icons will be added. 7. Click “Next” to start installation. 8. In a while, the program will finish installing all the utilities and drivers you selected. Thus far you have completed the installation phase and prepare to configure the Print Server.
- Page 21 User's Manual NOTE: If this is the first time you configure the print server, the “Print Server Name” is the same as the “Device Name” printed at the rear side of the print server. 9. Click “Next”, and the “Name the print Server” dialog box will be displayed as following, Y o u c a n a s s i g n a m e a n i n g f u l n a m e f o r t h e m a n a g e m e n t consideration.
- Page 22 User's Manual About the TCP/IP, you can either (1) assign a fixed IP address for the print server or (2) configure it later by the configuration utility. 11. Click “Next”, and the configuration summary is displayed in the window. Now, you have completed the “Print Server Setup”. By clicking “Next”, your system will perform “Add network port”...
- Page 23 User's Manual Now, you have completed the administrator’s setup for most of t h e n e t w o r k e n v i r o n m e n t . Y o u c a n t h e n p e r f o r m t h e “ C l i e n t I n s t a l l a t i o n”...
-
Page 24: Administrator Utilities
User's Manual Step5. Choose the “Print Server’s Network Port” which was created by the administrator installation process and click “Next”. Step6. Complete the rest of the questions to finish the network printer setup. 3.3 Administrator Utilities A f t e r A d m i n i s t r a t o r I n s t a l l a t i o n i s c o m p l e t e d , t h e r e w i l l b e s i x utilities in PrintSir’s Program folder. -
Page 25: Client Installation And Setup
User's Manual Network Ports Quick Setup Local printer port management tool (see section 3.5). Remote Ports Remote printer port management tool (see section 3.5). NetWare Quick Setup NetWare quick installation software (see chapter 5). PrintSir Configuration Complete PrintSir management tool (see chapter 7 – PrintSir Configuration). - Page 26 User's Manual 1. Insert the CD shipped along with the print server into your CD-ROM drive. The Autorun.exe program should be executed automatically by Windows. If not, run Autorun.exe manually from CD-ROM drive’s root directory. 2 . T h e " I n s t a l l a t i o n M a n a g e r " w i l l b e d i s p l a y e d o n t h e s c r e e n a s following.
- Page 27 User's Manual 5. Click “Next”, and specify the program folder where the program icons will be added. 6. Click “Next” to start installation. 7. Now, the installation procedure is completed, and the next step is to set up the client’s computer. Click “Continue”, and all the print server’s network ports detected on the network will be added to your...
- Page 28 User's Manual 8. Finally, the “Installation complete” window is displayed to indicate that the Client Installation procedure is finished. After the installation, you have completed the following tasks: Install all utilities and drivers to the client’s PC. Add all the print server’s network ports of the network to the client’s PC.
- Page 29 User's Manual Step3. Select “Local printer” => click “Next”. Step4. Select the suitable printer manufacturer and model, then click “Next”. Step5. Choose the “Print Server’s Network Port” which has been created in the client installation process and then click “Next”.
-
Page 30: Client Utilities
User's Manual Step6. Complete the rest of the questions to finish the network printer setup. 3.5 Client Utilities After Client Installation is completed, there will be three tools in PrintSir’s Program folder (see below). Network Ports Quick Setup Remote Ports Uninstall Network Driver The Uninstall Network Driver will assist you in removing all installed client software. - Page 31 User's Manual Network Ports Quick Setup Utility offers a very simple method to add or remove print server’s printer port from the client’s computer. D u r i n g t h e c l i e n t ’ s i n s t a l l a t i o n p r o c e d u r e , t h e s y s t e m w i l l automatically search for all PrintSir print servers on the network, and add them into the printer ports of the client’s computer.
- Page 32 User's Manual Chosen Chosen Please be aware that Network Ports Quick Setup Utility can only detect and configure all PrintSir print servers on the same network, it cannot search and configure print servers on other subnets across network segments. You must use Remote Ports Utility described in the next section to manage remote (across network segments) PrintSir print servers.
- Page 33 User's Manual Step2. Press Add, then enter the print server’s name, IP address, and port number. Step3. Press OK to add the remote printer port into your computer’s printer ports. In order to use the remote pr inting function, you will have to proceed with normal Add Printer procedure and select your printer port as the newly added remote printer port.
- Page 34 User's Manual...
-
Page 35: Windows Nt/2000 Server Installation And Setup
User's Manual 4 . W i n d o w s N T / 2 0 0 0 N e t w o r k 4.1 System Architecture I n W i n d o w s n e t w o r k e n v i r o n m e n t , o t h e r t h a n t h e P e e r - t o - P e e r network printing architecture described in the previous chapter, we also offer the Server-Based Printing architecture for Windows NT/2000 server. -
Page 36: User Installation And Setup
User's Manual Print Queue * TCP/IP Windows 98 * IPX Windows NT Server PTPP * NetBEUI TCP/IP TCP/IP Windows 2000 Step1. If this is your first time installing PrintSir print server, please install the administrator software on Windows NT/2000 server first. Refer to section 3.2 for installation instructions. - Page 37 User's Manual Windows 2000 After server side’s installation is completed, client side will be able to find the server’s shared printer in Network Neighborhood. You only need to perform Window’s standard Add New Printer procedure, select “ N e t w o r k P r i n t e r ” s h o w n i n t h e s c r e e n b e l o w , a n d c o m p l e t e t h e configurations afterwards to access the shared printer.
- Page 38 User's Manual 5 . N e t W a r e N e t w o r k 5.1 System Architecture We implement NetWare printer sharing functionality into the PrintSir itself, thus allowing one or more pr inters attached by a PrintSir to be connected to the network.
- Page 39 User's Manual Remote Printer Windows 2000 Co mp are with NetWare printing functionality, the advantages of embedding the NetWare network printing functionality in the PrintSir include: Installation is easier and quicker. Network management is easier. Printing performance is enhanced. Relieve NetWare file server’s burden. Relieve the need of a workstation running the remote printer utility.
-
Page 40: Netware 3.X Installation & Setup
User's Manual Better printing performance. The Advantage of a Remote Printer Save user licenses. NOTE: This remote printer feature is not available for the 10/100Mbps 3-port PrintSir models. 5.2 NetWare 3.x Installation & Setup Once your PrintSir is connected to your Ethernet network, you can set it up for use with your networking software. - Page 41 User's Manual To use this method, 1. Log into your NetWare server as SUPERVISOR. 2. Insert the CD-ROM included with the PrintSir, and change to the appropriate drive and directory. Ex. e:\dosutil\ 3. Run the INSTALL program 4 . S e l e c t y o u r n e w P r i n t S i r f r o m t h e d i s p l a y e d l i s t a n d p r e s s Enter.
-
Page 42: Installation Using Psetup
User's Manual 6. The quick installation program will not only set up the PrintSir, b u t c r e a t e a n d s e t up all required objects on the file server. When the setup is complete, it will also display an execution command as following that you can run after logging in to the file server to redirect print commands to the new PrintSir. - Page 43 User's Manual 5.2.2.1 Configuring as Print Server Mode For more complex setup needs, you can use the PSETUP program in conjunction with the NetWare PCONSOLE program. The installation procedure is as follows: 1 . F r o m a w o r k s t a t i o n , l o g i n t o y o u r N e t W a r e s e r v e r a s SUPERVISOR.
- Page 44 User's Manual 6. Change the Alias name if you want. 7 . S e t t h e P r i m a r y F i l e S e r v e r t o b e t h e f i l e s e r v e r w h e r e t h e PrintSir’s queue will be located.
- Page 45 User's Manual The print server name can be identical to the PSxxxxxx name printed on the label of the PrintSir, or you can use an alias name you have assigned using PSETUP. 17. Press Enter to select the newly created print server. 18.
- Page 46 User's Manual 23. Press Insert and add your newly created print queue to the list of queues serviced by the printer. Enter a priority number for the queue service, or press Enter to accept the default. 24. Repeatedly press Escape to exit the PCONSOLE program. 25.
- Page 47 User's Manual 3. Choose the Print Queue Information menu selection. 4. Press the Insert key to add a new print queue. 5. Type in a print queue name, such as “PQ” or “Q1”. 6. You have now successfully created the print queue that your NetWare print server will serve.
- Page 48 User's Manual the queue service, or press Enter to accept the default. 16. Repeatedly press Escape to exit the PCONSOLE program. 1 7 . Y o u m u s t l o a d N e t W a r e p r i n t s e r v e r o n t h e N e t W a r e f i l e server so that the PrintSir configured as a remote printer can connect to that print server and service the print jobs.
-
Page 49: Netware 4.X/5.X Installation & Setup
User's Manual 4. Choose NetWare Configuration from the menu. 5. Select Remote Printer in the Printing mode field. 6. Type the print server‘s name in the Print server field. The print server will be serviced by the PrintSir that is being configured as a remote printer now. - Page 50 User's Manual How NetWare 4.x/5.x is Different Novell NetWare version 3.x uses a database called the bindery for s t o r i n g i n f o r m a t i o n s u c h a s u s e r a n d g r o u p i n f o r m a t i o n , s e r v e r configuration, and information about network services.
- Page 51 User's Manual 1. Log in to your NetWare server as ADMIN. 2 . I n s e r t t h e C D - R O M a n d c h a n g e t o t h e a p p r o p r i a t e d r i v e a n d directory.
- Page 52 User's Manual The Current Tree and Current Context settings cannot be changed within the INSTALL program. If you need to change the tree or context where the PrintSir will be installed, use the CX command to change them before starting INSTALL program. 6.
- Page 53 User's Manual 7 . S e t t h e N D S t r e e a n d N D S c o n t e x t w h e r e t h e P r i n t S i r w i l l b e located.
- Page 54 User's Manual 14. Set the Banner type to PostScript if you are using a PostScript printer, and to Text otherwise. 15. Press F10 to save the new configuration. 16. Reset the PrintSir to have the changes take effect. NOTE: The PrintSir may require up to a minute after power-up to log into a NetWare Directory Services context because of the large number of calculations NDS security requires.
- Page 55 User's Manual 4. Enter the print server name in the Print server field. 5. Assign printer and print queue names. 6. Set the Banner type to PostScript if you are using a PostScript printer, and to Text otherwise. 7. Set the Location to Manual Load. 8.
- Page 56 User's Manual following steps: 1. Log in to your NetWare server as ADMIN. 2 . R u n t h e P S E T U P p r o g r a m i n c l u d e d o n t h e C D - R O M . e x : e:\DOSUTIL\psetup.exe 3.
-
Page 57: Enable Printsir's Tcp/Ip Support
User's Manual 6 . U N I X S y s t e m N e t w o r k 6.1 Introduction T h e P r i n t S i r i s a v a i l a b l e f o r T C P / I P p r i n t i n g b y U n i x l p d ( L i n e Printer Daemon) protocol. -
Page 58: Setup Printsir's Ip Address
User's Manual 6.3 Setup PrintSir’s IP Address The PrintSir must have a unique IP address in order to be recognized by the network. You can set up the IP address on the various Unix systems using any one of the following methods: 1. - Page 59 User's Manual ping 203.66.191.12 A t t h e m e a n t i m e , P r i n t S i r ’ s I P w i l l “ t e m p o r a r i l y ” b e s e t t o 203.66.191.12 (will restore after reboot).
- Page 60 User's Manual :ht=1:\ :ha=print_server_ethernet_address:\ :ip=print_server_ip_address: Lines should be indented with tabs. Where hostname is the device name of a PrintSir, the ht=1 tag s p ecif ies the hardware type is Ethernet, the ha= tag specifies the Ethernet address of a PrintSir, which is the Node ID located on the PrintSir.
-
Page 61: Configure Remote Lpd Printing On The Host
User's Manual can add this address to the /etc/hosts file, by adding a line such 203.66.191.12 pserver 3. Add the Ethernet address and the host name for the PrintSir to the /etc/ethers file, by adding a line such as: 00:00:B4:01:01:01 pserver W h e r e t h e E t h e r n e t a d d r e s s o f t h e P r i n t S i r i s t h e N o d e I D located on the PrintSir. - Page 62 User's Manual 3. The printer name (or queue name) on the remote host should be lpt1, lpt2 or lpt3, the name of the parallel port on the PrintSir. You will need to perform the tasks below, logged in as the superuser (root).
-
Page 63: Print A Test Page
User's Manual Lines should be indented with tabs. More than one printer name can be used, with variants separated by vertical bars (name1|name2). The rm= entry should correspond to the IP address you have assigned to the PrintSir. You can also use a host name if you have assigned one in the /etc/hosts file. - Page 64 User's Manual 7 . C o n f i g u r a t i o n U t i l i t y 7.1 Introduction This chapter introduces PrintSir’s system configuration utility in W i n d o w s e n v i r o n me n t . T h i s u tility is au to matically in s talled d u r in g Windows Administrator Utility installation procedure - refer to section 3.2 and 3.3 (see below).
-
Page 65: General - General Information Of Printsir
User's Manual Upgrade : Firmware Upgrade / Update DHCP Cfg : DHCP Server Configuration DHCP Information : DHCP Information Mail Print Cfg : Email Printing Setting SNMP Cfg : SNMP Parameter Setting We will explain each function separately in the following section. 7.2 General - General Information of PrintSir Every time when you run PrintSir’s configuration utility, the system will initially delay for several seconds because the utility is using... -
Page 66: Printsir Status - Printsir Network Status
User's Manual 7.3 PrintSir Status - PrintSir Network Status The PrintSir Status page displays the network ability and status of the PrintSir in detail. 7.4 Printer Status - Attached Printer Status The Printer Status page displays the printer status for each port. 7.5 IP Cfg - IP Address Configuration... -
Page 67: Nw Ps Cfg - Netware Print Server Configuration
User's Manual The IP Cfg page allows you to configure the IP address where the P r i n t S i r i s t o b e l o c a t e d . T h e P r i n t S i r w i l l o b t a i n i t s I P a d d r e s s automatically if you configure the IP address as Auto. -
Page 68: Nw Information - Netware Printing Summary
User's Manual The Write button: save the configuration to the PrintSir. The Reset button: reset the PrintSir to let the changes take effect. 7.7 NW RP Cfg - NetWare Remote Printer Configuration The NW RP Cfg page allows you to set: T h e P r i n t S e r v e r , w h i c h w i l l b e s e r v i c e d b y t h e P r i n t S i r configured as a remote printer. -
Page 69: Printsir Cfg - Printsir Network Ability Setting
User's Manual 7.9 PrintSir Cfg - PrintSir Network Ability Setting The PrintSir Cfg page allows you to set: T h e D i a g n o s t i c P r i n t o u t , w h i c h d e t e r mi n e s w h e t h e r o r n o t a diagnostic printout should be printed on the printer to which the PrintSir is connected. -
Page 70: Upgrade - Firmware Upgrade / Update
User's Manual The Restore Default page allows you to erase all of the PrintSir’s settings and restore them to the default settings the PrintSir had when it was shipped from the factory. The Restore button: save the default configuration displayed in this page to the PrintSir. -
Page 71: Dhcp Cfg - Dhcp Server Configure
User's Manual an upgrade, Make sure the updated PSxxROM.BIN (depending on your model) file is stored in your computer or CD-ROM. Choose the updated firmware in File Name field. For example, <CD Driver>\FLASHROM\<Model Name>\PSxxROM.BIN Choose the suitable Feature Set (“Standard Feature Set - Type 1” or “NetWare Enhancement Feature Set –... -
Page 72: Dhcp Information - Dhcp Information
User's Manual IP Address: specifies the IP address of PrintSir itself. S t a r t i n g I P: specifies the starting IP ad d ress for assigning to DHCP clients. IP range: specifies how many IP addresses are available to DHCP clients. -
Page 73: Mail Print Cfg - Email Printing Setting
User's Manual Next available IP: displays the next available IP address that can be assigned to a DHCP client. Gateway IP: displays the configured IP address of the default gateway. Netmask: displays the configured network mask. DNS server: displays the configured IP address of the domain name server. -
Page 74: Snmp Cfg - Snmp Parameter Setting
User's Manual Mail Password, the password of the mail account. C o n f i r m P a s s w o r d , d o u b l e c h e c k t h e p a s s w o r d o f t h e m a i l account. -
Page 75: Webdesk Utility
User's Manual 8 . W e b M a n a g e m e n t 8.1 Introduction PrintSir print server can be configured and managed on the Web. Through Local Area Network, or even Internet, administrator can easily configure and manage PrintSir’s vari ous main functions in browsers. - Page 76 User's Manual 8.2.2 Starting WebDESK Utility When you execute WebDESK Utility, system will display PrintSir Web Console Page for approximately 5 seconds. At the mean time, system will be searching for all PrintSir print servers on the same subnet. After searching is completed, the screen will be switched to the following:...
-
Page 77: Web Management Of Printsir
User's Manual The Window will be split into two parts: PrintSir List on the left portion, which lists all PrintSirs found on the same network. Web Pages for the selected PrintSir on the right portion, w h i c h d i s p l a y s t h e c o n f i g u r a t i o n i n f o r m a t i o n f o r t h e PrintSir. - Page 78 User's Manual Control Panel : On the top, which contains several Hypertext links that links to a information or configuration page respectively. Status Line : On the bottom, which is used to display warning or error message. Configuration Pages : In the middle, which contains several information pages a b o u t P r i n t S i r an d its attach ed p r in ter ( s ) , an d s ev er al configuration pages used to set up PrintSir.
-
Page 79: Getting Printer Status
User's Manual window. 8.3.2 Getting PrintSir Information Each time you run browser to connect to a PrintSir, you will get this PrintSir information page initially. The PrintSir information page displays some general information of PrintSir. 8.3.3 Getting Printer Status T h e P r i n t e r s t a t u s p a g e c a n b e u s e d t o d i s p l a y t h e s t a t u s o f attached printer(s) for each port. -
Page 80: Getting Dhcp Status
User's Manual 8.3.5 Getting DHCP Status T h e D H C P s t a t u s p a g e c a n b e u s e d t o d i s p l a y t h e D H C P information when the PrintSir’s client DHCP function is enabled. -
Page 81: Setting Ip Address
User's Manual Alias name, an alternate name by which the PrintSir can be c a l l e d ( i n a d d i t i o n t o t h e P S x x x x x x n a me p r i n t e d o n t h e label). -
Page 82: Configuring Dhcp Parameters
User's Manual P r i n t S i r i s t o b e l o c a t e d . T h e P r i n t S i r w i l l o b t a i n i t s I P a d d r e s s automatically by the protocol DHCP, BOOTP, RARP if you configure t h e I P a d d r e s s a s A u t o . - Page 83 User's Manual IP range: specifies how many IP addresses are available to DHCP clients. Net mask: gives the network mask. Gateway IP: gives the IP address of the default gateway. D N S s e r v e r : g i v e s t h e I P a d d r e s s o f t h e d o m a i n n a m e server.
-
Page 84: Configuring Snmp Parameters
User's Manual Mail Account, the account of the mailbox in the mail server. Mail Password, the password of the mail account. Print Mail Header, which determines whether or not the printing job will print out the mail header. 8.3.10 Configuring SNMP Parameters T h e S N M P C f g p a g e a l l o w s y o u t o c o n f i g u r e t h e S N M P parameters of this PrintSir. - Page 85 User's Manual The Software reset: which determines whether or not to reset the PrintSir. The Restore to factory default: which determines whether or not to erase all of the PrintSir’s setting and restore to the default configuration the PrintSir had when it was shipped from the factory.
-
Page 86: System Requirement
User's Manual 9 . E m a i l P r i n t i n g 9.1 Introduction E m a i l P r i n t i n g p r o v i d e s a n e w w a y o f p r i n t i n g s e r v i c e . A f t e r installation, Windows will establish a new Printer Driver which will convert the printing document to an Email and send to the mail account assigned by PrintSir. - Page 87 User's Manual Step3.In the Mail Print Cfg page,configure Mail polling time and Mailbox parameters. M a i l P o l l i n g T i m e : D e f a u l t i s 1 m i n u t e ; I n t e r v a l s f o r PrintSir to check Emails in the Mailbox.
- Page 88 User's Manual 3. Click “Next” and choose a installation path or use the default, 4. Click “Next” and assign a program folder name, 5 . C l i c k “ N e x t ” a n d t h e s y s t e m w i l l i n s t a l l t h e “ E m a i l P r i n t i n g Driver”.
- Page 89 User's Manual 6. Click the “AddPort” Button, and you can see the following dialog box, 7. Please input the proper value in the fields described as following, Port Name: The Printer Port Name for Email Printing. It will be used when you execute the “Add Printer” E-Mail Address: The email address serviced by the PrintSir.
- Page 90 User's Manual command and choose the Email Printer Port Name assigned in the above procedure. Please refer section 3.4 for detail “Add Printer” procedure. 9.3.2.2 Directly send an Email to the email account serviced by the PrintSir. For a client user who want to print a text email to the printer attached by the PrintSir but without the “Email Printing Driver”, he (or she) can, just as usual, run the mailing tool, key in the content and send the email.