Table of Contents

Related Manuals for Edimax PS-1210Un


Summary of Contents for Edimax PS-1210Un
- Page 2 Multi-Language QIG in Driver CD ================================================ Český: Českého průvodce rychlou instalací naleznete na přiloženém CD s ovladači Deutsch: Finden Sie bitte das deutsche QIG beiliegend in der Treiber CD Español: Incluido en el CD el QIG en Español Français: Veuillez trouver l’français QIG ci-joint dans le CD Italiano: Incluso nel CD il QIG in Italiano Magyar: A magyar telepítési útmutató...
- Page 3 Copyright© by Edimax Technology Co, LTD. all rights reserved. No part of this publication may be reproduced, transmitted, transcribed, stored in a retrieval system, or translated into any language or computer language, in any form or by any means, electronic, mechanical, magnetic, optical, chemical, manual or otherwise, without the prior written permission of this company.
-
Page 4: Table Of Contents
Contents Product Introduction………………………………………………..4 Package Contents…………………………………….……………..5 Hardware Installation………………………………………………..6 Software Installation……………………………………….………..7 4.1. EZMax Installation Wizard………………………...………..7 4.2. Administration Utilities Installation……………..………..8 4.3. Client Utilities Installation………………………….……..15 4.4. Windows Add Printer Procedure………………………..19 4.4.1. Windows Vista/7…………………………………..19 4.4.2. Windows XP………………………………………..23... -
Page 5: Product Introduction
1. Product Introduction Thank you for purchasing and using our print server. This print server allows your printer to become a shared device on the network. It offers printing flexibility and manageability on your Wired or Wireless Local Area Network with an absolute minimum setup and maintenance required. -
Page 6: Package Contents
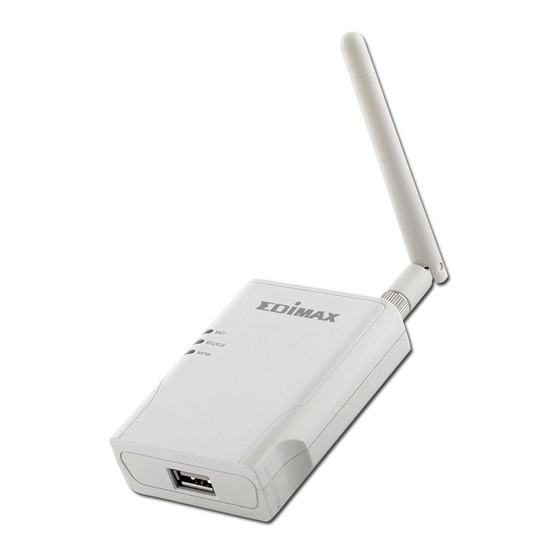
This package contains the following components: (A) One Print Server (B) One Antenna (Only for PS-1206UWg & PS-1206PWg & PS-1208UWg & PS-1210Un & PS-3207UWg) (C) One Power Adapter (D) One Quick Installation Guide (E) One CD (EZmax Wizard / Utility, Multi-language Quick Installation... -
Page 7: Hardware Installation
3. Hardware Installation 1. Unpack the print server package and verify that all the items listed in the previous section are provided. 2. Connect the print server to the printer you want to share on the network. 3. Connect the print server to your network by attached the network cable to the UTP port of the print server. -
Page 8: Software Installation
4. Software Installation 4.1. EZMax Installation Wizard This wizard can be run in Windows 2000/XP/Vista. The following procedures are operated in Windows XP. You can install the Print Server by EZMAX Setup Wizard in the CD-ROM including in the package. The wizard is an easy and quick configuration tool for internet connection with series process. -
Page 9: Administration Utilities Installation
4.2. Administration Utilities Installation **Please find the utility manually from CD-ROM drive’s root directory or download it from Edimax webiste. If you have any question please check with Edimax local technical support team. The Administrator Installation Program executes a wizard-driven procedure... - Page 10 2. The “Print Server Utilities” window will be displayed. Please Click “Next”. 3. Please Click “Next” to install the utilities in the default folder or click “Change” to specify the destination folder where you would like to install the utilities.
- Page 11 4. Select the components you want to install. It is highly recommended to install all provided components. Click “Next” to continue. 5. Click “Install”.
- Page 12 6. The system will start to install the utilities automatically.
- Page 13 NOTE 1: If this is the first time you configure the Print Server, the “Print Server Name” is the last 6-digit of MAC ID with prefix “PS”. Please check the MAC ID on the print server. NOTE 2: The list can only display the devices from Edimax.
- Page 14 8. Specify a recognizable name for the Print Server and click “Next”. 9. Specify the IP Address for the Print Server manually or click “Next” to keep default IP Address.
- Page 15 The configuration summary is displayed in the window. Now, you have completed the Print Server setup. Click “Finish” and your system will add network port of the Print Server to your PC automatically. The Administrator Installation procedure is totally completed. Click “Finish”.
-
Page 16: Client Utilities Installation
4.3. Client Utilities Installation *Please find the utility manually from CD-ROM drive’s root directory or download it from Edimax webiste. If you have any question please check with Edimax local technical support team. The Client Installation Program is a wizard driven procedure which will perform the following tasks: Install client utilities and drivers into your PC. - Page 17 2. The “Print Server Utilities” window will be displayed. Click “Next”. 3. Click “Next” to install the utilities in the default folder or click “Browse” to specify the destination folder where you would like to install the utilities.
- Page 18 4. Click “Install”. 5. The system will start to install the utilities automatically.
- Page 19 6. Now, the installation procedure is completed, you are ready to set up the client’s computer. All network ports of the Print Servers detected on the network will be added to your PC automatically, click “Continue”. Note that if there are no print servers detected in the network currently, please click “Continue”...
-
Page 20: Windows Add Printer Procedure
4.4.Windows Add Printer Procedure After adding a “Network Port” of the print server to your PC by Administrator or Client Installation Program, you can follow the procedures described in the following sections to add printer to the Windows Operation Systems. 4.4.1.Windows Vista / 7 The following “Add Printer”... - Page 21 4. Choose the suitable printer port which was created by the installation process and click “Next”. 5. Select the printer manufacturer and the printer model and click “Next”. If your printer is not in the list, click “Have Disk…” to install the driver of the printer.
- Page 22 6. Name your printer and set the default printer, click “Next”. 7. The printer drivers are being installed.
- Page 23 8. It is recommended to print a test page. Click “Finish”. 9. The printer is added to “Printers” page, you have added the printer to your computer successfully. Now you can start to print from your computer to the print server.
-
Page 24: Windows Xp
4.4.2.Windows XP The following “Add Printer” steps are running in Windows XP, the steps in other Operating Systems such as Windows 98SE/Me/2000 are similar. 1. Click “Start”, choose “Settings” and select “Printers and Faxes”. 2. Click “Add a Printer”. 3. The “Add Printer Wizard” is displayed. Click “Next”. - Page 25 4. Select “Local printer attached to this computer” and make sure that “Automatically detect and install my Plug and Play printer” is not selected. Click “Next”. 5. Choose the suitable “Print Server Network Port” which was created by the Administrator Installation or Client Installation process and click “Next”.
- Page 26 6. Select a suitable printer manufacturer and the printer model and click “Next”. If your printer is not in the list, click “Have Disk…” to install the driver of the printer. After installation, the printer model will be added to the list.
- Page 27 7. Name your printer and setup the default printer, click “Next”. 8. Choose to print the test page or not. It is recommended to print a test page. Click “Next”.
- Page 28 9. You have added the printer to the PC successfully. The information of the printer is displayed in the windows. Click “Finish”. Now you can start to print from your PC to the print server.
- Page 29 Federal Communication Commission Interference Statement This equipment has been tested and found to comply with the limits for a Class B digital device, pursuant to Part 15 of FCC Rules. These limits are designed to provide reasonable protection against harmful interference in a residential installation. This equipment generates, uses, and can radiate radio frequency energy and, if not installed and used in accordance with the instructions, may cause harmful interference to radio communications.
- Page 30 Slovenia, the Netherlands, Portugal, Spain, Sweden, and the United Kingdom. The ETSI version of this device is also authorized for use in EFTA member states: Iceland, Liechtenstein, Norway, and Switzerland. EU Countries not intended for use None Please check the declaration of conformity on www.edimax.com...