Chauvet COLORado Batten 72 Tour User Manual
Colorado batten 72 tour
Hide thumbs
Also See for COLORado Batten 72 Tour:
- Quick reference manual (44 pages) ,
- User manual (28 pages) ,
- User manual (26 pages)
Table of Contents
Advertisement
Quick Links
Download this manual
See also:
Quick Reference Manual
Advertisement
Table of Contents

Related Manuals for Chauvet COLORado Batten 72 Tour


Summary of Contents for Chauvet COLORado Batten 72 Tour
- Page 1 User Manual...
- Page 2 Copyright CHAUVET® owns the content of this user manual in its entirety, including but not limited to pictures, logos, trademarks and resources. Notice © Copyright 2010 CHAUVET®...
-
Page 3: Table Of Contents
Table of Contents Table of Contents 1. Before you Begin ......................1 What is included ..........................1 Unpacking Instructions ........................1 Text Conventions ..........................1 Icons ..............................1 Safety Notes ............................2 Expected LED Lifespan ........................2 2. Introduction ........................3 Product Description .......................... - Page 4 Table of Contents COLORado™ Batten 72 Tour Menu Map ..................14 DMX Values ............................15 TOUR ................................15 BLOCK1 ................................16 BLOCK1 ................................16 DMX Mode or Personality ..........................17 ARC1 ................................17 ARC1 + D ...............................17 ARC2 ................................17 ARC2 + D ...............................17 ARC2 + S ................................17 HSV ................................17 5.
-
Page 5: Before You Begin
Before you Begin 1. Before you Begin What is · One COLORado™ Batten 72 Tour · One power cord Included · One safety cable · Warranty Card · User Manual Unpacking Immediately upon receiving a fixture, carefully unpack the carton. Check the box or flight case contents to ensure that all parts are present and that they are in good Instructions condition. -
Page 6: Safety Notes
There are no user serviceable parts inside the COLORado™ Batten 72 Tour. Any reference to servicing this unit you may find from now on in this User Manual will only apply to properly CHAUVET® certified technicians. Do not open the housing or attempt any repairs unless you are one of them. -
Page 7: Introduction
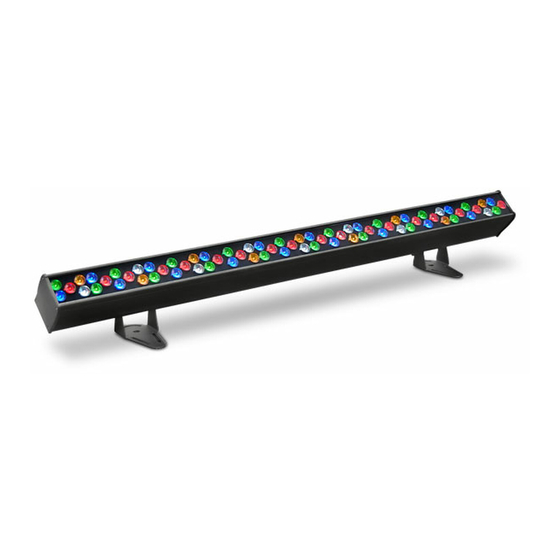
Introduction 2. Introduction Product The COLORado™ Batten 72 Tour is RGBW linear LED wash light fixture. It consists of a single module that accommodates the internal power supply, the main control, the Description control panel, the LED drivers, the LED boards and lenses as well as the power and signal connectors. -
Page 8: Dmx Channel Summary
Introduction DMX Channel Summary TOUR DMX Channel Function ARC1 DMX Channel Function Master Dimmer Green Green Blue Blue White ARC1 + D DMX Channel Function Amber Master Dimmer Macro + White Balance Strobe Green Auto Programs + Fan Blue Auto Speed Dimmer Speed ARC2 DMX Channel... -
Page 9: Product Overview
Introduction Product Overview Control Panel 5-Pin DMX In/Out 3-Pin DMX In/Out Safety Eye Bolt Fuse Power Out Power In Tilt Adjustment Knob Tilt Adjustment Knob March 3, 2010 COLORado™ Batten 72 Tour User Manual Rev. 01c... -
Page 10: Setup
Setup 3. Setup AC Power The COLORado™ Batten 72 Tour has an auto-ranging power supply that can work with an input voltage range of 100~240 VAC, 50/60 Hz. Make sure that you are connecting this product to the proper voltage, as per the specifications in this guide, the product’s user manual or on the product’s sticker. -
Page 11: Lens Replacement
Setup Lens The COLORado™ Batten 72 Tour comes with the 15° lens assembly pre-installed from the factory. However, there is an optional lens kit (CL20x25x6) available as an Replacement accessory, which will provide a 25º x 6º beam. Follow the instructions below to to change or replace the LED lenses. a) Disconnect the fixture from the AC power before opening it. -
Page 12: Mounting
Make sure to mount this fixture away from any flammable material as indicated in the Safety Notes. Rigging CHAUVET® recommends following the general guidelines below when mounting the COLORado™ Batten 72 Tour. · When selecting an installation location, consider ease of access to the product for operation, programming adjustments and routine maintenance. -
Page 13: Operation
Operation 4. Operation Control Panel Button Function ONTROL ANEL Exits from the current menu or Description <MENU> function Enables the currently displayed <ENTER> menu or sets the currently selected value in to the current function Navigates upwards through the <UP> menu list and increases the numeric value when in a function. -
Page 14: Dmx Control With Id Addressing
Operation Programming (Cont.) DMX Control With ID In this mode, the fixtures with the same DMX starting address will respond to the DMX Addressing controller based on the fixture’s individual ID address setting. If the user selects ID address “0”, all the fixtures with the same DMX address will respond in unison. Otherwise, each fixture will follow the control for its particular ID address. -
Page 15: Master/Slave
Operation Programming (Cont.) Master/Slave The Master/Slave mode allows a group of COLORado™ Batten 72 Tour fixtures (the slaves) to execute simultaneously the same program, whether auto or custom, that another COLORado™ Batten 72 Tour fixture (the master) is executing, and without a DMX controller. -
Page 16: Program Upload
Operation Programming (Cont.) Program Upload This option allows the user to copy the custom programs of one COLORado™ Batten 72 Tour fixture onto other COLORado™ Batten 72 Tour fixtures by using the Master/Slave method 1) Configure and connect the fixtures in a Master/Slave arrangement, where the master unit has the custom programs you want to transfer onto the slave units. -
Page 17: Fan Setting
Operation Programming (Cont.) 1) Press <MENU> repeatedly until FANS shows, and press <ENTER> to accept. Fan Setting 2) Use <UP> or <DOWN> to select a setting (OFF, LOW, NORMAL, HIGH or AUTO). 3) Press <MENU> to exit once done. a) When in AUTO, the fan speed automatically changes so the fixture’s temperature does not exceed the limit. -
Page 18: Colorado™ Batten 72 Tour Menu Map
Operation COLORado™ Batten 72 Tour Menu Map bcLORado™ Batten 72 Tour User Manual Rev. 01c -14- March 3, 2010... -
Page 19: Dmx Values
Operation DMX Values TOUR Channel Function Value Percent/Setting 000 ó 255 Dimmer 0~100% 000 ó 255 0~100% (or Step Time if Custom 01~10 in Ch. 9 is active) 000 ó 255 Green 0~100% (or Fade Time if Custom 01~10 in Ch. 9 is active) 000 ó... -
Page 20: Block1
Operation TOUR (Cont.) Channel Function Value Setting Value Setting Value Setting 000 ó 009 All IDs ID 23 ID 46 010 ó 019 ID 1 ID 24 ID 47 020 ó 029 ID 2 ID 25 ID 48 030 ó 039 ID 3 ID 26 ID 49... -
Page 21: Dmx Mode Or Personality
Operation ARC1 Channel Function Value Percent/Setting 000 ó 255 0~100% 000 ó 255 0~100% Green 000 ó 255 0~100% Blue ARC1 + D Channel Function Value Percent/Setting 000 ó 255 0~100% Master Dimmer 000 ó 255 0~100% 000 ó 255 0~100% Green 000 ó... -
Page 22: Technical Information
Even in the cleanest type of surroundings, the user should clean the external optics at least once every 30 days. CHAUVET® recommends cleaning the fixture’s external optics with a soft cloth using normal glass cleaning fluid. -
Page 23: Colorado™ Batten 72 Tour Troubleshooting Guide
Interference from AC wires Keep DMX cables separated from power cables or fluorescent/black lights If you still experience technical problems after trying the above solutions, contact CHAUVET® Technical Support. March 3, 2010 -19- COLORado™ Batten 72 Tour User Manual Rev. 01c... -
Page 24: Exploded View
Technical Information Exploded View Item Description Part Code Clear front plate P300-CB72TCP Complete lens set P115-CB72T LED board A P222-CB72TA LED board B P222-CB72TB Heat sink board P222-CB72THS Power supply P142-CB72T Display board P173-CB72T LED driver board P172-CB72T P131-24V40X20 Side cover P300-CB72TS Power output socket (white) P136-NAC3FCB... -
Page 25: Photometric Data
Technical Information Photometric Data March 3, 2010 -21- COLORado™ Batten 72 Tour User Manual Rev. 01c... -
Page 26: Returns Procedure
The user must clearly label the package with a Return Merchandise Authorization Number (RMA #). CHAUVET® will refuse any product returned without an RMA #. DO NOT write the RMA # directly on the box. Instead, write it on a properly affixed label. -
Page 27: Technical Specifications
Technical Information Technical Specifications Weight & Dimensions Length ..........................38.9 in (989 mm) Width............................ 3.0 in (77 mm) Height ..........................6.1 in (156 mm) Weight..........................9.8 lbs (4.4 kg) Power Auto-ranging ......................100~240 VAC, 50/60 Hz Power Consumption @ 120 V ..................... 72 W (1.067 A) Power Consumption @ 230 V ..................... -
Page 28: Appendix
Appendix 6. Appendix DMX Primer The DMX protocol (USITT DMX512-A) is a networking protocol that enables a universal DMX controller device to control the features of multiple DMX compatible fixtures, whether par cans, wash lights, moving heads, followspots, foggers, proprietary fixture controllers, etc. -
Page 29: Assigning Addresses
You must use DMX compliant data cables to link two or more DMX compatible fixtures. Cabling You may purchase CHAUVET® certified DMX cables directly from a dealer/distributor or construct your own cable. USITT recommends limiting the total length of the DMX cable (from the first fixture/controller to the last fixture) to 300~455 m (985~1,500 ft). -
Page 30: Dmx Cable Connectors
Appendix DMX Connectivity (Cont.) DMX Cable Each DMX cable must have a male, 3-pin XLR connector on one end and a female, 3- Connectors pin XLR connector on the other end. DMX Connector Configuration To DMX Input To DMX Output (Female) (Male) Common... -
Page 31: Master/Slave Linking
Appendix DMX Connectivity (Cont.) Controlle Other DMX Compatible First Third Second Fixtures Generic Cable Cable Cable DMX Data Connection Diagram DMX Fixture DMX Fixture Master/Slave The Master/Slave mode allows one fixture (the master) to run a preconfigured program to control several other fixtures of the same model (the slaves) without requiring a DMX Linking controller. -
Page 32: Id Addressing
Appendix ID Addressing ID Addressing is a sub-addressing method by which each fixture, apart from its starting address, can also have an “ID” address in the 1~66 range. This allows users to multiply the number of fixtures they can control with a single DMX controller. Many fixtures have at least one DMX personality or mode that enables ID addressing. -
Page 33: Sizing The Circuit Breakers
(rating) to which they can connect a group of fixtures. Using the CHAUVET® fixtures come with a sticker that indicates the current they consume in a Spec Sticker circuit at the specified voltage. This greatly simplifies calculating the total current drawn. - Page 34 CHAUVET® 3000 N 29th Ct, Hollywood, FL 33020 U.S.A. (800) 762-1084 – (954) 929-1115 FAX (954) 929-5560 www.chauvetlighting.com COLORado™ Batten 72 Tour User Manual Rev. 01c March 2010...