Table of Contents
Advertisement
Quick Links
Advertisement
Chapters
Table of Contents

Related Manuals for American Standard AccuLink Platinum ZV


Summary of Contents for American Standard AccuLink Platinum ZV
-
Page 1: Introduction
AccuLink Platinum ZV Control ™ User’s Guide... - Page 2 Amazingly versatile, incredibly advanced The AccuLink control ™ integrates home comfort into your personal lifestyle like nothing you’ve ever Features Include... seen before. • Large Color Display • Simple Programming • Weather Forecast (via wireless home network) • Allergy Clean/Quick Clean Cycles •...
-
Page 3: Table Of Contents
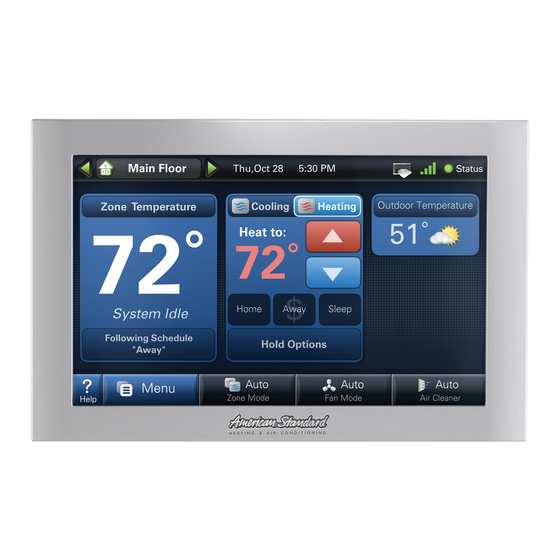
Easy to use Customizable Table of Contents The simple design and easy to Customize the screen to suit follow functions of this control your unique needs. You can Introduction ..........1-4 make it the most intuitive and setup shortcuts and an easy Buttons and Navigations ...... - Page 4 Easy to use... Everything is just a touch away See and adjust multiple Choose the shortcut items that zones or systems show in this menu bar See current system status View big, bold at-a-glance Choose the system status dashboard items that show in this section Use context...
-
Page 5: Buttons And Navigations
Buttons and Navigation Pressing a button will display additional information or a new menu screen. EXAMPLE: You may access the Menu screen by pressing the “Menu” button on the home screen. You may access the Settings Menu by pressing the “Settings”... -
Page 6: System, Fan, & Air Cleaner Modes
System ON/OFF, Mode Selection 1) System Mode To the right of the Menu button are 3 The “Auto” System Mode will Mode buttons: switch between heating and cooling automatically. 1) The first sets System Mode “Heating” and “Cooling” (including OFF). modes are dedicated 2) The second controls Fan Mode. -
Page 7: Air Cleaner Mode
3) Air Cleaner Mode Automatic means the air cleaner will run when the fan runs. Quick Clean is a full power air cleaning cycle that increases the system fan speed setting (when not actively heating or cooling) to 100% for three hours to achieve maximum clean air delivery rate. Allergy Clean is a full power air cleaning cycle that increases the system fan speed setting (when not actively heating or cooling) to 100% for 24 hours to achieve maximum clean air delivery rate. -
Page 8: Scheduling/Programming
Manually Set up a Schedule The procedure below describes setting up a manual schedule. Scheduling can also be set up via Guided Scheduling which creates a schedule by asking you a series of questions. Guided Scheduling can also be selected in the screen below. 1) Turn Scheduling On (and select Manual Scheduling) 2) Enter the Schedule Menu Default... - Page 9 Finished Examples: 4) Select the days you would like to schedule Example A: By selecting more than one day, you can Example A is for someone who works and is set the schedule to be the same for those out of the house during weekdays. days.
-
Page 10: Loading And Viewing Photos
Using Photos You can set up a photo album and a screen saver using Notch at top your own photos. Using an SD Card Insert the SD Card at the bottom right hand side of the control, taking care to keep the card’s “notch”... - Page 11 Load and Select Photos 1) If you do not yet have 3) Browse the album us- your SD card inserted ing the arrows on the or it is not inserted all right and left edges of the way, you will see the screen.
-
Page 12: Screen Saver Settings
Screen Saver A standard or a custom photo screen saver can be selected. 1) If you desire, turn “On” the screen saver. 2) The “Default Screen Saver” shows the cur- 3) Set the number of seconds before the next Set the wait time until the screen saver rent temperature as a floating icon over a photo will display. -
Page 13: Commonly Used Features
Other Commonly Used Features The following pages highlight some of the more common processes you will use. Name Your System Give your system a name. This is very important if you have more than one system in your home. Events and Vacations Set up how your system will operate for special events or when you are away from home for extended periods. -
Page 14: Setting Time And Date
Time & Date Set time, date and time zone. If a wireless network is set up, the time can be automatically synced via the internet. Security Protect your system from accidental or unwanted changes to your system by using a PIN lock. 1-Touch Presets Set up these presets to make quick temperature setpoint changes from the Home Screen. -
Page 15: Customize Your Home Screen
Customize your Home Screen Add shortcuts and customize the dashboard. Wireless Network Setup Set up a connection to your wireless network to enable weather and software update features. See the following section for setup details (802.11 B/G wireless router and internet required). Humidity You may see and adjust the humidity level in your home and adjust the humidity setpoints for both Heating and Cooling modes (for systems equipped with humidity control). -
Page 16: Wireless Networking
Optional Wireless Networking Your control can access real- time weather conditions, fore- Enabling wireless networking brings addi- casts and alerts. tional functionality to your control. IMPORTANT: After wireless networking is enabled, When you have multiple systems you will need to register your system in your home, each control can with a valid email address before the see and manage the others. - Page 17 Enabling Wireless Networking 1) Enter the Wireless Network Setup Menu. 2) Enable the wire- 3) After the wire- less radio by less radio is pressing “Wire- enabled, press less ON/OFF”. the “Connect to a Network” button to choose from a list of available wireless net- works.
-
Page 18: Network
Selecting a Network Available broadcasting networks with an adequate signal strength will display their SSIDs (Service Set IDentifiers) in this screen. A closed lock icon next to the SSID indicates a secure network. An open lock indicates a non-secure, “open” network. Select your network and press “Connect”. -
Page 19: Network Key
Enter Network Key/Password 1A) If the network is 3) The control will unsecured (with an connect to the “open” padlock), wireless network. the following mes- sage will be dis- played. 1B) If the network is 4) When the control secured (with a has successfully “closed”... -
Page 20: Advanced Networking Information
Advanced Networking Information Enter the Advanced Network Setup Menu. Advanced networking will be required in the following two instances: 1. When connecting to a non-broadcast network 2. When configuring a static IP address IMPORTANT: The Advanced Network screens are intended for individuals with networking familiarity. You or your network administrator will need to provide the required information. - Page 21 Network Security When the network’s SSID is not broadcast (hidden), manual configuration in this screen is required. 1) The “Network Security” button in this Ad- 2) Press the “Enter SSID Name” button. 3) Enter the SSID Name using the on-screen vanced Network Settings menu will be keypad.
- Page 22 Host Settings This screen is used to manage how the control obtains network addresses and is needed when DHCP (Dynamic Host Configuration Protocol) has been turned off or is not available on the router. Otherwise, you may use DHCP to automatically obtain this information. This manual configuration is required if a static IP address is desired.
- Page 23 Network Properties The Network Properties screen displays the control’s current network informa- tion. Disconnecting from a Network Once a network has been joined, the control will reconnect to it after signal or power interruptions. When connected, a green dot will be shown. To disconnect from this network, enter the “Connect to a Network”...
-
Page 24: Multi-System Control
Zoned and Multi-System Environments 1) In a multi-system environ- 3) In a multi-system ment each control can see environment and manage the others. where the sys- tems are in the NOTE: The controls must same Group, have wireless enabled and the “Zones”... - Page 25 5) In zoned and multi-sys- 8) A schedule for one tem environments, the zone can be copied to main screen display will another. change to indicate the presence of multiple zones. (Notice the new zone button—labeled “Upstairs”—at right.) Arrow buttons navigate between zone views.
-
Page 26: Wireless Registration
Wireless Registration Registration is required for Weather, Software Updates and linking two or more controls together. Registration ensures that your control is using the most up-to-date software and will also let you take advantage of exciting new features in the future. You will be notifed via email when there is a soft- ware upgrade available. -
Page 27: Schlage Link Enrollment
9) Enter the 5-digit veri- Schlage LiNK Enrollment fication code. NOTE: This will only The control can be managed remotely via an internet connected computer need to be done one and most smart cell phones via Schlage LiNK. Schlage is a leader in home time. -
Page 28: Software Upgrades
Software Upgrades Your control is built with the future in mind and has the ability to upgrade its operating system. Software upgrades ensure your control has the most up-to-date software optimizing its opera- tion and providing exciting new features as they become available. Requirements •... -
Page 29: Troubleshooting
Troubleshooting Slow response or unexpected operation: Reboot your control at the following location. “No System Found” displays on the screen: If this message stays on your screen, press the “Reboot” button shown at right. No response to any button presses: Remove and re-install the control as shown below. -
Page 30: Index
System Alerts 1) When your system indicates an Index of Functionality issue with communication or operation, an alert will display on the screen. 1-Touch Presets ........14 Air Cleaner Mode ........7 Click the “Dealer Contact Info” Alerts ..........30 to retrieve your dealer’s phone Customize Home Screen ....15 numbers and website informa- Dealer Information ......13... -
Page 31: Warranty
BASE LIMITED WARRANTY Controls, Zoning Products, Humidifiers, Energy Recovery Ventilators, Air Cleaners and Oil Furnaces (Variable and Non-Variable Speed) Subject to the terms and conditions of this limited warranty, Trane U.S., Inc. (“Company’) extends a limited warranty against EXCLUSIONS: The following are not covered by this limited warranty: manufacturing defects for the product(s) identified in Table 1A attached hereto (“Products’) that are installed in a residential application •... - Page 32 Base Limited Warranty Period: five (5) years Registered Limited Warranty Period: ten (10) years FCC/IC Caution: Any changes or modifications not expressly approved by American Standard Heating ENERGY RECOVERY VENTILATOR (ERV): *ERVR100, *ERVR200 & *ERVR300 & Air Conditioning could void the user’s authority to operate this equipment.