Table of Contents
Advertisement
Instructions for use
GB
English,1
IWME 147
WASHING MACHINE
Contents
Installation, 2-3-4-5-6-7
Unpacking and levelling
Technical details
Instructions for the fitter
Briefly: how to start a programme
Personalisations, 11
Cutting off the water or electricity supply
Troubleshooting, 15-16
Assistance, 17-18
GB
1
Advertisement
Table of Contents

Related Manuals for Indesit IWME 147


Summary of Contents for Indesit IWME 147
-
Page 1: Table Of Contents
Control panel Leds Starting and Programmes, 10 Briefly: how to start a programme Programme table Personalisations, 11 Setting the temperature IWME 147 Setting the spin speed Functions Detergents and laundry, 12 Detergent dispenser Bleach cycle Preparing your laundry Special items... -
Page 2: Electric And Water Connections
Installation Levelling your appliance correctly will provide it with sta- Keep this instruction manual in a safe place for future bility and avoid any vibrations, noise and shifting during reference. Should the appliance be sold, transferred or operation. If it is placed on a fitted or loose carpet, adjust moved, make sure the instruction manual accompanies the feet in such a way as to allow enough room for venti- the washing machine to inform the new owner as to its... - Page 3 Connecting the drain hose • the supply voltage is included within the values indica- ted on the Technical Data Plate fixed on the machine. Connect the drain hose, without bending it, to a • the socket is compatible with the washing machine’s draining duct or a wall drain plug.
-
Page 4: The First Wash Cycle
The first wash cycle As the colours of the wires in the lead may not correspond with the coloured markings identifying the terminals in your plug, proceed as follows: Once the appliance has been installed, and before you Connect Green & Yellow wire to terminal marked E or use it for the first time, run a wash cycle with detergent or coloured Green or Green &... -
Page 5: Technical Data
Technical data Model IWME 147 width 59.5 cm height 81.5 cm Dimensions depth 54.5 cm Capacity from 1 to 7 kg Electrical please refer to the technical data plate fixed to the machine connections maximum pressure 1 MPa (10 bar) Water connections minimum pressure 0.05 MPa (0.5 bar) - Page 6 Instructions for the fitter Door Mounting Accessories (Fig. 1-2-3-4-5). Mounting the wooden panel onto the door and in- serting the machine into cabinets: In the case where the machine must be shipped for final installation after the wooden panel has been mounted, we suggest leaving it in its original packaging.
- Page 7 Using the Drilling Template. - To trace the positions of the holes on the left-hand side of the panel, align the drilling template to the top left side of the panel using the lines traced on the extremities as a referen- - To trace the positions of the holes on the right-hand side of the panel, align the drilling template to the top right side of the panel.
-
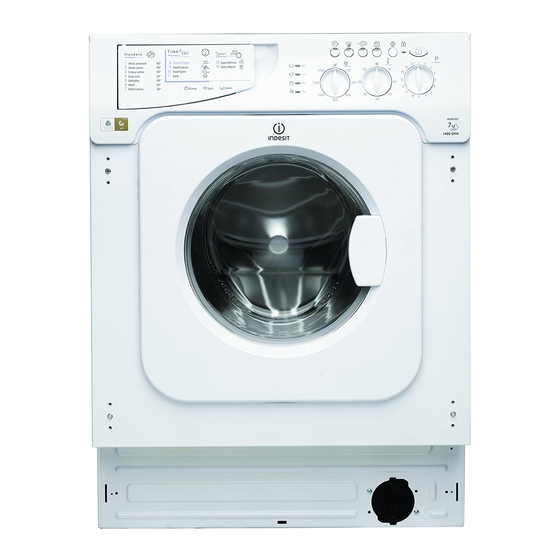
Page 8: Washing Machine Description
Washing machine description Control panel FUNCTION ON-OFF/DOOR Buttons LOCK Leds ON-OFF Button PROGRAMME Detergent dispenser Knob SPIN SPEED START/RESET Knob Button TEMPERATURE Knob Detergent dispenser: to add detergent and fabric PROGRAMME knob: to select the wash programmes. softener (see page 12). The knob stays still during the cycle. -
Page 9: Leds
Leds Cycle phase under way: During the wash cycle, the LEDs gradually illuminate on to The LEDS provide important information. indicate the cycle phase under way: This is what they can tell you: Prewash Delay set: If the Delay Timer function has been enabled (see page. Wash 11), once you have started the programme, the LED corresponding to the delay set will begin to flash:... -
Page 10: Starting And Programmes
Starting and Programmes Briefly: starting a programme 6. Add the detergent and any fabric softener (see page 12). 7. Start he programme by pressing the START/RESET 1. Switch the washing machine on by pressing button button. To cancel it, keep the START/RESET button All the LEDS will light up for a few seconds and pressed for at least 2 seconds. -
Page 11: Personalisations
Personalisations Setting the temperature Turn the TEMPERATURE knob to set the wash temperature (see Programme table on page 10). The temperature can be lowered, or even set to a cold wash ( ). Setting the spin speed Turn the SPIN SPEED knob to set the spin speed for the programme selected. The maximum spin speeds for each programme are as follows: Programmes Maximum spin speed... -
Page 12: Detergents And Laundry
Detergents and laundry Detergent dispenser Preparing your laundry Good washing results also depend on the correct dose of • Divide your laundry according to: detergent: adding too much detergent won’t necessarily - the type of fabric/the symbol on the label. make for a more efficient wash, and may in fact cause - the colours: separate coloured garments from build up on the interior of your appliance and even pollute... -
Page 13: Precautions And Advice
If you only see a little water through your appliance door, responsible for their safety. Children should be supervi- this is because thanks to the latest Indesit technology, your sed to ensure that they do not play with the appliance. -
Page 14: Care And Maintenance
Care and maintenance Cutting off the water or electricity 2. clean the interior thoroughly; supply 3. screw the lid back on. Checking the water inlet hose • Turn off the water tap after every wash. This will limit the wear of your appliance’s water system and also Check the water inlet hose at least once a year. -
Page 15: Troubleshooting
Troubleshooting Your washing machine could fail to work. Before calling for Assistance (see page 16), make sure the problem can’t easily be solved by consulting the following list. Possible causes/Solution: Problem • The appliance is not plugged into the socket fully, or not enough to make contact. The machine does not switch on. - Page 16 • There will always be some motor, pump and drum noise during spin. The machine is noisy. • Out of Balance detected when attempting to go into a spin cycle - If this happens The machine wont spin properly. the machine will continue to try to repeat the distribution of the load required before the machine will go into higher spin speeds - This will increase the programme time accordingly.
-
Page 17: Assistance
5 Year Parts Guarantee Indesit also offers you a free 5 year parts guarantee. This additional guarantee is conditional on you registering your appliance with us and the parts being fitted by one of our authorised engineers. There will be a charge for our engineer’s time. To activate the extra parts warranty on your appliance, simply call our registration line on 08448 24 24 24 (Republic of Ireland 01 230 0800). -
Page 18: After Sales Service
After Sales Service No one is better placed to care for your Indesit appliance during the course of its working life than us - the manufacturer. Essential Contact Information Indesit Service We are the largest service team in Europe offering you access to 400 skilled telephone advisors and 1100 fully qualified engineers on call to ensure you receive fast, reliable, local service. - Page 20 195097120.00 10/2011 - Xerox Fabriano...