
Related Manuals for Drill Master 750SP


Summary of Contents for Drill Master 750SP
-
Page 1: Table Of Contents
OPERATING INSTRUCTIONS & D R I L L I N F O R M A T I O N MODEL 750SP CONTENTS Warranty Congratulations Quick Steps Instructions Maintenance US Patents Quick Facts D385567, & 4,471,581 Replacement Parts 5,735,732 & 5,400,546... -
Page 2: Warranty
WASTE DISPOSAL METHOD: Waste will contain nickel. Dispose in accordance with all applicable federal, state, and local regulations. good condition. When using an extension cord be sure to use one heavy enough to carry the current the Drill Doctor® will draw. An SECTION VIII - PERSONAL PROTECTION INFORMATION RESPIRATORY PROTECTION: undersized cord will cause a drop in line voltage, resulting in a loss of Respiratory protection as needed see OSHA 29 CFR 1910.134... -
Page 3: Congratulations
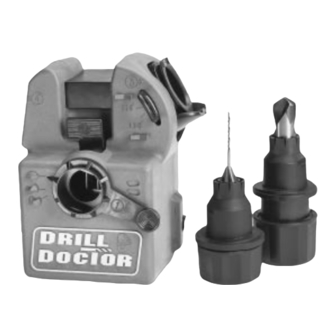
Before you sharpen your first drill bit Take a few minutes to familiarize yourself with your new Drill Doctor® and its basic parts. We will refer to all of the parts and features (Figure 1) during the course of this manual and in the video. There are some features and char- acteristics unique to the Drill Doctor®... -
Page 4: Quick Steps
QUICK OPERATING STEPS Models 500SP & 750SP A. Setting for split point style (full instructions page 4) 1. Determine the point angle of your drill by placing the drill point in the point angle gauges. See A-1 2. Insert a chuck (without drill) into the sharpening tube and pull the loop handle out. - Page 5 3/8" in diameter, or large enough to see how the point looks. Study Figure 1 on page 2 and the Figures 26 and 27 on page 8. Various Drill Doctor® and drill bit parts will be referenced in the following sections.
- Page 6 CW using both hands to secure the drill bit in the chuck. STEP 3: Sharpening The Drill Point A. Turn the Drill Doctor® switch on. B. Place the chuck into the sharpening tube . Align the high part of the Push INTO tube cam with the top cam follower and push it in all the way.
- Page 7 STEP 4: Splitting The Drill Point Fig. 14 You can split either a 118° or 135° drill point. Refer to Figure 31 on page 10 for a drawing and definition of a properly split drill bit point. A. After sharpening the drill point, do not remove the drill bit from the chuck.
-
Page 8: Maintenance
Drill Doctor®. Cleaning The Drill Doctor ® Unplug the Drill Doctor®. With a dry cloth wipe the inside and outside of the three Fig. 22 tubes to remove any grinding dust that may have accumulated. A standard 1 ⁄” vac- uum hose works equally well. -
Page 9: Quick Facts
If the drill bit cutting lips are not higher than the heel, then the drill bit will not cut into the material. This is often referred to as negative relief (see page 5 &10). The Drill Doctor® is designed to grind a standard factory relief on your drill bits. -
Page 10: Replacement Parts
Mounting Bracket REAR VIEW DD750 Parts Bag part # SAO1459PA move tube 1 slightly above the standard setting. Check ® DRILL DOCTOR TIPS the alignment again and adjust accordingly. Fig. 29 Heel Heel Slow and Fast Spiral / Helix Drill Bits, Raised Cutting Lip Margin Drill Bits &... -
Page 11: Troubleshooting
5. What can I do about the flat spot between the lip and the heel? The flat spots or chattering on a sharpened drill, are the The grinding wheel supplied with the Drill Doctor® is result of an incomplete or fast rotation of the chuck in the sharp-... -
Page 12: Dear Customer
Dear Customer, We appreciate the confidence you have placed in us by purchasing the Drill Doctor and we want ® you to be as excited about this remarkable tool as we are. It’s easy to use correctly, if you follow the instructions.