
Related Manuals for Linksys FENSK05


Summary of Contents for Linksys FENSK05
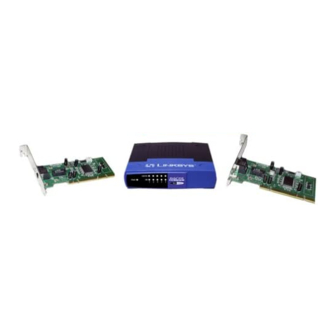
- Page 1 EtherFast Series 10/100 Network In a Box Use this guide to install this Linksys product: FENSK05 EtherFast 10/100 Network In a Box User Guide...
- Page 2 Linksys Customer Support in order to obtain a Return Authorization number. Warranty is for repair or replacement only. Linksys does not issue any refunds. BE SURE TO HAVE YOUR PROOF OF PURCHASE AND BAR CODE ON HAND WHEN CALLING. RETURN REQUESTS CANNOT BE PROCESSED WITHOUT PROOF OF PURCHASE AND BAR CODE.
-
Page 3: Table Of Contents
Contents Contents Introduction About PCI Hardware Setup Windows 98 Setup Windows 95 Setup Windows NT 4.0 Setup Windows For Workgroups Novell NetWare Client32 Setup 3.12 Server 4.x Server 5.0 Server How to Use Wake-On-LAN Appendix Windows 98 and 95 Client Setup For Windows NT 4.0 Windows 98 and 95 Client Setup For Novell NetWare 3.x... -
Page 4: Introduction
– the card's 10/100 combo port automatically detects your network's maximum speed and adjusts itself accordingly. The 10/100 LAN Card from Linksys also features Wake-On-LAN event management. If your PCI moth- erboard has built-in WOL support, you’ll be able to uti-... - Page 5 Introduction turn on any computer with a WOL network card to per- form after-hours tasks or to access files. The ultimate in managed 10/100 networking is yours! If you don’t have WOL support on your motherboard or you have no need for it, don’t worry -- your EtherFast 10/100 LAN Card will operate normally anyway.
-
Page 6: About Pci
About Plug-and-Play About Plug-and-Play PCI Technology The EtherFast 10/100 LAN Card is designed to run in a 32-bit desktop computer equipped with PCI expansion slots. The card is built to the PCI 2.1 standard. Short for Peripheral Components Interconnect, PCI is a technology that allows special Plug-and-Play expan- sion cards to be automatically configured by a comput- er’s BIOS (Basic Input/Output System) once they have... - Page 7 About Plug-and-Play 2. If loading the EMM386.EXE program in your PC's CONFIG.SYS, you MUST use version MS-DOS 6.22 or above. If you load an older EMM386.EXE program (below DOS 6.22), your PC will hang up while loading the network driver. 3.
-
Page 8: Hardware Setup
Hardware Setup Hardware Setup Before You Begin The EtherFast 10/100 LAN Cards are equipped with an RJ-45 port that automatically adjusts to either 10Mbps or 100Mbps speeds at any duplex. Also known as N- way technology, the card's auto-sensing mechanism allows you to attach your computer to either Fast Ethernet (also known as 100BaseTX) or regular 10BaseT Ethernet network segments of any duplex... - Page 9 Hardware Setup Using the Wake-On-LAN Feature The EtherFast 10/100 LAN Card supports both Magic Packet and Link Change remote wake-up events. Only install the Wake-On-LAN wires if your mother- board supports remote wake-up events. Improperly con- necting the wire or connecting it to a socket on the motherboard other than the designated 3-pin socket can damage your hardware.
- Page 10 Cabling Setup 5. Carefully slide the EtherFast card into your PC's slot. Make sure that all of its pins are touching the slot's con- tacts. After the card is firmly in place, secure its fasten- ing tab to your PC's chassis with a mounting screw. 6.
- Page 11 Network Planning Expanding Your Network in the Future If you want to add additional computers to your network in the future, all you need are more EtherFast 10/100 cards and 100BaseTX cables. Simply plug the new card(s) into your computer and run a cable from the card to one of the 5-Port hub's open ports.
- Page 12 Software Installation Preparing to Install the Software Setting up the EtherFast card's software involves installing a network driver onto your computer. The driver will allow the card to communicate with your Network Operating System software package, or NOS. Popular NOSs include Windows 98, Windows for Workgroups, Windows 95, Windows NT, Novell NetWare, and many others.
-
Page 13: Windows 98 Setup
Windows 98 Windows 98 Setup After installing the EtherFast hardware in your comput- er, follow these instructions for installing the network driver. The installation procedure for the network driver will vary slightly depending on the version of Windows 98 you are using and your current system configuration. If at any time during the installation you encounter problems, consult the Troubleshooting section on page 55 of this guide. - Page 14 6. Windows will begin searching your drives for the cor- rect device drivers. A message will appear that reads Windows found the Linksys LNE100TX Fast Ethernet Adapter driver. Click on Finish. 7. Windows 98 will begin copying a number of files onto your computer.
- Page 15 Make sure that the following network components are installed: Client for Microsoft Networks Client for Netware Network Linksys LNE100TX Fast Ethernet Adapter IPX/SPX-compatible Protocol NetBEUI There may be other components listed in addition to the ones shown above. However, if any components shown above are missing, you’ll need to install them manually.
- Page 16 Windows 98 Preparing Windows 98 for Use on a Network --Step 2 Before enabling File and Printer Sharing, you should prepare your computer to be used with any file servers that may be on the network. Using the Card with a NetWare File Server 3.11 or 3.12 Click on My Computer, Control Panel, and Network.
- Page 17 Windows 98 Preparing to Use File and Printer Sharing 1. Start up Windows 98. If you are asked to log in, be sure to give your correct username and password. 2. To set up sharing for the first time on a computer, click on Start, Settings, Control Panel, then double- click on Network.
- Page 18 Windows 98 Enabling File Sharing After following steps 1-5 on the previous page, double- click on your My Computer icon. A window of avail- able disk drives will appear. Using your right mouse button, click once on the drive that you want to make available to other users.
- Page 19 Windows 98 How To Share Printers After following steps 1-5 on page 15, double-click on your My Computer icon. Click on the Printers folder. A window of available printers will appear. Using your right mouse button, click once on the printer that you want to share with other users.
-
Page 20: Windows 95 Setup
Windows 95 Windows 95 Setup After installing the EtherFast hardware in your comput- er, follow these instructions for installing the network driver. The installation procedure for the network driver will vary slightly depending on the version of Windows 95 you are using and your current system configuration. There are currently two versions of Windows 95: •... - Page 21 Windows 95 Windows 95 Version A Setup 1. Windows 95 will detect the EtherFast card and dis- play a New Hardware Found window as shown below. 2. Put the EtherFast Card software disk into drive A. Using your mouse, select the Driver from disk provided by hardware manufacturer option on the screen, then click OK.
- Page 22 2. When the next window appears, click on the Other Locations button. Type a:\ in the Location box and click on the OK but- ton. Windows 95 will find the Linksys LNE100TX Fast Ethernet Adapter driver on the disk. 3. Click on the Finish button. Windows 95 will begin copying a number of files to your computer.
- Page 23 Make sure that the following network components are installed: Client for Microsoft Networks Client for Netware Network Linksys LNE100TX Fast Ethernet Adapter IPX/SPX-compatible Protocol NetBEUI There may be other components listed in addition to the ones shown above. However, if any components shown above are missing, you’ll need to install them manually.
- Page 24 Windows 95 Preparing Windows 95 for Use on a Network -- Step 2 Before enabling File and Printer Sharing, you should prepare your computer to be used with any file servers that may be on the network. Using the Card with a NetWare File Server 3.11 or 3.12 Click on My Computer, Control Panel, and Network.
- Page 25 Windows 95 Preparing to Use File and Printer Sharing 1. Start up Windows 95. If you are asked to log in, be sure to give your correct username and password. 2. To set up sharing for the first time on a computer, click on Start, Settings, Control Panel, then double- click on Network.
- Page 26 Windows 95 Enabling File Sharing After following steps 1-5 on the previous page, double- click on your My Computer icon. A window of avail- able disk drives will appear. Using your right mouse button, click once on the drive that you want to make available to other users.
- Page 27 Windows 95 How To Share Printers After following steps 1-5 on page 23, double-click on your My Computer icon. Click on the Printers folder. A window of available printers will appear. Using your right mouse button, click once on the printer that you want to share with other users.
-
Page 28: Windows Nt 4.0 Setup
Windows NT Windows NT 4.0 Setup The instructions that follow explain how to set up an NT 4.0 server/workstation. You should have your original Windows NT CD-ROM handy during the installation, as you might be asked to supply it. Always contact your network administrator or consult your NT documentation if you have questions. - Page 29 A. Type a:\winnt into the box on your screen and press the Enter key on your keyboard. 5. When the Linksys LNE100TX Fast Ethernet Adapter entry appears, click OK. The adapter will be added to the list of installed Network Adapters with a checkmark...
- Page 30 Windows NT 6. Click Next, then put checkmarks next to all of the network protocols that you want to install. See your Microsoft Windows NT user guide(s) or talk to your network administrator for more information about net- work protocols. When you're finished, click on Next. 7.
- Page 31 Windows NT 10. NT will copy the necessary network drivers to your computer. When the copying is complete, you will see a list of installed bindings. You can change the bindings settings as necessary if needed. When all of the settings are acceptable, click on Next, then Next again to start the NT network.
- Page 32 4. Put the EtherFast Card disk into drive A. Type a:\winnt into the box on your screen and click OK. NT will copy the necessary network drivers to your comput- 5. When Linksys LNE100TX Fast Ethernet Adapter appears in the adapter box, click OK.
- Page 33 Windows NT 6. When NT asks you for the media type or type of cabling, choose AutoDetect and click OK. 7. Choose the services that you want to install. Your Microsoft NT user guide(s) contain information about how services work. When you're finished, click on Next, followed by Next again.
- Page 34 Windows NT 10. NT will copy the necessary network drivers to your computer. When the copying is complete, you will see a list of installed bindings. You can change the bindings settings as necessary if needed. When all of the settings are acceptable, click on Next, then Next again to start the NT network.
-
Page 35: Windows For Workgroups
When asked to supply a driver disk, insert the first EtherFast disk into drive A and type a:\wfw311 into the box on your screen. Click OK. Linksys LNE100TX Fast Ethernet Adapter will appear in the Network Adapter box. Click OK, followed by Close. - Page 36 Windows For Workgroups After the Sharing window appears, use your mouse to put a checkmark next to any of the following options that you want: ...give others access to my files..allow others to print to my printer(s). 6. When you're finished, click the OK button. When the Network Setup window reappears, click OK.
-
Page 37: Novell Netware
NetWare Novell NetWare Setup The instructions below cover the following versions of Novell NetWare: · NetWare workstations for DOS & Windows 3.x · Client32 for Windows 95 & Windows 98 · 3.12, 4.x, and 5.0 NetWare Servers If you have a version or type of NetWare not shown above, run the README program on the EtherFast Card disk to obtain the installation instructions for your version. - Page 38 NetWare 3. When you type install, a new directory called DIAG will be created on your C: drive, and the DIAG setup and diagnostic program will be copied to it. 4. When you're ready to run DIAG, just type the follow- ing commands from the DOS command prompt (C:>) and press Enter after each one: cd c:\diag...
- Page 39 NetWare During the installation, your AUTOEXEC.BAT and CONFIG.SYS files will be automatically modified. The old versions of these files will be saved as AUTOEX- EC.LNK and CONFIG.LNK for later retrieval if you need to revert to them in the future. When the installation is complete, press OK, then select Exit from the menu to return to DOS.
-
Page 40: Client32 Setup
NetWare Novell Client32 Setup for Windows 95 and 98 Client32 drivers are required for connecting to a 4.x or 5.0 server while in Windows 95 only. If you are using Windows 98, you must obtain the latest version of Client32. The installation is very similar to that of Windows 95 OSR2. - Page 41 NetWare There are currently two versions of Windows 95: · the original release (version A) · a later release (also known as OSR2, or version B) The Client32 installation procedure will vary from this point forward depending on the version of Windows that you're using.
- Page 42 NetWare 8. Click on the Other Locations or Specify Location button when it appears. Put the EtherFast card disk into drive A. Type a:\client32 and press Enter. Windows 95 will locate the client driver. Click on the Finish button. If you receive a Msgsrv32 error message, don't worry -- just click on the Ignore button.
-
Page 43: Server
NetWare Installing a 3.12 Server The EtherFast Card network driver is installed during the NetWare installation process. During the setup you may want to refer to your NetWare 386 v3.12 Installation Manual for help. You will also be using ConfigDisk during the setup. 1. - Page 44 NetWare 5. At the server command line, type: LOAD c:\LNE100\NBI31X.NLM LOAD c:\LNE100\MSM31X.NLM LOAD c:\LNE100\ETHERTSM.NLM LOAD c:\LNE100\LNE100TX.LAN 6. Bind a protocol to the driver. For example: BIND IPX TO LNE100TX NET=XX where XX is the logical network address for the frame type in your LOAD command.
-
Page 45: Server
NetWare Installing a 4.x Server The EtherFast Card network driver is installed during the NetWare installation process. During the setup you may want to refer to your NetWare 386 v4.0 installation Manual for help. You will also be using ConfigDisk during the setup. -
Page 46: Server
NetWare Installing a 5.0 Server Follow these directions to set up a Novell NetWare 5.0 server. 1. Insert the EtherFast 10/100 LAN Card program disk into drive A. 2. At the NetWare prompt, run the INSTALL.NLM pro- gram by typing: <server name>: LOAD INSTALL and press Enter. - Page 47 NetWare The setup is complete. If you notice excessive “Tx FIFO Underflow” or “Rx FIFO Overflow” counts on your server in the LAN/WAN menu of your driver custom counters and you have a PCI computer with a Saturn or Mercury chipset, try using the keyword TURBO when loading the driver.
-
Page 48: How To Use Wake-On-Lan
Wake-On-LAN Wake-On-LAN The EtherFast 10/100 LAN Card supports both Magic Packet and Link Change remote wake-up events. Magic Packet is a type of Wake-On-LAN event devel- oped by AMD. Basically, an administrator can send a “wake-up” packet to a specific MAC address on the net- work. - Page 49 Wake-On-LAN There are also two different types of Remote Wake-Up compatible motherboards -- high power and low power. Remote Wake-Up is a little different than PME, but both events achieve the same goal. Of course, every LAN is built differently, and every administrator uses different software to manage the network.
- Page 50 Wake-On-LAN Setting Up Your EtherFast LAN Card for Wake- On-LAN Use 1. Use the diagram below to locate the WOL pins and the jumpers on the EtherFast LAN Card. 2. Connect one end of the 3-pin Wake-On-LAN wire to the EtherFast LAN Card. 3.
- Page 51 Wake-On-LAN Once your jumpers are set, be sure to write down the MAC address of the network card. It is either silkscreened on the card itself or it is noted on a sticker attached to the card. If no MAC address is given with the card, you can either run the card’s diagnostics (page 59), or run one of the programs described in the next section.
-
Page 52: Windows 98 And 95 Client Setup
Appendix Appendix Windows 98 or 95/NT 4.0 Client Setup If you are installing the EtherFast LAN Card in a Windows 95 or 98 PC that you plan on logging into a NT 4.0 file server, follow the directions below. 1. Follow the Windows 95 setup instructions or the Windows 98 setup instructions 2. - Page 53 Appendix If Access Control is grayed out and cannot be selected, refer to Problem 5 in the Troubleshooting section. 7. When you’re done, click OK. When asked if you want to restart your PC, choose to do so. The NT por- tion of the Windows setup is complete.
- Page 54 Appendix Novell 3.x Client Setup for Windows 98 or 95 The instructions below explain how to set up the regular Novell NetWare 3.x client for use on a Windows 98 or 95 PC. If you are installing NetWare’s Client32 software instead, follow the instructions on page 38.
-
Page 55: Twisted Pair Cabling
Appendix Twisted-Pair Cabling There are different grades, or categories, of twisted-pair cabling. Category 5 is the most reliable and widely compatible, and is highly recommended. Category 3 is a good second choice. Straight-through cables are used for connecting computers to a hub. Crossed cables are used for connecting a hub to another hub (there is an exception: some hubs have a built-in uplink port that is crossed internally, which allows you to uplink hubs... -
Page 56: Cabling Rules
Appendix To figure out which wire is wire number 1, hold the cable so that the end of the plastic RJ-45 tip (the part that goes into a wall jack first) is facing away from you. Flip the clip so that the cop- per side faces up (the springy clip will now be parallel to the floor). -
Page 57: Troubleshooting
Appendix Troubleshooting Troubleshooting hints for Windows can be found below. If you are using Windows NT, NetWare, or another net- work operating system, skip to the Card Diagnostics instructions on page 58. Troubleshooting Hints for Windows 95 and 98 Problem 1: Windows doesn’t detect new hardware with the EtherFast Card hardware installed, or it continues to detect the card each time you restart your PC. - Page 58 Appendix Problem 3: The Windows Logon screen doesn’t appear after you restart your computer. Solutions Click on Start, Shut Down, then Close All Programs and Logon as a Different User. If this doesn’t solve the problem, your PC’s manufacturer may have disabled Windows’...
- Page 59 Appendix Solutions Make sure that the cables are connected correctly. Make sure you are getting Link or Activity lights on both the EtherFast Card and your hub. Try changing to a new cable that you know is working. Your workgroup name may be different from other com- puters on your network.
-
Page 60: Running The Card's Diagnostics
Appendix Running the Card’s Diagnostics If you suspect that there may be a problem with the EtherFast Card, you can use the DIAG diagnostic pro- gram on the EtherFast Card disk to test the card's inter- nal and external network functions. To run the program, start up your computer in DOS. - Page 61 Bandwidth tests, any network problems that you are experiencing are external to the card. Check your cabling and hub connections. If the card fails the Loopback or Register tests, check your computer's set- tings, then contact Linksys Customer Support for help.
-
Page 62: Starting Over In Windows 98 And
4. If the box has a component called Dial-Up Adapter, skip forward to step 6. If it doesn’t, go to step 5. 5. Remove any instance on the name Linksys in the box. This includes IPS/SPX…Linksys, NetBEUI…Linksys, and TCP/IP…Linksys. Also remove Client for Microsoft Networks, Client for Netware Networks, and File and Printer Sharing for Microsoft Networks. - Page 63 6. For PCs with Dial-Up Networking and/or an AOL adapter, remove any instance of the name Linksys, all IPX/SPX protocols, all NetBEUI, all Clients, and File and Printer Sharing for Microsoft Networks. Do not...
- Page 64 9. Scroll down to the item Network Adapters and expand it by clicking on the plus [+] or minus [-] sign next to it. 10. Remove all devices with the name Linksys in it’s description. (If at any point you are asked to restart the computer, Click No).
- Page 65 Appendix 12. When you’re finished, click on the Close button, shut down Windows, and restart your computer. 13. After your computer has restarted, turn to page 11 for Windows 98 or page 18 for Windows 95 and fol- low the setup instructions.
-
Page 66: Manually Installing Network Components
3. Click on the Configuration tab. Make sure that the following network components are installed: Client for Microsoft Networks Client for Netware Network Linksys LNE100TX Fast Ethernet Adapter IPX/SPX-compatible Protocol NetBEUI There may be other components listed in addition to the ones shown above. - Page 67 Appendix Client for Microsoft Networks If you plan on connecting to an NT file server or peer- to-peer network, click on the Add button. Highlight Client and click on Add. In the Network Client box, highlight Client for Microsoft Networks and click OK. Client for Netware Networks If you plan on connecting to a Novell NetWare work- station, click on the Add button.
-
Page 68: Leds
Appendix LEDs LNE100TX EtherFast 10/100 Network Card The card has been successfully connected to LINK a live port on a hub or switch Denotes the card’s activity. Network packets are being transmitted or received when this LED is flickering When ON, the card is operting at 100Mbps When OFF, the card is operating at 10Mbps When ON, the card is operating at a maxi mum throughput of 200 or 20Mbps;... -
Page 69: Specifications
Appendix Specifications Model 10/100 Network In a Box Part No. FENSK05 Standards IEEE 802.3, IEEE 802.3u, PCI 2.1, 2.2, ACPI Card Bus Type 32-bit PCI Modes Half and Full Duplex Cards: Full Duplex 200/20Mbps Hub: Half Duplex 100/10Mbps WOL Support... -
Page 70: Customer Support
Customer Support For help with the installation or operation of your EtherFast 10/100 LAN Card, contact Linksys Customer Support at one of the phone numbers or Internet addresses below. Customer Support 949-261-1288 949-261-8868 Bulletin Board 949-261-2888 (33.6K, 8-N-1) Email support@linksys.com http://www.linksys.com... - Page 71 : / / w w w. l i n k s y s . c o m a Copyright 1999 Linksys, All Rights Reserved. Printed in the USA.