Table of Contents
Advertisement
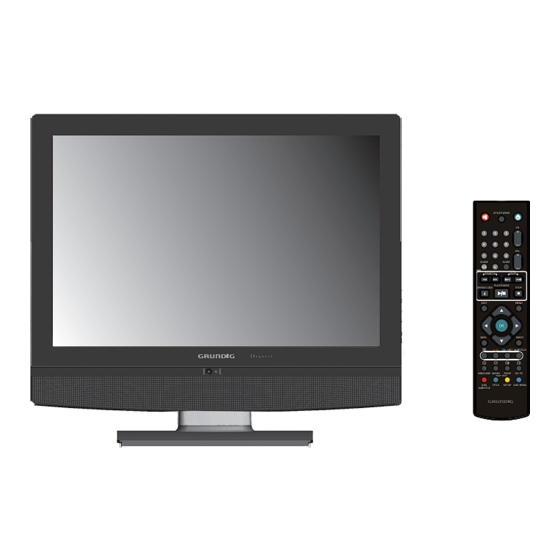
WITH INBUILT DVD PLAYER / USB & SD CARD SLOT
GU19WDVDT/GU19WDVDPCX
Grundig Web Site: www.grundig.co.uk
ATV/DTV/DVD
CH.
1
2
3
4
5
6
VOL.
7
8
9
GUIDE
SLEEP
+10
0
DVD
SEARCH
SKIP
PLAY/PAUSE
OPEN/CLOSE
STOP
EXIT
MENU
INFO
INPUT
I-II
CH. LIST
SUBTITLE
USB/CARD
AUDIO
ZOOM
GO TO
FAST TEXT
DVD
TITLE
SETUP
DVD MENU
SUBTITLE
Advertisement
Table of Contents

Related Manuals for Grundig GU19WDVDT


Summary of Contents for Grundig GU19WDVDT
- Page 1 WITH INBUILT DVD PLAYER / USB & SD CARD SLOT ATV/DTV/DVD VOL. GUIDE SLEEP SEARCH SKIP PLAY/PAUSE OPEN/CLOSE STOP EXIT MENU INFO INPUT I-II CH. LIST SUBTITLE USB/CARD AUDIO ZOOM GO TO FAST TEXT TITLE SETUP DVD MENU SUBTITLE Grundig Web Site: www.grundig.co.uk...
- Page 2 IMPORTANT SAFETY INSTRUCTIONS WARNING To reduce the risk of fire or electric shock, do not expose this equipment to rain or moisture. CAUTION RISK OF ELECTRIC SHOCK DO NOT OPEN CAUTION: TO AVOID THE RISK OF ELECTRIC SHOCK, DO NOT REMOVE COVER (OR BACK). NO USER-SERVICEABLE PARTS INSIDE.
-
Page 3: Electrical Information
MAINS PLUG WIRING Electrical Information The AC adaptor is fitted with a BS1363/A 13 amp plug. If it is not suitable for your supply sockets it must be removed and replaced with an appropriate plug. If the plug becomes damaged and/or needs to be replaced please follow the wiring instructions below. - Page 4 WARNINGS ● Unqualified attempts to repair this TV are not allowed. Refer repairs to this unit to a qualified technician only. ● Do not disassemble this unit. There are dangerous-voltage parts inside that may cause electric shock even after power is disconnected. ●...
-
Page 5: Table Of Contents
CONTENT PREPARTION Key Features......................5 Package Contents.....................6 Setting Up Your LCD TV ...................7 Your LCD TV......................8 Remote Control......................12 INSTALLATION Connecting a TV Cable or Aerial................14 Connecting a VCR & Video Camera.................17 Connecting a TV box and satellite Receiver ............18 Connecting an Audio Receiver ................19 HDMI ........... -
Page 6: Key Features
Key Features Various Audio/Video terminals for external equipment connection ▪ 1 set of composite A/V input terminals ▪ 1 SCART input terminals ▪ 1 set of component Video input terminals ▪ 1 VGA/ Audio input terminal ▪ 1 HDMI/Audio input terminals ▪... -
Page 7: Package Contents
Package Contents Make sure all of the following contents are included. LCD TV STAND Remote Control/ VIDEO Cable AAA Batteries x 2 ATV/DTV/DVD VOL. GUIDE SLEEP SEARCH SKIP PLAY/PAUSE OPEN/CLOSE STOP EXIT MENU INFO INPUT CH. LIST SUBTITLE I-II USB/CARD... -
Page 8: Setting Up Your Lcd Tv
Setting Up Your LCD TV If you prefer to mount your new TV on a wall instead of attaching it to the stand, please reference the instructions included in the wall mounting kit (not included). Ensure the TV stand is still attached with the bottom foam packaging material in the package. Read all instructions before continuing with the stand installation. - Page 9 How to setup the TV Connect an existing TV aerial to the aerial input socket on the rear of the TV. Connect the DC plug of the AC-DC power adapter to the DC 12V IN socket at the back of the TV.
-
Page 10: Your Lcd Tv
Your LCD TV Front View / Side View The LED light indicates when the LCD TV is activated (Red = standby, Green On). PC VGA IN AUDIO IN HDMI VHF/UHF IN DC 12V IN AUDIO IN DIGITAL OUT PC AUDIO IN VIDEO S VIDEO SCART... -
Page 11: Remote Control
Rear View and Sockets VOL.+ VOL. MENU INPUT ITEM DESCRIPTION Any of the following disc types are playable on the DVD player: 1. SLOT-TYPE DVD CD-R, CD-RW, DVD-R, DVDRW, VCD, SVCD,DVD+R, and DVD+RW. ( PLAYER DVD mode ) Allow the insertion of a USB disk, You can view digital images or movie 2. - Page 12 Rear View and Sockets PC VGA IN AUDIO IN HDMI VHF/UHF IN DC 12V IN PC AUDIO IN VIDEO S VIDEO AUDIO IN DIGITAL OUT SCART HDMI PC VGA IN AUDIO IN VHF/UHF IN DC 12V IN AUDIO IN DIGITAL OUT VIDEO PC AUDIO IN S VIDEO...
- Page 13 Your Remote Control Turn the LCD TV on and into standby ATV/DTV/DVD mode. Mute and restore your LCD TV sound. ATV/DTV/DVD Press enter ATV / DTV or DVD Mode . VOL. GUIDE SLEEP Select and switch to a channel by SEARCH SKIP using 0-9 buttons.
-
Page 14: Dvd Menu
MENU Displays the OSD ( On Screen Display ) menu. ATV/DTV/DVD Allow you to move, select, and set up the OSD options. INFO VOL. Press once displays a variety of information such as the current channel and the input source. GUIDE SLEEP Browse the disc’s information. -
Page 15: Installing The Lcd Tv
Installing the LCD TV When connecting any external equipment, do not connect any AC power cords to wall outlets until all other connections are completed. Connecting a TV Cable or an Antenna Antenna Connection The aerial requirements for good digital TV reception are far more important than for normal analogue TV reception. - Page 16 Refer to the owner’s manual of the external equipment to be connected.When connecting external equipment, do not connect any AC power cords to wall outlets until you have completed all the connections. Basic Connection: Connecting an aerial connect the AC-DC adapter to the DC IN Unplug from a socket at back of the TV.
- Page 17 2.In a short while you will see the TV programmes briefly as each channel is received and stored in the memory. After analogue stations have been located and stored into the memory,the digital tuning scan will commence. You may be prompted to start the Digital tuning scan. Press the OK button to start the scan.
-
Page 18: Installation
Connecting a VCR&Video Camera Rear of TV PC/VGA IN DC 12V IN VHF/UHF IN Audio Audi ideo Video/Audio Cable METHOD A (AV2) Use an Audio cable to connect the VCR’s/ the Video Camera’s audio output sockets to your LCD TV. Use a S-Video cable to connect your LCD TV and VCR player/ video camera. -
Page 19: Connecting A Tv Cable Box Or Satellite Receiver
Connecting a TV Cable Box or Satellite Receiver Rear of TV PC/VGA IN DC 12V IN VHF/UHF IN Audi Audio ideo HDMI CABLE Video/Audio Cable VGA CABLE Satellite antenna cable TV CABLE BOX SATELLITE RECEIVER Method A(AV4) : Use a Component cable to connect the Y/Pb/Pr sockets on the TV Cable Box to your LCD TV. -
Page 20: Connecting An Audio Amplifier
Connecting an Audio Amplifier Rear of TV PC/VGA IN DC 12V IN VHF/UHF IN Use an audio cable to connect the audio receiver’s audio LINE IN sockets to LCD TV ‘s DIGITAL OUT sockets. (Only for DVB-T / DVD input sources) ... -
Page 21: Hdmi
HDMI HDMI -This TV can accept High-Definition Multimedia Interface(HDMI) . -This TV SET supports HDCP(High-bandwidth Digital Content Protection) Protocol for TV SET (480p, 720p, 1080i) modes. -When you connect to the output of an HD ready player (DVD Player, Set Top Box or PC) switch to the AV6(HDMI) function and the TV will automatically detect the resolution used by the HDMI source. -
Page 22: Using The Features
USING THE FEATURES OSD Menu Operation 1 The main menu provides access to the following menus: Video Adjust picture setting such as picture mode, contrast, brightness,sharpness colour and advanced. Audio Adjust sound option and effects. Setup Adjust colour standard, sound standard, APS, Manual search, Channel setup. -
Page 23: The Video Settings
The VIDEO Settings OPTION DESCRIPTION Advanced Display Mode Allows you to select the display mode to be Wide, 4:3,16:9 Original, Zoom. Allows you to adjust the (Dynamic Contrast Enhancemen) to be off, low, mid, high. Blue Allows you to adjust the blue Stretch stretch. -
Page 24: The Setup Settings
The Setup Settings(Analogue TV) Setup menu is only available when viewing Analogue TV. Use this Setup menu to select Colour Standard, Sound Standard, APS, Manual Search, Channel Setup.Use the Up/Down arrow buttons to highlight the required setting. Press the Press OK button to select the function. Use left / right arrow buttons to adjust the settings. -
Page 25: The Preference Settings
The Preferences Settings Use this Preferences setting menu to set up some features: OSD, Blue Screen, Childlock, Sleep Timer, OSD Timer, OSD Reset. OPTION DESCRIPTION Language : Allows you to select the OSD to be English, French, Spanish, German, Italian, Portugese, Dutch, Polish or Russian . -
Page 26: Edit Favourite List
Using the DTV OSD Settings OPTION DESCRIPTION Edit Favourite Create, Modify or delete a channel list. List Lock some channels that are not suited for younger members of the family, skip/add the channel list as. Configuration Add new channel, set audio language, subtitle language, as you wish. - Page 27 Using the DTV OSD Settings F AV 1 B B C O NE B B C TWO B B C THR EE C B B C C hannel B B C NEWS 24 B B C i L ock Sk ip Sor t M ov e Sk ip A dd A ll Exit...
- Page 28 If you skip a channel, it cannot be shown in the list menu ( Press OK button will pop-up the favorite channel list menu when you watch the digital terrestrial television ) unless you add it again. ( In the channel list menu, the skipped channel name is not shown.) MODIFY A FAVOURITE LIST You can modify the favourite list which you have create.
- Page 29 Using the DTV OSD Settings CONFIGURATION Highlight the Configuration option, then press OK button to enter the selected option. The configuration menu is displayed on the screen now. CHANNEL INSTALLATION Use these options If you have moved location or want to rescan for new channels. Press OK button to display the channel installation menu.
- Page 30 Using the DTV OSD Settings If you want to install the channels by yourself, using the▲/▼buttons to highlight the channel installation (manual) option, and press ok to install manually. First you should choose the installation type, then you can see the following menu. Using ◄/► to cycle the channel option, then the bar graphs of signal level and signal quality will indicate whether any channels are likely to be found.
- Page 31 Using the DTV OSD Settings Using the ▲/▼buttons to highlight the user settings item in the configuration menu, then press OK button to display the user settings menu. AUDIO LANGUAGE This function selects which language soundtrack you will hear when switching to a channel broadcasting with multiple soundtracks.
- Page 32 Using the DTV OSD Settings SYSTEM INFORMATION Highlight the system information item in the system parameter menu, pressing OK button to display the system information menu. You can view the system information in this menu, however, you can modify nothing in this menu, Pressing OK button to quit. SIGNAL INFORMATION Highlight the Signal information item in the configuration menu, pressing OK button to display the Signal information menu.
- Page 33 Using the DTV OSD Settings PARENTAL CONTROL Highlight the parental control line in the parental control menu and use◄/► buttons to cycle through the enable and disable option. Toggle this option to enable, then the following items can be altered. RECEIVER LOCK You should enter the PIN CODE before you can see the DTV program while you power on the TV and select the DTV INPUT.
- Page 34 Using the DTV OSD Settings PIN CODE CHANGE Pressing the ‘RED’ button will popup the PIN code change menu, enter the previous code by using the 0-9 buttons on the remote control, then enter the new code twice to confirm and this menu will disappear (The PIN is factory set to 0000).
- Page 35 Using The Built-In DVD TO INSERT A DISC Select DVD function before inserting the disc to the player. Plays movies and other content on DVD, VCD, SVCD, and audio CD. Note: Insert a disc with label side facing to front of TV TO REMOVE A DISC When removing the disc, do not attempt to pull it from its slot.
- Page 36 Using The Card Reader & USB The Smart NAVI Viewer allows you to play JEPG / MPEG1 / MPEG2 / MPEG4 files in a SD storage card on your LCD TV. TO INSERT A SD CARD Be sure to insert the SD card in the correct orientation. If the SD card is forced in the wrong way, it may cause damage.
-
Page 37: Dvd Playback
Using The Card Reader & USB PLAYING BACK DVD / USB / CARD For trouble free operation of SD CARD/USB or DVD disc play. Please ensure that the following steps are taken before inserting an SD card, USB or DVD disc: DVD Playback 1. - Page 38 SEARCH PLAY For DVD discs: Press the GO TO key on the remote control in normal playing status to display on screen as follows: Use the arrow buttons and number keys to adjust the following: 1. Title 5. Time of the Title 2.
-
Page 39: Picture Cd Operations
WMA Playback To access your preferred directory, use the up/down ( ▲/▼ ) cursor keys to select the file, and press OK key to confirm. Use the up/down ( ▲/▼ ) cursor keys to select song and press OK Button to start playing. Press left cursor button to return to the previous directory, you can then select other directories. -
Page 40: Slide Show
Picture CD Operations Previous and Next selection: You can press Button to show previous picture or Button to show next picture manually. Slide Show: The player will automatically play pictures in slide show mode if the disc containing more than one picture. There are 16 available modes to wipe the TV screen when displaying a new picture: Press up/down ( ▲/▼... - Page 41 Using General Setup Page The setup menu is used for configuring the DVD player. OPTION DESCRIPTION TV DISPLAY 4:3 Pan Scan Select this when the player is connected with a standard format TV set . Widescreen picture shown in the full screen with some part cut.
- Page 42 Using General Setup Page OPTION DESCRIPTION SCREEN SAVER Screen saver When the player stops or the picture becomes motionless for a couple of minutes, there will be a screen saver to prevent damage to the display screen. ON: To activate screen saver. OFF: To disable screen saver.
-
Page 43: Dolby Digital Setup
Dolby Digital Setup OPTION DESCRIPTION DUAL Dual Mono Stereo: It means that the player will output MONO Left channel and Right channel audio. L-Mono: It means that the player will output left channel audio only. R-Mono: It means that the player will output right channel audio only. -
Page 44: Using The Digital Tv Features
Using Preference Page The unit must be at complete STOP mode to access to SETUP Preference Page. OPTION DESCRIPTION AUDIO AUDIO Set the audio language to your language of choice: English / Norwegian / Sweden / Finish / Dainish / Greek / Italian / Polish / Hungarian / Czech / French. -
Page 45: Troubleshooting
TROUBLESHOOTING Before consulting Grundig the Helpline, check the following chart for a possible cause of problem and for a possible solution. HELPLINE NUMBER 0871 230 1777 TV will not turn on Make sure the AC adaptor / power cord is plugged in ... -
Page 46: Specifications
SPECIFICATIONS MODEL: GU19WDVDT/GU19WDVDPCX LCD Panel Panel Size 19” TFT LCD Brightness Contrast Ratio 800:1 Max. Resolution 1440 x 900 Input Connector VIDEO S-VIDEO YPbPr/ AUDIO IN(L/R) 1 AUDIO IN(L/R) PC/VGA IN HDMI IN PC AUDIO IN DIGITAL OUT HEADPHONE VHF/UHF IN...