Gateway Notebook User Manual
Hide thumbs
Also See for Notebook:
- Reference manual (170 pages) ,
- User manual (160 pages) ,
- User manual & code book (128 pages)
Table of Contents
Advertisement
Quick Links
Advertisement
Table of Contents
Troubleshooting

Related Manuals for Gateway Notebook


Summary of Contents for Gateway Notebook
-
Page 1: User Guide
Gateway Notebook User Guide... -
Page 3: Table Of Contents
Starting your notebook ........28 Waking up your notebook ........29 Turning off your notebook . - Page 4 Caring for your notebook ........
- Page 5 Cleaning the keyboard ........80 Cleaning the notebook screen ....... 80 Cleaning CDs or DVDs .
- Page 6 ............123 www.gateway.com...
-
Page 7: Getting Help
Chapter 1 Getting Help • Using the Gateway Web site • Using Help and Support • Using BigFix • Using Your Computer guide • Using online help... - Page 8 Chapter 1: Getting Help Thank you for purchasing our notebook! You have made an excellent decision choosing Gateway. We are sure that you will be pleased with the outstanding quality, reliability, and performance of your new notebook. Each and every Gateway notebook...
-
Page 9: Gateway Web Site
Gateway Web site Gateway Web site Gateway's online support is available 24 hours per day, 7 days per week and provides the most current drivers, product specifications, tutorials, and personalized information about your notebook. Visit the Gateway eSupport Web site at support.gateway.com. - Page 10 Notebook Computers specifications, and guides for all Gateway notebooks. Product Support Click to view a list of all the products that Gateway Product Support supports. Downloads Click , then click to get the latest software...
-
Page 11: Help And Support
Help and Support Help and Support Your notebook includes Help and Support, an easily accessible collection of help information, troubleshooters, and automated support. Use Help and Support to answer questions about Windows and to help you quickly discover and use the many features of your Gateway notebook. -
Page 12: Searching For A Topic
Search Results BigFix BigFix monitors your notebook for problems and conflicts. It automatically gathers information about the latest bugs, security alerts, and updates from BigFix sites on the Internet. Whenever BigFix detects a problem, it alerts you by flashing the blue taskbar icon. To fix the problem, click on that icon to open BigFix. -
Page 13: Using Your Computer Guide
Click , then click Start All Programs Gateway Documentation Online help Many programs provide information online so you can research a topic or learn how to perform a task while you are using the program. You can access most online help information by selecting a topic from a... - Page 14 Chapter 1: Getting Help You can search for information by viewing the help contents, checking the index, searching for a topic or keyword, or browsing through the online help. www.gateway.com...
-
Page 15: Checking Out Your Gateway Notebook
Chapter 2 Checking Out Your Gateway Notebook • Identifying features • Locating your notebook’s model and serial number • Locating the Microsoft Certificate of Authenticity • Locating the specifications for your notebook • Purchasing accessories... -
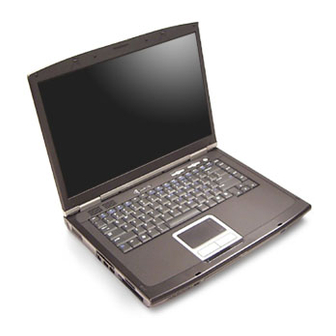
Page 16: Front
LED on - battery is charging. ■ LED blinking - battery charge is very low. ■ LED off - battery is fully charged. ■ This LED only lights when the notebook is connected to AC power or the battery is very low. www.gateway.com... -
Page 17: Left Side
Helps cool internal components. Warning: Do not work for long periods with the notebook resting on your lap. If the air vents are blocked, the notebook may become hot enough to harm your skin. Caution: Do not block or insert objects into these slots. If... -
Page 18: Right Side
44. This drive may DVD±RW drive be a combination DVD/CD-RW or multi-format DVD±RW drive. To determine the type of drive in the notebook, examine the drive tray’s plastic cover and compare the logo to those listed in “Identifying drive types” on page... -
Page 19: Back
Ethernet network” on page Monitor port Plug an analog VGA monitor or projector into this port. USB ports Plug USB devices (such as a diskette drive, flash drive, printer, scanner, camera, keyboard, or mouse) into these ports. www.gateway.com... - Page 20 Caution: Provide adequate space around your notebook so air vents are not obstructed. Do not use the notebook on a bed, sofa, rug, or other similar surface. Kensington™ Secure your notebook to an object by connecting a lock slot Kensington cable lock to this slot.
-
Page 21: Bottom
Slide to release the battery. For more information, see “Changing batteries” on page Battery Provides power when the notebook is not plugged into AC power. Hard drive bay The hard drive is located in this bay. For more information, see “Replacing the hard drive kit” on page Memory bay Install a memory module into this bay. -
Page 22: Keyboard Area
Chapter 2: Checking Out Your Gateway Notebook Keyboard area Power Multi-function button buttons Keyboard Status indicators Touchpad Component Icon Description Multi-function Press these buttons to open programs assigned to them or buttons control the volume. For more information, see “Multi-function buttons”... -
Page 23: Identifying Your Model
Label information varies by model, features ordered, and location. Gateway model and serial number The label on the bottom of your notebook contains information that identifies your notebook model and its features. Gateway Customer Care will need this information if you call for assistance. -
Page 24: Finding Your Specifications
“Adding or replacing memory” on page 71 for more information. Printers You can attach almost any type of printer to your notebook. The most common types are inkjet and laser printers, which print in color or black and white. www.gateway.com... - Page 25 Laser printers and cartridges are more expensive, but they print much faster than inkjet printers. Laser printers are better than inkjet printers when you are printing large documents. USB flash drive Use a USB flash drive for storing files or transferring files to another computer. www.gateway.com...
- Page 26 Chapter 2: Checking Out Your Gateway Notebook www.gateway.com...
-
Page 27: Getting Started
• Connecting the AC adapter • Connecting the dial-up modem • Connecting to a cable or DSL modem or to an Ethernet network • Turning your notebook on and off • Using the status indicators • Using the keyboard and the EZ Pad touchpad •... -
Page 28: Installing The Battery
Installing the battery To install the battery: Close the LCD panel. Turn your notebook over so the bottom is facing up. Hold the battery label-side down and slide it into the open battery compartment until the battery clicks into place. -
Page 29: Connecting The Ac Adapter
Connecting the AC adapter Connecting the AC adapter You can run your notebook using an AC adapter or your notebook’s battery. The battery was shipped to you partially charged. You should use the AC adapter right away to fully charge the battery. Allow 24 hours for the battery to fully charge. - Page 30 Press F +F1 to toggle the status lights on and off. When you finish using your notebook for the first time, turn off your notebook and leave your notebook connected to AC power until the battery charge indicator turns off.
-
Page 31: Protecting From Power Source Problems
Protecting from power source problems During a power surge, the voltage level of electricity coming into your notebook can increase to far above normal levels and cause data loss or system damage. Protect your notebook and peripheral devices by connecting them to a surge protector, which absorbs voltage surges and prevents them from reaching your notebook. -
Page 32: Connecting The Dial-Up Modem
Chapter 3: Getting Started Connecting the dial-up modem Your notebook has a built-in 56K modem that you can use to connect to a standard telephone line. Warning To reduce the risk of fire, use only No. 26 AWG or larger telecommunications line cord. -
Page 33: Connecting To A Cable Or Dsl Modem Or To An Ethernet Network
Connecting to a cable or DSL modem or to an Ethernet network Your notebook has a network jack that you can use to connect to a cable or DSL modem or to an Ethernet network. To connect to a cable or DSL modem or to an Ethernet network: Insert one end of the network cable into the network jack the back of your notebook. -
Page 34: Starting Your Notebook
Chapter 3: Getting Started Starting your notebook To start your notebook: Slide the latch on the front of your notebook, then lift the LCD panel. Press the power button located above the keyboard. The power button is preset to On/Off mode. However, you can also set it to function in Standby/Resume mode. -
Page 35: Waking Up Your Notebook
Waking up your notebook When you have not used your notebook for several minutes or if you close the LCD panel without turning off your notebook, it may enter a power-saving mode called Standby. While in Standby, the power indicator flashes. -
Page 36: Restarting (Rebooting) Your Notebook
End Task Click in the top-right corner of the Windows Task Manager dialog box. If your notebook does not respond, turn it off, wait ten seconds, then turn it on again. Important If your notebook does not turn off immediately, complete... -
Page 37: Status Indicators
LED blinking - The hard drive is in use. ■ LED off - The hard drive is not in use. ■ Important If none of the indicators are on, you may need to press to toggle the status lights on and off. www.gateway.com... -
Page 38: Using The Keyboard
Chapter 3: Getting Started Using the keyboard Your notebook features a full-size keyboard that functions the same as a desktop computer keyboard. Many of the keys have been assigned alternate functions, including shortcut keys for Windows, function keys for specific system operations, and the Num Lock keys for the numeric keypad. -
Page 39: Key Types
Press to turn on the numeric keypad. Application key Press this key for quick access to shortcut menus and help assistants in Windows. Arrow keys Press these keys to move the cursor up, down, right, or left. www.gateway.com... -
Page 40: System Key Combinations
Chapter 3: Getting Started System key combinations When you press the F key and a system key at the same time, your notebook performs the action identified by the text or icon on the key. Press and hold F , then To... - Page 41 Skip ahead one CD song or DVD track. Turn on Num Lock so you can use the numeric keypad. Press this key combination again to turn off Num Lock. The Num Lock status indicator appears when this function is turned on. www.gateway.com...
-
Page 42: Multi-Function Buttons
Music player Open your default music player. Volume up Turn the volume up. Press the Volume Up and Volume Down buttons at the same time to mute or un-mute the sound. E-mail Open your default e-mail program. www.gateway.com... -
Page 43: Using The Ez Pad Touchpad
“Searching for files” in Using Your Computer which has been included on your hard drive. To access this guide, click Start, All Programs, then click Gateway Documentation. Using the EZ Pad touchpad The EZ Pad™ consists of a touchpad, two buttons, and a scroll zone. - Page 44 “Changing the mouse or touchpad settings” in Using Your Computer which has been included on your hard drive. To access this guide, click Start, All Programs, then click Gateway Documentation. www.gateway.com...
-
Page 45: Using The Touchpad
. Access a shortcut Position the pointer menu or find more over the object. information about Quickly press and an object on the release the right screen. button once. This action is called right-clicking . www.gateway.com... - Page 46 Tips & Tricks You received your notebook with the EZ Pad touchpad set to only accept clicking by using the touchpad buttons. You can change this feature to allow tapping on the touchpad to simulate clicking the left button.
-
Page 47: Adjusting The Volume
Tips & Tricks For instructions on how to adjust the volume in Windows, see “Adjusting the Volume” in Using Your Computer which has been included on your hard drive. To access this guide, click Start, All Programs, then click Gateway Documentation. www.gateway.com... -
Page 48: Turning Your Wireless Radio On Or Off
Your Gateway notebook may have wireless networking built-in. To turn the wireless radio on or off: ■... -
Page 49: Using Drives And Ports
Chapter 4 Using Drives and Ports • Using a DVD drive • Using the media card reader • Using a PC Card • Viewing the display on a monitor or projector • Connecting a video camera to your notebook... -
Page 50: Using The Cd Or Dvd Drive
Chapter 4: Using Drives and Ports Using the CD or DVD drive You can use your notebook to enjoy a wide variety of multimedia features. Identifying drive types Your Gateway notebook may contain one of the following drive types. Look on the front of the drive for one or more of the following logos: If your drive has this logo... -
Page 51: Inserting A Cd Or Dvd
Important Some music CDs have copy protection software. You may not be able to play these CDs on your notebook. To insert a CD or DVD: Press the eject button on the DVD drive. After the tray opens slightly, pull the disc tray completely open. -
Page 52: Playing A Cd
Chapter 4: Using Drives and Ports Playing a CD Use a music program or Windows Media Player on your notebook to: ■ Play music CDs ■ Create MP3 and WMA music files from your music CDs ■ Edit music track information ■... -
Page 53: Using The Memory Card Reader
Using the memory card reader You can use memory cards to transfer pictures from a digital camera to your notebook. You can also use the memory card reader to transfer data between your notebook and a device that uses memory cards, such as a PDA, MP3 player, or cellular telephone. -
Page 54: Inserting A Memory Card
Remove the protector from the memory card slot. Insert the memory card into the memory card slot with the label facing up and the arrow on the label pointing towards the notebook. To access a file on the memory card, click... -
Page 55: Adding And Removing A Pc Card
Adding and removing a PC Card Adding and removing a PC Card Your notebook has a PC Card slot (also known as a PCMCIA card slot). This slot accepts one Type II card. You do not need to restart your notebook when changing most cards because your notebook supports hot-swapping. - Page 56 Click the remove hardware icon in the taskbar, the PC Card name, then click Stop -OR- Turn off your notebook. Important If the remove hardware icon does not appear on the taskbar, click the show hidden icons button. Release the eject button by pressing the PC Card eject button once.
-
Page 57: Viewing The Display On A Projector Or Monitor
(VGA) port. Your notebook supports simultaneous LCD and external display. Simultaneous display lets you control the presentation from your notebook and at the same time face your audience. To use a projector or external monitor: Turn off your notebook. - Page 58 LCD panel and viewing the display on the projector or monitor. Important If an external monitor or projector is connected and you close the LCD panel, your notebook may turn off the LCD panel, but will not enter Standby mode. www.gateway.com...
-
Page 59: Viewing The Display On A Television
Viewing the display on a television Viewing the display on a television The S-Video out jack on your notebook lets you view your notebook display on a television screen using a standard S-Video cable. Important To turn on external video by default, connect the television (or other external video device) before starting your notebook. -
Page 60: Modifying Television Settings
If your Control Panel is in Category View, click Appearance and Themes Click/Double-click the icon. The Display Properties dialog box Display opens. Click the tab. Settings Click . The Multiple Monitors and ATI RADEON Xpress 200 Advanced Series Properties dialog box opens. www.gateway.com... - Page 61 Click the Enable TV button if it is not already enabled. Important If the Enable TV and TV buttons are grayed out, your notebook has not detected the television. Make sure that the television is turned on and connected correctly. www.gateway.com...
- Page 62 If you are traveling internationally, you may need to change the video standard. For example, many televisions in Asia use PAL instead of NTSC. Click Apply Click to close the Multiple Monitors and ATI RADEON Xpress 200 Series Properties dialog box. www.gateway.com...
-
Page 63: Connecting A Video Camera To Your Notebook
Connecting a video camera to your notebook Connecting a video camera to your notebook ® Your notebook has a 4-pin IEEE 1394 port (also known as a Firewire ® i.Link port) for connecting devices such as a digital camcorder. To connect your video camera to your notebook: Connect one end of the IEEE 1394 cable to your video camera. - Page 64 Chapter 4: Using Drives and Ports www.gateway.com...
-
Page 65: Managing Power
Chapter 5 Managing Power • Checking and recharging the battery • Recalibrating the battery • Changing batteries • Extending the life of the battery... -
Page 66: Monitoring The Battery Charge
Chapter 5: Managing Power Monitoring the battery charge Your new Gateway notebook is designed to provide an exceptional balance of performance and portability. Your notebook uses the latest chipset and mobile processor technologies to manage the processor speed and power consumption for a greater battery life experience. This design provides you with maximum performance when plugged into AC power balanced with optimized battery life when on battery power. -
Page 67: Recharging The Battery
Recharging the battery Recharging the battery The battery recharges while it is installed and your notebook is connected to AC power. While the battery recharges, the battery charge indicator turns purple and the power cord icon in the taskbar has a lightning... - Page 68 AC power. Charge the battery completely until the yellow battery status indicator goes out. When you are ready to use your notebook again, do the following: From the desktop, right-click on the power icon, then select Adjust Power Properties Click the tab.
-
Page 69: Changing Batteries
If your notebook is on and is connected to AC power, go to Step -OR- If your notebook is on and is not plugged into an AC outlet, save your work and turn off the notebook. Close the LCD panel. - Page 70 Slide the battery release latch, then lift the battery out of the bay. Place a recharged battery into the bay and press down until it snaps into place. Slide the battery lock to the lock position. Turn your notebook over. Open the LCD panel and press the power button. www.gateway.com...
-
Page 71: Extending Battery Life
Gateway Documentation. ■ Close the LCD panel to turn off the display while you are not using your notebook. The display stays off until you open the panel again. ■ Use Hibernate mode for maximum power savings while your notebook is not in use. -
Page 72: Using Alternate Power Sources
You can use the following power modes to lengthen the life of your notebook’s battery: ■ Standby - while your notebook is in Standby, it switches to a low power state where devices, such as the display and drives, turn off. ■... - Page 73 Using power saving modes Always save your work before using Standby mode. In Standby mode, your notebook reduces or turns off the power to most devices except memory. However, the information in memory is not saved to the hard drive. If power is interrupted, the information is lost.
- Page 74 Chapter 5: Managing Power www.gateway.com...
-
Page 75: Upgrading Your Notebook
Chapter 6 Upgrading Your Notebook • Adding and replacing memory • Replacing the hard drive... -
Page 76: Preventing Static Electricity Discharge
Important Before installing memory or replacing the hard drive, you should read and understand the information in this section. The components inside your notebook are extremely sensitive to static electricity, also known as electrostatic discharge (ESD). Warning To avoid exposure to dangerous electrical voltages and... -
Page 77: Adding Or Replacing Memory
Turn off your notebook. Disconnect the AC adapter, modem cable, and network cable. Disconnect all peripheral devices and remove any PC cards. Turn your notebook over so the bottom is facing up. Remove the battery. For more information, see “Replacing the battery”... - Page 78 Chapter 6: Upgrading Your Notebook Remove the memory bay cover screw. Slide the memory bay cover, then remove it. If you are removing a module, gently press outward on the clip at each end of the memory module until the module tilts upward.
- Page 79 Gently push the module down until it clicks in place. Replace the memory bay cover, then replace the cover screw. Insert the battery, then turn your notebook over. Connect the power adapter, modem cable, and network cable, then turn on your notebook.
-
Page 80: Replacing The Hard Drive Kit
Chapter 6: Upgrading Your Notebook Replacing the hard drive kit If you would like more hard drive capacity, you can replace your original drive with a higher-capacity drive. Hard drive To replace the hard drive kit: Back up any data you want to transfer to the new hard drive. For more information, see “Backing up files”... - Page 81 Replacing the hard drive kit Turn your notebook over so the bottom is facing up. Remove the battery. For more information, see “Replacing the battery” on page Remove the hard drive kit screw, then slide the old hard drive kit out of your notebook.
- Page 82 Replace the four screws that secure the bracket to the drive. Slide the new hard drive kit into your notebook. Replace the screw that secures the hard drive kit to your notebook. Insert the battery, then turn your notebook over.
-
Page 83: Maintaining Your Notebook
Chapter 7 Maintaining Your Notebook • Caring for your notebook • Cleaning your notebook • Protecting your notebook from viruses • Updating Windows • Restoring your system... -
Page 84: Caring For Your Notebook
Caring for your notebook To extend the life of your notebook: ■ Be careful not to bump or drop your notebook, and do not put any objects on top of it. The case, although strong, is not made to support extra weight. -
Page 85: Cleaning Your Notebook
Cleaning your notebook Cleaning your notebook Keeping your notebook clean and the vents free from dust helps keep your notebook performing at its best. You may want to gather these items and put together a notebook cleaning kit: ■ A soft, lint-free cloth ■... -
Page 86: Cleaning The Keyboard
Cleaning the notebook screen To clean a notebook LCD screen, use a soft cloth and water to clean the LCD screen. Squirt a little water on the cloth (never directly on the screen), and wipe the screen with the cloth. -
Page 87: Protecting Your Notebook From Viruses
A virus is a program that attaches itself to a file on a computer, then spreads from one computer to another. Viruses can damage data or cause your notebook to malfunction. Some viruses go undetected for a period of time because they are activated on a certain date. - Page 88 Chapter 7: Maintaining Your Notebook To scan for viruses: Click , then click Start All Programs Norton AntiVirus Norton . Norton AntiVirus opens. AntiVirus 2005 Click Scan for Viruses Click the type of scan you want to make in the Scan for Viruses area.
- Page 89 If Norton AntiVirus finds a virus, follow all on-screen instructions to remove the virus. Turn off your notebook and leave it off for at least 30 seconds. Turn on your notebook and rescan for the virus. To update Norton AntiVirus:...
-
Page 90: Updating Windows
New content is added to the site regularly, so you can always get the most recent updates and fixes to protect your notebook and keep it running smoothly. Windows Update scans your notebook and provides you with a tailored selection of updates that apply only to the software and hardware on your notebook. -
Page 91: Troubleshooting
Chapter 8 Troubleshooting • Troubleshooting typical hardware and software problems • Getting telephone support • Using automated troubleshooting systems... -
Page 92: Safety Guidelines
While troubleshooting your notebook, follow these safety guidelines: ■ Never remove the memory bay cover or hard drive kit while your notebook is turned on, while the battery is installed, and while the modem cable, network cable, and AC power adapter are connected to your notebook. -
Page 93: First Steps
First steps If you have problems with your notebook, try these things first: ■ Make sure that the AC power adapter is connected to your notebook and an AC outlet and that the AC outlet is supplying power. ■ If you use a power strip or surge protector, make sure that it is turned ■... -
Page 94: Troubleshooting
Click/Double-click , click the tab, then click System Hardware . The Device Manager window opens. Device Manager Click , then click . Double-click View Resources by type Interrupt . All IRQs and their hardware assignments are request (IRQ) displayed. www.gateway.com... -
Page 95: Display
Tips & Tricks For instructions on changing the screen resolution, see “Adjusting the screen resolution” in Using Your Computer which has been included on your hard drive. To access this guide, click Start, All Programs, then click Gateway Documentation. www.gateway.com... -
Page 96: Dvd Drives
■ Adjust the brightness using the system keys. For more information, “System key combinations” on page ■ Make sure the notebook is not in standby or hibernate mode. For more information, see “Changing power modes” on page ■ The notebook may be sending its display to an external monitor. - Page 97 Some music CDs have copy protection software. You may not be able to play these CDs on your notebook. ■ Make sure that the volume control on your notebook is turned up. For more information, see “System key combinations” on page ■...
- Page 98 You cannot eject a CD or DVD Your notebook must be turned on to remove CDs and DVDs. If you do not want to turn on your notebook, manually eject the disc by inserting an opened paper clip into the manual eject hole. See “Inserting a CD or...
-
Page 99: File Management
For instructions on deleting unnecessary files, see “Using Disk Cleanup” in Using Your Computer which has been included on your hard drive. To access this guide, click Start, All Programs, then click Gateway Documentation. ■ Empty the Recycle Bin by right-clicking the... - Page 100 Make sure that the hard drive is installed correctly. Remove it, firmly reinsert it, then restart your notebook. For more information, see “Replacing the hard drive kit” on page ■ If your notebook has been subjected to static electricity or physical shock, you may need to reinstall the operating system. www.gateway.com...
-
Page 101: Internet
Double-check the URL or try a different URL. If the error message still appears, disconnect from the ISP connection and close your browser, then reconnect and open the browser. If you still get the error, your ISP may be having technical difficulties. www.gateway.com... -
Page 102: Keyboard
■ If you spilled liquid in the keyboard, turn off your notebook and unplug the keyboard. Clean the keyboard and turn it upside down to drain it. Let the keyboard dry before using it again. If the keyboard does not work after it dries, you may need to replace it. -
Page 103: Memory
■ Make sure that your notebook is connected to the telephone line and the telephone line has a dial tone. ■ Make sure that the modem cable is less than 6 feet (1.8 meters) long. - Page 104 1). When the dial tone stops, listen for line noise. Wiggle the modem cable to see if that makes a difference. Make sure that the connectors are free from corrosion and all screws in the wall or telephone wall jack are secure. www.gateway.com...
- Page 105 53K. Other factors, such as line noise, telephone service provider equipment, or ISP limitations, may lower the speed even further. If your notebook has a v.90 modem, the speed at which you can upload (send) data is limited to 33.6K. If your notebook has a v.92 modem, the speed at which you can upload data is limited to 48K.
- Page 106 Chapter 8: Troubleshooting ■ Use the modem cable that came with your notebook. Some telephone cables do not meet required cable standards and may cause problems with the modem connection. ■ Shut down and restart your notebook. ■ Run Windows modem diagnostics.
-
Page 107: Mouse
The external mouse does not work ■ Make sure that the mouse cable is plugged in correctly. ■ Shut down and restart your notebook. ■ Remove all extension cables and switch boxes. ■ Try a mouse you know is working to make sure that the mouse port works. -
Page 108: Networks
You cannot connect to your home network ■ If your notebook is a member of a domain at your workplace, you may not be able to connect your notebook to your home network workgroup to access shared files or printers on your home network. -
Page 109: Pc Cards
Troubleshooting PC Cards You installed a PC Card and now your notebook is having problems ■ Make sure that you have correctly installed required software for the PC Card. For more information, see your PC Card’s documentation. ■ Make sure that the PC Card you installed is not causing a system resource conflict. -
Page 110: Printer
Make sure that the power cable is plugged into an AC power source. The printer is on but will not print ■ Check the cable between the printer and your notebook. Make sure that it is connected to the correct port. ■... -
Page 111: Sound
■ Make sure that headphones are not plugged into the headphone jack. ■ Make sure that the volume control on your notebook is turned up. For more information, see “Multi-function buttons” on page ■ Make sure that the Windows volume control is turned up. -
Page 112: Status Indicators
“Changing the mouse or touchpad settings” in Using Your Computer which has been included on your hard drive. To access this guide, click Start, All Programs, then click Gateway Documentation. The pointer moves unexpectedly ■ Clean the touchpad with a damp cloth (water only) and wipe it dry. -
Page 113: Video
Make sure that the television is turned on and that the S-Video cable is connected correctly. ■ Televisions in different countries use different standards. If you are traveling, you may need to change the TV Out mode. For more information, see “Viewing the display on a television” on page www.gateway.com... -
Page 114: Telephone Support
■ Make sure that your notebook is nearby at the time of your call. The technician may have you follow troubleshooting steps. www.gateway.com... -
Page 115: Telephone Numbers
Telephone support Telephone numbers Gateway offers a wide range of customer service, customer care, and information services. Automated troubleshooting system Service description How to reach Use an automated menu system and your telephone 800-846-2118 keypad to find answers to common problems. -
Page 116: Self-Help
, then click the arrow. Tutoring Answers by Gateway is a telephone service that provides answers to all of your “How do I” questions on Gateway computers. For more information, go to www.gateway.com/answers. Training Gateway provides the following computer-based training: Resource... - Page 117 Appendix A Safety, Regulatory, and Legal Information • Safety information • Regulatory statements • Notices...
-
Page 118: Important Safety Information
Do not spill anything on the system. The best way to avoid spills is to avoid eating and drinking near your system. ■ Do not work for long periods with the notebook resting on your lap. If the air vents are blocked, the notebook may become hot enough to harm your skin. ■... - Page 119 ■ When the notebook is turned off, a small amount of electrical current still flows through the notebook. To avoid electrical shock, always unplug all power cables and modem cables from the wall outlets before cleaning the system.
-
Page 120: Regulatory Compliance Statements
The power output of the wireless device or devices that may be embedded in your notebook is well below the RF exposure limits as known at this time. Because the wireless devices (which may be embedded into your notebook) emit less energy than is allowed in radio frequency safety standards and recommendations, Gateway believes these devices are safe for use. -
Page 121: United States Of America
2.4 GHz band and/or 5.15 – 5.35 GHz band, may be present (embedded) in your notebook system. This section is only applicable if these devices are present. Refer to the system label to verify the presence of wireless devices. - Page 122 The power output of the wireless device (or devices), which may be embedded in your notebook, is well below the RF exposure limits as set by the FCC. The wireless devices installed in this system are intended to be used indoors. In some areas, use of these devices outdoors is prohibited.
- Page 123 Caution Changes or modifications not expressly approved by Gateway could void the FCC compliance and negate your authority to operate the product. Caution Recycle or dispose of the used product properly according to federal, state and local laws.
- Page 124 This device should be used more than 20 cm (8 inches) from the body when wireless devices are on. The power output of the wireless device (or devices), which may be embedded in your notebook, is well below the RF exposure limits as set by Industry Canada.
- Page 125 Caution Wireless devices are not user-serviceable. Do not modify them in any way. Modification to a wireless device will void the authorization to use it. Contact Gateway for service. Caution The transmitting device embedded in this system may not be used with any antenna other than provide with the system.
-
Page 126: Japanese Notice
The termination on an interface may consist of any combination of devices subject only to the requirement that the sum of the Ringer Equivalence Numbers of all the devices does not exceed 5. Japanese Notice Japanese Modem Notice www.gateway.com... -
Page 127: Laser Safety Statement
Regulatory compliance statements Laser safety statement All Gateway systems equipped with CD and DVD drives comply with the appropriate safety standards, including IEC 825. The laser devices in these components are classified as “Class 1 Laser Products” under a US Department of Health and Human Services (DHHS) Radiation Performance Standard. - Page 128 Macrovision statement If your notebook has a DVD drive and an analog TV Out port, the following paragraph applies: This product incorporates copyright protection technology that is protected by method claims of certain U.S.
- Page 129 PC Card slots battery troubleshooting memory card alternate power sources troubleshooting PC Card changing types of memory cards supported charge indicator charge status carrying case charging conserving power cleaning icons creating installing inserting latch playing audio locating www.gateway.com...
- Page 130 CD modem case monitor (VGA) mouse computer screen network power keyboard printer LCD panel projector notebook exterior scanner notebook screen speaker screen S-Video (TV) out clicking closing unresponsive program connecting video camera AC adapter copyright notice dial-up modem...
- Page 131 Firewire port cleaning Fn key creating folders drive opening inserting function keys playing troubleshooting DVD drive Gateway identifying eSupport locating model number troubleshooting serial number using Web address DVD/CD-RW drive Web site See DVD drive DVD±RW drive See DVD drive...
- Page 132 Windows Update locating memory troubleshooting USB port installing keys purchasing application removing arrow replacing brightness troubleshooting directional memory card reader locating function memory card types supported LCD brightness using LCD/CRT www.gateway.com...
- Page 133 LCD panel screen resolution notebook mouse programs troubleshooting shortcut menu USB port moving pointer password screen objects PC Card MP3 player adding memory cards eject button multi-format DVD±RW drive...
- Page 134 EmPower adapter extending battery life Hibernate mode safety indicator caring for notebook management general precautions source problems guidelines for troubleshooting Standby mode status indicator static electricity troubleshooting scanner turning off notebook...
- Page 135 Pad Lock troubleshooting power training toggle on or off troubleshooting classroom surge protector Gateway Learning Libraries Suspend Learn With Gateway S-Video (TV) out troubleshooting jack audio using automated system system identification label device installation...
- Page 136 Web browser button touchpad Web site video Gateway Web site connection speed Windows turning off notebook Product Key Code...
- Page 138 MAN 7000 SER / M520 USR GDE R2 2/05...