Planet VIP-156 User Manual
Voip analog telephone adapter
Hide thumbs
Also See for VIP-156:
- User manual (75 pages) ,
- Quick start manual (68 pages) ,
- User manual (33 pages)
Table of Contents
Advertisement
Quick Links
Download this manual
See also:
User Manual
Advertisement
Table of Contents

Related Manuals for Planet VIP-156


Summary of Contents for Planet VIP-156
- Page 1 User’s Manual VoIP Analog Telephone Adapter VIP-156/VIP156PE/VIP-157/VIP-157S...
-
Page 2: Ce Mark Warning
Trademarks The PLANET logo is a trade mark of PLANET Technology. This documentation may refer to numerous hardware and software products by their trade nam es. In most, if not all cases, their respectiv e companies claim these designations as trademarks or registered trademarks. - Page 3 Revision User’s Manual for PLANET VoIP Analog Telephone Adapter: Model: VIP-156 / VIP156PE / VIP-157 / VIP-157S Rev: 5.0 (2012, March) Part No. EM-VIP_ATA_V5.0...
-
Page 4: Table Of Contents
TABLE OF CONTENTS Chapter 1 Introduction ......................6 Overview ..............................6 Package Content ............................7 Physical Details ............................7 LED Display & Button ........................10 Chapter 2 Preparations & Installation ................12 Physical Installation Requirement ......................12 LAN IP address configuration via web configuration interface ............ - Page 5 Appendix B The method of operation guide ................... 62 Call Transfer ............................62 3-Way Conference ..........................62 Call Waiting ............................62 Switch the Realm (Registration Proxy Server) .................. 62 Auto Update firmware by manual (Keypad) ..................63 Appendix C VIP-156/VIP-156PE/VIP-157/VIP-157S Specifications ............ 64...
-
Page 6: Chapter 1 Introduction
Chapter 1 Introduction Overview Based on years of VoIP manufacturing experiences, PLANET Technology VoIP total solutions are known for advanced implementation of standards based telephony with mass deployment capability. Cost-effective, easy-to-install and simple-to-use, the PLANET VIP-156/VIP-157/VIP-157S VoIP Phone Adapter (“ATA” in the following term) converts standard telephones to IP-based networks. The service providers and enterprises offer users traditional and enhanced the telephony communication services via the existing broadband connection to the Internet or corporation network. -
Page 7: Package Content
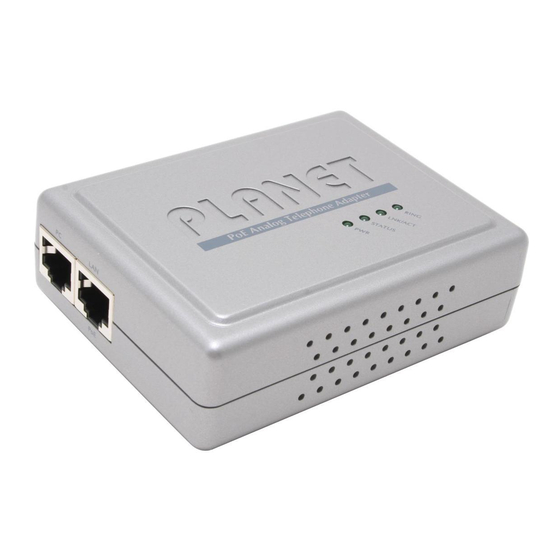
Physical Details The following figure illustrates the front/rear panel of ATA. Respective model/descriptions are shown below: VIP-156: SIP Analog Telephone Adapter VIP-156PE: 802.3af PoE SIP Analog Telephone Adapter VIP-157: 1 FXS/ 1 FXO SIP Analog Telephone Adapter VIP-157S: 2-port FXS SIP Analog Telephone Adapter... - Page 8 Left / Right Panel of VIP-156 Front Panel of VIP-156PE Left / Right Panel of VIP-156PE...
- Page 9 Front Panel of VIP-157 Left / Right Panel of VIP-157 Front Panel of VIP-157S...
-
Page 10: Led Display & Button
Left / Right Panel of VIP-157S LED Display & Button RJ-45 connector, to main tain the existing network structure, connected directly to the PC through straight CAT-5 cable RJ-45 connector, for Inte rnet access, connected directly to Switch/Hub through straight CAT-5 cable. The LAN interface also can be connected with 802.3af PoE switch or converter for power supply (VIP-156PE) 12V DC Power input outlet... - Page 11 LED display of VIP-156 / VIP-156PE ED Indicators scriptions Power is supplied to the device. The Status LED will be flashing when the machine is operational STATUS OFF: the device is connected to LAN at 10Mb/s. LNK/ACT ON: the device is conne cted to LAN at 100Mb/s.
-
Page 12: Chapter 2 Preparations & Installation
Chapter 2 Preparations & Installation Physical Installation Requirement This chapter illustrates basic installation of ATA analog Phone Adapter ((“ATA” in the following term)) • Network cables. Use standard 10/100BaseT network (UTP) cables with RJ45 connectors. • TCP/IP protocol must be installed on all PCs. For Internet Access, an Internet Access account with an ISP, and either of a DSL or Cable modem Administration Interface PLANET ATA provides GUI (Web based, Graphical User Interface) for machine management and... -
Page 13: Lan Ip Address Configuration Via Web Configuration Interface
Please locate your PC in the same network segment Note (192.168.0.x) of ATA. If you’re not familiar with TCP/IP, please refer to related chapter on user’s manual CD or consult your network administrator for proper network configurations. LAN IP address configuration via web configuration interface Execute your web browser, and insert the IP address (default: 192.168.0.1) of VIP in the address bar. - Page 14 IVR Menu Choice Machine operation Parameter(s) Notes: ATA will change to DHCP Set DHCP client None #111# Client Use the * (star) key DHCP will be disabled and #112xxx*xxx*xxx* Setup Static IP Address when entering a decimal system will change to the xxx# point.
- Page 15 of the ATA. IVR will announce the current gateway IP Check Gateway IP Address #124# address of the ATA. IVR will announce the current setting in the Check Primary DNS Server Setting #125# Primary DNS field. IVR will announce the current LAN port IP Check LAN IP Address #126# address of the ATA.
- Page 16 Forward function disable Disable forwrad funciton #145# enable forward to FXS Eanble forward to FXS #146+Number# Port Port enable forward to FXO Eanble forward to FXO #147+Number# Port Port Enable PPTP function None Enable PPTP function #116# Disable PPTP function None Disable PPTP function #117#...
-
Page 17: Chapter 3 Network Service Configurations
Chapter 3 Network Service Configurations Configuring and monitoring your ATA from web browser The ATA integrates a web-based graphical user interface that can cover most configurations and machine status monitoring. Via standard web browser, you can configure and check machine status from anywhere around the world. - Page 18 VoIP Phone Adatper main page...
-
Page 19: Chapter 4 Voip Telephone Adapter Configurations
Chapter 4 VoIP Telephone Adapter Configurations Status Show all the system information, ex: WAN/LAN IP address, System information, IPV6 connection information, Register status and VPN connection message. (After you setup the VPN line then the status will start to show out) -
Page 20: Phone Book
Phone Book ATA can set up 140 records of Phone Book. User can dial the Name records to make calls via Phone Book feature. Field Description The default is Page 1. It can select Page1 ~ Page 7 to Phone Book Page look round Phone Book records. - Page 21 records in total. The name of Phone Book records, it only can input Name numerals character. Fill in the outgoing number (Line Number) or IP address. Clean this item’s data. Delete Save the phone book data as CSV file. Export csv Upload the phone book file Upload If you need to add a phone number into the Phone Book list, you need to input the position, the name,...
-
Page 22: Call Service
You can input the name and the phone number in URL field. Also you have to set the Time Out time for system to start to forward the call to the number you choosed. When you finished the setting, please click the Submit button. Call Forward function for VIP-156/VIP-156PT/VIP-157S... - Page 23 All to PSTN/ No Answer to PSTN (VIP-157): VIP-157 not only support Call Forward to IP calls, but also can forward the calls to PSTN. You can choose the Call Forward type with PSTN, then input the name and the PSTN number in URL/Number field. IP Line Forward function for VIP-157 The IP Line Forward function is use for the incomin g call is IP call type, and the destinatio n is IP or PSTN call types.
-
Page 24: Sntp Settings
[Alarm Type] This page defines the Alarm setting in this page. It provides the alarm function, and it can set up the Alarm Time to get the telephone ringed up every day. Alarm Type: The default is Off. If set up as On, the telephone will ringed up at the specific time. Alarm Time: It can set up the system prompt time with 24 hours. -
Page 25: Dail Plan Setting
Volume Settings for VIP-156T/VIP-156PT Beside the above settings, VIP-157 also can set the volume of PSTN. PSTN-Out Volume is to set the PSTN volume for you can hear. PSTN-In Gain is to set the volume send out to the other side’s handset. Volume Settings for VIP-157 Dail Plan Setting This page defines the Dial Plan Setting function. - Page 26 Dial Plan Settings for VIP-156 For VIP-157 have four more items. Field Description The rule of add or replace code. If setup as Disable, it will add the Drop Prefix prefix number prior to the identification number. If setup as Enable, it will replace the identification number.
- Page 27 If the dialing number are match with this field, it will dial out and need Dial Now rule not to press the “#” key to end the dialing. It accepts the numeral or symbol, and the max length are 124. Note: The starting number can’t be the “0”.
- Page 28 1. If the dialing number is “002+86xxxx”, it will ma tch the rule [002], then system will automatically replace the prefix [002] to the p refix number [006].The real dialing number is [006+8613xxxxx]. 2. If the dialing number is “003+77xxxx”, it will ma tch the rule [003], then system will automatically replace the prefix [003] to the prefix n umber [006].
-
Page 29: General
3. If the dialing number is “00782280220”, it will match the routing rule [D007], then system will decreas the [007] then dial out from the [FXO].The real dialing number is [82280220]. General This page defines the volume, auto answer, Caller ID, and call waiting caller ID(CID type II), VIP-156 VIP-157... - Page 30 Field Description Default is enable. Call Waiting When you are talking with other people, You can choose If you want to hear the notice when th ere is a ne w coming call. If the call waiting function is On, if there is a new incomeing call, you will hear the call waiting notice in your cu rrent call.
-
Page 31: Chapter 5 Netowrk
Chapter 5 Netowrk Network Settings This page defines the LAN setting in this page. Field Description The default is Fixed IP, and it also provides DHCP Client and PPPoE WAN Active connection modes. Fixed IP: It could setup the IP address manual. DHCP Client: It will acquire the IP address automatically. -
Page 32: Ddns Settings
, you can apply your DDNS account in web site Planet DDNS www.planetddns.com) DDNS Settings for VIP-156/VIP-156PE/VIP-157 VLAN Settings This page defines the VLAN setting in this page. This function needs to co-operate with network devices which have VLAN function, also this page defines the SIP and RTP port number in this page. -
Page 33: Vpn Settings
Field Description If setup as On, it could receive VLAN messages. VLAN Active Dispose VLAN ID is add a Tag header after realize enable the VLAN VID (802.1Q/TAG) function. The realized voice packets transfer at the same VLAN. The prerequisite is it must the same as VLAN of upper switch. The value range are 2~4094. -
Page 34: Ipv6 Settings
VIP-156/VIP-157 VPN can’t use the encryption or compression for VPN connection. Caution: IPV6 Settings This page defines the IPV6 setting in this page, you can programm the IPV6 information. Field Description Support three IPV6 type: Auto, Fixed IPV6, IPV6 in IPV4 Tunnel IPV6 Active Setting the WAN IPV6 address or display it.(64 bits) -
Page 35: Chapter 6 Nat Trans
Chapter 6 NAT Trans Stun Settings This page defines the STUN Enable/Disable and STUN Server IP address in this page. This function can help your Phone Adapter working properly behind NAT. To change these settings please following your ISP information. When you finished the setting, please click the Submit button. PC Settings This page defines the PC setting in this page. -
Page 36: Dmz And Mac Clone
address. The IP address of PC port. (In the Birdge mode, the Default IP: PC IP address 192.168.0.1 The MAC of PC port PC MAC Address It will allot the IP address automatically when enabke this function. Enable DHCP Server The range for DHCP IP address. - Page 37 Field Description The serial number. There are total 12 records from Num 1 to 12. Index The activate status. The default is Disable, this record will been Active activate if enable. The TCP or UDP communication protocol. Protocol For corresponding the internal port. Internal Port For corresponding the external port.
-
Page 38: Chapter 7 Sip Setting
Chapter 7 Setting Service Domain Settings In Service Domain Function you need to input the account and the related informations in this page, please refer to your ISP provider. You can register five SIP account in the ATA. You can dial the VoIP phone to your friends via first enable SIP account and receive the phone from these five SIP accounts. -
Page 39: Codec Setting
Note: The starting number can’t be the “0”. For example, if the number is “0xxxx”, because the starting number is “0”, so that the system will ignore this dial plan. You can see the Register Status in the Status page. If the item shows “Registered”, then your Phone Adapter is registered to the ISP, you can make a phone call direcly. -
Page 40: Sip Advance Setting
SIP Advance Setting This page defines the Hold by RFC, Voice/SIP QoS and other settings in this page. To change these settings please following your ISP information. When you finished the setting, please click the Submit button. - Page 41 Field Description To setup the registration interval time. SIP Expire Time Default is G eneral; Register interval time setting. Provide items SIP Expire Time General (standard), 1/2, 2/3, 3/4, 4/5, 5/6, 6/7, 7/8, 8/9, 9/10。 Type Note: register server need support this function. Register time calculated General: expire time-[(expire time/30)*6], when Expire Time>60 it will start to work, if less then 60 seconds, it will decrease 5 seconds.
- Page 42 If SIP register fail, system will retry interval after this time. SIP Register Retry Timer Setting the maximum retransmit interval for non-INVITE requests and SIP session timer T1 INVITE responses. Note: register server need support this function. Setting the maximum retransmit interval for non-INVITE requests and SIP session timer T2 INVITE responses.
- Page 43 Class(IPV6) The default is disable, and use DNS SRV mode. Set enable t o use Use DNS SRV DNS to SRV mode to search the host information. Always to transport the network packets to keep the NAT port could be Send Keep Alives opened continuous.
-
Page 44: Chapter 8 Advance Setting
Chapter 8 Advance Setting Status Log Display and saving systems running status message data, Press “Get Status Log” can backup the status log file. Auto Config T This page defines the Auto Configuration (Auto Provision) setting. ATA supports TFTP, FTP, HTTP and IP PBX auto configuration function in total. -
Page 45: Management-Advanced Setting
Management-Advanced Setting This page defines the advanced functions. When you finished the setting, please click the Submit button. - Page 46 Field Description This function can disable echo when someone ping this device, it can ICMP Not Echo avoid hacker try to attack the device If enable this function, machine will to start the calling hidden Anonymous Call function, and it will not send the related Caller information. Note: register server need support this function.
-
Page 47: Tones
disconnection the line. Timeout It must wo rk with [Phon e – Ge neral] [Auto Answer] fun ction or PSTN CID forward [Phone – Ca ller Service] [Forwa rd] function。 When en able this function, The caller ID from FXO, can transfer to other device FXO flash time, define would you hold or hang on the phone Generate Flash Signal for PSTN... - Page 48 auto-configuration. It also can take control of other CPE functions.
-
Page 49: Chapter 9 Other Setting
Chapter 9 Other Setting System Authority In System Authority it can change admin/System/User login password. Firmware Upgrade This page defines the SIP and RTP port number in this page. Each ISP provider will have different SIP/RTPport setting, please refer to the ISP to setup the port number correctly. When you finished the setting, please click the Submit button. -
Page 50: Auto Update Settings
Note For technological consideration, we’ve strongly suggested refering to the following upgrade methods for update your device. After firmware loaded, the unit will be reboot, and Default IP address of the customized firmware: http://192.168.0.1 ; login name/password: root/null (no password) Auto Update Settings The device can update new firmware with the gz or ds file format automatically by the Auto Upgrade function. - Page 51 - Power On (+ Scheduling): The machine will check the new firmware when power on and following the scheduling date and time. - Scheduling: The machine will follow the scheduling date and time to check the new firmware. The machine will check the new firmware between the time range Scheduling (Date) by random.
-
Page 52: Reset To Default
Reset to default In Default Setting you can restore the Phone Adapter to factory default in this page. You can just click the Restore button, then the Phone Adapter will restore to default and automatically restart again. Save and Reboot In Save &... -
Page 53: Appendix A Voice Communication Samples
Appendix A Voice Communication Samples There are several ways to make calls to desired destination in ATA. In this section, we’ll lead you step by step to establish your first voice communication via keypad and web browsers operations. Case 1: ATA to ATA connection via IP address Assume there are two ATAs in the network the IP address are 192.168.0.1, 192.168.0.2 Analog telephone sets are connected to the phone (RJ-11) port of ATAs respectively 192.168.0.1... -
Page 54: Case 2: (Peer-To-Peer Mode) Vip-157S Port 1 To Port 2 Communications
Case 2: (Peer-to-Peer mode) VIP-157S Port 1 to Port 2 communications Supposing one VIP-157S connects to two telephones, just pick up phone 1 and dial ‘192*168*0*1**5062’, phone 2 will ring. Analog telephone sets are connected to the phone (RJ-11) ports of VIP-157S respectively 192.168.0.1 1001 1002... -
Page 55: Case 3: Call Forward Feature_Example 1
Case 3: Call Forward Feature_Example 1 In the following samples, we’ll introduce the Call Forward Feature applications. In this example, there are three VIP-156 register to IPX-300 and VIP-156_A had set Call Forward function to VIP-156_B. Machine configuration on the VIP-156: Please log in VIP-156_A via web browser, browse to the Phone Settings menu and select the Call service config menu. -
Page 56: Case 4: Call Forward Feature_Example 2
Case 4: Call Forward Feature_Example 2 In this example, there are one VIP-157 and two VIP-156 register to IPX-300. The VIP-157_A had set Call Forward function to phone number 1111-2222 (PSTN). Machine configuration on the VIP-157: Please log in VIP-157_A via web browser, browse to the Phone Settings menu and select the Call service config menu. -
Page 57: Case 5: Call Forward Feature_Example 3
Case 5: Call Forward Feature_Example 3 In this example, there are one VIP-157 and two VIP-156 register to IPX-300. The VIP-157_A had set Call Forward function to number 2002 (VIP-156_B). Machine configuration on the VIP-157: Please log in VIP-157_A via web browser, browse to the Phone Settings menu and select the Call service config menu. -
Page 58: Case 6: Call Forward Feature_Example 4
Case 6: Call Forward Feature_Example 4 In this example, there are three VIP-156 and connect with Peer to Peer mode. VIP-156_A had set Call Forward function to VIP-156_B. Machine configuration on the VIP-156: Please log in VIP-156_A via web browser, browse to the Phone Settings menu and select the Call service config menu. - Page 59 Machine configuration on the VIP-157: STEP 1: Please log in VIP-157_A via web browser, browse to the Phone Settings menu and select the Call service config menu. In the setting page, please disable All Forward function, and then the sample configuration screen is shown below: STEP 2: Please log in VIP-157_A via web browser, browse to the Phone Settings / General setting menu and select the Auto Answer config menu.
-
Page 60: Case 8: Auto Answer Feature_Pstn To Ip
Case 8: Auto Answer Feature_PSTN to IP In this example, there are one VIP-157 and two VIP-156 and connect with Peer to Peer mode. The VIP-157_A had set Auto Answer function for forwarding to arbitrary telephone. If there have incoming PSTN calls and VIP-157_A doesn’t answer the incoming calls after specific time, the caller will hear... - Page 61 Test the scenario: 1. The Phone Number 11112222 pick up the telephone 2. Dial the PSTN Phone Number 33334444(VIP-157_A) 3. VIP-157_A will ring up but doesn’t answer the call 4. After 3 rings, the Phone Number 11112222 will hear the prompt sounds then input the password 123# 5.
-
Page 62: Appendix B The Method Of Operation Guide
Appendix B The method of operation guide In this section, we’ll introduce the steps of how to set up some call features of the ATA. Please follow the steps below to utilize those features. Call Transfer A. Blind Transfer 1. B call to A and they are in the process of conversation. 2. -
Page 63: Auto Update Firmware By Manual (Keypad)
SIP accounts incoming call, and it can switch to any one SIP accounts for making calls through input the switch code. Realm switch code: 1*: Realm 1 2*: Realm 2 3*: Realm 3 4*: Realm 4 5*: Realm 5 For example: The default is realm 1, input the (Follow by the # key) from keypad and hang up the telephone set. -
Page 64: Appendix C Vip-156/Vip-156Pe/Vip-157/Vip-157S Specifications
Appendix C VIP-156/VIP-156PE/VIP-157/VIP-157S Specifications Product SIP Analog Telephone Adapter Model VIP-156 VIP-156PE VIP-157 VIP-157S Hardware 1 x 10/100Mbps RJ-45 port (802.3af PoE for VIP-156PE) 1 x 10/100Mbps RJ-45 port FXS (for telephone set 1 x RJ-11 2 x RJ-11 connection) -
Page 65: Ec Declaration Of Conformity
EC Declaration of Conformity For the following equipment: *Type of Product : SIP Telephone Adapter *Model Number : VIP-156 * Produced by: Manufacturer‘s Name : Planet Technology Corp. Manufacturer‘s Address: 11F, No 96, Min Chuan Road Hsin Tien, Taipei, Taiwan, R. O.C. - Page 66 *Model Number : VIP-156PE * Produced by: Manufacturer‘s Name : Planet Technology Corp. Manufacturer‘s Address: 11F, No 96, Min Chuan Road Hsin Tien, Taipei, Taiwan, R. O.C. is herewith confirmed to comply with the requirements set out in the Council Directive on the Approximation of the Laws of the Member States relating to 1999/5/EC R&TTE.
- Page 67 *Model Number : VIP-157 * Produced by: Manufacturer‘s Name : Planet Technology Corp. Manufacturer‘s Address: 11F, No 96, Min Chuan Road Hsin Tien, Taipei, Taiwan, R. O.C. is herewith confirmed to comply with the requirements set out in the Council Directive on the Approximation of the Laws of the Member States relating to Electromagnetic Compatibility Directive on (89/336/EEC,92/31/EEC,93/68/EEC).
- Page 68 *Model Number : VIP-157S * Produced by: Manufacturer‘s Name : Planet Technology Corp. Manufacturer‘s Address: 11F, No 96, Min Chuan Road Hsin Tien, Taipei, Taiwan, R. O.C. is herewith confirmed to comply with the requirements set out in the Council Directive on the Approximation of the Laws of the Member States relating to Electromagnetic Compatibility Directive on (89/336/EEC,92/31/EEC,93/68/EEC).