Crown Xs500 Operation Manual
Xs series power amplifiers
Hide thumbs
Also See for Xs500:
- Operation manual (36 pages) ,
- Architectural & engineering specifications (1 page) ,
- Specifications (1 page)
Table of Contents
Advertisement
Quick Links
Operation Manual
Xs Series
Obtaining Other Language Versions: To obtain information in another language about the use of this product, please contact your
local Crown Distributor. If you need assistance locating your local distributor, please contact Crown at 574-294-8000.
This manual does not include all of the details of design, production, or variations of the equipment. Nor does it cover every possible
situation which may arise during installation, operation or maintenance.
The information provided in this manual was deemed accurate as of the publication date. However, updates to this information may have
occurred. To obtain the latest version of this manual, please visit the Crown website at www.crownaudio.com.
Trademark Notice: Crown and Amcron are registered trademarks of Crown International. Other trademarks are the property of their
respective owners.
Some models may be exported under the name Amcron.
©2004 by Crown Audio Inc., P.O. Box 1000, Elkhart, Indiana 46515-1000 U.S.A. Telephone: 574-294-8000
Xs500
Xs700
Xs900
Xs1200
Xs4300
®
136268-4
1/04
Advertisement
Table of Contents

Related Manuals for Crown Xs500


Summary of Contents for Crown Xs500
- Page 1 Trademark Notice: Crown and Amcron are registered trademarks of Crown International. Other trademarks are the property of their respective owners. ® Some models may be exported under the name Amcron. ©2004 by Crown Audio Inc., P.O. Box 1000, Elkhart, Indiana 46515-1000 U.S.A. Telephone: 574-294-8000 136268-4 1/04...
-
Page 2: Important Safety Instructions
Xs Series Power Amplifiers Important Safety Instructions Read these instructions. TO PREVENT ELECTRIC SHOCK DO NOT REMOVE Keep these instructions. TOP OR BOTTOM COVERS. NO USER SERVICE- Heed all warnings. ABLE PARTS INSIDE. REFER SERVICING TO QUALIFIED SERVICE PERSONNEL. Follow all instructions. Do not use this apparatus near water. -
Page 3: Declaration Of Conformity
Equipment Type: Commercial Audio Power Amplifiers Family Name: Xs Model Names: Xs4300, Xs1200, Xs900, Xs700, Xs500 EMC Standards: EN 55103-1:1995 Electromagnetic Compatibility - Product Family Standard for Audio, Video, Audio-Visual and Entertainment Lighting Control Apparatus for Professional Use, Part 1: Emissions EN 55103-1:1995 Magnetic Field Emissions-Annex A @ 10 cm and 1 M EN 61000-3-2:1995+A14:2000 Limits for Harmonic Current Emissions (equipment input current ≤16A per phase) -
Page 4: Table Of Contents
Xs Series Power Amplifiers Table of Contents 3.2 Front Panel Controls and Indicators ........12 Important Safety Instructions ............2 3.3 Back Panel Controls and Connectors (2-channel models)..13 Declaration of Conformity ..............3 3.4 Back Panel Controls and Connectors (Xs4300).....14 1 Welcome ............ -
Page 5: Welcome
Xs Series Power Amplifiers 1 kHz Xs500 Power* 750W** 2-ohm Dual (per ch.) 500W 4-ohm Dual (per ch.) 400W 8-ohm Dual (per ch.) 1,600W** 4-ohm Bridge 1,450W 8-ohm Bridge *1 kHz Power: refers to maximum average power in watts at 1kHz with 0.15% THD. -
Page 6: Setup
Xs Series Power Amplifiers 2 Setup 2.3 Ensure Proper Cooling 2.1 Unpack Your Amplifier 2.2 Install Your Amplifier When using an equipment rack, mount units Please unpack and inspect your amplifier for CAUTION: Before you begin, make sure directly on top of each other. Close any open any damage that may have occurred during your amplifier is disconnected from the spaces in rack with blank panels. -
Page 7: Choose Input Wire And Connectors
Xs Series Power Amplifiers 2 Setup 2.4 Choose Input Wire and Connectors Crown recommends using pre-built or professionally wired bal- anced line (two-conductor plus shield), 22-24 gauge cables and connectors. At the amplifier inputs, use either: • 3-pin male XLR cable ends, •... -
Page 8: Wire Your System
Xs Series Power Amplifiers 2 Setup Figure 2.8 Stereo Wiring, 2.6 Wire Your System 2-Channel Models 2.6.1 Stereo Mode Typical input and output wiring is shown in Figures 2.8 and 2.10. INPUTS: Connect input wiring for both channels. OUTPUTS: Connect speakers to the 5-way binding posts or to ®... -
Page 9: Bridge-Mono Mode
Xs Series Power Amplifiers 2 Setup 2.6.3 Bridge-Mono Mode Typical input and output wiring is shown in Figures 2.11 and 2.12. NOTE: Crown provides a reference of wiring pin assignments for commonly used connector types in the Crown Amplifier Application Guide available at www.crownaudio. -
Page 10: Connect To Ac Mains
Xs Series Power Amplifiers 2 Setup NOTE: In Bridge-Mono mode, only the 75 Hz for speech. On each mixer input channel, set Channel 1 Level control is functional. the filter frequency just below the lowest fundamen- tal frequency of that channel's instrument. 2.7 Connect to AC Mains 2.9 Startup Procedure Connect your amplifier to the AC mains power... -
Page 11: Operation
The load you save may be your own! fier might shut down. The Xs500, 700 900 and 1200 can be used with a 2-ohm 3. Do not short the ground lead of an output cable load. -
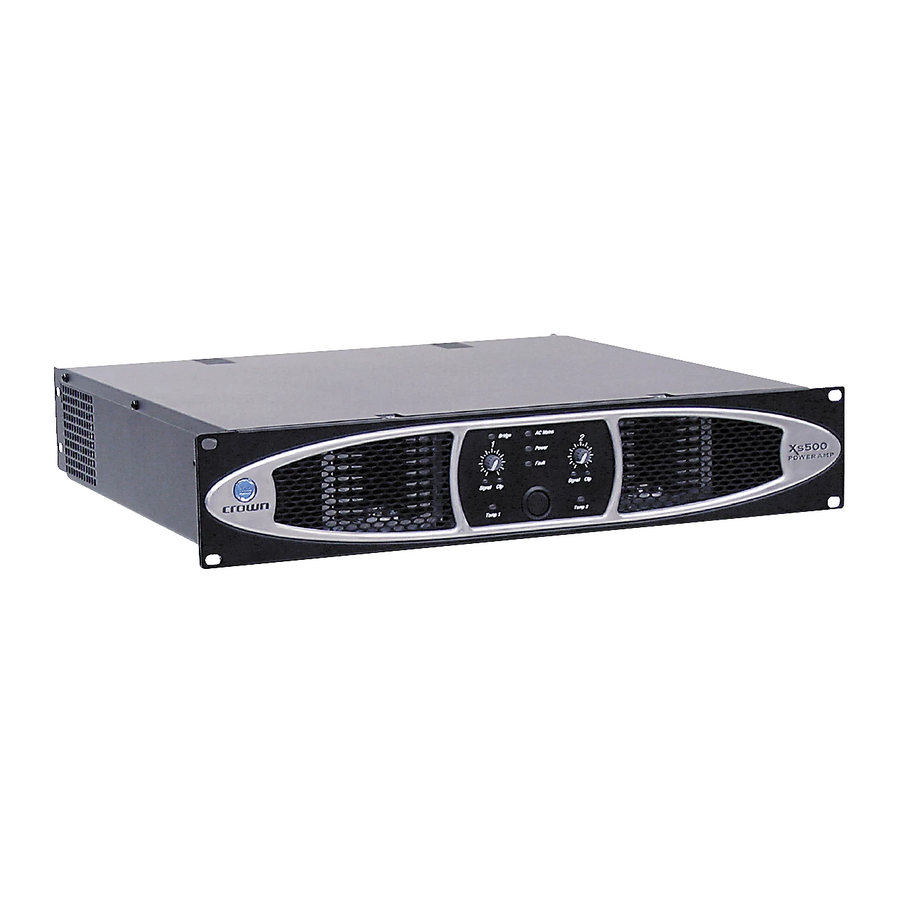
Page 12: Front Panel Controls And Indicators
Xs Series Power Amplifiers 3 Operation H. Clip Indicators 3.2 Front Panel Controls D. Power Indicator and Indicators Yellow LED indicates that amplifier has been turned on and Two or four red LEDs, one for each channel, illumi- nates when the channel’s output signal is being over- AC power is available. -
Page 13: Back Panel Controls And Connectors (2-Channel Models)
Xs Series Power Amplifiers 3 Operation 3.3 Back Panel Controls and D. XLR-1/4" Combo Input Connectors F. IEC Power Inlet Connectors (2-Channel Models) G. Phoenix-Style Input Connectors One per channel, XLR-1/4" combo connector includes 3-pin female XLR connector and A. 4-Pole Speakon Output Connector One per channel, 3-pin Phoenix-style connec- TRS 1/4"... -
Page 14: Back Panel Controls And Connectors (Xs4300)
Xs Series Power Amplifiers 3 Operation 3.4 Back Panel Controls and C. XLR-1/4" Combo Input Connectors Note: Binding post outputs on European mod- Connectors (Xs4300) els come with safety plugs installed to prevent One per channel, XLR-1/4" combo connector European power-cord plugs from being includes 3-pin female XLR connector and inserted. -
Page 15: Advanced Features And Options
Xs700 4.1.2 DC Protection Xs500 DC Protection disconnects the loudspeaker load in the event of an output DC offset exceed- ing 2V. In such an event the yellow Fault LED will illuminate (see Figure 4.1) and the ampli- 4.1.4 Thermal Protection... -
Page 16: Troubleshooting
Xs Series Power Amplifiers 5 Troubleshooting CONDITION: No sound. POSSIBLE REASONS: CONDITION: Normal operation. • The amplifier has just turned on and is still in POSSIBLE REASON: the 4-second turn-on delay. • This is normal operation for your amp. • The amplifier is in “fault”... -
Page 17: Specifications
Xs Series Power Amplifiers 6 Specifications Minimum Guaranteed Power Xs500 Xs700 Xs900 Xs1200 Xs4300 120 VAC, 60 Hz Units, per channel, both channels driven 1 kHz with 0.15% THD Dual, 2 ohms (per ch.) 750W* 900W* 1200W* 1600W* Not rated Dual, 4 ohms (per ch.) - Page 18 Xs Series Power Amplifiers 6 Specifications Performance Xs500 Xs700 Xs900 Xs1200 Xs4300 Damping Factor (8 ohm): 10 Hz to 400 Hz > 200 > 200 > 200 > 200 > 200 Crosstalk (below rated power) at 1 kHz > 55 dB >...
-
Page 19: Service
Xs Series Power Amplifiers 7 Service 3. To ensure the safe transportation of your Crown amplifiers are quality units that rarely list of authorized service centers in your area require servicing. Before returning your unit for can be obtained from the Crown website at unit to the factory, ship it in an original servicing, please contact Crown Technical Sup- www.crownaudio.com, or by calling Crown... -
Page 20: Warranty
Xs Series Power Amplifiers 8 Warranty UNITED STATES & CANADA est, insurance, closing costs, and other finance FROM ANY DEFECT IN THE NEW CROWN SUMMARY OF WARRANTY charges less a reasonable depreciation on the PRODUCT. THIS INCLUDES ANY DAMAGE TO Crown International, 1718 West Mishawaka Road, product from the date of original purchase. - Page 21 Xs Series Power Amplifiers 8 Warranty WORLDWIDE EXCEPT USA & CANADA SUMMARY OF WARRANTY We will remedy any defect, regardless of the rea- DISCLAIMER OF CONSEQUENTIAL AND son for failure (except as excluded), by repair, INCIDENTAL DAMAGES Crown International, 1718 West Mishawaka Road, replacement, or refund.
- Page 22 Xs Series Power Amplifiers THIS PAGE INTENTIONALLY LEFT BLANK page 22 Operation Manual...
-
Page 23: Crown Factory Service Information Form
Xs Series Power Amplifiers Crown Factory Service Information Shipping Address: Crown Factory Service, 1718 W. Mishawaka Rd., Elkhart, IN 46517 Phone: 1-800-342-6939 or 1-574-294-8200 Fax: 1-574-294-8124 Owner’s Name : _________________________________________________________________________________________________________________________________________________________________ Shipping Address: _______________________________________________________________________________________________________________________________________________________________ Phone Number: ________________________________Fax Number: ________________________________ Email ________________________________________________________________________________ Model: __________________________________________________________________________________ Serial Number: _________________________________________________________________________ Purchase Date : _________________________________________________________________________________________________________________________________________________________________ NATURE OF PROBLEM...