AEG COMPETENCE 61016VI Installation And Operating Instructions Manual
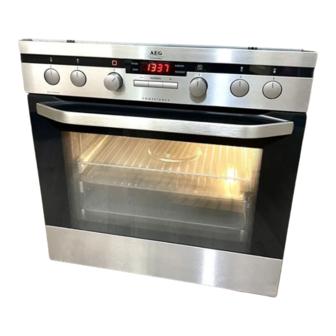
Free standing electric cooker
Hide thumbs
Also See for COMPETENCE 61016VI:

Related Manuals for AEG COMPETENCE 61016VI


Summary of Contents for AEG COMPETENCE 61016VI
- Page 1 COMPETENCE 61016VI Free standing electric cooker Installation and Operating Instructions...
-
Page 2: Dear Customer
Dear Customer, Please read these user instructions carefully and keep them to refer to later. Please pass the user instructions on to any future owner of the appli- ance. The following symbols are used in the text: Safety instructions Warning! Information that affects your personal safety. Important! Information that prevents damage to the appliance. -
Page 3: Table Of Contents
Contents Operating Instructions ........Safety instructions. - Page 4 Cleaning and Care ..........43 Outside of the appliance.
-
Page 5: Operating Instructions
Operating Instructions 1 Safety instructions This appliance conforms with the following EU Directives: – 73/23/EEC dated 19.02.1973 Low Voltage Directive – 89/336/EEC dated 03.05.1989 EMC Directive inclusive of Amending Directive 92/31/EEC – 93/68/EEC dated 22.07.1993 CE Marking Directive Electrical safety •... - Page 6 • If you use ingredients containing alcohol in the oven, a slightly flam- mable mixture of alcohol and air may ensue. In this case, be careful when opening the door. Do not handle any sources of heat, sparks or naked flames when doing so. Information on acrylamides According to the latest scientific knowledge, intensive browning of food, especially in products containing starch, can constitute a health...
-
Page 7: Disposal
Disposal Packaging material The packaging materials are environmentally friendly and can be recy- cled. The plastic components are identified by markings, e.g. >PE<, >PS<, etc. Please dispose of the packaging materials in the appropriate container at the community waste disposal facilities. Old appliance The symbol on the product or on its packaging indicates that this... -
Page 8: Description Of The Appliance
Description of the Appliance General Overview Control panel Door handle Full glass door Pan drawer... -
Page 9: Control Panel
Control Panel Temperature Pilot Light Oven Power Indicator Time display Clock function buttons Oven Functions Temperature selector Hob Cooking Zone Control Hob Cooking Zone Control Cooking surface Single cooking zone Multi-purpose zone Oven steam outlet 1200W 2300W Double ring cooking zone Residual heat Single cooking zone 2200W... -
Page 10: Oven Features
Oven Features Top heat and heating elements Oven lighting Shelf positions Fat Filter Fan heating element Bottom Heat Oven shelf runners, removable Oven accessories Oven shelf For cookware, cake tins, roasts and grilled foods. Baking tray For cakes and biscuits. Roasting Pan For baking and roasting or as a pan for collecting fat. -
Page 11: Before Using For The First Time
Before Using for the first time Setting and changing the time The oven only operates when the time has been set. When the appliance has been con- nected to the electrical supply or when there has been a power cut, the function indicator Time flashes automatically. -
Page 12: Initial Cleaning
Initial Cleaning You should clean the appliance thoroughly before using for the first time. Wipe the glass ceramic cooking surface with a damp cloth. Attention: Do not use sharp or abrasive cleaning materials. These could damage the surface. For appliances with metal fronts, use normal commercially available cleaning agents. -
Page 13: Operating The Hob
Operating the hob When a cooking zone is switched on, it may hum briefly. This is a char- acteristic of all ceramic glass cooking zones and does not impair either the function or the life of the appliance. Heat settings •... -
Page 14: Setting The Heat Setting
Setting the heat setting 1. Select the heat setting. 2. To end the cooking process, turn back to the Off position. The corresponding ring pilot light is lit while the ring is operating. Switching on the dual fry/cook area The control for the dual fry/cook area is switched on by turning to the right, and cannot be turned past the stop! 1. -
Page 15: Using The Oven
Using the Oven The oven is equipped with retractable buttons for “Oven functions” and “Temperature selection”. To use, press the relevant button. The button then sticks out. Switching the Oven On and Off Temperature Pilot Light Oven Power Indicator Oven Functions Temperature selector 1. -
Page 16: Oven Functions
Oven Functions The oven has the following functions: Heating element/ Oven function Application Light Using this function you can light up the oven interior, e.g. for cleaning. Fan-assisted For baking on up to two oven Top heat, bottom- circulation levels. heat, fan Set the oven temperatures 20-40 °C lower than when using Con-... -
Page 17: Inserting The Oven Shelf, Baking Tray And Roasting Pan
Inserting the Oven Shelf, Baking Tray and Roasting Pan Shelf runner safety and anti-tip device As a shelf runner safety device, all insertable components have a small curved indentation at the bottom on the right and left-hand edge. Always insert insertable components so that this indentation is at the back of the oven interior. -
Page 18: Inserting/Removing The Grease Filter
Inserting/Removing the Grease Filter Only use the grease filter when roasting to protect the rear heating elements from fat splashes. Inserting the grease filter Hold the grease filter by the grip and insert the two mounts downwards into the opening on the rear wall of theoven (fan opening). -
Page 19: Clock Functions
Clock Functions Function Indicators Time display Function Indicators Selector Button Button Button Countdown To set a countdown. A signal sounds after the time has elapsed. This function does not affect the functioning of the oven. Cook time To set how long the oven is to be in use. End time To set when the oven is to switch off again. -
Page 20: Switching Off The Time Display
How to use the clock functions • After a function has been selected, the corresponding function indi- cator flashes for about 5 seconds. During this period, the desired times can be set using the button. • When the desired time has been set, the function indicator continues to flash for approx. - Page 21 Countdown 1. Press the Selection button re- peatedly until the function indica- tor Countdown flashes. 2. Using the button set the desired Countdown (max. 2 hours 30 minutes). After approx. 5 seconds the display shows the time remaining. The function indicator Countdown lights up.
- Page 22 Cook time 1. Press the Selection button re- peatedly until the function indica- tor Cook time flashes. 2. Using the button set the desired cooking time. After approx. 5 seconds the display returns to showing the current time. The function indicator Cook time lights up.
- Page 23 End time 1. Press the Selection button re- peatedly until the function indica- tor End time flashes. 2. Using the button set the desired switch-off time. After approx. 5 seconds the display returns to showing the current time. The function indicator End time lights up.
- Page 24 Cook time and End time combined Cook time and End time can be used simultaneously, if the oven is to be switched on and off automatically at a later time. 1. Using the Cook time function, set the time required for cooking the dish.
-
Page 25: Uses, Tables And Tips
Uses, Tables and Tips Pans • You can recognise good pans by their bases. The base should be as thick and flat as possible. • Pay particular attention when buying new pans to the diameter of the base. Manufacturers often give only the diameter of the upper rim. -
Page 26: Cooking Table
Cooking table The information given in the following table is for guidance only. Heat Cooking- Cooking set- suitable for Tips/Hints process time ting Residual heat, Off posi- tion Keeping Keeping cooked foods food as required Cover warm warm Hollandaise sauce, Melting melting butter, chocolate, 5-25 mins. - Page 27 We recommend when boiling or searing foods using the highest heat setting at first and then letting foods requiring a longer cooking time finish cooking on the desired heat setting. Overheated fats and oils can ignite quickly. If you are cooking foods in fat or oil (e.g.
-
Page 28: Baking
Baking Oven function: Fan-assisted circulation , Fan cooking Conventional Baking tins • For Conventional , dark metal and non-stick tins are suitable. • For Fan-assisted circulation or Fan cooking , bright metal tins are also suitable. Oven levels • Baking with Conventional and Fan-assisted circulation is possi- ble on one oven level. - Page 29 General Instructions • Insert the tray with the bevel at the front. • With Conventional or Fan-assisted circulation you can also bake with two tins next to one another on the oven shelf at the same time. This does not significantly increase baking time. When frozen foods are used the trays inserted may distort during cook- ing.
-
Page 30: Baking Table
Baking table Time Type of Shelf Temper- Ovenfunction Hours baking position ature °C mins. Baking in tins Ring cake or brioche Fan-assisted 150-160 0:50-1:10 circulation Madeira cake/Fruitcakes Fan-assisted 140-160 1:10-1:30 circulation Sponge cake Fan-assisted 0:25-0:40 circulation Sponge cake Conventional 0:25-0:40 Flan base - short pastry Conventional 180-200... - Page 31 Time Type of Shelf Temper- Ovenfunction Hours baking position ature °C mins. Fruit flans (made with yeast Fan-assisted 0:35-0:50 dough/sponge mixture) circulation Fruit flans (made with yeast Conventional 0:35-0:50 dough/sponge mixture) Fruit flans made with short Conventional 170-190 0:40-1:20 pastry Yeast cakes with delicate top- Conventional 160-180...
- Page 32 Time Type of Shelf Temper- Ovenfunction Hours baking position ature °C mins. Rolls Fan-assisted 0:20-0:35 circulation Rolls Conventional 0:20-0:35 Small cakes (20per tray) Fan-assisted 0:20-0:30 circulation Small cakes (20per tray) Fan-assisted 1 / 4 0:25-0:40 circulation Small cakes (20per tray) Conventional 0:20-0:30 1) Pre-heat the oven...
-
Page 33: Tips On Baking
Tips on Baking Baking results Possible cause Remedy The cake is not Wrong oven level Place cake lower browned enough un- derneath The cake sinks (be- Oven temperature too high Use a slightly lower setting comes soggy, lumpy, Baking time too short Set a longer baking time streaky) Baking times cannot be re-... -
Page 34: Table For Bakes And Gratins
Table for Bakes and Gratins Tempera- Time Shelf Dish Oven function ture Hours position °C mins. Pasta bake Conventional 180-200 0:45-1:00 Lasagne Conventional 180-200 0:25-0:40 Vegetables au gratin Rotitherm 160-170 0:15-0:30 Baguettes topped with Rotitherm 160-170 0:15-0:30 melted cheese Sweet bakes Conventional 180-200 0:40-0:60... -
Page 35: Roasting
Roasting Oven function: Conventional or Rotitherm Insert the grease filter when roasting! Roasting dishes • Any heat-resistant ovenware is suitable to use for roasting (please read the manufacturer's instructions). • Large roasting joints can be roasted directly in the roasting tray or on the oven shelf with the roasting tray placed below it. -
Page 36: Roasting Table
Roasting table Temper- Time Shelf Type of meat Quantity Ovenfunction ature Hours position °C mins. Beef Conven- Pot roast 1-1.5 kg 200-250 2:00-2:30 tional per cm. of Roast beef or fillet thickness per cm. 190- - rare Rotitherm 0:05-0:06 of thickness per cm. - Page 37 Temper- Time Shelf Type of meat Quantity Ovenfunction ature Hours position °C mins. Poultry 200-250g Poultry portions Rotitherm 200-220 0:35-0:50 each 400-500g Half chicken Rotitherm 190-210 0:35-0:50 each Chicken, poulard 1-1.5 kg Rotitherm 190-210 0:45-1:15 Duck 1.5-2 kg Rotitherm 180-200 1:15-1:45 Goose 3.5-5 kg Rotitherm...
-
Page 38: Grill Sizes
Grill Sizes Oven function: Grill or Dual gril with maximum temperature setting Important: Always grill with the oven door closed. The empty oven should always be pre-heated with the grill functions for 5 minutes. • For grilling, place the shelf in the recommended shelf position. •... -
Page 39: Defrosting
Defrosting Oven function: Defrost (no temperature setting) • Unwrap the food and place it on a plate on the oven shelf. • Do not cover with a plate or bowl, as these can substantially lengthen the defrosting time. • For defrosting, place the shelf in the 1st oven level from the bot- tom. -
Page 40: Drying
Drying Oven function: Fan cooking • Use oven shelves covered with greaseproof paper or baking parch- ment. • You get a better result if you switch the oven off halfway through the drying time, open the door and leave the oven to cool down overnight. -
Page 41: Making Preserves
Making Preserves Oven function: Bottom heat • For preserving, use only commercially available preserve jars of the same size. • Jars with twist-off or bayonet type lids and metal tins are not suitable. • When making preserves, the first shelf position from the bottom is the one most used. - Page 42 Preserves table The times and temperatures for making preserves are for guidance only. Cooking time Continue to Temperature Preserve until simmering cook at 100°C in°C in mins. in mins. Soft fruit Strawberries, blueberries, 160-170 35-45 raspberries, ripe gooseberries Unripe gooseberries 160-170 35-45 10-15...
-
Page 43: Cleaning And Care
Cleaning and Care Warning: For cleaning, the appliance must be switched off and cooled down. Warning: For safety reasons, do not clean the appliance with steam jet or high-pressure cleaning equipment. Attention: Do not use any scouring agents, sharp cleaning tools or scourers. - Page 44 Stubborn residues 1. Use a scraper to remove foods that have boiled over or stubborn splashes. 2. Place the scraper on the glass ceramic surface at an angle. 3. Remove residues by sliding the blade over the surface. You can get scrapers and glass ceramic cleaners from specialist shops. Special residues 1.
-
Page 45: Hob Frame
Hob Frame Important! Do not put vinegar, lemon-juice or scale removers on the hob frame, otherwise dull spots will appear. 1. Wipe the frame with a damp cloth and a little washing up liquid. 2. Soften dried dirt with a wet cloth. Then wipe off and rub dry. Oven interior Clean the appliance after each use. -
Page 46: Shelf Support Rails
Shelf Support Rails The shelf support rails on the left and right hand sides of the oven can be removed for cleaning the side walls. Removing the shelf support rails First pull the front of the rail away from the oven wall (1) and then un- hitch at the back (2). -
Page 47: Oven Lighting
Oven Lighting Warning: There is a danger of electric shock! Prior to changing the oven light bulb: – Switch off the oven! – Remove the fuses in the fuse box or switch off the circuit breaker. Place a cloth on the oven floor to protect the oven light and glass cov- Replacing the oven light bulb/ cleaning the glass cover 1. -
Page 48: Oven Ceiling
Oven Ceiling The upper heating element can be folded down to make it easier to clean the oven ceiling. Folding down the heating ele- ment Warning: Only fold down the heat- ing element when the oven is switched off and there is no risk of being burnt! 1. -
Page 49: Oven Door
Oven Door The door of your appliance may be removed for cleaning. Removing the oven door 1. Open the oven door completely. 2. Completely fold back the clamp- ing levers on both door hinges. 3. Grip the oven door with both hands and close it about 3/4 going past the point of resistance. -
Page 50: Oven Door Glass
Oven door glass The oven door has two glass plates, set next to each other. The inner plate can be removed for cleaning. Caution: the following steps must be performed only with the oven door removed! If the glass is removed while the door is attached, the lighter weight may cause it to spring up and cause injury. -
Page 51: Pan Drawer
Pan drawer The pan drawer underneath the oven can be removed for easier cleaning. Removing / Replacing the pan drawer 1. Pull the pan drawer out of the cooker as far as possible. 2. Lift the pan drawer slightly, so that it can be lifted upwards at an angle out of the drawer guides. -
Page 52: What To Do If
What to do if … Problem Possible cause The cooking zones are not Consult the operating instructions for the built-in cook- functioning ing surface The oven does not heat up The oven is not switched Switch the oven on The clock is not set Set the current time on the clock The required settings have... -
Page 53: Instruction On Setting Up
Instruction on setting up Important! The new appliance may only be installed and connected by qualified personnel. Please observe this instruction, otherwise the warranty will not cover any damage that may occur. Setting up • In the units or furniture surrounding the appliance, veneers or plastic coatings must have been made up using heat-resistant bonding agents (100°C). -
Page 54: Safety Information For The Installer
Safety information for the installer • The set-up of the electrical installation is arranged so that the appli- ance can be isolated from the mains with a minimum 3 mm all-pole contact separation. Suitable separation devices include e. g. cut-outs, fuses (screw fuses are to be taken out of the holder), RCD’s and contactors. -
Page 55: Service
Service In the event of technical faults, please first check whether you can remedy the problem yourself with the help of the operating instruc- tions (section “What to do if…”). If you were not able to remedy the problem yourself, please contact the Customer Care Department or one of our service partners. - Page 56 From the Electrolux Group qÜÉ=bäÉÅíêçäìñ=dêçìé=áë=íÜÉ=ïçêäÇ…ë=ä~êÖÉëí=éêçÇìÅÉê=çÑ=éçïÉêÉÇ=~ééäá~åÅÉë=Ñçê=âáíÅÜÉåI=ÅäÉ~åáåÖ=~åÇ=çìíÇççê ìëÉK= jçêÉ= íÜ~å= RR= ãáääáçå= bäÉÅíêçäìñ= dêçìé= éêçÇìÅíë= EëìÅÜ= ~ë= êÉÑêáÖÉê~íçêëI= ÅççâÉêëI= ï~ëÜáåÖ= ã~ÅÜáåÉëI î~Åììã=ÅäÉ~åÉêëI=ÅÜ~áå=ë~ïë=~åÇ=ä~ïå=ãçïÉêëF=~êÉ=ëçäÇ=É~ÅÜ=óÉ~ê=íç=~=î~äìÉ=çÑ=~ééêçñK=rpa=NQ=Äáääáçå=áå=ãçêÉ íÜ~å=NRM=ÅçìåíêáÉë=~êçìåÇ=íÜÉ=ïçêäÇK AEG Hausgeräte GmbH Postfach 1036 D-90327 Nürnberg http://www.aeg-electrolux.de © Copyright by AEG 822 926 896-A-200306-02 Subject to change without notice...