Advertisement
Table of Contents
Advertisement
Table of Contents

Related Manuals for Azden PCS-6000H


Summary of Contents for Azden PCS-6000H
-
Page 2: Table Of Contents
Introduction Congratulations! Now you are the owner of the most advanced state—of the—art VHF FM transceiver available today. Please read this manual carefully before attempting to operate your PCS—6000 transceiver. This will ensure that you obtain the maximum operating convenience and versatility. Unpack your PCS—6000 carefully and make sure that it is supplied with the standard accessories listed at page 14. -
Page 3: Cautions Before Operation
—1— CAUTION BEFORE OPERATION - Before connecting the unit to a power supply, make sure that you have the polarity correct. The red lead of the power cord should go to the positive (+) terminal of the power supply or battery. In mobile installations, the system must normally ~e negative—ground. -
Page 4: Major Features
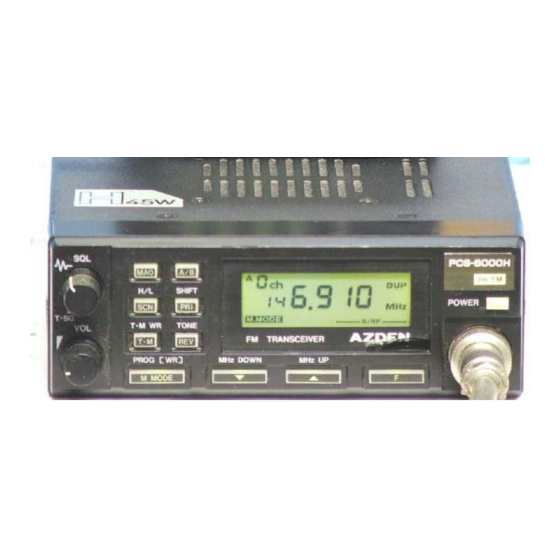
The LCD shows the operating frequency, S/RF , memory channel in use and various other operating functions. The LCD is back—lighted by green LEDs, making it possible for you to read the display even in total darkness. 11. Azden Traditional Discriminator Scan Centering —3—... -
Page 5: Operating Controls And Functions
-OPERATING CONTROLS AND FUNCTIONS – (1) Power Switch: Push ‘ON’ Push ‘OFF’ switch. Pressing the button once will turn the power ON and pressing it again will turn the power off. (2) Volume Control: Turning the knob clockwise will increase the sound volume. (3) Tone Squelch (TSQ)/Squelch Control. - Page 6 (8) Reverse Mode Indicator (REV): This indicator is lit when the reverse operation mode is in use. (See: Reverse mode operation Page 7) (9) Low Power Indicator (LOW): When the transmitter output is set at low power (5W— PCS—6000/IOW—PCS—6000H), this indicator comes on. In the high power mode (25W —...
-
Page 7: How To Use Keyboard
(19)Memory Mode Indicator (M Mode): This indicator lights up when the PCS—6000 is in the memory mode. In this mode, the up/down keys function as memory address keys, and the scan key as memory scan key. When the indicator is not lit, the unit is in the up/down mode. - Page 8 5. Setting Shift Width and Direction: When ‘F’ indicator comes on after the ‘F’ ‘~witch pressed, pressing the ‘SHIFT’ key will indicate +(6) that means transmission occurs at 6UOkHz above the receiving frequency. Furthermore, when the ‘F’ indicator on, pressing the ‘SHIFT’...
-
Page 9: How To Store Frequencies In Memory
How To Store Frequencies in Memory: —Setting Receive Frequency and Tone Code Entry — a) Pressing the function (F) key and the program (PROG) key will set the unit in the program mode and the ‘AD’ blinks and indicates that you can write frequency in the MAO (memory bank A, address channel 0). - Page 10 After a round of procedures for storing the receiving and transmitting frequencies and tone code, the Memory Address Indicator flickers showing the next channel. By repeating the same procedures as above, you can store r eceive frequencies, receive tones, as well as transmit frequencies and transmit tones in the memory bank AD through A9 and memory bank BO through B 9 for a total of 20 channels.
-
Page 11: Recalling Memory Channels
Recalling Memory Channels 1) Calling ‘MAO The ‘MAO’(memory bank A, address (I channel) is called when the power is turned “ON” or when the program mode is released. If the ‘MAO’ has already been called by the ‘MAO’ key, the unit returns to the status before the MAO was pressed. - Page 12 Memory Scanning Memory scanning is initiated by pressing the SCN key while the unit is in the memory mode.(M MODE is lit). The scan will start at the channel following the one indicated on the memory address. That is, if you are at memory address 5 and press the SCN, scanning will begin at address —...
-
Page 13: Scanning Stop
Scanning Stop Scanning will be stopped, either in Memory Mode or UP/DOWN mode, by pressing any of the keys or the microphone PTT switch. To resume the ‘SCAN’ mode, press the ‘SCAN’ key. But be sure to note the following. I) Push either UP or DOWN key to stop the scanning. -
Page 14: Microphone
DTMF MICROPHONE499—21* Model 499—21 in a Dynamic Microphone with 16 key encoder and multi function. This microphone is provided as a standard accessory for U.S. version. (1)To transmit, depress the Push—to—Talk (PTT) switch and speak slowly and clearly in your normal tone of voice with the microphone about two inches from your mouth. - Page 15 MICROPHONE PCM-463 A multi—functional microphone is provided as a standard accessory. (European version/Asian version.) (1) Push—to—Talk Switch Lever To transmit, depress the Push—to—Talk (PTT) switch and speak slowly and clearly in your normal tone of voice with the microphone about two inches from your mouth. Depressing the PTT switch turns the TX indicator Light on the LCD, indicating that the transmitter is in operation.
-
Page 16: Accessories List
ACCESSORIES LIST 1. Microphone 499—21* U.S. version…………………………………………………….. PCM—463* ( European version} (Asian ‘‘ 2. Microphone Hanger…………………………………………………………………………… 3. DC Power Cord (w/fuse)……………………………………………………………………... 4. Spare Fuse …………………………………………………………………………………… 5. Mounting Bracket ……………………………………………………………………………. 6. Screw for Bracket Mounting…………………………………………………………………. 7 Taping Screw ………………………………………………………………………………… 8. Owner’s Manual w/schematic diagram………………………………………………………. * Microphones arc subject to change without notice to an improvement or for manufacturers conveniences’... -
Page 17: Specifications
SPECIFICATIONS GENERAL Frequency Coverage. ……………. AM 118000 135.995MHz (Rx) FM 136.000 173.995MHz (Rx) FM 140.000 149.995MHz (Rx/Tx) Note Specifications guarantee 144 — 148MHz Display ……………………………LCD Frequency Control. ………….….. .Microcomputer-controlled PLL Emission Type ……………………FM (16F3) Memory Channels…………………20 + 1 Temporary Memory Power Requirement. - Page 19 Filename: Introduction Directory: D:\azdenpsc6000 Template: C:\WINDOWS\Application Data\Microsoft\Templates\Normal.dot Title: Subject: Author: Keywords: Comments: Creation Date: 10/6/01 9:10 AM Change Number: Last Saved On: 10/6/01 9:10 AM Last Saved By: Total Editing Time: 7 Minutes Last Printed On: 10/7/01 1:58 PM As of Last Complete Printing Number of Pages: 18 Number of Words: 4,263 (approx.)