Table of Contents
Advertisement
Advertisement
Table of Contents

Related Manuals for LevelOne WAP-6013


Summary of Contents for LevelOne WAP-6013
-
Page 1: User Manual
LevelOne User Manual WAP-6013 300Mbps Wireless Access Point Ver. 1.0... - Page 2 Council Directive 89/336/EEC on the approximation of the laws of the Member States relating to electromagnetic compatibility. CE Marking Warning Hereby, Digital Data Communications, declares that this product is in compliance with the essential requirements and other relevant provisions of Directive 1999/5/EC. The CE-Declaration of Conformity can be downloaded at: http://www.levelone.eu/support.php...
- Page 3 If you would like a copy of the GPL or other open source code in this software on a physical CD medium, LevelOne (Digital Data Communications) offers to mail this CD to you upon request, for a price of US$9.99 plus the cost of...
-
Page 4: Table Of Contents
Appendix A FAQ and Troubleshooting ..............43 What can I do when I have some trouble at the first time?......... 43 How do I connect router by using wireless? ............44 IP Address 192.168.1.1 Password admin Wireless Mode Enable Wireless SSID LevelOne Wireless Security None... -
Page 5: Chapter 1 Introduction
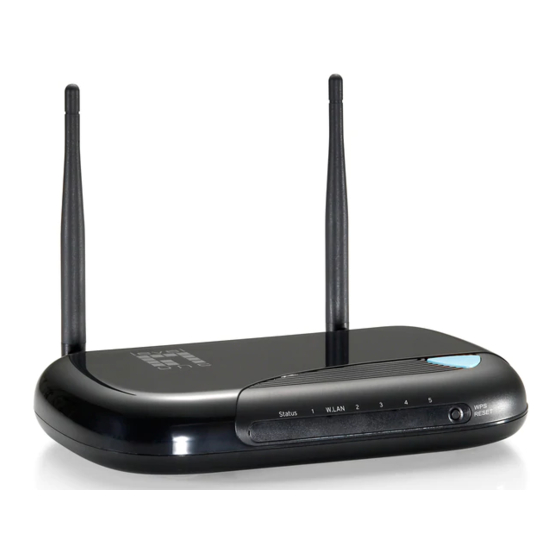
Instructions for installing and configuring this product can be found in this manual. Before you install and use this product, please read this manual carefully for fully exploiting the functions of this product. 1.1 Packing List WAP-6013 Power Adapter Antenna (x2) Network Cable... -
Page 6: Package Information
Routing Protocol Static route, dynamic route (RIP v1/v2) Management SNMP, syslog, Administration Web-based UI, remote login, backup/restore setting Environment & Certification Package DC 5V/1A power adapter, Quick Installation Guide Information Package Device dimension (mm) 185 x 119 x 32 mm Information Operation Temp. -
Page 7: Led Indicators
Wi-Fi Status WPS/Reset LAN1~LAN5 Button LEDs 1.4 LED indicators LED status Description Status Green in flash Device status is working. Green RJ45 cable is plugged LAN LED Green in flash Data access Green WLAN is on WiFi LED Green in flash Data access Green in fast flash Device is in WPS PBC mode... -
Page 8: Procedure For Hardware Installation
1.5 Procedure for Hardware Installation Step 1. Attach the antenna. 1.1. Remove the antenna from its plastic wrapper. 1.2. Screw the antenna in a clockwise direction to the back panel of the unit. 1.3. Once secured, position the antenna upward at its connecting joint. This will ensure optimal reception. -
Page 9: Chapter 3 Making Configuration
This product provides Web based configuration scheme, that is, configuring by your Web browser, such as Mozilla Firefox or or Internet Explorer. This approach can be adopted in any MS Windows, Macintosh or UNIX based platforms. 3.1 Login to Configure from Wizard Type in the IP Address (http://192.168.1.1) Type password, the default is... - Page 10 Step 1 Set up your system password. Step 2: Setup the LAN IP Step 3: Set up your Wireless.
- Page 11 Set up your Authentication and Encryption. Step 4: Then click Apply Setting. And then the device will reboot. Step 5: Click Finish to complete it.
-
Page 12: System Status
3.2 System Status This option provides the function for observing this product’s working status:... -
Page 13: Advanced
3.3 Advanced 3.3.1 Basic Setting Please Select “Advanced Setup” to Setup... - Page 14 1. LAN IP Address: the local IP address of this device. The computers on your network must use the LAN IP address of your product as their Default Gateway. You can change it if necessary. 3.3.1.2 DHCP Server Press “More>>” DHCP Server: Choose “Disable”...
- Page 15 address pool. Domain Name: Optional, this information will be passed to the client. Primary DNS/Secondary DNS: This feature allows you to assign DNS Servers Primary WINS/Secondary WINS: This feature allows you to assign WINS Servers Gateway: The Gateway Address would be the IP address of an alternate Gateway. This function enables you to assign another gateway to your PC, when DHCP server offers an IP to your PC.
- Page 16 Wireless Off Schedule: Before turning Off Wireless Radio, the device will detect if Wireless station is online, then depend as Schedule ” 01:00~08:30” to disable WiFi service. Network ID (SSID): Network ID is used for identifying the Wireless LAN (WLAN). Client stations can roam freely over this product and other Access Points that have the same Network ID.
- Page 17 Security: Select the data privacy algorithm you want. Enabling the security can protect your data while it is transferred from one station to another. WDS Hybrid Mode: While acting as Bridges, Wireless Router 1 and Wireless Router 2 can communicate with each other through wireless interface (with WDS).
- Page 18 Wireless Off Schedule: Before turning Off Wireless Radio, the device will detect if Wireless station is online, then depend as Schedule ” 01:00~08:30” to disable WiFi service. Network ID (SSID): Network ID is used for identifying the Wireless LAN (WLAN). Client stations can roam freely over this product and other Access Points that have the same Network ID.
- Page 19 data while it is transferred from one station to another. Remote AP MAC : Choose “Manual” or scan one AP to copy to item1~4. WDS(Wireless Distribution System) The WDS (Wireless Distributed System) function let this access point acts as a wireless LAN access point and repeater at the same time.
- Page 20 Network ID (SSID): Network ID is used for identifying the Wireless LAN (WLAN). Client stations can roam freely over this product and other Access Points that have the same Network ID. (The factory setting is “default”) SSID Broadcast: The router will Broadcast beacons that have some information, including ssid so that The wireless clients can know how many ap devices by scanning function in the network.
- Page 21 Universal Repeater Mode Universal Repeater is a technology used to extend wireless coverage. It provides the function to act as Adapter (client) and AP at the same time and can use this function to connect to a Root AP and use AP(SSID name is same with Root AP ) function to service all wireless stations within its coverage.
- Page 22 RADIUS Server IP address or the 802.1X server’s domain-name. RADIUS Shared Key Key value shared by the RADIUS server and this router. This key value is consistent with the key value in the RADIUS server. WPA-PSK 1. Select Encryption and Pre-share Key Mode If you select HEX, you have to fill in 64 hexadecimal (0, 1, 2…8, 9, A, B…F) digits If ASCII, the length of pre-share key is from 8 to 63.
- Page 23 Check Box was used to switch the function of the WPA. When the WPA function is enabled, the Wireless user must authenticate to this router first to use the Network service. RADIUS Server IP address or the 802.1X server’s domain-name. Select Encryption and RADIUS Shared Key If you select HEX, you have to fill in 64 hexadecimal (0, 1, 2…8, 9, A, B…F) digits If ASCII, the length of pre-share key is from 8 to 63.
- Page 24 WPA2(AES) Check Box was used to switch the function of the WPA. When the WPA function is enabled, the Wireless user must authenticate to this router first to use the Network service. RADIUS Server IP address or the 802.1X server’s domain-name. Select RADIUS Shared Key If you select HEX, you have to fill in 64 hexadecimal (0, 1, 2…8, 9, A, B…F) digits If ASCII, the length of Pre-share key is from 8 to 63.
- Page 25 WPA/WPA2 Check Box was used to switch the function of the WPA. When the WPA function is enabled, the Wireless user must authenticate to this router first to use the Network service. RADIUS Server The router will detect automatically which Security type(Wpa-psk version 1 or 2) the client uses to encrypt.
- Page 26 SSID Broadcast: The router will Broadcast beacons that have some information, including ssid so that The wireless clients can know how many ap devices by scanning function in the network. Therefore, This function is disabled, the wireless clients can not find the device from beacons. Channel: The radio channel number.
- Page 27 Security: Select the data privacy algorithm you want. Enabling the security can protect your data while it is transferred from one station to another. There are several security types to use: WEP : When you enable the 128 or 64 bit WEP key security, please select one WEP key to be used and input 26 or 10 hexadecimal (0, 1, 2…8, 9, A, B…F) digits.
- Page 28 WPA-PSK 1. Select Encryption and Pre-share Key Mode If you select HEX, you have to fill in 64 hexadecimal (0, 1, 2…8, 9, A, B…F) digits If ASCII, the length of pre-share key is from 8 to 63. 2. Fill in the key, Ex 12345678...
- Page 29 Check Box was used to switch the function of the WPA. When the WPA function is enabled, the Wireless user must authenticate to this router first to use the Network service. RADIUS Server IP address or the 802.1X server’s domain-name. Select Encryption and RADIUS Shared Key If you select HEX, you have to fill in 64 hexadecimal (0, 1, 2…8, 9, A, B…F) digits If ASCII, the length of pre-share key is from 8 to 63.
- Page 30 If you select HEX, you have to fill in 64 hexadecimal (0, 1, 2…8, 9, A, B…F) digits If ASCII, the length of Pre-share key is from 8 to 63. 2. Fill in the key, Ex 12345678 WPA/WPA2 Check Box was used to switch the function of the WPA. When the WPA function is enabled, the Wireless user must authenticate to this router first to use the Network service.
- Page 31 Universal Repeater Mode If set to Adapter Mode (Client mode), this device can work like a wireless station when it’s connected to a computer so that the computer can send packets from wired end to wireless interface.
-
Page 32: Security Settings
3.3.1.4 Change Password You can change Password here. We strongly recommend you to change the system password for security reason. 3.3.3 Security Settings 3.3.3.4 MAC control Administrator MAC Control Regardless the MAC access configuration of administrator, specific MAC can access the device. - Page 33 MAC Address Control allows you to assign different access right for different users and to assign a specific IP address to a certain MAC address. MAC Address Control Check “Enable” to enable the “MAC Address Control”. All of the settings in this page will take effect only when “Enable” is checked.
- Page 34 Association control Check "Association control" to enable the controlling of which wireless client can associate to the wireless LAN. If a client is denied to associate to the wireless LAN, it means the client can't send or receive any data via this device.
- Page 35 You can select a specific client in the “DHCP clients” Combobox, and then click on the “Copy to” button to copy the MAC address of the client you select to the ID selected in the “ID” Combobox. Previous page and Next Page To make this setup page simple and clear, we have divided the “Control table”...
- Page 36 Example: In this scenario, there are three clients listed in the Control Table. Clients 1 and 2 are wireless, and client 3 is wired. 1.The "MAC Address Control" function is enabled. 2."Connection control" is enabled, and all of the wired and wireless clients not listed in the "Control table"...
- Page 37 5.Clients 2 and 3 and other wired clients with a MAC address unspecified in the Control table are all allowed to connect to this device. But client 1 is denied to connect to this device. 6.Clients 1 and 2 are allowed to associate to the wireless LAN, but a wireless client with a MAC address not specified in the Control table is denied to associate to the wireless LAN.
-
Page 38: Advanced Settings
3.3.4 Advanced Settings 3.3.4.1 System Time Get Date and Time Set Date and Time manually Selected if you want to Set Date and Time manually. Set Date and Time manually... - Page 39 Selected if you want to Set Date and Time manually. 3.3.4.2 System Log This page support two methods to export system logs to specific destination by means of syslog(UDP) and SMTP(TCP). The items you have to setup including: IP Address for Syslog Host IP of destination where syslogs will be sent to.
- Page 40 3.3.4.4 SNMP In brief, SNMP, the Simple Network Management Protocol, is a protocol designed to give a user the capability to remotely manage a computer network by polling and setting terminal values and monitoring network events. Enable SNMP You must check Local, Remote or both to enable SNMP function. If Local is checked, this device will response request from LAN.
- Page 41 3.3.5 Toolbox 3.3.5.1 View Log You can View system log by clicking the View Log button...
- Page 42 3.3.5.2 Firmware Upgrade You can upgrade firmware by clicking Firmware Upgrade button. 3.3.5.3 Backup Setting You can backup your settings by clicking the Backup Setting button and save it as a bin file. Once you want to restore these settings, please click Firmware Upgrade button and use the bin file you saved.
-
Page 43: Appendix A Faq And Troubleshooting
3.3.5.5 Reboot You can also reboot this product by clicking the Reboot button. What can I do when I have some trouble at the first time? 1.Why can I not connect the router even if the cable is plugged in Lan port and the led is light? A: First, please check Status Led. -
Page 44: How Do I Connect Router By Using Wireless
How do I connect router by using wireless? 1.How to start to use wireless? A: First, make sure that you already installed wireless client device in your computer. Then check the Configuration of wireless router. The default is as below: About wireless client, you will see wireless icon: Then click and will see the ap list that wireless client can be accessed: If the client can not access your wireless router, please refresh network list again. - Page 45 Choose the one that you will want to connect and Connect: If successfully, the computer will show and get ip from router: 2.When I use AES encryption of WPA-PSK to connect even if I input the correct pre-share key? A: First, you must check if the driver of wireless client supports AES encryption. Please refer to the below: If SSID is default and click “Properties”...
- Page 46 3.When I use wireless to connect the router, but I find the signal is very low even if I am close to the router? A: Please check if the wireless client is normal, first. If yes, please send the unit to the seller and verify What the problem is.