
Related Manuals for Huawei B200 Series


Summary of Contents for Huawei B200 Series
- Page 1 Wonderful Communication, Mobile Life. Welcome to HUAWEI B200 Series Wireless Gateway HUAWEI B200 Series Wireless Gateway User Guide...
- Page 2 Notice Copyright © Huawei Technologies Co., Ltd. 2009. Huawei Technologies Co., Ltd reserves the right to change or modify any information or specifications contained in this man- All rights reserved. ual without prior notice or obligation. No part of this document may be reproduced or transmitted in...
-
Page 3: Table Of Contents
Table of Contents Table of Contents 1 LAN IP Filter..........21 Virtual Server ........... 22 Quick Start 1 DMZ Settings ........... 23 Appearance ..........1 UPnP Settings.......... 23 PC Configuration Requirements....2 Remote Management ......23 Installation ..........2 Troubleshooting 25 Making a Call..........4 Abbreviations 28 Dial-up Access ...........4 Restoring the Factory Defaults....5... -
Page 4: Safety Precautions
Safety Precautions Read the safety precautions carefully to ensure the Do not place your device or its accessories correct and safe use of your wireless device. in containers with strong electromagnetic field. Do not switch on your device when the Do not place magnetic storage media near device use is prohibited or when the device your device. -
Page 5: Table Of Contents
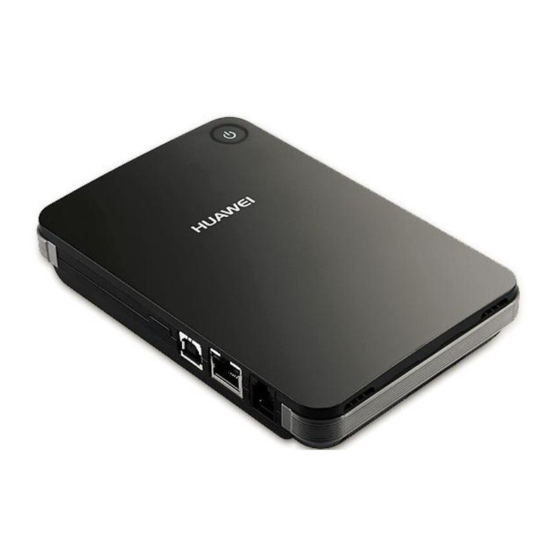
Quick Start Indicator Status The supported functions and actual Note Signal • Steady on and in green: Signal strength appearance are subject to your product is strong purchased. The following pictures are displayed • Steady on and in yellow: Signal strength for illustration purpose only. -
Page 6: Pc Configuration Requirements
PC Configuration Requirements PC Configuration Requirements The recommended PC configurations for using the gateway are as follows: • CPU: Pentium 500 MHz or above • Memory: 128 MB RAM or above • Hard disk: 100 MB or above available space •... - Page 7 Installation Step 3: Connect to a PC Step 5: Connect the external antenna (optional) ◆ ◆ If the indicator of the Ethernet interface connecting Connect the external antenna cable with the antenna with a network cable is on, the connection is jack on the main unit.
-
Page 8: Making A Call
Making a Call Step 6: Place the device ◆ Dial-up Access By default, the device dials up to access the Internet To prevent electrical devices from being as required. You can directly use the network interfered by wireless signals, place electrical services such as web browsing, and receiving or Warning devices one meter away from the device. -
Page 9: Restoring The Factory Defaults
Restoring the Factory Defaults Accessing the Internet Wait for several minutes. If you are notified that the connection is successful, you can start the browser and enter the website address to Click Connection. access the Internet. • If you are required to enter the PIN code, Note Restoring the Factory Defaults enter the correct one. -
Page 10: Using The Management
Using the Management Page Item Green icon Red icon Management Page Overview The card is valid. The card is not Operation Functions inserted or is invalid. The following table shows the main operations in the The PPP dial-up The PPP dial-up management page. -
Page 11: Quick Setup
Quick Setup provider provides the relevant parameters, select Static Click Basic Status and enter their values. Otherwise, select Dynamic and the device automatically obtains them. Click Advanced on the right part of the page to Configuring PPP Dial-up Settings view the advanced status PPP Connection: Select the dial-up access mode. - Page 12 Quick Setup when you set up a WLAN. It is not recommended to SSID Broadcast: Enable or disable the SSID select this option in daily use. broadcast. WPA-PSK/WPA2-PSK • Enabled: The device broadcasts the SSID of the WLAN and users can easily access the WLAN. In this •...
-
Page 13: Validating Quick Setup
Quick Setup Validating Quick Setup The last page of the wizard displays all the settings you have configured. • To accept the settings, click Finish. • To change the settings, click Back. • To quit the settings, click Cancel. -
Page 14: Configuring Your Computer
Configuring Your Computer Configuring the Wireless Network This takes the Windows XP operating system (OS) as an example to describe how to configure your computer. For other OSs, the configurations may be Choose Start > Control Panel > Network different and you need to configure them as required. Connections >... -
Page 15: Configuring The Pc Network
Configuring the PC Network Disabling Proxy Settings Configuring the PC Network The recommended configurations of the PC are as Start the Internet browser, and then choose follows: Tools > Internet Options. • Obtain an IP address automatically. • Deselect Use a proxy server for your LAN. Select the Connections tab, and then click LAN Configuring the Network Connection Settings. -
Page 16: Advanced Settings
Advanced Settings Icon Description Overview Click to access the WLAN Settings page. Click Advanced Settings, you can configure both (Optional) the basic attributes and advanced parameters of the device, and also perform routine maintenance and System Management management to the device. The following table shows the functions of the shortcut icons. -
Page 17: Sim Settings
Viewing the Version Information automatically restarts. Warning • The software programs for upgrading must come from the official website of Huawei or the official website of the service provider. Click to access the Version page. • Upgrading the software does not change the configuration of the client. -
Page 18: Mobile Network Settings
Mobile Network Settings Click Apply. Select Enable/Disable in the Auto Validate option button. Changing the PIN Code Enter the current PIN code. When the PIN code protection is enabled, you can reset the PIN code. Click Apply. Click Mobile Network Settings Select Modify in the PIN Code Operation list box. -
Page 19: Dial-Up Settings
Dial-up Settings • If the service provider provides only the In Manual mode, select the searched network 3G service and the preferred mode is and click Log on. configured as 2G only, you cannot access the Internet. • If the service provider provides neither Dial-up Settings the 3G nor 2G service, you cannot access the Internet regardless of the... -
Page 20: Dhcp Settings
DHCP Settings • PPP MTU: It is the maximum transmission unit Click Save. (MTU) of the PPP connection. It is used to set the maximum number of bytes encapsulated in a Deleting a Profile ◆ single data frame. • PPP Max Dial Time: Set the maximum waiting Select a profile to be deleted in the Profile List time when connecting to the Internet. -
Page 21: Clip Settings
Clip Settings • DHCP Server: It is used to assign IP addresses Clip Settings dynamically. If the DHCP server is Enabled, it can automatically assign IP addresses for PCs. It is recommended to select Enabled for the DHCP server. Click to access the Clip Settings page. - Page 22 WLAN Settings (Optional) WLAN Basic Settings Auto and the device can automatically search for the channel. Configuring the 802.11 Mode ◆ Click to access the WLAN Basic Settings Mode Description page. 54g Auto The WLAN has the best compatibility ◆ Wireless Interface in this mode.
- Page 23 WLAN Settings (Optional) WLAN Bridge Click Apply to submit the setting. WLAN Advance Settings Click to access the WLAN Bridge page. • Preamble Type: It has two options: Long and Short. In the case that the client (PC) supports the Short type, Click to access the WLAN Advance Settings the WLAN can have a better performance if it is Short.
-
Page 24: Configuring The Mac Filter
WLAN Settings (Optional) • Bridges: It refers to the physical address of the remote Parameter Description peer bridge. The device supports the point-to-multipoint Deny The clients with addresses in the MAC (PTM) bridge mode. Addresses list are not allowed to •... -
Page 25: Security Settings
Security Settings Click Security. You can configure the advanced LAN MAC Filter security settings. Your device supports MAC filtering based on a list of either denied or allowed computers. A common Firewall Switch method to restrict network access is to specify the Media Access Control (MAC) address. -
Page 26: Virtual Server
Virtual Server computers in the local network. Enter values in the following text boxes: • Name: Enter a name to the service provided by Click the LAN. • WAN Port: Enter the WAN port of the LAN in Select Protocol and Status. which the computer provides services. -
Page 27: Dmz Settings
DMZ Settings DMZ Settings UPnP Settings If your PC cannot run network applications through The Universal Plug and Play (UPnP) service allows the device, you can set the computer to access the other network users to control your device’s network Internet unlimitedly by configuring the IP address of features to realize the intelligent interconnection. - Page 28 Remote Management Select Enabled/Disabled for Remote Status to enable or disable the service. Enter the IP address that can access and control your device. Click Apply.
-
Page 29: Troubleshooting
Troubleshooting are correct, and see "Configuring PPP Profile What to do if a PC in the LAN cannot access the Settings" for details. Internet? If the power indicator is off, you need to check If the DHCP service is disabled and the PC whether the power adapter is normally obtains the IP address dynamically, the PC also connected. - Page 30 What to do if bridging between two devices is Check and record the following data on the unsuccessful? (Optional) network adapter of your PC: SSID, WEP type, and key. Make sure that the two devices work on the same channel. For details, see "Selecting a Check and record the following data on the WLAN Channel".
- Page 31 Choose Edit > New > DWORD Value. Rename New Value #1 to TcpWindowSize. Right-click TcpWindowSize and then select Modify. Select Decimal and enter 65535 in the Value data text box, and then click OK. For the DWORD Value of DefaultRcvWindow, do the same operations as that of TcpWindowSize.
-
Page 32: Abbreviations
Abbreviations The Third Generation Wide Area Network Access Point WLAN Wireless Local Area Network Access Point Name WCDMA Wideband CDMA CDMA Code Division Multiple Access WI-FI Wireless Fidelity DHCP Dynamic Host Configuration Protocol Domain Name Server EDGE Enhanced Data rates for GSM Evolution Global System for Mobile communications GPRS...