Table of Contents
Advertisement
Quick Links
Advertisement
Table of Contents

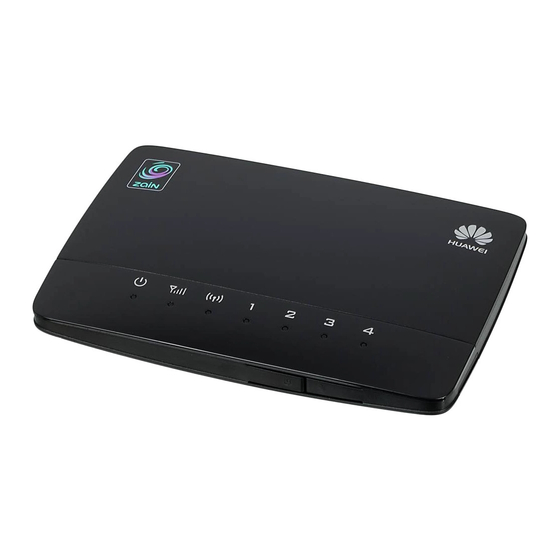
Summary of Contents for Huawei B68A
- Page 1 B68A Wireless Gateway Quick Start...
- Page 2 96722598_01...
- Page 3 Connect to computer, switch, or other LAN device. Power port Connect to compatible power adapter. Telephone port Connect to telephone. External antenna Connect to external antenna. port On: the B68A is powered on. Off: the B68A is powered off. Power indicator...
- Page 4 When the B68A is powered on, use a sharply Reset button pointed object to press and hold for about 3 seconds until all indicators are blinking to restore the B68A to its factory settings. After the factory defaults are restored, the B68A will restart automatically.
-
Page 5: Installation
If required, please contact your local dealer purchase it. You can place the B68A on a flat surface such as a table or a desk, or hang it on a wall. You can also use the table stand of the B68A to place it upright. -
Page 6: (Optional) Installing The External Antenna
The external antenna is an optional accessory, and may not included in the packaging box. If required, please contact your local dealer purchase it. Before installing the external antenna, ensure that the B68A is powered off and disconnected from the power outlet. -
Page 7: Connecting Cables
Connecting cables To prevent interference caused by radio signals, place the B68A at least 1 meter (3.28 feet) away from telephone and other electrical devices. Once connected to a power outlet, the B68A automatically powers on. Power adapter Telephone Computer... -
Page 8: Recording The Ssid And Wi-Fi Key
Save. Recording the SSID and Wi-Fi key The default SSID and Wi-Fi key are printed on the B68A's rear label. To prevent unauthorized parties from accessing your wireless network, it is recommended that you change the SSID and Wi-Fi key from time to time. Log in to the web management page (default address: http://192.168.1.1, default password:... -
Page 9: Setting Up A Wi-Fi Connection From A Client
From the search results, select the wireless network with the same SSID as the B68A, and click Connect. In the Connect to a Network dialog box, enter the B68A's Wi-Fi key, and click OK. Note that the Wi-Fi key is case sensitive. - Page 10 SSID as the B68A. In the displayed dialog box, enter the B68A's Wi-Fi key, and click Join. Note that the Wi-Fi key is case sensitive. When a check mark appears next to the B68A's SSID, the Mac is connected to the wireless network.
- Page 11 SSID as the B68A. In the displayed dialog box, enter the Wi-Fi key, and touch Connect. Note that the Wi-Fi key is case sensitive. When Connected is displayed under the B68A's SSID, the device is connected to the wireless network.
-
Page 12: Setting Up A Wi-Fi Connection Through Wps
Configuring your B68A After a client is connected to the B68A through Wi-Fi or LAN port, launch a browser on the client and visit http://192.168.1.1. Enter the password (admin by default) to log in to the web management page. -
Page 13: For More Help
For More Help If you are experiencing any issues with the B68A: See What's this? information on the web management page. Restart the B68A. Restore the B68A to its factory settings. Contact your service provider. Please visit http://consumer.huawei.com/en/support/hotline for recently updated hotline and email address in your country or region. -
Page 14: Safety Information
Safety information This section contains important information about the operation of your device. It also contains information about how to use the device safely. Read this information carefully before using your device. Electronic device Do not use your device if using the device is prohibited. Do not use the device if doing so causes danger or interference with other electronic devices. - Page 15 Ideal operating temperatures are 0°C to 45°C. Ideal storage temperatures are -30°C to +60°C. Extreme heat or cold may damage your device or accessories. Keep the device and accessories in a well-ventilated and cool area away from direct sunlight. Do not enclose or cover your device with towels or other objects. Do not place the device in a container with poor heat dissipation, such as a box or bag.
-
Page 16: Power Adapter Safety
fire, explosion or other hazards. Choose only accessories approved for use with this model by the device manufacturer. The use of any other types of accessories may void the warranty, may violate local regulations and laws, and may be dangerous. Please contact your retailer for information about the availability of approved accessories in your area. -
Page 17: Emergency Calls
cable, causing the device to malfunction. Before you clean or maintain the device, stop using it, stop all applications, and disconnect all cables connected to it. Do not use any chemical detergent, powder, or other chemical agents (such as ... -
Page 18: Eu Regulatory Conformance
EU regulatory conformance Statement Hereby, Huawei Technologies Co., Ltd. declares that this device is in compliance with the essential requirements and other relevant provisions of Directive 1999/5/EC. For the declaration of conformity, visit the web site www.huaweidevice.com/certification. The following marking is included in the product: This device may be operated in all member states of the EU. -
Page 19: Legal Notice
Copyright © Huawei Technologies Co., Ltd. 2014. All rights reserved. No part of this manual may be reproduced or transmitted in any form or by any means without prior written consent of Huawei Technologies Co., Ltd. and its affiliates ("Huawei"). -
Page 20: Import And Export Regulations
THE MAXIMUM LIABILITY (THIS LIMITATION SHALL NOT APPLY TO LIABILITY FOR PERSONAL INJURY TO THE EXTENT APPLICABLE LAW PROHIBITS SUCH A LIMITATION) OF HUAWEI ARISING FROM THE USE OF THE PRODUCT DESCRIBED IN THIS MANUAL SHALL BE LIMITED TO THE AMOUNT PAID BY CUSTOMERS FOR THE PURCHASE OF THIS PRODUCT.


