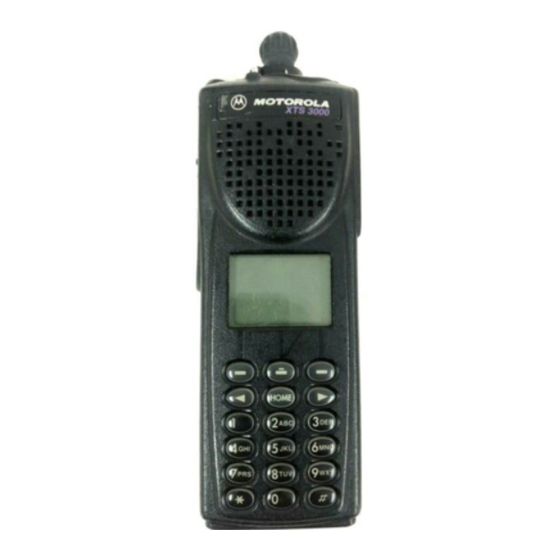
Motorola ASTRO Digital XTS 3000 User Manual
Full-featured model portable radio
Hide thumbs
Also See for ASTRO Digital XTS 3000:
- Service manual (236 pages) ,
- User manual (104 pages) ,
- Basic service manual (48 pages)

Related Manuals for Motorola ASTRO Digital XTS 3000


Summary of Contents for Motorola ASTRO Digital XTS 3000
- Page 1 D I G I T A L S O L U T I O N S Digital XTS 3000 Full-Featured Model Motorola 8000 West Sunrise Boulevard Fort Lauderdale, Florida 33322 User’s Guide...
-
Page 2: Notations Used In This Manual
This manual first introduces you to your new radio. Then it covers general radio operation and commonly used radio features. Next, special radio features available on an ASTRO Digital XTS 3000 radio are described. The back section of this manual includes a glossary, alert tone and status indicator tables, helpful tips, and an index. -
Page 3: Portable Radio
Digital XTS 3000 COMMON RADIO FEATURE Full-Featured Model Selecting a Zone and Channel: Making an Individual Call: Portable Radio Quick-Reference Card > > ZONE Press until the softkey appears. 1a. Press until one 1b. Press the Phone, of the following Call, or Page Concentric 16-Position... -
Page 4: Special Radio Features
Softkey Feature List COMMON and SPECIAL RADIO FEATURES Softkey Feature Softkey Feature Most of your radio features can be accessed by List Programming of Individual- Individual Private-Conversation PROG CALL performing the following steps (for more detail, Call Numbers and Scan Channels Call or Selection Call refer to the feature description in your manual). -
Page 5: Table Of Contents
Smart PTT ..........52 , Motorola, XTS 3000, Private-Line, Digital Private-Line, Call Alert, MDC- 1200, DVP, DVP-XL, Private Conversation, Call Alert, SmartZone, and Quik- Call are trademarks of Motorola, Inc. - Page 6 The Motorola equipment described in this manual may include copyrighted Motorola computer programs stored in semiconductor memories or other media. Laws in the United States and in other countries preserve for Motorola certain exclusive rights for copyrighted computer programs, including the exclusive right to copy or reproduce in any form the copyrighted computer program.
-
Page 7: Introduction
Your ASTRO Digital XTS 3000 radio will provide you with many years of dependable service, with the quality and reliability that you expect from Motorola. -
Page 8: Radio Controls
Programmable Switches and Buttons Refer to Table 1 for the features that are programmable through radio service software (RSS) to the ASTRO Digital XTS 3000 radio controls. Then write, in the space provided below the appropriate switch or button on this page, the features that apply to your radio’s programming (consult... - Page 9 Introduction Table 1. Programmable Features Nuisance-Delete (pg. 47) Secure/Clear (pg. 57 ) Call Alert™ (pg. 36-43) Call Response (pg. 42) Phone (pg. 36-43) Selective Call (pg. 36-43) Channel (pg. 12-15) PL Defeat (pg. 43) Site Lock/Unlock (pg. 64) Dynamic Priority (pg. 47) Private Call (pg.
-
Page 10: Softkey
Introduction Switches, Buttons, Knobs, and Indicators Bicolor LED Indicates the radio’s operating status; Red =Transmitting Blinking Red = Channel Busy or Low Battery (while transmitting) Blinking Green = Receipt of Individual Call 16-Position Select Knob Antenna Selects the operating system (zone) Radiates and receives and/or specific channel. -
Page 11: Antenna Installation And Removal
Introduction Antenna Installation and Removal Before installing the antenna, ensure that the match between your radio and antenna is correct. Your radio’s model number is on a label attached to the back of your radio. A typical model number might be H09UCC9PW5AN. The fourth position of the model number (in this example “U”) identifies the operating-frequency band of the radio. - Page 12 Introduction Antenna Identification Table Antenna Type Approx. Length Insulator Frequency Antenna Color Code Range Kit No. VHF Wide Band 136-174MHz NAD6563 Helical VHF Helical YELLOW 136-151MHz NAD6566 BLACK 151-162MHz NAD6567 BLUE 162-174MHz NAD6568 UHF Helical 403-435˙MHz NAE6546 GREEN 435-470MHz NAE6547 BLACK 470-512MHz NAE6548...
-
Page 13: Battery Installation And Removal
Introduction Battery Installation and Removal WARNING To avoid a possible explosion: DO NOT replace the battery in an area labeled “hazardous atmosphere.” DO NOT discard batteries in a fire. CAUTION If your radio is programmed with volatile-key retention (consult your service technician), encryption keys will be retained for approximately 30 seconds after battery removal. -
Page 14: Belt-Clip Installation And Removal
Introduction Belt-Clip Installation and Removal The battery must be removed from the radio before the belt clip Note can be installed or removed. Installing the Belt Clip Slide Assembly Hold the battery in one hand so that the top of the battery faces upward, and the back of the battery faces you. -
Page 15: Universal Connector Cover Installation And Removal
Introduction Universal Connector Cover Installation and Removal CAUTION When the universal connector is not in use, keep it covered with the universal connector cover. Installing the Universal Connector Cover 1. Looking at the antenna side of the radio, insert the top (flat) hooked end of the Slot Hooked End cover into the slot on the top of the... - Page 16 Introduction Notes...
-
Page 17: General Radio Operation
General Radio Operation After a fully-charged battery and an antenna have been connected to the radio, operation may begin. If necessary, refer to page 2 to insure a complete understanding of the radio’s controls and indicators. Also, for your convenience, the “Additional Information” section (starting on page 67) contains a glossary, alert tone and status indicator tables, helpful tips, and an index. -
Page 18: Selecting A Zone And Channel
General Radio Operation Selecting a Zone and Channel A zone is a grouping of channels. A channel is a group of radio characteristics such as transmit/receive frequency pairs. After you turn your radio on, select the desired zone and channel. •... -
Page 19: Channel Selection
General Radio Operation > 4a. Press until the desired zone 4b. Enter the number of the name appears on the display. desired zone. F F F F I I I I R R R R E E E E D D D D I I I I S S S S P P P P N N N N W W W W If the selected zone is unprogrammed, the display will show Note “... - Page 20 General Radio Operation Method 2 Channel Selection — used when a softkey is programmed for channel selection. > Press until the C C C C H H H H A A A A N N N N softkey appears F F F F I I I I R R R R E E E E D D D D I I I I S S S S P P P P N N N N W W W W on the display.
- Page 21 General Radio Operation > 4a. Press until the desired 4b. Enter the number of the channel name appears on the desired channel. display. F F F F I I I I R R R R E E E E R R R R E E E E S S S S C C C C U U U U E E E E 1 1 1 1 If the selected channel is unprogrammed, the display will show Note “...
-
Page 22: Receiving/Transmitting
General Radio Operation Receiving/Transmitting After you have turned your radio on and selected the desired zone and channel, you can receive (listen to) or transmit (send) communications as follows: 1a. Listen until 1b. Press the Volume Set 1c. Press the Monitor you hear a Button (if programmed, Button (if programmed,... -
Page 23: Using Lists
General Radio Operation Using Lists The “list” feature on your radio allows you to store commonly used numbers with an identifiable name. For example, the telephone feature has an associated list of names and telephone numbers. The following general operations are available using lists: •... - Page 24 General Radio Operation Press directly below the list you wish to view. For example, to view the list of telephone F F F F I I I I R R R R E E E E R R R R E E E E S S S S C C C C U U U U E E E E 1 1 1 1 numbers stored in your radio, press directly below...
- Page 25 General Radio Operation Press directly below P P P P R R R R O O O O G G G G F F F F I I I I R R R R E E E E R R R R E E E E S S S S C C C C U U U U E E E E 1 1 1 1 V V V V I I I I E E E E W W W W P P P P R R R R O O O O G G G G P P P P W W W W R R R R...
- Page 26 General Radio Operation To select a specific member from the list: 6a. Scroll through the list by pressing 6b. Go directly to a specific < > until you locate the member in the list by member’s number you wish to entering the number (1-19) change.
- Page 27 General Radio Operation When the maximum number of digits has been entered, the cursor will disappear: 16 numbers maximum for a telephone number or 8 numbers maximum for an ID number. If you try to add any more digits, you will hear an invalid tone. Notes <...
- Page 28 General Radio Operation • Selecting From a List > Press until the feature you desire appears as a softkey on the display. F F F F I I I I R R R R E E E E R R R R E E E E S S S S C C C C U U U U E E E E 1 1 1 1 For example, to select from the telephone list P P P P H H H H O O O O N N N N >...
- Page 29 General Radio Operation 4c. Go directly to a specific 4b. Scroll through the preprogrammed < > member in the list by list by pressing until you entering the number locate the desired member’s name/ (1–19) that corresponds number. to that member’s <...
- Page 30 General Radio Operation Note • Pressing twice, or directly below L L L L N N N N U U U U M M M M softkey, will take you to the Last telephone NUMber dialed or the F F F F I I I I R R R R E E E E R R R R E E E E S S S S C C C C U U U U E E E E 1 1 1 1 Last ID NUMber transmitted/received.
-
Page 31: General Radio Features
General Radio Operation General Radio Features • Radio Lock (Non-Secure Radios) The radio-lock feature enables you to select a unique numeric password. If the feature is enabled (programmable through R R R R A A A A D D D D I I I I O O O O L L L L O O O O C C C C K K K K E E E E D D D D the radio service software), you will see “... - Page 32 General Radio Operation • Radio Lock (Secure Radios Only) By definition, this feature changes your radio to a more robust security system, which protects the use of the secure encryption keys. If this feature is enabled (programmable through the radio service software), you will see “...
- Page 33 General Radio Operation 4b. If the password is 4a. If the password is incorrect, the radio correct, the radio will remain locked. will unlock. D D D D E E E E A A A A D D D D L L L L O O O O C C C C K K K K E E E E D D D D After you enter three incorrect passwords, the radio will display...
- Page 34 General Radio Operation The display will then show “ C C C C O O O O N N N N F F F F I I I I R R R R M M M M .” Re-enter the new password and press directly below S S S S E E E E L L L L 9b.
-
Page 35: Muting The Keypad Tones
General Radio Operation • Muting the Keypad Tones The radio’s keypad tones, normally heard each time a keypad key is pressed, can be turned off (muted) or on (unmuted) at your discretion. Muting Keypad Tones Using the Keypad-Mute Switch: The Keypad-Mute Switch is programmable Note through radio service software. - Page 36 General Radio Operation • Time-Out Timer The new ASTRO portable radio is equipped with a programmable time-out timer which, upon expiration, will turn off the transmitter. This timer is programmable through radio service software and can be set from 0 seconds (off) to 7.75 minutes (465 seconds), at 15 second increments.
-
Page 37: Common Radio Features
Common Radio Features Data Calls (Status Calls or Message Calls) This feature allows you to send data calls (status calls or message calls) from your radio to the dispatcher to indicate a predefined condition. Each defined status or message can have a 12-character alias. You can have the following maximum number of predefined conditions: 16 message conditions;... - Page 38 Common Radio Features The last acknowledged status call or the first message in the message list will be displayed. If no status has been acknowledged, the first status in the status Note list will be displayed. 4b. Go directly to a specific 4a.
-
Page 39: Emergency
Common Radio Features Emergency For radios programmed with the emergency feature, pressing the Emergency Button (if programmed, see page 2) will send out an emergency signal that takes precedence over any other signalling activity in progress on the selected channel. There are two types of emergency signals: •... - Page 40 Common Radio Features 3a. Emergency Alarm 3b. Silent-Emergency Alarm 3c. Emergency Call During a non-silent During a silent- Press the PTT emergency alarm emergency state: Switch. state: • the LED will not • the LED will light, light, • tones will not be •...
- Page 41 Common Radio Features • Exiting the Emergency State It is important that you exit the emergency state when you have finished. There are four ways to exit the emergency state: Press the Emergency Button for approximately 1 second (this time is programmable through radio service software);...
-
Page 42: Individual Calls
Common Radio Features Individual Calls Individual calls are defined as follows: • Telephone Calls — similar to standard telephone calls, except you use your radio. These calls can be landline caller to radio, radio to landline caller, or landline caller to radio talkgroup. •... - Page 43 Common Radio Features • Selecting the Feature On conventional channels, you must monitor the channel for Note activity before making an individual call (see page 16 for details). > 1a. Press until one of the following 1b. If your radio has been softkeys appear on the display: programmed for “quick- access”...
- Page 44 Common Radio Features • Using the Feature Telephone Calls Only — Your radio may be programmed to automatically access the telephone system (immediate access/auto access) or wait for you to do something (manual access/delayed access); consult your service technician to determine which way your radio was programmed. •...
- Page 45 After reaching the number you are calling, you may need to dial an extension number before you can reach your party. • Motorola trunked radios generate a high-pitched tone when the radio’s PTT Switch is released. This is heard by the landline party and is an indicator to begin talking.
- Page 46 Common Radio Features • Calling the Last Number Dialed or Last ID Number Transmitted/Received For Telephone Calls Only — Press the PTT Switch. You will either hear ringing or a busy tone. On a trunking system, if you hear a busy tone, press the PTT Switch to try again.
- Page 47 Common Radio Features • Calling a New Number (if enabled through radio service software) Enter a new phone number or ID number using any of the numeric (0–9) keys; then press the PTT Switch (see following note). This action does not “program” a new number in your radio’s memory list; this is a temporary number only.
-
Page 48: Call Alert Page
Common Radio Features • Answering an Individual Call When an individual call is being received, you will hear and/or see: • a telephone-type ringing if it is a telephone call; • two alert tones if it is a Private-Conversation call or selective call; •... -
Page 49: Pl Defeat
Common Radio Features Converse in the normal manner. Press the PTT Switch to talk; release the PTT Switch to listen. Talk = Press & Hold PTT Switch Listen = Release PTT Switch When you have finished your conversation, “hang up” (disconnect) by pressing . -
Page 50: Repeater/Direct
Common Radio Features Repeater/Direct The repeater/direct feature allows you to bypass the repeater and talk directly to another radio. This is known as DIRECT operation or talkaround operation. The transmit frequency is the same as the receive frequency. In REPEATER operation, you talk through the repeater, which increases the radio’s operating range. -
Page 51: Scan
Common Radio Features Scan F F F F I I I I R R R R E E E E D D D D I I I I S S S S P P P P N N N N W W W W = Scan Feature Active C C C C A A A A L L L L L L L L P P P P H H H H O O O O N N N N... -
Page 52: Turning Scan On And Off
Common Radio Features • Turning Scan On and Off > 1a. Press until appears on the S S S S C C C C A A A A N N N N 1b. Place the Scan On/Off Switch display. (if programmed, see page 2) in the “scan on”... -
Page 53: Viewing A Scan List
Common Radio Features • Deleting Nuisance Channels When the radio scans to a channel that you do not wish to hear (nuisance channel), you can temporarily delete the channel from the scan list. When the radio is locked onto the channel to be deleted, press the Nuisance-Delete Button (if programmed, see page 2). -
Page 54: Programming A Scan List
Common Radio Features • Programming a Scan List Priority channels and the selected channel cannot be deleted Notes using the nuisance-delete feature. > Press until the P P P P R R R R O O O O G G G G softkey appears on the display. - Page 55 Common Radio Features The display will show the first member in the list. The status indicator will appear (flashing), indicating you are in the programming mode. F F F F I I I I R R R R E E E E D D D D I I I I S S S S P P P P N N N N W W W W Flashing = Programming Mode S S S S E E E E L L L L D D D D E E E E L L L L 6a.
- Page 56 Common Radio Features < > 7a. Use 7b. Use the keypad to 7c. Rotate the 16- select additional go directly to a Position Select channels to be channel number to Knob to select added or deleted be added or additional from the scan list.
-
Page 57: Selecting Squelch Operation
Common Radio Features Selecting Squelch Operation Tone Private-Line® (PL), Digital Private-Line™ (DPL), network ID, and carrier squelch operations are all available in the same radio on a per channel basis. Network ID is only available on ASTRO “digital” channels Note (consult your service technician). -
Page 58: Smart Ptt
Common Radio Features Smart PTT Smart PTT is a per-channel, programmable feature used in conventional radio systems to keep radio users from talking over other radio conversations. When smart PTT is enabled in your radio, you will not be able to transmit on an active channel. -
Page 59: Special Radio Features
Special Radio Features Special Radio Features Dynamic Regrouping The dynamic regrouping feature allows the dispatcher to temporarily reassign selected radios to a single special channel so that they can communicate with each other. This feature, enabled in each radio by means of the radio service software, is typically used during special operations. -
Page 60: Reprogram Request
Special Radio Features Talk and listen as usual. 3a. For Radios Using Only Softkeys for 3b. For Radios Using Knobs or Switches for Zone and/or Zone and Channel Selection — Channel Selection— When the dynamic regrouping is When the dynamic regrouping cancelled by the dispatcher, the is cancelled by the dispatcher, radio will automatically return to... - Page 61 Special Radio Features • Select Enable/Disable The dispatcher may classify regrouped radios into either of two categories: select enabled or select disabled. • Select-enabled radios are free to make channel changes to any available channel, including the dynamic-regrouping channel. • Select-disabled radios cannot change channels since the dispatcher has specifically chosen to force the radio to remain on the dynamic- regrouping channel.
-
Page 62: Ptt-Id Receive
Special Radio Features PTT-ID Receive The PTT-ID receive feature allows you to see the radio ID number of the radio you are currently receiving. This ID can be a maximum of eight characters and can be viewed by both the receiving radio and the dispatcher. On trunking <... -
Page 63: Secure Operation
Secure operation provides the highest level of commercially Note available voice security on trunked or conventional channels. Unlike other forms of security, Motorola digital encryption provides signalling that makes it virtually impossible for others to decode any part of an encrypted message. -
Page 64: Managing Encryption
Special Radio Features • Managing Encryption KEY Loading Refer to the key-variable loader (KVL) manual for equipment connections and setup. When the KVL is attached to your radio, the display will show “ K K K K E E E E Y Y Y Y L L L L O O O O A A A A D D D D I I I I N N N N G G G G ,”... - Page 65 Special Radio Features KEY Erasure (All KEYS Erased) — Method 2 With the radio on, press and hold the Top Side Button; while holding this button down, press the Emergency Button. DO NOT press the Emergency Button before pressing the Top Note Side Button unless you are in an emergency situation;...
-
Page 66: Softkey
Special Radio Features < > 4a. Press to scroll through 4b. Enter the number of the the encryption keys. desired index. If an erased key is selected, the key name will be alternated with Note “ E E E E R R R R A A A A S S S S E E E E D D D D K K K K E E E E Y Y Y Y .”... - Page 67 Special Radio Features 4a. Press directly below the 4b. Enter the number of the desired index. desired index. To save the newly selected index, press below S S S S E E E E L L L L . The radio will then exit index selection and return to the home display.
-
Page 68: Selectable Power-Level
Special Radio Features Selectable Power-Level This feature allows you to select the power level at which your radio will transmit messages. The radio will always turn on to the default setting as determined Note through radio service software. > 1a. Press until the P P P P W W W W R R R R softkey... -
Page 69: Trunking System Controls
Special Radio Features Trunking System Controls • Busy Override When a talkgroup call is placed in a SmartZone™ system and the system is not able to obtain voice channels at all necessary sites, a busy tone will be generated. If so programmed in the zone manager and through the radio service software, you may override this busy by performing the following steps: Press the PTT Switch;... -
Page 70: Failsoft
Special Radio Features • Failsoft If a trunking system experiences a complete failure, the radio will revert to failsoft operation and automatically switch to its failsoft channel. During F F F F A A A A I I I I L L L L S S S S O O O O F F F F T T T T failsoft, the trunking repeaters will transmit a medium-pitched tone every 10 seconds. -
Page 71: Site Trunking
Special Radio Features • Site Trunking If the zone dispatcher loses communication with any site, that site will revert to what is known as “site trunking.” Your radio will alternately display “ S S S S I I I I T T T T E E E E T T T T R R R R U U U U N N N N K K K K N N N N G G G G ”... - Page 72 Special Radio Features Notes...
-
Page 73: Additional Information
Additional Information Glossary Acknowledgement of communication Channel A group of characteristics such as transmit/receive frequency pairs, radio parameters, and encryption encoding Control Channel In a trunking system, one of the channels that is used to provide a continuous, two-way/data communications path between the central controller and all radios on the system Conventional Typically refers to radio-to-radio communications,... - Page 74 Additional Information Push-To-Talk - the PTT switch engages the transmitter and puts the radio in transmit (send) operation when pressed Radio-To-Landline Communicating from a portable/mobile radio through the telephone system. Repeater A conventional radio feature, where you talk through a receive/transmit facility (repeater), that re-transmits received signals in order to improve communications range and coverage...
-
Page 75: Alert Tones
Additional Information Alert Tones Sound Tone Name Occurs: Invalid Key-Press when the wrong key is pressed Radio Self-Test when the radio fails its power-up self Fail test Short, when the radio fails to receive an Low-Pitched No ACK Received acknowledgement from the Tone dispatcher when an unauthorized request is... - Page 76 Additional Information Sound Tone Name Occurs: when volume changed on a quiet Volume Set channel Continuous, Medium-Pitched Emergency Exit upon exiting the emergency state Tone when data is sent by pressing the PTT PTT Sidetone switch, but the user must wait to talk Failsoft when system fails Automatic Call...
-
Page 77: Status Indicators
Additional Information Status Indicators Indicator Symbol Description Name Battery Status flashes when the battery is low Carrier indicates the radio is operating in Squelch the carrier-squelch mode appears when your radio is in Secure secure operation; on ( ) = secure; Operation off ( )= clear-operation... -
Page 78: Battery Charging And Disposal
(NiMH) rechargeable battery. Charge the battery before use to ensure optimum capacity and performance. The battery was designed specifically to be used with a Motorola charger. Charging in non-Motorola equipment may lead to battery damage and void the battery warranty. - Page 79 In addition, U.S. Environmental Protection Agency (EPA) regulations classify used Ni-Cd batteries as hazardous waste, unless certain exemptions apply. Motorola fully endorses and encourages the recycling of Ni-Cd batteries. If you are located in the United States or Canada, you can ship, post paid, your used Ni-Cd batteries to INMETCO, an EPA approved recycling facility, at the address listed below.
-
Page 80: Helpful Tips
3. Problem Not Solved If, after following steps 1 and 2, your radio still has a problem, review your service agreement and call the applicable Motorola service representative. If you do not have a service agreement on your radio, contact your nearest authorized Motorola service shop for guidance... -
Page 81: Radio Care
Additional Information Radio Care • Cleaning Clean external surfaces of your radio with the following solution: one teaspoon of mild dishwashing detergent to one gallon of water (0.5% solution). CAUTION Do not use solvents to clean your radio; spirits may be harmful and permanently damage the radio housing. -
Page 82: Air Bag Safety Information
Service Proper repair and maintenance procedures will assure efficient operation and long life for this product. A Motorola maintenance agreement will provide expert service to keep this and all other communication equipment in perfect operating condition. A nationwide service organization is provided by Motorola to support maintenance services. -
Page 83: Index
Index Index A A A A B B B B R R R R T T T T softkey ..........58 Alert Tones . - Page 84 Index H H H H I I I I G G G G H H H H softkey ..........62 Home Key .
- Page 85 Index “P” ............21 P P P P A A A A G G G G E E E E softkey .
- Page 86 Index Talkaround ..........44, 71 Telephone Call .
- Page 87 Notes...
- Page 88 Notes...
- Page 89 QUESTIONNAIRE We believe that reports from users provide valuable information for producing quality operating instructions. Your comments and answers to the following questions will aid us in preparing manuals that contain accurate and complete information of maximum benefit to you. In reference to Manual No.
- Page 90 NO POSTAGE NECESSARY IF MAILED IN THE UNITED STATES BUSINESS REPLY MAIL FIRST CLASS MAIL PERMIT NO 9040 FT. LAUDERDALE, FL POSTAGE WILL BE PAID BY ADDRESSEE Attention: Technical Communications 8000 W. Sunrise Boulevard Ft. Lauderdale, FL 33322...