Table of Contents
Advertisement
Advertisement
Table of Contents

Related Manuals for Remington 482


Summary of Contents for Remington 482
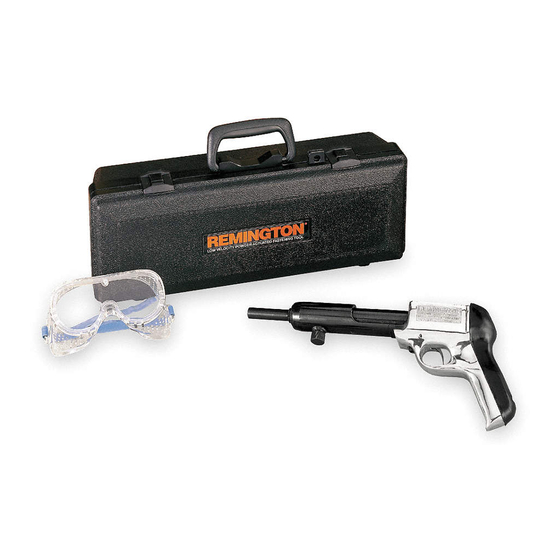
- Page 1 REMINGTON ® REMINGTON Model 482 Powder Actuated Fastening Tool Operating Instructions Important : Read this manual and all labels carefully before operating your powder actuated tool. This manual should always accompany the tool and be transferred with it upon change...
-
Page 2: Table Of Contents
REMINGTON Model 482 Powder Actuated Fastening Tools The Remington Model 482 Powder Actuated Fastening Tool is designed for use with Remington 22 caliber Type A crimped loads and Remington Power Fasten- ers. Remington Power Fasteners are manufactured from special steel and heat treated to produce a very hard yet ductile fastener. -
Page 3: Warning: Safety Precautions
Warning: Safety Precautions The following pages contain detailed warnings, cautions, and rules of safe operation. Read carefully and become familiar before operating to avoid serious injury. We expressly disclaim any liability for any injury to persons or damage to property which result from your failure to take the precautions contained in this manual. -
Page 4: Safety Precautions
Safety Precautions ATTENTION PISTOLETS DE SCELLEMENT EN USAGE 4. ALWAYS clear the work area on all sides and post appropriate warning signs on job sites. 5. ALWAYS make sure the work area is clean from loose material and debris. HANDLING THE TOOL 1. - Page 5 Safety Precautions 3. ALWAYS store UNLOADED powder actuated tool and power loads in a locked container. Keep power loads of different power levels in separate containers. 4. NEVER carry or pass a loaded powder actuated tool. NEVER point a powder actuated tool at anyone.
- Page 6 NEVER drink alcoholic beverages or take medications which impair your vision, balance or judgement before using a powder actuated tool. KNOW YOUR FASTENING BASE MATERIAL Sinks in with average hammer blow CENTER TOO SOFT PUNCH TEST 482-28 482-27 Start Point Surface flattens shatters GRAY BROWN TOO HARD TOO BRITTLE...
- Page 7 TILE CAST IRON GLASS 482-33 2. NEVER attempt to drive power fasteners into very hard or brittle materials including, but not limited to cast iron, glass, tile, stone, brick, or hardened steel. Materials of this type tend to shatter and create hazard from flying particles.
- Page 8 3" 3" 3" 3" 482-38 482-39 6. DO NOT drive power fasteners into concrete less than three times as thick as the intended fastener penetration, within 3" of the edge, within 3" of another power fastener or within 3" of a failed power fastener.
- Page 9 Safety Precautions WATER 482-45 2. Should the tool fail to fire, hold the muzzle firmly against the work surface for 30 seconds. Release the trigger and remove pressure on the tool while holding the muzzle against the work surface. Again press the tool firmly against the work surface and pull the trigger.
- Page 10 482-53 482-31 2. Remington power loads are available in four power levels with gray (1) being the lowest power level and yellow (4) being the highest power level. Always start with the lowest power level (gray-level 1) and increase until a proper fastening is made (see page 13 Selecting Fasteners and Loads).
- Page 11 Shank Plastic Flute 482-60 7. NEVER use common nails or other materials as fasteners. Remington Power Fasteners are manufactured from special steel and heat treated to produce a very hard yet ductile fastener. 8. NEVER pry a power load out of the tool. Prying can discharge the load causing serious injury (see Troubleshooting Guide , page 16).
-
Page 12: Why A Fastener Holds
The fastener displaces the concrete which tries to return to its original form causing a squeezing effect. 482-63 Maximum holding power is achieved when the depth of pen- etration produces a bond on the power fastener equal to the strength of the concrete. - Page 13 The concrete must be three times as thick as the intended fastener penetration. In most cases, penetration should be 482-85 Wood or Non-Metals approximately 1" to 1 " into the base concrete material.
-
Page 14: Operation
482-72 damage to tool 482-71 (see page 13). 3. Select the proper Remington Power Load and insert into the chamber until it stops (see Application Chart on page 23). 482-73 4. Push barrel into housing to the closed position. 106088... -
Page 15: Operation
Operation 90˚ 482-74 482-75 5. Place the muzzle of tool perpendicular to work surface without tilting the tool. Push tool against work surface until sliding action of barrel stops. 482-76 6. Squeeze trigger to set power fastener. Be sure to keep pressure on tool during this operation. -
Page 16: Maintenance
Maintenance IMPORTANT: Clean your tool after each day’s use. The parts shown in the illustration below should be cleaned daily. Clean metal parts with accessory wire brushes. Apply penetrating lubricant sparingly and wipe dry. Receiver Barrel Muzzle Cap Tang Tang Spring Buffer Tang Cap Piston... -
Page 17: Troubleshooting
Troubleshooting Guide (cont.) PROBLEM POSSIBLE CAUSE REMEDY Tool does not Misassembled or damaged Remove breech and check all completely depress. breech and firing pin parts. parts for correct fit assembly. Tool does not fire. Failure of tool to depress com- See data listed under Tool Does Not Completely Depress, pletely. -
Page 18: Parts List
Parts List – Model 482 PART DESCRIPTION 078613 Piston & Ring Assembly 058971 Piston Ring 076998 Barrel 056216 Ejector Spring 075373 Ejector 075369 Breech 056215 Breech Spring 076690 Receiver Assembly TA4083 Buffer (5 Pack) 078506 Handle Housing Assembly 10.1 045918 10.2 056209... -
Page 19: Accessories
Remove set screw (18) from breech. Turn and align firing pin sear (19) with sear access hole. Re- 482-93 move sear and sear spring (20) from c.) Insert a rod or screwdriver into bar- breech Slide barrel and breech from rel chamber (6) and push piston (7) receiver. - Page 20 Retaining Slot Replace set screw (18). CHECK FOR ANY DAMAGED PARTS. CLEAN BEFORE REASSEMBLING. 482-90 ASSEMBLY 4. With barrel (6) touching breech, insert 1. a.) Push piston (7) all the way into the tang (3) and tang spring (2) into hole in barrel (6).
-
Page 21: Buffer And Piston Replacement
1. Push new piston (7) all the way into the barrel (6). 2. Remove muzzle cap (5) from barrel (6) by unscrewing counterclockwise. 482-88 2. Place new buffer (8), small end first, in new muzzle cap (5) and screw muzzle 482-93 cap into barrel 3. -
Page 22: Application Chart
Application Chart - Model 482 Power load and power fastener application information. POWER POWER FASTENER LOAD FOR FASTENING THIS LENGTH COLOR TO THIS Green Concrete " Two by fours Green Cement block " Yellow Steel (3/16" to 3/8" thick) 2"... -
Page 23: Remington
• If power fastener goes below the top surface of the board, use penetrating control disc (* see illustration below). • Always wear approved goggles and ear protection. * Use power fastener with penetration control disc, part number 015549. 482-90 Load Color Code Stock... - Page 24 Limited Warranty Agreement DESA warrants the Remington Model 482 Powder Actuated Fastening Tool against defects in materials and workmanship for a period of one (1) year from the date of purchase. If within one (1) year from the purchase date this Powder Actuated Tool fails due to a defect in material or workmanship, DESA will repair or replace the tool at DESA’s...