
Related Manuals for Pioneer DEH-P6900IB


Summary of Contents for Pioneer DEH-P6900IB
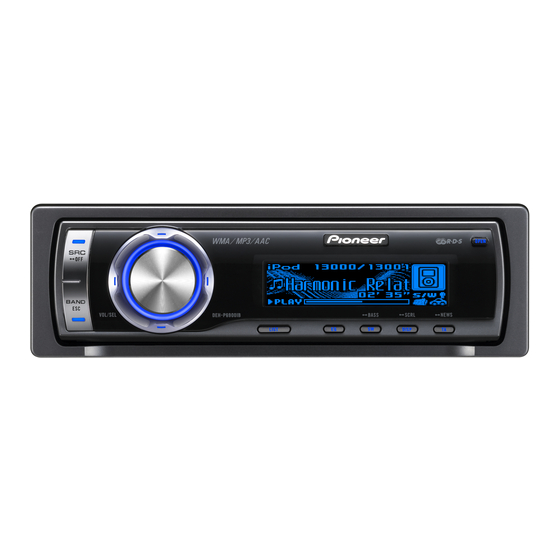
- Page 1 Operation Manual Manual de instrucciones CD RDS Receiver Reproductor de CD con receptor RDS DEH-P6900IB...
-
Page 2: Table Of Contents
Contents Thank you for buying this Pioneer product. Please read through these operating instructions so you will know how to operate your model properly. After you have finished reading the instructions, keep this man- ual in a safe place for future reference. - Page 3 Contents – Setting the clock 29 – Introduction of advanced – Turning the off clock display on or operations 38 – Connecting a Bluetooth audio off 30 – Setting the FM tuning step 30 player 38 – Switching Auto PI Seek 30 –...
- Page 4 Contents – Displaying BD (Bluetooth Device) address 48 – Displaying system version for repair 48 Multi-CD Player 48 – Basic Operations 48 – Selecting a track directly 49 – Introduction of advanced operations 49 – Using ITS playlists 50 – Using disc title functions 51 –...
-
Page 5: Before You Start
Before You Start cess to the inside of the product. Refer all ser- vicing to qualified personnel. ! The Pioneer CarStereo-Pass is for use only in Germany. ! Keep this manual handy as a reference for op- If you want to dispose this product, do not mix erating procedures and precautions. -
Page 6: Visit Our Website
For de- ! We offer the latest information about tails, please visit Pioneer Corporation on our website. http://www.mp3licensing.com. About AAC In case of trouble AAC is short for Advanced Audio Coding and... -
Page 7: Attaching The Front Panel
Section Before You Start Grip the left side of the front panel and reverse, and then continue reversing every 10 pull it gently outward. seconds. Pressing BAND when power to this Take care not to grip it too tightly or to drop unit is turned off while the ignition switch is the front panel and protect it from contact set to ACC or ON cancels the reverse mode. -
Page 8: Using The Remote Control
Section Before You Start ! Danger of explosion if battery is incorrectly re- placed. Replace only with the same or equiva- lent type. ! Do not handle the battery with metallic tools. ! Do not store the battery with metallic materi- als. -
Page 9: Operating This Unit
Section Operating this unit a a a 9 9 9 b b b 1 1 1 3 3 3 2 2 2 j j j 1 1 1 1 1 c c c i i i h h h h h g g g 5 5 5 d d d... -
Page 10: Basic Operations
Section Operating this unit e CLEAR button Basic Operations Press to cancel the input number when 0 to Power ON/OFF 9 are used. Turning the unit on f 0 to 9 buttons % Press SOURCE to turn the unit on. Press to directly select the desired track, preset tuning or disc. -
Page 11: Adjusting The Volume
Section Operating this unit ! External unit refers to a Pioneer product (such Tuner as one available in the future) that, although Basic Operations incompatible as a source, enables control of basic functions by this unit. Two external units This unit’s AF (alternative frequencies search) can be controlled by this unit. -
Page 12: Storing And Recalling Broadcast Frequencies
Section Operating this unit Non-RDS or MW/LW Storing and recalling broadcast frequencies 1 1 1 1 2 2 2 2 3 3 3 4 4 4 4 5 5 5 5 You can easily store up to six broadcast fre- quencies for later recall. -
Page 13: Introduction Of Advanced Operations
Section Operating this unit Introduction of advanced Use MULTI-CONTROL to select BSM in the function menu. operations Press MULTI-CONTROL to turn BSM on. Press MULTI-CONTROL to display the main menu. Six strongest broadcast frequencies will be stored in the order of their signal strength. FUNCTION, AUDIO and ENTERTAINMENT # To cancel the storage process, press appear on the display. -
Page 14: Receiving Traffic Announcements
Section Operating this unit Press MULTI-CONTROL to turn AF on. Notes # To turn AF off, press MULTI-CONTROL again. ! Regional programming and regional networks are organized differently depending on the Notes country (i.e., they may change according to ! Only RDS stations are tuned in during seek the hour, state or broadcast area). -
Page 15: Using Pty Functions
Section Operating this unit Using news program interruption Notes When a news program is broadcast from a ! You can also turn the TA function on or off in PTY code news station, the unit can switch the menu that appears by using from any station to the news broadcast sta- MULTI-CONTROL. -
Page 16: Pty List
Section Operating this unit Press DISPLAY and hold to display radio PTY list text. Radio text for the currently broadcasting sta- General Specific Type of program tion is displayed. News&Inf News News # You can cancel radio text display by pressing Affairs Current affairs DISPLAY or BAND. -
Page 17: Built-In Cd Player
Section Operating this unit Built-in CD Player Others Educate Educational programs Drama Radio plays and serials Basic Operations Culture National or regional cul- The built-in CD player can play back audio CD ture (CD-DA) and compressed audio (WMA/MP3/ AAC/WAV) recorded on CD-ROM. (Refer to Science Nature, science and tech- nology... -
Page 18: Selecting A Track Directly
Section Operating this unit Disc loading slot Notes ! There is sometimes a delay between starting up disc playback and the sound being issued. When being read, Format read is displayed. ! If an error message such as ERROR-11 is dis- played, refer to Understanding error messages on page 56. -
Page 19: Introduction Of Advanced Operations
Section Operating this unit # After entering the number input mode, if you Use MULTI-CONTROL to select do not perform an operation within about eight Play mode in the function menu. seconds, the mode is automatically canceled. Press MULTI-CONTROL to select the re- peat range. -
Page 20: Pausing Disc Playback
Section Operating this unit Press MULTI-CONTROL to turn scan play Press MULTI-CONTROL to select Rough search. ! FF/REV – Fast forward and reverse The first 10 seconds of each track is played. ! Rough search – Searching every 10 tracks When you find the desired track press # To select FF/REV, press MULTI-CONTROL MULTI-CONTROL to turn scan play off. -
Page 21: Displaying Text Information On Disc
Section Operating this unit Push MULTI-CONTROL left or right to For WAV discs move the cursor to the previous or next Play time— : folder name and : file name character position. Notes Move the cursor to the last position by ! You can scroll to the left of the title by pressing pushing MULTI-CONTROL right after enter- and holding DISPLAY. -
Page 22: Selecting Tracks From The File Name List
2-digit of the folder/file number is displayed. While the iPod is connected to this unit, # Number of the folders/files in the currently se- PIONEER (or (check mark)) is displayed on lected folder will be indicated on the right side of the iPod. -
Page 23: Browsing For A Song
Section Operating this unit ! When the ignition switch is set to ACC or ON, Displaying text information on the iPod’s battery is charged while the iPod is iPod connected to this unit. % Press DISPLAY to select the desired text ! While the iPod is connected to this unit, the information. -
Page 24: Repeating Play
Section Operating this unit Repeating play Note For playback of the songs on the iPod, there You can also turn shuffle all on in the menu that are two repeat play ranges: Repeat One (re- appears by using MULTI-CONTROL. peat one song) and Repeat All (repeat all songs in the list). -
Page 25: Audio Adjustments
Section Operating this unit Audio Adjustments Using balance adjustment You can change the fader/balance setting so Introduction of audio adjustments that it can provide you an ideal listening envir- onment in all occupied seats. Use MULTI-CONTROL to select Fader. # If the balance setting has been previously ad- justed, Balance will be displayed. - Page 26 Section Operating this unit +6 to –4 (or –6) is displayed as the equalizer Custom 1 Custom 1 curve is increased or decreased. Custom 2 Custom 2 # The actual range of the adjustments are differ- ent depending on which equalizer curve is se- Flat Flat lected.
-
Page 27: Adjusting Loudness
Section Operating this unit +6 to –6 is displayed as the level is increased Push MULTI-CONTROL right to select normal or decreased. phase and Normal appears in the display. # You can then select another band and adjust the level. Adjusting subwoofer settings When the subwoofer output is on, you can ad- Press BAND to cancel the 7-band gra-... -
Page 28: Using The High Pass Filter
Section Operating this unit Push MULTI-CONTROL up or down to Use MULTI-CONTROL to select SLA. select a desired level. Push MULTI-CONTROL up or down to 0 to +6 is displayed as the level is increased or adjust the source volume. decreased. -
Page 29: Initial Settings
Section Operating this unit # BT AUDIO and Pin code input can be se- Initial Settings lected only when Bluetooth adapter (e.g., CD- Adjusting initial settings BTB100) is connected to this unit. # To cancel initial settings, press BAND. Using the initial settings, you can customize various system settings to achieve optimal per- formance from this unit. -
Page 30: Turning The Off Clock Display On Or Off
Section Operating this unit Turning the off clock display on Switching the warning tone or off If the front panel is not detached from the head unit within four seconds of turning off If the off clock display is turned on, when the the ignition, a warning tone will sound. -
Page 31: Setting The Rear Output And Subwoofer Controller
Section Operating this unit ! Both rear speaker leads outputs and RCA rear Use MULTI-CONTROL to select Brightness. output are switched simultaneously in this setting. Push MULTI-CONTROL left or right to adjust the brightness level. Switching the sound muting/ 0 to 15 is displayed as the level is increased or attenuation decreased. -
Page 32: Switching The Reverse Mode
Section Operating this unit Switching the reverse mode Press MULTI-CONTROL to turn the BT Audio source on. If you do not perform an operation within # To turn the BT Audio source off, press about 30 seconds, screen indications start to MULTI-CONTROL again. -
Page 33: Other Functions
Section Operating this unit Other Functions Selecting AUX as the source % Press SOURCE to select AUX as the Using the AUX source source. This unit can control up to two auxiliary equip- # If the auxiliary setting is not turned on, AUX ments such as VCR or portable devices (sold cannot be selected. -
Page 34: Using The Pgm Button
Section Operating this unit BGV-1 (background visual 1)—BGV-2 (back- ground visual 2)—BGP-1 (background picture 1)—BGP-2 (background picture 2)—BGP-3 (background picture 3)—BGP-4 (background picture 4)—SIMPLE-1 (simple display 1)— SIMPLE-2 (simple display 2)—LEVEL METER (level meter)—VISUALIZER1 (visualizer 1)— VISUALIZER2 (visualizer 2)—VISUALIZER3 (vi- sualizer 3)—SPECTRUM ANALYZER 1 (spec- trum analyzer 1)—SPECTRUM ANALYZER 2 (spectrum analyzer 2)—MOVIE (movie)—... -
Page 35: Available Accessories
Section Available accessories Playing songs on USB portable To skip back or forward to another compressed audio file, push audio player/USB memory MULTI-CONTROL left or right. Basic Operations You can use this unit to control a USB adapter, Selecting an audio file directly which is sold separately. -
Page 36: Displaying Text Information Of An Audio File
Section Available accessories Selecting files from the file Function name Operation name list Refer to Selecting a repeat play range on page 19. The operation is the same as that of the built- But the repeat play ranges you can in CD player. -
Page 37: Bluetooth Audio
Section Available accessories Bluetooth Audio tooth audio player operations with this unit which slightly differes or is cut short from that Basic Operations described in the Bluetooth adapter’s operation manual. If you connect Bluetooth adapter (e.g. CD- ! Even though your audio player does not BTB100) to this unit, you can control Bluetooth contain a Bluetooth module, you can still audio player via Bluetooth wireless technology. -
Page 38: Introduction Of Advanced Operations
Section Available accessories Introduction of advanced Press MULTI-CONTROL to open the con- nection. operations Always Waiting is displayed. This unit is now Press MULTI-CONTROL to display the on standby for connection from Bluetooth main menu. audio player. FUNCTION, AUDIO and ENTERTAINMENT If your Bluetooth audio player is set ready for appear on the display. -
Page 39: Disconnecting A Bluetooth Audio Player
Device info. in the function menu. you are driving. When you need to use these The device name (Pioneer BT Unit) of this advanced operations, stop your vehicle in a unit appears in the display. -
Page 40: Setting Up For Hands-Free Phoning
Section Available accessories # Your phone should now be temporarily con- Shows the battery strength of cellular phone. ! Battery strength indicator may differ nected; however, to make best use of the technol- from the actual battery strength. ogy, we recommend you register the phone to ! If the battery strength is not available, this unit. -
Page 41: Taking A Phone Call
Section Available accessories Taking a phone call Introduction of advanced operations Answering an incoming call Press MULTI-CONTROL to display the When a call comes in, push main menu. MULTI-CONTROL up. FUNCTION, AUDIO and ENTERTAINMENT # If the private mode is selected on the cellular appear on the display. -
Page 42: Connecting A Cellular Phone
(automatic reject complete the connection, please check the de- setting)—Auto answer (automatic answer vice name (Pioneer BT Unit) and enter the setting)—Ring tone (ring tone select)— link code on your cellular phone. If the con- Auto connect (automatic connection setting) nection is established, Connected is dis- —Echo cancel (echo cancel)—Device info. -
Page 43: Registering Connected Cellular Phone
Section Available accessories Registering connected cellular Press MULTI-CONTROL to delete the phone. phone After the phone is deleted, Deleted is dis- Use MULTI-CONTROL to select played. Set phone in the function menu. Push MULTI-CONTROL up or down to Connecting to a registered select a registration assignment. - Page 44 Section Available accessories Use MULTI-CONTROL to select Press MULTI-CONTROL to display en- PH.B.Transfer in the function menu. tries. The display shows the first three Phone Book Press MULTI-CONTROL to enter in the entries starting with that letter (e.g. “Ben”, phone book transfer standby mode. “Brian”...
- Page 45 Section Available accessories Turn MULTI-CONTROL to switch to the Alphabet (upper case), numbers and symbols —alphabet (lower case)—numbers and sym- number input screen. bols—European characters, such as those Edit name (name input screen)— with accents (e.g., á, à, ä, ç) or Russian char- Edit number (number input screen)—...
-
Page 46: Using The Call History
Section Available accessories # If you do not operate anything within about 30 Press MULTI-CONTROL to delete the Phone Book entry. seconds, the list display is canceled automati- Cleared is displayed. cally. The Phone Book entry is deleted. The display Press MULTI-CONTROL to make a call. -
Page 47: Clearing Memory
Section Available accessories Use MULTI-CONTROL to select Push MULTI-CONTROL right to deter- Number dial in the function menu. mine the item that you want to delete # You can also enter in this menu from the from this unit. Clear memory YES is displayed. Clearing standby display by pressing DIRECT on the re- memory is now on standby. -
Page 48: Echo Canceling And Noise Reduction
Use MULTI-CONTROL to select Device info. in the function menu. 1 1 1 2 2 2 The device name (Pioneer BT Unit) of this unit appears in the display. Push MULTI-CONTROL left to switch to the BD address. 12-digit hexadecimal string is displayed. -
Page 49: Selecting A Track Directly
Section Available accessories # If you do not operate functions except for Notes ITS memo and TitleInput "A" within about 30 ! When the multi-CD player performs the pre- seconds, the display is automatically returned to paratory operations, Ready is displayed. the ordinary display. -
Page 50: Using Its Playlists
Section Available accessories Press BAND to return to the playback Notes display. ! If you select other discs during repeat play, the repeat play range changes to Note M-CD repeat. After data for 100 discs has been stored in mem- ! If you perform track search or fast forward/re- ory, data for a new disc will overwrite the oldest verse during Track repeat, the repeat play... -
Page 51: Using Disc Title Functions
Section Available accessories Use MULTI-CONTROL to select CD player. Each title can be up to 10 charac- ITS memo in the function menu. ters long. For details concerning operation, refer to En- Select the desired track by pushing tering disc titles on page 20. MULTI-CONTROL left or right. -
Page 52: Dvd Player
Section Available accessories DVD Player The operation is the same as that of the built- in CD player. Basic Operations Refer to Displaying text information on disc on page 21. You can use this unit to control a DVD player or multi-DVD player, which is sold separately. -
Page 53: Selecting A Disc
Section Available accessories # You can also select the function by pressing Selecting a disc FUNCTION on the remote control. ! You can operate this function only when a # To return to the playback display, press BAND. multi-DVD player is connected to this unit. % Press any of 1 to 6 on the remote con- Function and operation trol to select the desired disc. -
Page 54: Tv Tuner
Section Available accessories TV tuner Notes ! If you select other discs during repeat play, Basic Operations the repeat play range changes to Disc repeat. You can use this unit to control a TV tuner, ! During video CD or CD playback, if you per- which is sold separately. -
Page 55: Storing And Recalling Broadcast Stations
Section Available accessories Storing and recalling broadcast Storing the strongest broadcast stations stations sequentially You can easily store up to 12 broadcast sta- Press MULTI-CONTROL to display the tions for later recall. main menu. ! Up to 24 stations, 12 for each of two TV FUNCTION, AUDIO and ENTERTAINMENT bands, can be stored in memory. -
Page 56: Additional Information
(e.g., not caught in metal objects). When you contact your dealer or your nearest After checking, Pioneer Service Center, be sure to record the switch the ignition error message. key or disconnect the iPod and con- Built-in CD Player nect again. -
Page 57: Dual Discs
Appendix Additional Information ! Do not insert anything other than a CD into ! Please refer to the information from the the CD loading slot. disc manufacturer for more detailed infor- ! Do not use cracked, chipped, warped, or mation about Dual Discs. otherwise damaged discs as they may da- mage the player. -
Page 58: Example Of A Hierarchy
(LPCM), 22.05 kHz to 44.1 kHz (MS AD- PCM) About handling the iPod CAUTION ! Pioneer accepts no responsibility for data lost Level 1 Level 2 Level 3 Level 4 on the iPod even if that data is lost while ! This unit assigns folder numbers. -
Page 59: Specifications
Appendix Additional Information Specifications Signal format: Sampling frequency ..44.1 kHz General Number of quantization bits ........... 16; linear Power source ......14.4 V DC (10.8 V to 15.1 V Frequency characteristics ... 5 Hz to 20 000 Hz (±1 dB) allowable) Signal-to-noise ratio .... - Page 60 Contenido Gracias por haber comprado este producto Pioneer. Lea con detenimiento estas instrucciones sobre el funcionamiento del aparato, para que pueda darle el mejor uso posible. Una vez que las haya leído, conserve este manual en un lugar seguro para consultarlo en el futuro.
- Page 61 Contenido – Selección del idioma de – Selección de ficheros de la lista de visualización 90 nombres de ficheros 98 – Ajuste del reloj 90 Audio Bluetooth 99 – Activación y desactivación de la – Funciones básicas 99 – Introducción a las funciones visualización del reloj de apagado 91 –...
- Page 62 Contenido – Ajuste de la respuesta Especificaciones 125 automática 111 – Cambio del tono de llamada 111 – Cancelación del eco y reducción de ruido 111 – Visualización de la dirección BD (Bluetooth Device) 111 – Visualización de la versión del sistema para tareas de reparación 111 Reproductor de CD múltiple 112 –...
-
Page 63: Antes De Comenzar
Solicite a personal calificado que realice el para los productos electrónicos que requieren servicio técnico. ! El CarStereo-Pass Pioneer es para usarse sólo un procedimiento adecuado de tratamiento, recuperación y reciclado. en Alemania. -
Page 64: Visite Nuestro Sitio Web
AAC, pero los formatos y extensio- rrectamente, póngase en contacto con su con- nes de los ficheros varían según la aplicación cesionario o con el centro de servicio Pioneer utilizada para la codificación. autorizado más cercano. Esta unidad reproduce ficheros AAC codifica- ®... -
Page 65: Extracción De La Carátula
Sección Antes de comenzar Acerca del modo demo Importante ! Proceda con cuidado al retirar o colocar la ca- Esta unidad ofrece dos modos de demostra- ción. Uno es el modo inverso y el otro es la ca- rátula. ! Evite someter la carátula a impactos excesi- racterística de modo demo. -
Page 66: Uso Del Mando A Distancia
Sección Antes de comenzar ! Al utilizar el mando a distancia por primera Importante vez, extraiga la película que sobresale de la ! No guarde el mando a distancia en lugares ex- bandeja. puestos a altas temperaturas o a la luz solar directa. -
Page 67: Utilización De Esta Unidad
Sección Utilización de esta unidad a a a 9 9 9 b b b 1 1 1 3 3 3 2 2 2 j j j 1 1 1 1 1 c c c i i i h h h h h g g g 5 5 5 d d d... -
Page 68: Funciones Básicas
Sección Utilización de esta unidad b Botón FUNCTION Funciones básicas Presione este botón para seleccionar las Encendido y apagado funciones. Encendido de la unidad c Joystick % Presione SOURCE para encender la uni- Mueva el joystick para utilizar los controles de sintonización por búsqueda manual, dad. -
Page 69: Ajuste Del Volumen
Se puede activar y desactivar la función AF ! Por unidad externa se entiende un producto (búsqueda de frecuencias alternativas) de esta Pioneer (como el que pueda estar disponible unidad. Se debe desactivar la función AF para en el futuro) que, si bien es incompatible la sintonización normal (consulte la página... -
Page 70: Almacenamiento Y Recuperación De Frecuencias
Sección Utilización de esta unidad # Si mantiene presionado MULTI-CONTROL iz- No RDS o MW/LW quierda o derecha, podrá saltar las emisoras. La 1 1 1 1 2 2 2 2 3 3 3 4 4 4 4 5 5 5 5 sintonización por búsqueda comienza inmediata- mente después de que suelte MULTI-CONTROL. -
Page 71: Introducción A Las Funciones Avanzadas
Sección Utilización de esta unidad # También se puede seleccionar la función pre- Uso del mando a distancia sionando FUNCTION en el mando a distancia. % Cuando encuentre la frecuencia que # Si se elige la banda MW/LW, sólo se puede se- desea almacenar en la memoria, presione leccionar BSM o Local. -
Page 72: Selección De Frecuencias Alternativas
Sección Utilización de esta unidad ! Otro programa puede interrumpir temporal- Utilice MULTI-CONTROL para seleccio- nar Local en el menú de funciones. mente el sonido durante la búsqueda de una frecuencia AF. Presione MULTI-CONTROL para activar ! La función AF se puede activar y desactivar in- la sintonización por búsqueda local. -
Page 73: Recepción De Anuncios De Tráfico
Sección Utilización de esta unidad ! El número de presintonía puede desaparecer ! Sólo se sintonizan las emisoras TP y las emi- del display si se sintoniza una emisora regio- soras TP de otra red realzada durante la sinto- nal que es diferente de la emisora almacena- nización por búsqueda o BSM cuando la da originalmente. -
Page 74: Uso Del Radio Texto
Sección Utilización de esta unidad Uso de la interrupción por programa recepción menos reciente con el nuevo texto recibido. de noticias Cuando se transmite un programa de noticias Visualización de radio texto de una emisora de noticias con código PTY, la unidad puede cambiar de cualquier emisora a Se puede visualizar el radio texto que se acaba la emisora que transmite las noticias. -
Page 75: Lista Pty
Sección Utilización de esta unidad Mantenga presionados cualquiera de Others Educate Programas educativos los botones 1 a 6 en el mando a distancia Drama Comedias y series radiofó- para almacenar el radio texto seleccionado. nicas Se visualizará el número de la memoria y el Culture Cultura nacional o regio- radio texto seleccionado se almacenará... -
Page 76: Reproductor De Cd Incorporado
Sección Utilización de esta unidad Reproductor de CD Presione OPEN para abrir la carátula. Aparece la ranura de carga de discos. incorporado Ranura de carga de discos Funciones básicas El reproductor de CD incorporado puede re- producir CD audio (CD-DA) y audio comprimi- do (WMA/MP3/AAC/WAV) grabado en CD- ROM. -
Page 77: Selección Directa De Una Pista
Sección Utilización de esta unidad Para realizar el avance rápido o retroce- Selección directa de una pista so, mantenga presionado MULTI-CONTROL Al utilizar el mando a distancia, se puede se- izquierda o derecha. leccionar directamente una pista ingresando # Si selecciona Rough search, al mantener pre- el número de la pista deseada. -
Page 78: Selección De Una Gama De Repetición De Reproducción
Sección Utilización de esta unidad # Al reproducir audio comprimido, si se realiza Play mode (repetición de reproducción)— Random mode (reproducción aleatoria)— una búsqueda de pista o el avance rápido/retro- Scan mode (reproducción con exploración)— ceso durante Track repeat (repetición de pista), Pause (pausa)—Compression (compresión y se cambia la gama de repetición de reproducción BMX)—... -
Page 79: Pausa De La Reproducción De Un Disco
Sección Utilización de esta unidad Cuando encuentre la pista deseada, Utilice MULTI-CONTROL para seleccio- presione MULTI-CONTROL para desactivar nar Search mode en el menú de funciones. la reproducción con exploración. Presione MULTI-CONTROL para seleccio- # Si el display vuelve automáticamente a la vi- nar Rough search. -
Page 80: Visualización De Información De Texto En El Disco
Sección Utilización de esta unidad Presione MULTI-CONTROL arriba o pista— : nombre de artista de la pista : tí- abajo para seleccionar una letra del alfabe- tulo de la pista— : título de la pista y tiempo de reproducción Para discos WMA/MP3/AAC Presione MULTI-CONTROL izquierda o Tiempo de reproducción—... -
Page 81: Selección De Pistas De La Lista De Títulos De Las Pistas
Sección Utilización de esta unidad # Si el número de carpeta o fichero es superior Selección de pistas de la lista a 100, se visualizarán los últimos 2 dígitos de de títulos de las pistas dicho número. Esta función le permite ver la lista de los títu- # El número de las carpetas o ficheros presen- los de las pistas en un disco CD TEXT y selec- tes en la carpeta seleccionada actualmente apa-... -
Page 82: Para Reproducir Canciones En El Ipod
Mientras el iPod está conectado a esta unidad, bre de su iPod. Esta lista de reproduccion aparece en él PIONEER (o (marca de verifi- reproduce todas las canciones del iPod. cación)). -
Page 83: Visualización De Información De Texto En El Ipod
Sección Utilización de esta unidad # También puede seleccionar la categoría pre- Utilice MULTI-CONTROL para seleccio- sionando MULTI-CONTROL derecha. nar FUNCTION. # Para volver a la lista anterior, presione Haga girar el control para cambiar la opción MULTI-CONTROL izquierda. de menú y presiónelo para seleccionarla. # Para ir al menú... -
Page 84: Reproducción De Las Canciones En Un Orden Aleatorio (Shuffle)
Sección Utilización de esta unidad Reproducción de las canciones Presione MULTI-CONTROL para activar la pausa. en un orden aleatorio (shuffle) Se detiene temporalmente la reproducción de Para la reproducción de las canciones en el la canción actual. iPod existen dos métodos de reproducción # Para desactivar la pausa, vuelva a presionar aleatoria: Shuffle Songs (reproducir cancio- MULTI-CONTROL. -
Page 85: Ajustes De Audio
Sección Utilización de esta unidad # Para volver a la visualización de cada fuente, Ajustes de audio presione BAND. Introducción a los ajustes de audio # Si no se utilizan las funciones exceptuando 50Hz en unos 30 segundos, el display volverá automáticamente a la visualización normal. -
Page 86: Uso Del Ecualizador
Sección Utilización de esta unidad Uso del ecualizador pueden ajustar a un nivel preciso (control de matiz). El ecualizador le permite ajustar la ecualiza- ción de acuerdo con las características acústi- Utilice MULTI-CONTROL para seleccio- cas del interior del automóvil. nar el ajuste del ecualizador gráfico. -
Page 87: Ajuste De La Sonoridad
Sección Utilización de esta unidad ! Se puede crear una curva Custom 2 Presione MULTI-CONTROL para activar común a todas las fuentes. Si se realizan la sonoridad. ajustes cuando la curva Custom 2 está se- El nivel de sonoridad (p. ej., Mid) aparece en leccionada, la curva Custom 2 se actuali- el display. -
Page 88: Intensificación De Los Graves
Sección Utilización de esta unidad Utilice MULTI-CONTROL para seleccio- Uso del filtro de paso alto nar Sub W.2. Cuando no desea que se generen los sonidos # También puede seleccionar el menú de ajus- bajos de la gama de frecuencias de salida de tes de subgraves presionando SW en la unidad. -
Page 89: Uso Del Nivelador Automático De Sonido
Sección Utilización de esta unidad Utilice MULTI-CONTROL para seleccio- Presione MULTI-CONTROL izquierda o nar SLA. derecha para seleccionar el nivel del ASL deseado. Presione MULTI-CONTROL arriba o Cada vez que se presiona MULTI-CONTROL iz- abajo para ajustar el volumen de la fuente. quierda o derecha, se selecciona un nivel del Cada vez que se presiona MULTI-CONTROL ASL en el siguiente orden:... -
Page 90: Ajustes Iniciales
Sección Utilización de esta unidad # También se puede seleccionar la función pre- Ajustes iniciales sionando FUNCTION en el mando a distancia. Configuración de los ajustes # BT AUDIO y Pin code input sólo se pueden iniciales seleccionar cuando el adaptador Bluetooth (p. ej., CD-BTB100) está... -
Page 91: Activación Y Desactivación De La Visualización Del Reloj De Apagado
Sección Utilización de esta unidad Nota Nota Se puede sincronizar el reloj con una señal tem- El paso de sintonía es de 50 kHz durante la sinto- poral presionando MULTI-CONTROL. nización manual. ! Si los minutos son 00 a 29, éstos se redon- dean hacia abajo. -
Page 92: Cambio Del Ajuste Del Atenuador De Luz
Sección Utilización de esta unidad Utilice MULTI-CONTROL para seleccio- ajuste de la salida posterior a Rear SP :S/W, nar AUX1/AUX2. se podrá conectar el cable de altavoces trase- ros directamente al altavoz de subgraves sin Presione MULTI-CONTROL para activar necesidad de usar un amplificador auxiliar. AUX1/AUX2. -
Page 93: Cambio Del Silenciamiento/Atenuación Del Sonido
Sección Utilización de esta unidad Cambio del silenciamiento/ DISPLAY mientras la unidad está apagada. Para obtener más detalles, consulte Modo de atenuación del sonido demostración de características en la página El sonido proveniente de este sistema se silen- cia o atenúa automáticamente cuando se reci- be la señal desde el equipo con función de Cambio del modo inverso silenciamiento. -
Page 94: Activación De La Fuente Bt Audio
Sección Utilización de esta unidad Activación de la fuente BT Audio Después de ingresar el código PIN (hasta 16 dígitos), presione Es necesario activar la fuente BT Audio para MULTI-CONTROL. utilizar un reproductor de audio Bluetooth. El código PIN que ha ingresado quedará en ! Únicamente cuando un adaptador Blue- espera para almacenarse en memoria. -
Page 95: Otras Funciones
Sección Utilización de esta unidad Otras funciones Selección de AUX como la fuente % Presione SOURCE para seleccionar AUX Uso de la fuente AUX como la fuente. Esta unidad puede controlar hasta dos com- # Si el ajuste auxiliar no está activado, no es po- ponentes auxiliares, como VCR o dispositivos sible seleccionar AUX. -
Page 96: Uso Del Botón Pgm
Sección Utilización de esta unidad % Mantenga presionado PGM para activar BGV-1 (presentación visual de fondo 1)— BGV-2 (presentación visual de fondo 2)— la función BSSM al seleccionar el televisor BGP-1 (imagen de fondo 1)—BGP-2 (imagen como la fuente. Mantenga presionado PGM hasta que se acti- de fondo 2)—BGP-3 (imagen de fondo 3)—... -
Page 97: Memoria Usb
Sección Accesorios disponibles Reproducción de canciones Para realizar el avance rápido o retroce- so, mantenga presionado MULTI-CONTROL en el reproductor de audio izquierda o derecha. portátil USB/memoria USB Para saltar y retroceder o avanzar hasta Funciones básicas otro fichero de audio comprimido, presione MULTI-CONTROL izquierda o derecha. -
Page 98: Visualización De Información De Texto De Un Fichero De Audio
Sección Accesorios disponibles ! Una vez finalizada la exploración de ficheros o Función y operación carpetas, volverá a comenzar la reproducción Las operaciones Play mode, Random mode, normal de los ficheros. Scan mode y Pause son básicamente las mis- mas que las del reproductor de CD incorpora- Visualización de información de texto de un fichero de audio Nombre de la función... -
Page 99: Audio Bluetooth
Sección Accesorios disponibles Audio Bluetooth Para obtener más información, consulte el manual de instrucciones del adaptador Blue- Funciones básicas tooth. Esta sección proporciona información básica sobre las funciones del reproductor de Al conectar un adaptador Bluetooth (p. ej., CD- audio Bluetooth con esta unidad que difieren BTB100) a esta unidad, es posible controlar un ligeramente o son un resumen de las instruc- reproductor de audio Bluetooth a través de tec-... -
Page 100: Introducción A Las Funciones Avanzadas
Sección Accesorios disponibles Para saltar y retroceder o avanzar hasta Conexión de un reproductor de otra pista, presione MULTI-CONTROL iz- audio Bluetooth quierda o derecha. Utilice MULTI-CONTROL para seleccio- nar Connection open en el menú de funcio- Introducción a las funciones nes. -
Page 101: Para Detener La Reproducción
Visualización de la dirección BD (Bluetooth Device) Utilice MULTI-CONTROL para seleccio- nar Device info. en el menú de funciones. El nombre del dispositivo (Pioneer BT Unit) de esta unidad se mostrará en el display. Presione MULTI-CONTROL izquierda para visualizar la dirección BD. -
Page 102: Teléfono Bluetooth
Sección Accesorios disponibles 3 Indicador del número de usuario Teléfono Bluetooth Muestra el número de registro del teléfono Funciones básicas móvil. 4 Indicador de potencia de la batería Si utiliza un adaptador Bluetooth (p. ej., CD- Muestra la potencia de la batería del teléfono BTB100), puede conectar a esta unidad un telé- móvil. -
Page 103: Configuración De La Función Manos Libres
Sección Accesorios disponibles Configuración de la función Realización de una llamada manos libres telefónica Antes de poder hacer uso de la función Reconocimiento de voz manos libres, deberá configurar la unidad Mantenga presionado BAND hasta que para su utilización con el teléfono móvil. Esto Voice dial aparezca en el display. -
Page 104: Introducción A Las Funciones Avanzadas
Sección Accesorios disponibles Presione MULTI-CONTROL abajo para fi- tono de llamada)—Auto connect (ajuste de nalizar todas las llamadas. conexión automática)—Echo cancel (cancela- Presione MULTI-CONTROL abajo para finali- ción de eco)—Device info. (información del zar todas las llamadas, incluida una llamada dispositivo) en espera. -
Page 105: Conexión De Un Teléfono Móvil
Mientras se realiza la búsqueda, Connecting destella. Para completar la conexión, verifique Utilice MULTI-CONTROL para seleccio- el nombre del dispositivo (Pioneer BT Unit) e nar Set phone en el menú de funciones. ingrese el código de enlace de su teléfono móvil. -
Page 106: Eliminación De Un Teléfono Registrado
Sección Accesorios disponibles # A medida que seleccione cada asignación, Conexión a un teléfono móvil podrá ver si un teléfono ya está registrado o no. registrado Si la asignación está vacía, se visualizará Conexión manual a un teléfono No data. Si ya se ha adoptado la asignación, apa- registrado recerá... - Page 107 Sección Accesorios disponibles Utilice MULTI-CONTROL para seleccio- Presione MULTI-CONTROL izquierda o nar PH.B.Transfer en el menú de funciones. derecha para seleccionar la primera letra del nombre que está buscando. Presione MULTI-CONTROL para acceder al modo de espera de transferencia del di- Presione MULTI-CONTROL para visuali- rectorio de teléfonos.
- Page 108 Sección Accesorios disponibles Edición del nombre de una entrada Edición de números de teléfono del Directorio de teléfonos Importante Importante Para realizar esta operación debe estacionar su vehículo y poner el freno de mano. Para realizar esta operación debe estacionar su vehículo y poner el freno de mano.
-
Page 109: Uso Del Historial De Llamadas
Sección Accesorios disponibles Visualice la lista detallada de su entra- Directorio de teléfonos—Llamadas perdidas— da del Directorio de teléfonos deseada. Llamadas marcadas—Llamadas recibidas # Para obtener información sobre el Directorio Consulte los pasos 1 al 5 en Llamada a un nú- mero del Directorio de teléfonos en la página de teléfonos, consulte Uso del Directorio de teléfo- 107 para el procedimiento. -
Page 110: Realización De Una Llamada Ingresando El Número De Teléfono
Sección Accesorios disponibles Cuando haya terminado de ingresar el Es posible asignar a la memoria los números que marca frecuentemente, para volver a mar- número, presione MULTI-CONTROL. carlos rápidamente. Se mostrará la confirmación de llamada. Seleccione un número de teléfono del Presione MULTI-CONTROL nuevamente Directorio de teléfonos o del historial de para hacer una llamada. -
Page 111: Ajuste Del Rechazo Automático
Utilice MULTI-CONTROL para seleccio- seleccionado se borran de la memoria de esta nar Device info. en el menú de funciones. unidad. El nombre del dispositivo (Pioneer BT Unit) de esta unidad se mostrará en el display. Ajuste del rechazo automático Presione MULTI-CONTROL izquierda Utilice MULTI-CONTROL para seleccio- para visualizar la dirección BD. -
Page 112: Reproductor De Cd Múltiple
Sección Accesorios disponibles Reproductor de CD múltiple Para saltar y retroceder o avanzar hasta otra pista, presione MULTI-CONTROL iz- Funciones básicas quierda o derecha. Se puede usar esta unidad para controlar un re- Notas productor de CD múltiple, que se vende por se- parado. - Page 113 Sección Accesorios disponibles Play mode (repetición de reproducción)— Consulte Pausa de la repro- Random mode (reproducción aleatoria)— Pause ducción de un disco en la Scan mode (reproducción con exploración)— página 79. Pause (pausa)—Compression (compresión y Consulte Uso de la compre- DBE)—ITS play mode (reproducción ITS)—...
-
Page 114: Uso De Listas De Reproducción Its
Sección Accesorios disponibles Uso de listas de reproducción ITS Reproducción de la lista de reproducción ITS La función ITS (selección instantánea de La reproducción ITS le permite escuchar las pista) le permite crear una lista de reproduc- pistas que ha ingresado en su lista de repro- ción de las pistas favoritas incluidas en el car- ducción ITS. -
Page 115: Uso De Las Funciones De Títulos De Discos
Sección Accesorios disponibles Seleccione la pista deseada presionan- Ingreso de títulos de discos do MULTI-CONTROL izquierda o derecha. Utilice la función de ingreso de títulos de dis- cos para almacenar hasta 100 títulos de CD Presione MULTI-CONTROL abajo para (con la lista de reproducción ITS) en el repro- eliminar la pista de la lista de reproducción ductor de CD múltiple. -
Page 116: Uso De Las Funciones Cd Text
Sección Accesorios disponibles # Cuando reproduzca un disco CD TEXT, presio- Reproductor de DVD ne MULTI-CONTROL derecha para visualizar una Funciones básicas lista de las pistas en el disco seleccionado. Pre- sione MULTI-CONTROL izquierda para volver a la Se puede utilizar esta unidad para controlar un lista del disco. -
Page 117: Selección De Un Disco
Sección Accesorios disponibles Para realizar el avance rápido o retroce- Play mode (repetición de reproducción)— so, mantenga presionado MULTI-CONTROL Pause (pausa) izquierda o derecha. Durante la reproducción de un CD Play mode (repetición de reproducción)— Para saltar y retroceder o avanzar hasta Random mode (reproducción aleatoria)—... - Page 118 Sección Accesorios disponibles ! Durante la reproducción de un vídeo CD o un Nombre de la función Operación CD, si se realiza una búsqueda de pistas o el Consulte Selección de una avance rápido/retroceso durante la repetición gama de repetición de repro- Track repeat, la gama de repetición cambia a ducción en la página 78.
-
Page 119: Sintonizador De Tv
Sección Accesorios disponibles # Se puede cancelar la sintonización por bús- Sintonizador de TV queda presionando MULTI-CONTROL izquierda o Funciones básicas derecha. # Si mantiene presionado MULTI-CONTROL iz- Se puede utilizar esta unidad para controlar un quierda o derecha, podrá saltar los canales. La sintonizador de TV, que se vende por separado. -
Page 120: Almacenamiento Consecutivo De Las Emisoras Con Las Señales Más Fuertes
Sección Accesorios disponibles % Cuando encuentre la emisora que Utilice MULTI-CONTROL para seleccio- desea almacenar en la memoria, presione nar la emisora deseada. uno de los botones de ajuste de presinto- Haga girar el control para cambiar la emisora nías 1 a 6 y manténgalo presionado hasta y presiónelo para seleccionarla. -
Page 121: Información Adicional
Cuando contacte con su concesionario o con ERROR-30 Falla del iPod Reinicie el iPod. el servicio técnico Pioneer más cercano, ase- ERROR-A0 El iPod no está Compruebe si el gúrese de anotar el mensaje de error. cargado pero cable de conexión... -
Page 122: Discos Dobles
Apéndice Información adicional ! Utilice sólo discos convencionales y com- Discos dobles pletamente circulares. No use discos con ! Los discos dobles son discos de dos caras formas irregulares. que incluyen CD grabable de audio en una cara y DVD grabable de vídeo en la otra cara. -
Page 123: Ejemplo De Una Jerarquía
Apéndice Información adicional ! Los ficheros de audio comprimidos no son Ejemplo de una jerarquía compatibles con la transferencia de datos : Carpeta en formato Packet Write. : Archivo de audio comprimido ! Se pueden visualizar sólo 64 caracteres desde el principio como nombre de fichero (incluida la extensión, como .wma, .mp3, .m4a o .wav) o nombre de carpeta. -
Page 124: Acerca Del Manejo Del Ipod
ADPCM) Acerca del manejo del iPod PRECAUCIÓN ! Pioneer no asume responsabilidades por la pérdida de datos en el iPod, incluso si la pérdi- da ocurre durante el uso de esta unidad. ! No deje el reproductor el iPod expuesto a la luz solar directa durante un largo periodo de tiempo. -
Page 125: Ajuste De La Respuesta Especificaciones
Apéndice Información adicional Especificaciones Reproductor de CD Sistema ........Sistema de audio de discos Generales compactos Fuente de alimentación ..14,4 V CC (10,8 a 15,1 V per- Discos utilizables ....Disco compacto misible) Formato de la señal: Sistema de conexión a tierra Frecuencia de muestreo ............. - Page 126 TEL: (03) 9586-6300 PIONEER ELECTRONICS OF CANADA, INC. 300 Allstate Parkway, Markham, Ontario L3R OP2, Canada TEL: 1-877-283-5901 PIONEER ELECTRONICS DE MEXICO, S.A. de C.V. Blvd.Manuel Avila Camacho 138 10 piso Col.Lomas de Chapultepec, Mexico, D.F. 11000 TEL: 55-9178-4270 先鋒股份有限公司...