Pioneer DEH-P6000UB Operation Manual
Pioneer operation manual cd rds receiver deh-p6000ub
Hide thumbs
Also See for DEH-P6000UB:
- Operation manual (89 pages) ,
- Exploded views and parts list (16 pages) ,
- Installation manual (8 pages)

Related Manuals for Pioneer DEH-P6000UB


Summary of Contents for Pioneer DEH-P6000UB
- Page 1 Operation Manual Manual de instrucciones CD RDS RECEIVER REPRODUCTOR DE CD CON RECEPTOR RDS DEH-P6000UB...
-
Page 2: Table Of Contents
Contents Thank you for buying this Pioneer product. Please read through these operating instructions so you will know how to operate your model properly. After you have finished reading the instructions, keep this man- ual in a safe place for future reference. - Page 3 Contents – Recalling equalizer curves 27 – Adjusting equalizer curves 27 – Fine-adjusting equalizer curve 27 Adjusting loudness 28 Using subwoofer output 28 – Adjusting subwoofer settings 28 Using the high pass filter 29 Boosting the bass 29 Adjusting source levels 29 Initial Settings Adjusting initial settings 30 Setting the clock 30...
- Page 4 Contents – Using the Phone Book 43 – Using the Call History 44 – Making a call by entering phone number 44 – Clearing memory 44 – Setting automatic rejecting 45 – Setting automatic answering 45 – Switching the ring tone 45 –...
-
Page 5: Before You Start
Refer all ser- vicing to qualified personnel. ! The Pioneer CarStereo-Pass is for use only in Germany. ! Keep this manual handy as a reference for op- erating procedures and precautions. -
Page 6: Visit Our Website
! iPod is a trademark of Apple Inc., regis- tered in the U.S. and other countries. CAUTION ! Pioneer accepts no responsibility for data lost on the USB portable audio player/USB mem- ory even if that data is lost while using this unit. -
Page 7: Attaching The Front Panel
Before You Start Grip the left side of the front panel and pull it gently outward. Take care not to grip it too tightly or to drop the front panel and protect it from contact with water or other fluids to prevent perma- nent damage. -
Page 8: Using The Remote Control
Section Before You Start Using the remote control Point the remote control in the direction of the front panel to operate. ! The remote control may not function prop- erly in direct sunlight. Important ! Do not store the remote control in high tem- peratures or direct sunlight. -
Page 9: Operating This Unit
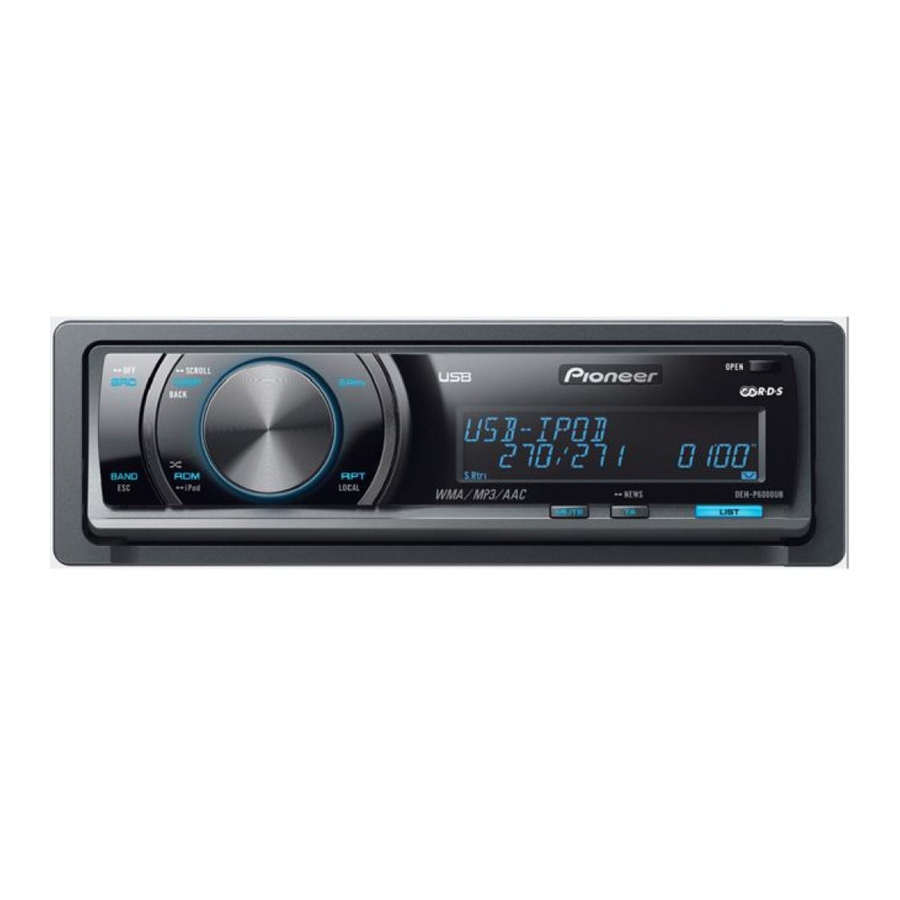
Operating this unit What’s What Head unit 1 SRC/OFF button This unit is turned on by selecting a source. Press to cycle through all the available sources. 2 DISP/BACK/SCROLL button Press to select different displays. Press and hold to scroll the text information. Press to return to the previous display when operating the menu. -
Page 10: Remote Control
Section Operating this unit 6 7 8 9 b b BAND/ESC button Press to select among three FM bands and MW/LW bands. Press to return to the ordinary display when operating menu. Remote control Operation is the same as when using the but- tons on the head unit. -
Page 11: Basic Operations
Operating this unit 9 LOC indicator Appears when local seek tuning is on. a 5 (stereo) indicator Appears when the selected frequency is being broadcast in stereo. b TA indicator Appears when TA (traffic announcement standby) function is on. c TP indicator Appears when a TP station is tuned in. -
Page 12: Adjusting The Volume
DC power source while connecting it to AUX input may generate noise. In this case, stop charging. ! External unit refers to a Pioneer product (such as ones available in the future) that, although incompatible as a source, enables control of basic functions with this unit. -
Page 13: Receiving Pty Alarm Broadcasts
Operating this unit # You can also store the frequency in memory by pushing and holding MULTI-CONTROL right. Use MULTI-CONTROL to select the de- sired station. Turn to change the station. Press to select. # You can also change the station by pushing MULTI-CONTROL up or down. -
Page 14: Receiving Traffic Announcements
Section Operating this unit Use MULTI-CONTROL to select AF in the function menu. Press MULTI-CONTROL to turn AF on. # To turn off, press MULTI-CONTROL again. Notes ! Only RDS stations are tuned in during seek tuning or BSM when AF is on. ! When you recall a preset station, the tuner may update the preset station with a new fre- quency from the station’s AF list. -
Page 15: Using Pty Functions
Operating this unit Notes ! You can also turn this function on or off in the menu that appears by using MULTI-CONTROL. ! The system switches back to the original source following traffic announcement recep- tion. ! Only TP and enhanced other network’s TP sta- tions are tuned in during seek tuning or BSM when TA is on. -
Page 16: Built-In Cd Player
Section Operating this unit POPULAR POP MUS ROCK MUS EASY MUS OTH MUS JAZZ COUNTRY NAT MUS OLDIES FOLK MUS CLASSICS L. CLASS CLASSIC OTHERS EDUCATE DRAMA CULTURE SCIENCE VARIED CHILDREN SOCIAL RELIGION PHONE IN TOURING LEISURE DOCUMENT Built-in CD Player Popular music Contemporary modern Basic Operations... -
Page 17: Displaying Text Information On Disc
Operating this unit # This operation is available only when playing CD-EXTRA or MIXED-MODE CDs. # If you have switched between compressed audio and CD-DA, playback starts at the first track on the disc. Notes ! The built-in CD player can play back audio CD and compressed audio recorded on a CD- ROM. -
Page 18: Selecting Files From The File Name List
Section Operating this unit # You can also change the track title by pushing MULTI-CONTROL up or down. # You can also play the track by pushing MULTI-CONTROL right. # To return to the ordinary display, press BAND/ESC or LIST. # If you do not operate the list within about 30 seconds, the display automatically returns to the ordinary display. -
Page 19: Playing Tracks In Random Order
Operating this unit # When FOLDER (folder repeat) is selected, it is not possible to play back a subfolder of that folder. Note You can also perform this operation in the menu that appears by using MULTI-CONTROL. Playing tracks in random order Tracks in a selected repeat range are played in random order. -
Page 20: Playing Songs On Usb Portable Audio Player/Usb Memory
Section Operating this unit After entering the title, press and hold MULTI-CONTROL to store it in memory. Notes ! Titles remain in memory, even after the disc is removed from the unit, and are recalled when the disc is reinserted. ! After data for 48 discs are stored in the mem- ory, data for a new disc overwrites the oldest one. -
Page 21: Displaying Text Information Of An Audio File
Operating this unit Displaying text information of an audio file % Press DISP to select the desired text in- formation. For WMA/MP3/AAC discs Play time—folder name and file name—artist name and track title—artist name and album title—album title and track title—track title and play time—comment and play time—bit rate and play time For WAV discs... -
Page 22: Playing Songs On Ipod
! When using an iPod, iPod Dock Connector to USB Cable is required. ! Read the precautions for iPod on page 54. ! While iPod is connected to this unit, PIONEER (check mark)) is displayed on the iPod. ! If an error message such as ERROR-19 is dis- played, refer to Error messages on page 50. -
Page 23: Displaying Text Information On Ipod
Operating this unit Use MULTI-CONTROL to select a cate- gory. Turn to change the category; press to select. PLAYLISTS (playlists)—ARTISTS (artists)— ALBUMS (albums)—SONGS (songs)— PODCASTS (podcasts)—GENRES (genres)— COMPOSERS (composers)—AUDIOBOOKS (audiobooks) List for the selected category is displayed. # Press and hold LIST displays the album list of current selected artist. -
Page 24: Playing Songs In A Random Order (Shuffle)
Section Operating this unit Function name Operation Refer to Selecting a repeat play range on page 18. However, the repeat play ranges you can select are dif- ferent from that of the built-in CD player. The repeat play REPEAT ranges of the iPod are: ! ONE –... -
Page 25: Changing Audiobook Speed
Operating this unit This unit’s iPod function can be operated from your iPod. Sound can be heard from car’s speaker, and operation can be conducted from your iPod. ! While this function is in use, even if the ignition key is turned off, iPod is not turned off. -
Page 26: Audio Adjustments
Section Audio Adjustments Introduction of audio adjustments Press MULTI-CONTROL to display the main menu. Use MULTI-CONTROL to select AUDIO. Turn to change the menu option. Press to se- lect. Turn MULTI-CONTROL to select the audio function. Turn MULTI-CONTROL to switch between the audio functions in the following order. -
Page 27: Using The Equalizer
Audio Adjustments Using the equalizer The equalizer lets you adjust the equalization to match the car’s interior acoustic character- istics as desired. Recalling equalizer curves There are six stored equalizer curves which you can easily recall at any time. Here is a list of the equalizer curves. -
Page 28: Adjusting Loudness
Section Audio Adjustments Turn MULTI-CONTROL to adjust the se- lected segement. Band LOW (low)—MID (mid)—HI (high) Frequency Low: 40HZ—80HZ—100HZ—160HZ Mid: 200HZ—500HZ—1KHZ—2KHZ High: 3KHZ—8KHZ—10KHZ—12KHZ Q factor 2N—1N—1W—2W # You can also perform the same operations by pushing MULTI-CONTROL up or down. Adjusting loudness Loudness compensates for deficiencies in the low- and high-sound ranges at low volume. -
Page 29: Using The High Pass Filter
Audio Adjustments Using the high pass filter When you do not want low sounds from the subwoofer output frequency range to play from the front or rear speakers, turn on the HPF (high pass filter). Only frequencies higher than those in the selected range are output from the front or rear speakers. -
Page 30: Initial Settings
Section Initial Settings Adjusting initial settings Press SRC and hold until the unit turns off. Press MULTI-CONTROL and hold until CLOCK SET appears in the display. Turn MULTI-CONTROL to select one of the initial settings. CLOCK SET (clock)—OFF CLOCK (off clock)— FM STEP (FM tuning step)—AUTO PI (auto PI seek)—WARNING TONE (warning tone)—... -
Page 31: Switching Auto Pi Seek
Initial Settings Switching Auto PI Seek The unit can automatically search for a differ- ent station with the same programming, even during preset recall. Use MULTI-CONTROL to select AUTO PI. Press MULTI-CONTROL to turn Auto PI seek on. # To turn Auto PI seek off, press MULTI-CONTROL again. -
Page 32: Switching The Feature Demo
Section Initial Settings When REAR SP (rear speaker setting) is se- lected. REAR SP :SUB W (subwoofer)— REAR SP :FULL (full-range speaker) When PREOUT (RCA output setting) is se- lected. PREOUT :SUB W (subwoofer)— PREOUT :REAR (full-range speaker) # When no subwoofer is connected to the rear output, select REAR SP :FULL. -
Page 33: Displaying System Version Of Bluetooth Adapter For Repair
Initial Settings Use MULTI-CONTROL to select PIN CODE INPUT. Press MULTI-CONTROL to display the setting mode. # Press BACK to return to the previous display. Turn MULTI-CONTROL to select a num- ber. # You can also perform the same operations by pushing MULTI-CONTROL up or down. -
Page 34: Other Functions
For details concerning operation, refer to En- tering disc titles on page 19. Using the external unit External unit refers to a Pioneer product (such as ones available in the future) that, although incompatible as a source, enables control of basic functions with this unit. -
Page 35: Basic Operation
Other Functions Basic operation Functions allocated to the following opera- tions are different depending on the con- nected external unit. For details concerning functions, refer to the connected external unit’s owner’s manual. % Press BAND/ESC. % Press and hold BAND/ESC. % Push MULTI-CONTROL left or right. -
Page 36: Available Accessories
Push MULTI-CONTROL left or right. Notes ! Read the precautions for iPod on page 54. ! While iPod is connected to this unit, PIONEER (check mark)) is displayed on the iPod. ! If an error message such as ERROR-19 is dis- played, refer to Error messages on page 50. -
Page 37: Playing Songs In A Random Order (Shuffle)
Available accessories Playing songs in a random order (shuffle) % Press RDM repeatedly to select the de- sired setting. ! SONGS – Play back songs in the selected list in random order. ! ALBUMS – Play back songs from a ran- domly selected album in order. -
Page 38: Connecting A Bluetooth Audio Player
Section Available accessories Turn MULTI-CONTROL to select the function. CONNECTION OPEN (connection open)— DISCONNECT AUDIO (disconnect audio)— PLAY (Play)—STOP (Stop)—PAUSE (pause)— DEVICE INFO (device information) PAUSE is the same as that of the built-in CD player. (Refer to Pausing playback on page 19.) # You can also perform the same operations by pushing MULTI-CONTROL up or down. -
Page 39: Displaying Bd (Bluetooth Device) Address
Available accessories Displaying BD (Bluetooth Device) address Use MULTI-CONTROL to select DEVICE INFO in the function menu. Press MULTI-CONTROL to display the setting mode. Use MULTI-CONTROL to select the de- sired setting. Turn to change the setting. DEVICE NAME (Device name)—BD ADDRESS (BD (Bluetooth Device) address) Bluetooth Telephone Basic Operations... -
Page 40: Making A Phone Call
Section Available accessories Making a phone call Voice recognition Press BAND/ESC and hold until VOICE DIAL appears in the display. VOICE DIAL appears in the display. When VOICE DIAL ON is displayed, voice recogni- tion function is now ready. # If your cellular phone does not feature voice recognition function, NO VOICE DIAL appears in the display and opearation is not available. -
Page 41: Connecting A Cellular Phone
While connecting, CONNECTING flashes. To complete the connection, check the device name (PIONEER BT UNIT) and enter the link code on your cellular phone. If the connection is established, CONNECTED is displayed. # The link code is set to 0000 as default. You can change this code in the initial setting. -
Page 42: Disconnecting A Cellular Phone
Section Available accessories Disconnecting a cellular phone Use MULTI-CONTROL to select DISCONNECT PHONE in the function menu. Device name of the connected phone appears in the display. Press MULTI-CONTROL to disconnect a cellular phone from this unit. After disconnection is completed, DISCONNECTED is displayed. -
Page 43: Using The Phone Book
Available accessories # You can also perform the same operations by pushing MULTI-CONTROL up or down. # If the assignment is empty, NO DATA is dis- played and operation is not possible. Press MULTI-CONTROL to connect the selected cellular phone. While connecting, CONNECTING is displayed. -
Page 44: Using The Call History
Section Available accessories Using the Call History Important Be sure to park your vehicle and apply the park- ing brake when performing this operation. The 12 most recent calls made (dialled), re- ceived and missed, are stored in the Call His- tory. -
Page 45: Setting Automatic Rejecting
Available accessories Press MULTI-CONTROL to clear the memory. While clearing, CLEARING is displayed. After the data on the selected item is cleared, CLEARED is displayed. Setting automatic rejecting Use MULTI-CONTROL to select REFUSE CALLS in the function menu. Press MULTI-CONTROL to turn auto- matic call rejection on. -
Page 46: Using Compression And Bass Emphasis
Section Available accessories Press MULTI-CONTROL to display the main menu. Use MULTI-CONTROL to select FUNCTION. Turn to change the menu option. Press to se- lect. Turn MULTI-CONTROL to select the function. REPEAT (repeat play)—RANDOM (random play)—SCAN (scan play)—PAUSE (pause)— COMP/DBE (compression and DBE)— ITS PLAY (ITS play)—ITS MEMORY (ITS pro- gramming)—TITLE INPUT (disc title input) # If you do not operate functions other than... -
Page 47: Using Its Playlists
Available accessories Using ITS playlists ITS (instant track selection) lets you make a playlist of favorite tracks from the multi-CD player magazine. After you have added your fa- vorite tracks to the playlist, you can turn on ITS play and play just those selections. You can use ITS to enter and play back up to 99 tracks per disc from up to 100 discs (with the disc titles). -
Page 48: Using Disc Title Functions
Section Available accessories Erasing a CD from your ITS playlist You can delete all tracks of a CD from your ITS playlist if ITS play is off. Play the CD that you want to delete. Use MULTI-CONTROL to select ITS MEMORY in the function menu. Press MULTI-CONTROL to display the setting mode. -
Page 49: Storing And Recalling Broadcast Stations
Available accessories % Seek tuning Push and hold MULTI-CONTROL left or right for about one second and release. Notes ! Band can be selected from TV-1 or TV-2. ! You can cancel seek tuning by pushing MULTI-CONTROL left or right. ! If you push and hold MULTI-CONTROL left or right, you can skip stations. -
Page 50: Additional Information
Appendix Additional Information Error messages When you contact your dealer or your nearest Pioneer Service Center, be sure to have the error message recorded. Built-in CD Player Message Cause ERROR-11, 12, Dirty disc 17, 30 ERROR-11, 12, Scratched disc 17, 30... -
Page 51: Handling Guideline Of Discs And Player
Additional Information iPod Message Cause Action ERROR-19 Communication Disconnect the failure cable from iPod. Once iPod main menu is displayed, connect the cable again. Reset the iPod. iPod failure Disconnect the cable from iPod. Once iPod main menu is displayed, connect the cable again. -
Page 52: Dual Discs
Appendix Additional Information ! Road shocks may interrupt disc playback. ! Read the precautions for discs before using them. Dual Discs ! Dual Discs are two-sided discs that have a recordable CD for audio on one side and a recordable DVD for video on the other. ! Since the CD side of Dual Discs is not phy- sically compatible with the general CD standard, it may not be possible to play the... -
Page 53: Usb Audio Player/Usb Memory
Additional Information ! This unit can play back files in the USB porta- ble audio player/USB memory that is USB Mass Storage Class. However, copyright pro- tected files that are stored in above-mentioned USB devices cannot be played back. (If the iPod is connected to this unit, file playback condition depends on the iPod specifications.) ! You cannot connect a USB portable audio... -
Page 54: Ipod
! For details, refer to the iPod’s manuals. About iPod settings ! You cannot operate the iPod Equalizer on Pioneer products. We recommend that you set the iPod Equalizer to off, before con- necting to this unit. ! You cannot set Repeat to off on the iPod when using this unit. -
Page 55: Russian Character Chart
Additional Information Example of a hierarchy : Folder : Compressed audio file Level 1 Level 2 Level 3 Level 4 ! This unit assigns folder numbers. The user cannot assign folder numbers. ! Folder hierarchy is allowed up to eight tiers. However, a practical hierarchy of folder is less than two tiers. -
Page 56: Specifications
Appendix Additional Information Specifications General Power source ... 14.4 V DC (10.8 V to 15.1 V allowable) Grounding system ... Negative type Max. current consumption ... 10.0 A Dimensions (W × H × D): Chassis ... 178 mm × 50 mm × 162 Nose ... - Page 57 Contenido Gracias por haber comprado este producto Pioneer. Lea con detenimiento estas instrucciones sobre el funcionamiento del aparato, para utilizarlo correctamente. Una vez que las haya leído, conserve este manual en un lugar seguro para consultas futuras. Antes de comenzar...
- Page 58 Contenido Ajustes de audio Introducción a los ajustes de audio 84 Uso del ajuste del balance 84 Uso del ecualizador 85 – Recuperación de las curvas de ecualización 85 – Ajuste de las curvas de ecualización 85 – Ajuste preciso de la curva de ecualización 85 Ajuste de la sonoridad 86 Uso de la salida de subgraves 86...
- Page 59 Contenido – Introducción a las funciones avanzadas 100 – Conexión de un teléfono móvil 101 – Desconexión de un teléfono móvil 101 – Registro de un teléfono móvil conectado 102 – Eliminación de un teléfono registrado 102 – Conexión a un teléfono móvil registrado 102 –...
-
Page 60: Antes De Comenzar
Solicite a personal cualificado que realice el servicio técnico. ! El CarStereo-Pass Pioneer debe utilizarse úni- camente en Alemania. ! Conserve este manual a mano para que pueda consultar los procedimientos de fun- cionamiento y las precauciones a seguir. -
Page 61: Visite Nuestro Sitio Web
! Cuando utiliza un iPod, se requiere un co- nector del Dock del iPod para el cable USB. ! El cable de la interfaz CD-IU50 de Pioneer también está disponible. Para obtener in- formación, consulte con su proveedor. ! Esta unidad puede controlar modelos de iPod de generaciones anteriores con un adaptador iPod de Pioneer (p. -
Page 62: En Caso De Problemas
Corporation. En caso de problemas En caso de que este producto no funcione co- rrectamente, póngase en contacto con su pro- veedor o con el Servicio técnico oficial Pioneer más próximo a su domicilio. Protección del producto contra robo Se puede extraer la carátula como medida antirrobo. -
Page 63: Uso Y Cuidado Del Mando A Distancia
Antes de comenzar Modo de demostración de características La demostración de características se inicia automáticamente cuando se apaga la unidad mientras el contacto de arranque está en ACC o en ON. Presione el botón DISP durante la de- mostración de características para cancelar este modo de demostración. -
Page 64: Utilización De Esta Unidad
Sección Utilización de esta unidad Qué es cada cosa Unidad principal 1 Botón SRC/OFF Esta unidad se enciende al seleccionar una fuente. Presione este botón para visualizar todas las fuentes disponibles. 2 Botón DISP/BACK/SCROLL Presione este botón para seleccionar las di- ferentes pantallas. -
Page 65: Mando A Distancia
Utilización de esta unidad 6 7 8 9 b Cuando utilice el iPod, presione este botón para reproducir todas las pistas en orden aleatorio. Mantenga presionado para cambiar el modo de control cuando utilice un iPod co- nectado al conector USB de la unidad. Si utiliza el iPod con un adaptador de inter- faz (CD-IB100N), presione para cambiar la función de selección aleatoria. - Page 66 Sección Utilización de esta unidad 5 Indicador d Aparece cuando existe un nivel, carpeta o menú inferior. 6 Indicador (intérprete) Aparece cuando se muestra el nombre del artista del disco (pista) en la sección princi- pal de la pantalla. Aparece durante la búsqueda precisa del in- térprete en la función de exploración del iPod.
-
Page 67: Funciones Básicas
En este caso, detenga la carga. ! Por unidad externa se entiende un producto Pioneer (como el que pueda estar disponible en el futuro) que, si bien es incompatible como fuente, permite el control de funciones básicas con esta unidad. Dos unidades exter- nas se pueden controlar con este sistema. -
Page 68: Sintonizador
Sección Utilización de esta unidad Sintonizador Funciones básicas % Seleccione una banda Presione BAND/ESC. # Puede seleccionar la banda entre FM1, FM2, FM3 o MW/LW. % Sintonización manual (paso a paso) Pulse MULTI-CONTROL izquierda o derecha. % Sintonización por búsqueda Presione MULTI-CONTROL y mantenga pre- sionado hacia la izquierda o hacia la derecha durante cerca de un segundo y luego suelte. -
Page 69: Almacenamiento De Las Frecuencias De Radio De Mayor Intensidad
Utilización de esta unidad Haga girar MULTI-CONTROL para selec- cionar la función. BSM (memoria de las mejores emisoras)— REGIONAL (regional)—LOCAL (sintonización por búsqueda local)—PTY SEARCH (selección de tipo de programa)—TRAFFIC (espera por anuncio de tráfico)—AF (búsqueda de fre- cuencias alternativas)—NEWS (interrupción por programa de noticias) Notas ! También se puede seleccionar la función pre-... -
Page 70: Recepción De Anuncios De Tráfico
Sección Utilización de esta unidad ! Durante la búsqueda de AF, el sonido podría interrumpirse temporalmente. ! La función AF se puede activar y desactivar in- dependientemente en cada banda FM. Uso de la búsqueda PI Si el sintonizador no puede encontrar una emisora adecuada o el estado de la recepción empeora, la unidad buscará... -
Page 71: Uso De Las Funciones Pty
Utilización de esta unidad ! Sólo se sintonizan las emisoras TP y las emi- soras TP de otra red realzada durante la sinto- nización por búsqueda o BSM cuando la función TA está activada. Uso de las funciones PTY Se puede sintonizar una emisora usando la in- formación PTY (tipo de programa). -
Page 72: Lista Pty
Sección Utilización de esta unidad Lista PTY Generales Específico NEWS/INFO NEWS AFFAIRS INFO SPORT WEATHER FINANCE POPULAR POP MUS ROCK MUS EASY MUS OTH MUS JAZZ COUNTRY NAT MUS OLDIES FOLK MUS CLASSICS L. CLASS CLASSIC OTHERS Tipo de programa Noticias Temas de actualidad Información general y... -
Page 73: Reproductor De Cd Incorporado
Utilización de esta unidad Reproductor de CD incorporado Funciones básicas % Abrir la carátula. Presione OPEN. Aparece la ranura de inserción de discos. Ranura de inserción de discos # Cuando inserte un disco, coloque el lado de la etiqueta hacia arriba. # Para evitar fallos en el funcionamiento, asegú- rese de que ningún objeto metálico entre en con- tacto con los terminales mientras la carátula está... -
Page 74: Selección De Pistas De La Lista De Títulos De Las Pistas
Sección Utilización de esta unidad Para discos CD TEXT Tiempo de reproducción—nombre del intér- prete del disco y título de la pista—nombre del intérprete del disco y título del disco—título del disco y título de la pista—nombre del intér- prete de la pista y título de la pista— título de la pista y tiempo de reproducción Para discos WMA/MP3/AAC Tiempo de reproducción—nombre de la carpe-... -
Page 75: Introducción A Las Funciones Avanzadas
Utilización de esta unidad Utilice MULTI-CONTROL para seleccio- nar el nombre del archivo deseado (o de la carpeta deseada). Haga girar el control para cambiar el nombre del archivo o carpeta. — tras seleccionar un archivo, presione para reproducirlo. — presione para ver una lista de archivos (o carpetas) de una carpeta seleccionada. -
Page 76: Reproducción De Las Pistas En Orden Aleatorio
Sección Utilización de esta unidad Reproducción de las pistas en orden aleatorio Las pistas de una gama de repetición seleccio- nada se reproducen en orden aleatorio. % Presione RDM para activar la reproduc- ción aleatoria. Las pistas se reproducirán en orden aleatorio. # Vuelva a pulsar RDM para desactivar la repro- ducción aleatoria. -
Page 77: Reproducción De Canciones En El Reproductor De Audio Portátil Usb/Memoria Usb
Utilización de esta unidad Gire MULTI-CONTROL para seleccionar una letra del alfabeto. # También puede realizar estas operaciones pul- sando MULTI-CONTROL arriba o abajo. Presione MULTI-CONTROL para despla- zar el cursor hacia el siguiente carácter. Una vez introducido el título, mantenga presionado MULTI-CONTROL para almace- narlo en la memoria. -
Page 78: Visualización De Información De Texto De Un Archivo De Audio
Sección Utilización de esta unidad ! Si se conecta un reproductor de audio portátil USB/memoria USB a esta unidad, la fuente cambia a USB automáticamente. Si no utiliza un dispositivo USB, desconéctelo de esta uni- dad. Según el dispositivo USB conectado, co- locar la llave de encendido en posición de activación mientras el dispositivo USB esté... - Page 79 Utilización de esta unidad Nombre de la función Operación Consulte Selección de una gama de repetición de repro- ducción en la página 75. Sin embargo, las gamas de repetición para la repro- ducción que puede selec- cionar son diferentes a las del reproductor de CD in- corporado.
-
Page 80: Para Reproducir Canciones En El Ipod
! Lea las precauciones sobre el iPod en la pági- na 115. ! Mientras el iPod está conectado a esta uni- dad, aparece en él PIONEER (o verificación)). ! Si aparece un mensaje de error como ERROR-19, consulte Mensajes de error en la página 111. -
Page 81: Visualización De Información De Texto En El Ipod
Utilización de esta unidad # Para volver a la visualización normal, presione BAND/ESC o LIST. # Si no se utiliza la lista en unos 30 segundos, la pantalla volverá automáticamente a la visuali- zación normal. Visualización de información de texto en el iPod % Presione DISP para seleccionar la infor- mación de texto deseado. -
Page 82: Reproducción De Las Canciones En Orden Aleatorio (Shuffle)
Sección Utilización de esta unidad ! Cuando CONTROL está activado, sólo se po- drán utilizar CONTROL y SOUND RETRIEVER. Reproducción de las canciones en orden aleatorio (shuffle) Utilice MULTI-CONTROL para seleccio- nar SHUFFLE en el menú de funciones. Presione MULTI-CONTROL para mostrar el modo de ajuste. -
Page 83: Cambio De La Velocidad Del Audiolibro
Utilización de esta unidad Ponga en funcionamiento el iPod co- nectado para seleccionar una canción y re- producirla. Nota También puede activar o desactivar esta función en el menú que aparece mediante el MULTI-CONTROL. Cambio de la velocidad del audiolibro Mientras escucha un audiolibro en el iPod, puede modificar la velocidad de reproducción. -
Page 84: Ajustes De Audio
Sección Ajustes de audio Introducción a los ajustes de audio Presione MULTI-CONTROL para visuali- zar el menú principal. Utilice MULTI-CONTROL para seleccio- nar AUDIO. Haga girar el control para cambiar la opción de menú. Presione para seleccionar. Haga girar MULTI-CONTROL para selec- cionar la función de audio. -
Page 85: Uso Del Ecualizador
Ajustes de audio Uso del ecualizador El ecualizador le permite ajustar la ecualiza- ción de acuerdo con las características acústi- cas del interior del automóvil. Recuperación de las curvas de ecualización Hay seis tipos de curvas de ecualización me- morizadas que se pueden recuperar con facili- dad en cualquier momento. -
Page 86: Ajuste De La Sonoridad
Sección Ajustes de audio Presione MULTI-CONTROL para seleccio- nar el segmento que desea ajustar. Presione MULTI-CONTROL varias veces para cambiar el segmento en el siguiente orden: Banda—Frecuencia—Factor Q Haga girar MULTI-CONTROL para ajustar el segmento seleccionado. Banda LOW (bajo)—MID (medio)—HI (alto) Frecuencia Baja: 40HZ—80HZ—100HZ—160HZ Media: 200HZ—500HZ—1KHZ—2KHZ... -
Page 87: Uso Del Filtro De Paso Alto
Ajustes de audio Uso del filtro de paso alto Si no desea que se generen los sonidos bajos de la gama de frecuencias de salida de sub- graves a través de los altavoces delanteros o traseros, active el filtro de paso alto (HPF). Sólo las frecuencias más altas que aquellas en la gama seleccionada se generan a través de los altavoces delanteros o traseros. -
Page 88: Ajustes Iniciales
Sección Ajustes iniciales Configuración de los ajustes iniciales Presione y mantenga presionado SRC hasta que se apague la unidad. Mantenga presionado MULTI-CONTROL hasta que CLOCK SET aparezca en la panta- lla. Haga girar MULTI-CONTROL para selec- cionar uno de los ajustes iniciales. CLOCK SET (reloj)—OFF CLOCK (reloj apaga- do)—FM STEP (paso de sintonía de FM)—... -
Page 89: Cambio De La Búsqueda Pi Automática
Ajustes iniciales Utilice MULTI-CONTROL para seleccio- nar FM STEP. Presione MULTI-CONTROL para mostrar el modo de ajuste. # Presione BACK para volver a la visualización anterior. Haga girar MULTI-CONTROL para selec- cionar el paso de sintonía de FM. Al hacer girar MULTI-CONTROL se cambiará el paso de sintonía de FM entre 50 kHz y 100 kHz mientras la función AF o TA está... -
Page 90: Ajuste De La Salida Posterior Y Del Controlador De Subgraves
Sección Ajustes iniciales Ajuste de la salida posterior y del controlador de subgraves La salida posterior de esta unidad (salida de cables de altavoces traseros y salida RCA pos- terior) se puede usar para la conexión de alta- voces de toda la gama (REAR SP :FULL/ PREOUT :REAR) o subgraves (REAR SP :SUB W/PREOUT :SUB W). -
Page 91: Cambio Del Desplazamiento Continuo
Ajustes iniciales ! También puede activar o desactivar la demos- tración de características, presionando DISP mientras la unidad está apagada. Para obte- ner más detalles, consulte Acerca del modo demo en la página 62. Cambio del desplazamiento continuo Si la función de desplazamiento continuo está activada (ON), la información de texto grabada se desplaza de manera ininterrumpida. -
Page 92: Visualización De La Versión Del Sistema Del Adaptador Bluetooth Para Tareas De Reparación
Sección Ajustes iniciales Visualización de la versión del sistema del adaptador Bluetooth para tareas de reparación Si se produce un fallo de funcionamiento del adaptador de conexión de Bluetooth y debe ponerse en contacto con un concesionario para que realice la reparación, es posible que tenga que indicar la versión del sistema y la versión del módulo Bluetooth del adaptador. -
Page 93: Otras Funciones
76. Uso de la unidad externa Por unidad externa se entiende un producto Pioneer (como el que pueda estar disponible en el futuro) que, si bien es incompatible como fuente, permite el control de funciones básicas con esta unidad. Dos unidades exter- nas se pueden controlar con este sistema. -
Page 94: Selección De La Unidad Externa Como Fuente
Sección Otras funciones Selección de la unidad externa como fuente % Presione SRC para seleccionar EXTERNAL como la fuente. Funcionamiento básico Las funciones asignadas a las siguientes ope- raciones varían dependiendo de la unidad ex- terna conectada. Para obtener más información sobre las funciones, consulte el manual de instrucciones de la unidad externa conectada. -
Page 95: Accesorios Disponibles
! Lea las precauciones sobre el iPod en la pági- na 115. ! Mientras el iPod está conectado a esta uni- dad, aparece en él PIONEER (o verificación)). ! Si aparece un mensaje de error como ERROR-19, consulte Mensajes de error en la página 111. -
Page 96: Reproducción De Las Canciones En Orden Aleatorio (Shuffle)
Sección Accesorios disponibles ! Para volver al menú principal, presione duran- te varios segundos BACK. ! Para volver a la visualización normal, presione BAND/ESC. ! Si no se utiliza ninguna función en aprox. 30 segundos, la pantalla volverá automáticamen- te a la visualización normal. Reproducción de las canciones en orden aleatorio (shuffle) % Presione RDM repetidamente para se-... -
Page 97: Función Y Operación
Accesorios disponibles Notas ! Para obtener más información, consulte el manual de instrucciones del adaptador Blue- tooth. Esta sección proporciona información básica sobre las funciones del reproductor de audio Bluetooth con esta unidad que difieren ligeramente o son un resumen de las instruc- ciones incluidas en el manual de funciona- miento del adaptador Bluetooth. -
Page 98: Reproducción De Canciones En El Reproductor De Audio Bluetooth
Sección Accesorios disponibles Nota Antes de que pueda utilizar algunos reproducto- res de audio, es necesario que introduzca el códi- go PIN en esta unidad. Si su reproductor requiere un código PIN para establecer una conexión, lo- calice el código en el reproductor o en su docu- mentación. -
Page 99: Configuración De La Función Manos Libres
Accesorios disponibles Configuración de la función manos libres Antes de poder hacer uso de la función manos libres, deberá configurar la unidad para su utilización con el teléfono móvil. Esto conlleva establecer una conexión inalámbrica Bluetooth entre esta unidad y su teléfono, re- gistrar su teléfono en esta unidad, y ajustar el nivel de volumen. -
Page 100: Introducción A Las Funciones Avanzadas
Sección Accesorios disponibles Manejo de una llamada en espera % Atender una llamada en espera Cuando entre una llamada, presione MULTI-CONTROL. # También puede realizar esta operación presio- nando MULTI-CONTROL arriba. % Finalización de todas las llamadas Pulse MULTI-CONTROL hacia abajo. % Cambio entre los autores de llamadas en espera Pulse MULTI-CONTROL. -
Page 101: Conexión De Un Teléfono Móvil
Mientras se realiza la búsqueda, CONNECTING parpadeará. Para completar la conexión, verifique el nombre del dispositivo (PIONEER BT UNIT) e introduzca el código de enlace de su teléfono móvil. Si la conexión se establece, se visualizará CONNECTED. # El ajuste predefinido del código de enlace es 0000. -
Page 102: Registro De Un Teléfono Móvil Conectado
Sección Accesorios disponibles Registro de un teléfono móvil conectado Utilice MULTI-CONTROL para seleccio- nar SET PHONE en el menú de funciones. Presione MULTI-CONTROL para mostrar el modo de ajuste. Haga girar MULTI-CONTROL para selec- cionar la asignación de registro. P1 (teléfono de usuario 1)—P2 (teléfono de usuario 2)—P3 (teléfono de usuario 3)—G1 (teléfono de invitado 1)—G2 (teléfono de invi- tado 2) -
Page 103: Uso Del Directorio De Teléfonos
Accesorios disponibles Presione MULTI-CONTROL para co- nectar el teléfono móvil seleccionado. Mientras se realiza la conexión, se mostrará CONNECTING. Una vez completada la cone- xión, aparece CONNECTED. Conexión automática a un teléfono registrado Utilice MULTI-CONTROL para seleccio- nar AUTO CONNECT en el menú de funcio- nes. -
Page 104: Uso Del Historial De Llamadas
Sección Accesorios disponibles Presione MULTI-CONTROL para hacer una llamada. # Presione MULTI-CONTROL y mantenga pre- sionado para cambiar a la pantalla de elimina- ción del directorio de teléfonos. Para obtener más información, consulte Borrar memoria en esta pá- gina. Uso del Historial de llamadas Importante Asegúrese de estacionar el vehículo y poner el freno de mano para realizar esta operación. -
Page 105: Ajuste Del Rechazo Automático
Accesorios disponibles Haga girar MULTI-CONTROL para selec- cionar un alimento. PHONE BOOK (directorio de teléfonos)— MISSED (historial de llamadas perdidas)— DIALLED (historial de llamadas marcadas)— RECEIVED (historial de llamadas recibidas)— ALL (borrar toda la memoria) # Si desea borrar todo el Directorio de teléfonos y la lista del historial de llamadas marcadas/reci- bidas/perdidas, seleccione ALL. -
Page 106: Uso De Las Funciones Cd Text
Sección Accesorios disponibles % Avance rápido o retroceso Presione MULTI-CONTROL y mantenga pre- sionado hacia la izquierda o hacia la derecha durante cerca de un segundo y luego suelte. % Selección de una pista Pulse MULTI-CONTROL izquierda o derecha. Notas ! Mientras el reproductor de CD múltiple realiza las funciones preparatorias, se visualiza READY. -
Page 107: Uso De La Compresión Y Del Enfatizador De Graves
Accesorios disponibles Consulte Pausa de la repro- PAUSE ducción en la página 76. Consulte Introducción de tí- TITLE INPUT tulos de discos en la página Notas ! También se puede seleccionar la función pre- sionando FUNCTION en el mando a distancia. ! Para volver a la pantalla anterior, presione BACK. -
Page 108: Uso De Las Funciones De Títulos De Discos
Sección Accesorios disponibles Reproducción de la lista de reproducción ITS La reproducción ITS le permite escuchar las pistas que ha introducido en su lista de repro- ducción ITS. Cuando activa la reproducción ITS, se comenzarán a reproducir las pistas de la lista de reproducción ITS en el reproductor de CD múltiple. -
Page 109: Sintonizador De Tv
Accesorios disponibles Introducción de títulos de discos Utilice la función de introducción de títulos de discos para almacenar hasta 100 títulos de CD (con la lista de reproducción ITS) en el repro- ductor de CD múltiple. Cada título puede tener una longitud de hasta 10 caracteres. Para obtener más información sobre el funcio- namiento, consulte Introducción de títulos de discos en la página 76. -
Page 110: Almacenamiento Y Recuperación De Emisoras
Sección Accesorios disponibles ! Mantenga presionado MULTI-CONTROL iz- quierda o derecha para saltar las emisoras. La sintonización por búsqueda comienza inme- diatamente después de que suelte MULTI-CONTROL. Almacenamiento y recuperación de emisoras Se pueden almacenar con facilidad hasta 12 emisoras para recuperarlas posteriormente. ! Se pueden almacenar en la memoria 12 emisoras por cada banda. -
Page 111: Información Adicional
Información adicional Mensajes de error Cuando contacte con su proveedor o con el servicio técnico Pioneer más cercano, asegú- rese de haber anotado el mensaje de error. Reproductor de CD incorporado Mensaje Causa Acción ERROR-11, 12, Disco sucio Limpie el disco. -
Page 112: Pautas Para El Manejo De Discos Y Del Reproductor
Apéndice Información adicional El conector USB o el cable USB CHECK USB está cortocircui- tado. El reproductor de audio portátil USB/memoria USB conectado consume más de 500 mA (corrien- te máxima admi- sible). iPod Mensaje Causa ERROR-19 Fallo de comuni- cación Fallo del iPod N/A USB... -
Page 113: Discos Dobles
Información adicional ! No toque la superficie grabada de los dis- cos. ! Almacene los discos en sus cajas cuando no los utilice. ! Evite dejar discos en ambientes excesiva- mente calientes o expuestos a la luz solar directa. ! No fije etiquetas, no escriba ni aplique sus- tancias químicas en la superficie de los discos. -
Page 114: Reproductor De Audio Usb/Memoria Usb
Apéndice Información adicional ! Frecuencia de muestreo: 16 kHz a 48 kHz (LPCM), 22,05 kHz a 44,1 kHz (MS ADPCM) Reproductor de audio USB/ memoria USB Compatibilidad del reproductor de audio USB/memoria USB ! Versión USB: 2.0, 1.1 y 1.0 ! Velocidad de transferencia de datos USB: velocidad total ! Clase USB: Dispositivo MSC (Clase de al-... -
Page 115: Ipod
Acerca de los ajustes del iPod Nivel 4 ! No se puede utilizar el Ecualizador del iPod en los productos Pioneer. Recomendamos que desactive el Ecualizador del iPod antes de conectarlo a esta unidad. ! No puede desactivar la Repetición del iPod cuando utiliza esta unidad. -
Page 116: Archivos De Audio Comprimidos En El Disco
Apéndice Información adicional Archivos de audio comprimidos en el disco ! Según la versión del Windows Media Player utilizada para codificar los archivos WMA, es posible que no se visualicen correcta- mente los nombres de álbumes y demás in- formación de texto. ! La reproducción de archivos WMA/AAC co- dificados con datos de imagen puede tar- dar varios minutos en comenzar. - Page 117 Información adicional П Р С Т У Ф Х Ц Ч Ш, Щ Ъ Ы Ь Э Ю Я Apéndice...
-
Page 118: Especificaciones
Apéndice Información adicional Especificaciones Generales Fuente de alimentación ... 14,4 V CC (10,8 V a 15,1 V permisible) Sistema de conexión a tierra ... Tipo negativo Consumo máximo de corriente ... 10,0 A Dimensiones (An × Al × Pr): Bastidor ... 178 mm × 50 mm × 162 Cara anterior ... - Page 119 Apéndice Información adicional Sintonizador de MW Gama de frecuencias ... 531 kHz a 1 602 kHz (9 kHz) Sensibilidad utilizable ... 18 µV (Señal/ruido: 20 dB) Relación de señal a ruido ... 65 dB (red IEC-A) Sintonizador de LW Gama de frecuencias ... 153 kHz a 281 kHz Sensibilidad utilizable ...
- Page 120 TEL: (03) 9586-6300 PIONEER ELECTRONICS OF CANADA, INC. 300 Allstate Parkway, Markham, Ontario L3R 0P2, Canada TEL: 1-877-283-5901 TEL: 905-479-4411 PIONEER ELECTRONICS DE MEXICO, S.A. de C.V. Blvd.Manuel Avila Camacho 138 10 piso Col.Lomas de Chapultepec, Mexico, D.F. 11000 TEL: 55-9178-4270 先鋒股份有限公司...