Table of Contents
Advertisement
Operating Instructions
Auto Features . . . . . . . . .20
Cleaning . . . . . . . . . . .33, 34
Changing the
Power Level . . . . . . . . . . .13
Cooking Guide . . . . .15, 16
Defrosting Guide . . . . . .18
Exhaust Feature . . . .37, 38
Microwave Oven . . . .11, 12
Microwave Terms . . . . . .32
Other Features . . . . . 25-31
Replacing Bulbs . . . .35, 36
Sensor Features . . . . .21-24
Time Features . . . . . .14-19
Troubleshooting Tips . . .
Microwave Oven . . . . . . .40
Consumer Support
Consumer
Support . . . . . . .Back Cover
Optional Kits . . . . . . . . . .10
Warranty . . . . . . . . . . . . . .43
Write the model and serial numbers here:
Model # __________________________
Serial # __________________________
Find these numbers on a label inside
the oven.
GEAppliances.com
Español
2-9
For a Spanish version
of this manual,
visit our Website at
GEAppliance.com.
Para consultar una
version en español
de este manual
de instrucciones,
visite nuestro sitio
de internet
GEAppliance.com.
39
Owner's
Manual
PVM1870
PNM1871
PVM1873
DE68-03448A
49-40570-2 04-09 JR
Advertisement
Table of Contents

Related Manuals for GE Spacemaker PNM1871


Summary of Contents for GE Spacemaker PNM1871
-
Page 1: Table Of Contents
Time Features ..14–19 Troubleshooting Tips . . . Things That Are Normal With Your Microwave Oven ..40 Consumer Support Consumer Support ..Back Cover Optional Kits . -
Page 2: Important Safety Instructions
■ Install or locate this appliance only in accordance with the provided Installation Instructions. ■ This microwave oven is intended for household use and is UL listed for installation over electric and gas ranges. ■ This microwave oven is not approved or tested for... - Page 3 Time Cook for additional cooking time. ■ See door surface cleaning instructions in the Care and cleaning of the microwave oven section of this manual. ■ This appliance should be serviced only by qualified service personnel.
- Page 4 ■ Metal or foil touching the side of the oven. FOODS ■ Do not pop popcorn in your microwave oven unless in a special microwave popcorn accessory or unless you use popcorn labeled for use in microwave ovens. ■ Some products such as whole eggs and sealed containers—for example,...
- Page 5 — Do not use straight-sided containers with narrow necks. — After heating, allow the container to stand in the microwave oven for a short time before removing the container. — Use extreme care when inserting a spoon or other utensil into the container.
- Page 6 IMPORTANT SAFETY INSTRUCTIONS READ ALL INSTRUCTIONS BEFORE USING MICROWAVE-SAFE COOKWARE Make sure all cookware used in your microwave oven is suitable for microwaving. Most glass casseroles, cooking dishes, measuring cups, custard cups, pottery or china dinnerware which does not have metallic trim or glaze with a metallic sheen can be used.
- Page 7 ■ Use foil only as directed in this manual. When using foil in the microwave oven, keep the foil at least 1″ away from the sides of the oven. SAVE THESE INSTRUCTIONS GEAppliances.com ■...
-
Page 8: Grounding Instructions
IMPORTANT SAFETY INSTRUCTIONS READ ALL INSTRUCTIONS BEFORE USING Improper use of the grounding plug can result in a risk of electric shock. GROUNDING INSTRUCTIONS plug must be plugged into an outlet that is properly installed and grounded. Consult a qualified electrician or service technician if the grounding instructions are not completely understood, or if doubt exists as to whether the appliance is properly grounded. -
Page 9: The Vent Fan
■ In the event of a grease fire on the surface units below the microwave oven, smother a flaming pan on the surface unit by covering the pan completely with a lid, a cookie sheet or a flat tray. -
Page 10: Optional Kits
JX81H – Recirculating Charcoal Filter Kit Filter kits are used when the microwave oven cannot be vented to the outside. Available at extra cost from your GE supplier. See the back cover for ordering by phone or at GEAppliances.com. JX81B, JX81H... -
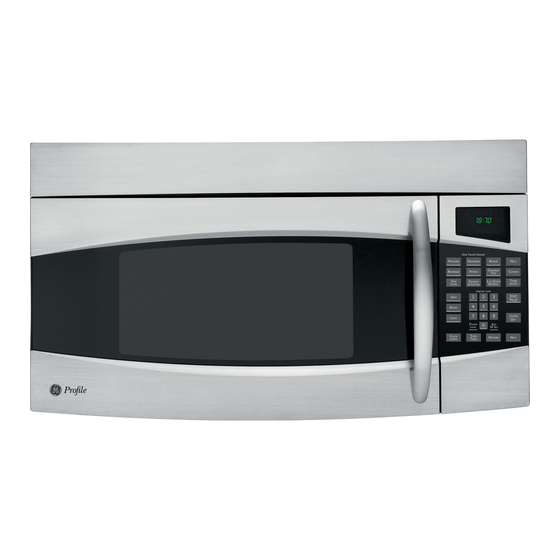
Page 11: Features Of Your Microwave Oven
The turntable may be removed for cleaning. NOTE: Rating plate is located on the inside wall of the microwave, or on the upper left front behind the door. Oven vent(s) and oven light are located on the inside walls of the microwave oven. -
Page 12: Cooking Controls
About the features of your microwave oven. You can microwave by time, with the sensor features or with the auto features. Cooking Controls Time and Auto Features Press TIME COOK I & II Press once or twice AUTO/TIME DEFROST Press twice... -
Page 13: Power Level
1–10. Press START. Variable power levels add flexibility to microwave cooking. The power levels on the microwave oven can be compared to the surface units on a range. High (power level 10) or full power is the fastest way to cook and gives you 100% power. Each power level gives you microwave energy a certain percent of the time. -
Page 14: Time Features
About the time features. Press TIME COOK . Enter cooking time. Change power level if you don’t want full power. (Press POWER LEVEL. Select a desired power level 1–10.) Press START . Time Cook I Allows you to microwave for any time up to 99 minutes and 99 seconds. -
Page 15: Cooking Guide
Cooking Guide for Time Cook I and Time Cook II NOTE: Use power level High (10) unless otherwise noted. Vegetable Amount Asparagus (fresh spears) 1 lb. (frozen spears) 10-oz package Beans (fresh green) 1 lb. cut in half (frozen green) 10-oz package (frozen lima) 10-oz package... - Page 16 About the time features. Vegetable Amount Corn (frozen kernel) 10-oz package Corn on the cob (fresh) 1 to 5 ears (frozen) 1 ear 2 to 6 ears Mixed vegetables (frozen) 10-oz package Peas (fresh, shelled) 2 lbs. unshelled 9 to 12 min. (frozen) 10-oz package Potatoes...
- Page 17 Press AUTO/TIME DEFROST twice. Enter defrosting time. Press START. Time Defrost Allows you to defrost for the length of time you select. See the Defrosting Guide for suggested times. Power level 3 is automatically set, but you may change this for more flexibility. You may defrost small items more quickly by raising the power level after entering the time.
-
Page 18: Defrosting Guide
About the time features. Defrosting Guide Food Breads, Cakes Bread, buns or rolls (1 piece) Sweet rolls (approx. 12 oz) Fish and Seafood Fillets, frozen (1 lb.) Shellfish, small pieces (1 lb.) Fruit Plastic pouch – 1 to 2 (10-oz package) Meat Bacon (1 lb.) Franks (1 lb.) - Page 19 Express Cook This is a quick way to set cooking time for 1 –6 minutes. Press one of the Express Cook pads (from 1 to 6) for 1 to 6 minutes of cooking at power level 10. For example, press the 2 pad for 2 minutes of cooking time.
-
Page 20: Auto Features
About the auto features. Press AUTO/TIME DEFROST once for Auto Defrost . Using the Conversion Guide at right, enter food weight. For example, press pads 1 and 2 for 1.2 pounds (1 pound, 3 ounces). Enter weight up to 6 pounds for Auto Defrost . -
Page 21: Sensor Features
Be sure the outside of the cooking containers and the inside of the microwave oven are dry before placing food in the oven. Beads of moisture turning into steam can mislead the sensor. - Page 22 About the sensor features. Use only with prepackaged microwave popcorn weighing 3.0 to 3.5 ounces. NOTE: Do not use the metal shelf when using the Popcorn feature. NOTE: Do not use this feature twice in succession on the same food portion—it may result in severely overcooked or burnt food.
- Page 23 For reheating single servings of previously cooked foods or a plate of leftovers. NOTE: Do not use the metal shelf when using the Reheat feature. NOTE: Do not use this feature twice in succession on the same food portion—it may result in severely overcooked or burnt food.
- Page 24 About the sensor features. Sensor cooking gives you easy, automatic results with a variety of foods (see the Cooking Guide below). NOTE: Do not use the metal shelf with Sensor Cooking. NOTE: Do not use this feature twice in succession on the same food portion—it may result in severely overcooked or...
-
Page 25: Other Features
Other features your model may have. Custom The CUSTOM pad allows you to save your most frequently used settings. (Sensor cooking settings cannot be saved.) To set and save a setting: Press the CUSTOM pad. Set the amount of cooking time. Set the power level, if desired. - Page 26 Other features your model may have. Timer Timer operates as a minute timer and can be used at any time, even when the oven is operating. Press TIMER . Enter time you want to count down. Press TIMER to start. To pause the countdown, press TIMER .
- Page 27 GEAppliances.com Start/Pause In addition to starting many functions, START/PAUSE allows you to stop cooking without opening the door or clearing the display. Child Lock-Out You may lock the control panel to prevent the microwave from being accidentally started or used by children.
- Page 28 Other features your model may have. Turntable For best cooking results, leave the turntable on. It can be turned off for large dishes. Press TURNTABLE to turn the turntable on or off. Sometimes the turntable can become too hot to touch. Be careful touching the turntable during and after cooking.
- Page 29 Options Press the OPTIONS pad multiple times to cycle through the available options. Auto Nite Light The Auto Nite Light can be set to come on and go off at desired times. To set the timer: Press 1. Enter the time of day for the light to come on. Select AM or PM.
- Page 30 Other features your model may have. How to Use the Shelf When Microwaving ■ Make sure the shelf is positioned properly inside the microwave to prevent damage to the oven from arcing. ■ Do not use a microwave browning dish on the shelf. The shelf could overheat.
- Page 31 Switch places after 1/2 time Switch places after 1/2 time Switch places twice Shelf and Reheating ■ To reheat on 2 levels ■ To reheat 2 dishes on the lower level: Multiply reheat time by 1 Switch places after 1/2 the time. ■...
-
Page 32: Microwave Terms
Microwave terms. Term Definition Arcing Arcing is the microwave term for sparks in the oven. Arcing is caused by: ■ ■ ■ ■ ■ Covering Covers hold in moisture, allow for more even heating and reduce cooking time. Venting plastic wrap or covering with wax paper allows excess steam to escape. -
Page 33: Care And Cleaning
Care and cleaning of the microwave oven. Helpful Hints An occasional thorough wiping with a solution of baking soda and water keeps the inside fresh. NOTE: Be certain the power is off before cleaning any part of this oven. How to Clean the Inside... - Page 34 We recommend against using cleaners with ammonia or alcohol, as they can damage the appearance of the microwave oven. If you choose to use a common household cleaner, first apply the cleaner directly to a clean cloth, then wipe the soiled area.
-
Page 35: Replacing Bulbs
Replacing the light bulbs. Remove screw Cooktop Light/Night Light Replace the burned-out bulb with a 120 volt, 20-watt halogen bulb (WB36X10213), available from your GE supplier. To replace the bulb(s), first disconnect the power at the main fuse or circuit breaker panel or pull the plug. -
Page 36: Replacing The Light Bulbs
Oven Light Replace the burned-out bulb with a 120 volt, 20-watt halogen bulb (WB36X10213), available from your GE supplier. To replace the oven light, first disconnect the power at the main fuse or circuit breaker panel or pull the plug. -
Page 37: Exhaust Feature
About the exhaust feature. Charcoal Filter (on some models) Reusable Grease Filter (on all models) The Vent Fan The vent fan has a metal reusable grease filter. Models that recirculate air back into the room also use a charcoal filter. Reusable Grease Filter The reusable grease filter traps grease released by foods on the cooktop. - Page 38 Charcoal Filter (on some models) The charcoal filter cannot be cleaned. It must be replaced. Order Part No. WB2X10733 from your GE supplier. If the model is not vented to the outside, the air will be recirculated through a disposable charcoal filter that helps remove smoke and odors.
-
Page 39: Before You Call For Service
Before you call for service… Troubleshooting Tips Save time and money! Review the charts on the following pages first and you may not need to call for service. Problem Oven will not start Floor of the oven is warm, even when the oven has not been used “CONTROL LOCKED”... -
Page 40: Things That Are Normal With Your Microwave Oven
Before you call for service… Things That Are Normal With Your Microwave Oven ■ Moisture on the oven door and walls while cooking. Wipe the moisture off with a paper towel or soft cloth. ■ Moisture between the oven door panels when cooking certain foods. - Page 41 Notes.
- Page 42 Notes.
-
Page 43: Warranty
This warranty is extended to the original purchaser and any succeeding owner for products purchased for home use within the USA. If the product is located in an area where service by a GE Authorized Servicer is not available, you may be responsible for a trip charge or you may be required to bring the product to an Authorized GE Service Location for service. -
Page 44: Parts And Accessories
Contact Us If you are not satisfied with the service you receive from GE, contact us on our Website with all the details including your phone number, or write to: Register Your Appliance Register your new appliance on-line—at your convenience! Timely product registration...