Table of Contents
Advertisement
Quick Links
Advertisement
Table of Contents

Related Manuals for Epson DS-510


Summary of Contents for Epson DS-510
- Page 1 User’s Guide NPD4887-01 EN...
-
Page 2: Copyright And Trademarks
Neither Seiko Epson Corporation nor its affiliates shall be liable to the purchaser of this product or third parties for damages, losses, costs, or expenses incurred by the purchaser or third parties as a result of: accident, misuse, or abuse of this product or unauthorized modifications, repairs, or alterations to this product. - Page 3 (INCLUDING NEGLIGENCE OR OTHERWISE) ARISING IN ANY WAY OUT OF THE USE OF THIS SOFTWARE, EVEN IF ADVISED OF THE POSSIBILITY OF SUCH DAMAGE. General Notice: Other product names used herein are for identification purposes only and may be trademarks of their respective companies. Copyright © 2013 Seiko Epson Corporation. All rights reserved.
-
Page 4: Table Of Contents
Product Parts......10 Epson Scan Driver ......39 Status Light. - Page 5 Technical Support Web Site....62 Contacting Epson Support....62 Before Contacting Epson.
-
Page 6: Operating System Versions
DS-510 User’s Guide Operating System Versions Operating System Versions In this manual, the following abbreviations are used. Windows refers to Windows 8, Windows 7, Windows Vista, Windows XP, and Windows XP x64. ❏ Windows 8 refers to Windows 8 and Windows 8 Pro. -
Page 7: Safety Instructions
DS-510 User’s Guide Safety Instructions Safety Instructions Important Safety Instructions In this document, warnings, cautions, important, and notes indicate the following: Warnings must be followed to avoid serious bodily injury. Cautions must be followed carefully to avoid bodily injury. Importants: must be observed to avoid damage to your equipment. -
Page 8: Restrictions On Copying
DS-510 User’s Guide Safety Instructions ❏ When connecting this product to a computer or other device with a cable, ensure the correct orientation of the connectors. Each connector has only one correct orientation. Inserting a connector in the wrong orientation may damage both devices connected by the cable. - Page 9 DS-510 User’s Guide Safety Instructions Note: Copying these items may also be prohibited by law. Responsible use of copyrighted materials Products can be misused by improperly copying copyrighted materials. Unless acting on the advice of a knowledgeable attorney, be responsible and respectful by obtaining the permission of the copyright holder before copying published material.
-
Page 10: Getting To Know Your Product
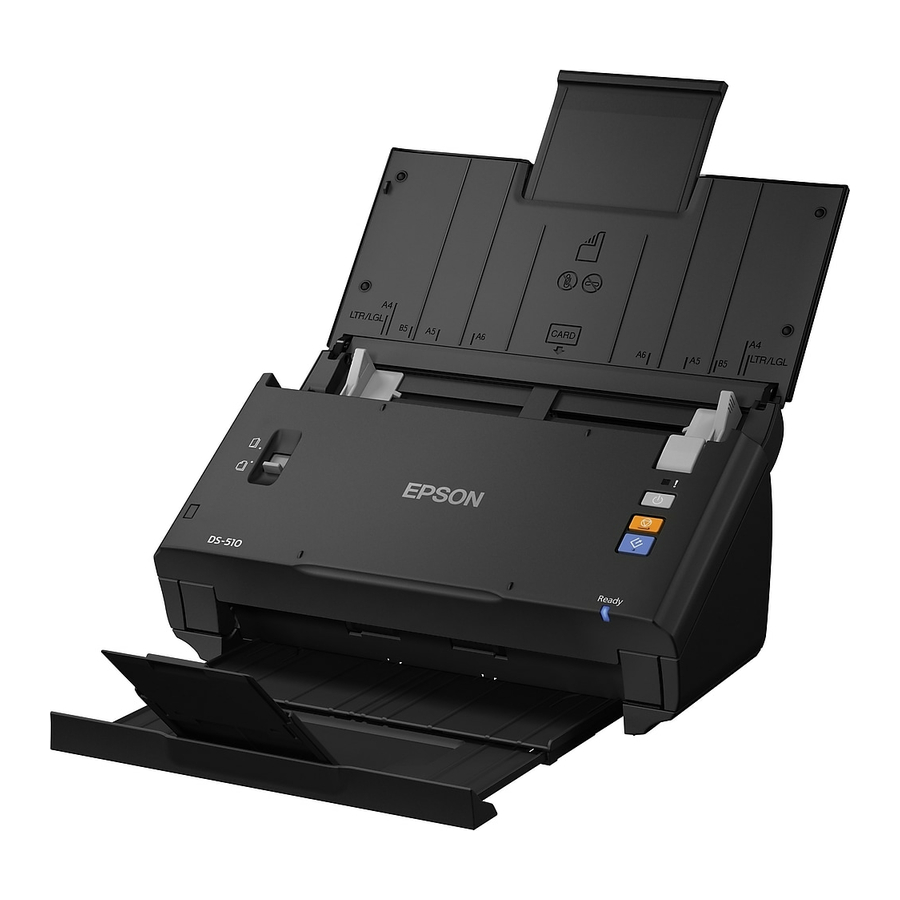
DS-510 User’s Guide Getting to Know Your Product Getting to Know Your Product Product Parts Note: Use all the items that came with your product. a. scanner cover b. page separation lever c. edge guides d. input tray e. cover open lever... -
Page 11: Status Light
DS-510 User’s Guide Getting to Know Your Product a. security slot b. USB interface connector c. DC inlet a. AC adapter b. AC power cord c. USB cable Status Light The Status light indicates whether the product is operating normally. -
Page 12: Button
DS-510 User’s Guide Getting to Know Your Product Light Indicator Status Meaning Ready (Blue) and Error The product is off. (Amber) Button The product has three buttons for scanning operations. Before using these buttons, make sure you have installed your scanning software. -
Page 13: Page Separation Lever
DS-510 User’s Guide Getting to Know Your Product Page Separation Lever Change the position of the page separation lever depending on the type of document you are going to scan. Separation feeding You should normally use separation feeding. Documents with multiple pages are fed one sheet at a time. -
Page 14: Placing Originals On The Product
DS-510 User’s Guide Placing Originals on the Product Placing Originals on the Product Loading Documents Document specifications The following table provides a list of the paper you can load into the product. Paper Size Measurements Paper Thickness Paper Type Loading Capacity 210 ... -
Page 15: Loading A Mixture Of Documents At Different
DS-510 User’s Guide Placing Originals on the Product ❏ Ripped, wrinkled, or curled documents ❏ Document with staples or paper clips (which may damage the paper source) ❏ Documents with holes (not including punched holes) ❏ Bound documents ❏ Documents with carbon paper on the back ❏... -
Page 16: Loading Documents
DS-510 User’s Guide Placing Originals on the Product ❏ Slide the edge guides to fit the edges of the widest document. Loading documents Follow the steps below to load the document. Open and extend the input tray, and then slide out the output tray and raise and extend the central guide. - Page 17 DS-510 User’s Guide Placing Originals on the Product Make sure that the page separation lever is lowered. Load only the first page of your documents into the input tray with the printed side facing down and the top edge facing into the feeder.
-
Page 18: Loading Cards
❏ Smooth out the folding lines on the documents before loading them. Slide the edge guides to fit the edge of the paper. “Scanning Using Document Capture Pro/Document Capture” on page 25 & “Scanning Using Epson Scan ” on page 26 & Loading Cards Note: Scan results are not guaranteed for plastic cards with shiny surfaces. - Page 19 DS-510 User’s Guide Placing Originals on the Product 56 85.6 mm Size (2.1 3.3 inches) Loading capacity Loading direction Horizontal Paper thickness Up to 1.24 mm thick (including emboss) * ISO7810 compliant Follow the steps below to load a plastic card.
- Page 20 DS-510 User’s Guide Placing Originals on the Product Raise the page separation lever. Load the card into the input tray with the printed side facing down and the top edge facing into the feeder. Slide the card into the feeder until it meets resistance. Then slide the edge guides to fit the edge of the card.
-
Page 21: Loading Special Documents
❏ Do not load plastic cards vertically. ❏ To scan plastic cards, clear Detect Double Feed in Epson Scan. See the Epson Scan Help for details. This completes the procedure for loading cards. See the following sections for more information on scanning documents. - Page 22 DS-510 User’s Guide Placing Originals on the Product Open and extend the input tray, and then slide out the output tray and raise and extend the central guide. Slide the edge guides on the input tray all the way out.
- Page 23 ❏ Do not load the document with the open side facing down. ❏ To scan special documents, clear Detect Double Feed in Epson Scan. See the Epson Scan Help for details. This completes the procedure for loading documents. See the following sections for more information on scanning the...
- Page 24 User’s Guide Placing Originals on the Product “Scanning Using Document Capture Pro/Document Capture” on page 25 & “Scanning Using Epson Scan ” on page 26 & Lower the page separation lever after scanning. Note: When loading a photo or paper that is an irregular shape, use the carrier sheet (sold separately).
-
Page 25: Basic Scanning
DS-510 User’s Guide Basic Scanning Basic Scanning Scanning from the Button Load the document(s). “Loading Documents” on page 14 & “Loading Cards” on page 18 & “Loading Special Documents” on page 21 & Press the ] Start button. The scanned image is saved to the folder you specified. -
Page 26: Scanning Using Epson Scan
DS-510 User’s Guide Basic Scanning If you want to make detailed settings such as image quality, click Detailed Settings to display the "Epson Scan” scanner driver screen, and then make the necessary settings. Mac OS X To display the EPSON Scan screen, select Displays the EPSON Scan Setup Screen in Scan from the menu. - Page 27 In the File Save Settings window, select the Type setting and click OK. Note: If the Show this dialog box before next scan check box is cleared, Epson Scan starts scanning immediately without displaying the File Save Settings window. The scanned image is saved to the folder you specified.
-
Page 28: Various Types Of Scanning
DS-510 User’s Guide Various Types of Scanning Various Types of Scanning Scanning to SharePoint or Cloud Service You can upload scanned images to a SharePoint Server or Cloud Service. Windows Start Document Capture Pro and scan your document. “Scanning Using Document Capture Pro/Document Capture” on page 25 steps 1 to 5 &... -
Page 29: Scanning Multiple Documents To Separate Files (Windows)
DS-510 User’s Guide Various Types of Scanning On the Main window of Document Capture, click the destination icon. See the Help for details on Document Capture. Make settings for each item, enter the server’s Address, User Name, and Password, and then click OK. -
Page 30: Assigning A Specified Scanning Setting To A Program
DS-510 User’s Guide Various Types of Scanning Make other settings on the Save As window, and then click OK. Scanned images are saved separately based on the separation method selected. Assigning a Specified Scanning Setting to a Program By registering a specific scanning operation to a scanner button, you can perform that operation by simply pressing the scanner button. - Page 31 “How to start” on page 39 & Click the (Scan) icon. Click Detailed Settings and display EPSON Scan. Select Double-Sided from Source on the Main Settings tab. Select the document size from Size. Select Top&Bottom or Left&Right from Stitch Images, and then click OK.
-
Page 32: Adjusting The Scanned Image
If the images are not stitched together in the intended direction, check Binding Position (for Double-Sided Scanning) on the EPSON Scan Configuration screen. Adjusting the Scanned Image Epson Scan offers a variety of settings for improving color, sharpness, and other aspects affecting image quality. - Page 33 DS-510 User’s Guide Various Types of Scanning Unsharp Mask Sharpens the edges of image areas. Descreening A ripple or cross-hatch pattern (known as moiré) may appear in a scanned image of a printed document. Text Enhancement Enhances text recognition when scanning text documents.
- Page 34 DS-510 User’s Guide Various Types of Scanning See the Help for details on Epson Scan.
-
Page 35: Using The Network Interface Unit
Scan in the Document Capture Pro or Epson Scan window. Connecting a Network Interface Unit Epson Scan works with the optional Network Interface Unit (B12B808451/B12B808461) to enable direct control of all features of your scanner in a network environment. -
Page 36: Setting Up Client Computers With Epson Scan Settings
Obtain the IP address or host name of the Network Interface Unit from your network administrator. Start Epson Scan Settings. Windows: Start > All Programs or Programs > EPSON > EPSON Scan > EPSON Scan Settings Mac OS X: Select Applications > EPSON Software > EPSON Scan Settings. -
Page 37: Scanning Over A Network
In the Add window, choose the Network Interface Unit’s IP address under Search for addresses, or select Enter address and type in the address. Then click OK. In the Epson Scan Settings window, click Test to check the connection. If everything works properly, a message indicating successful connection is displayed. -
Page 38: Scanning From The Network Interface Unit (For Windows)
DS-510 User’s Guide Using the Network Interface Unit Make necessary settings on Main Settings, and then click Scan. Scanning from the Network Interface Unit (for Windows) Setup a Job in advance. “Assigning a Specified Scanning Setting to a Program” on page 30 &... -
Page 39: Software Information
TWAIN-compliant scanning program. How to start ❏ Windows: Select Start > All Programs or Programs > EPSON > EPSON Scan > EPSON Scan. ❏ Mac OS X: Select Applications > Epson Software > EPSON Scan. How to access the help... -
Page 40: Another Scanning Software
DS-510 User’s Guide Software Information Another Scanning Software Presto! BizCard You can scan business cards and convert them to editable text using the Presto! BizCard software that came with your scanner. How to start ❏ Windows: Select Start > All Programs or Programs > NewSoft > Presto! BizCard > Presto! BizCard. -
Page 41: Checking And Installing Your Software
Double-click the Add or Remove Programs icon. Check the list of currently installed programs. For Mac OS X Double-click Macintosh HD. Double-click the Epson Software folder in the Applications folder and check the contents. Note: The Applications folder contains software provided by third parties. -
Page 42: Uninstalling Your Software
DS-510 User’s Guide Software Information Installing the software Insert the software disk that came with your product and select the software you want to install on the Software Select window. Uninstalling Your Software You may need to uninstall and then reinstall your software to solve certain problems or if you upgrade your operating system. -
Page 43: For Mac Os X
Access the site at: http://www.epson.com Next, select the support section of your local Epson Web site. ❏ To uninstall applications, you must log on to a Computer Administrator account. You cannot uninstall programs if you log on as a limited account user. -
Page 44: Maintenance
DS-510 User’s Guide Maintenance Maintenance Cleaning the Product To keep your product operating at its best, follow the steps below to clean it periodically. Important: ❏ Never use alcohol, thinner, or corrosive solvent to clean the product. These chemicals can damage the product components and the case. - Page 45 DS-510 User’s Guide Maintenance Unplug the AC adapter from the product. Pull the cover open lever and open the scanner cover. Use a soft cloth to wipe off any stains on the roller on the Scanner cover side. Wipe off any stains on the pickup roller.
- Page 46 DS-510 User’s Guide Maintenance Wipe off any stains on the four rollers on the bottom. Hold down the ] button for at least two seconds. Press the ] button several times to rotate the roller and wipe off any stains on the roller.
-
Page 47: Replacing The Roller Assembly Kit
DS-510 User’s Guide Maintenance Replacing the Roller Assembly Kit You need to replace the parts on the Roller Assembly Kit after scanning every 100,000 times. Removal part Part number Number of scanning Roller Assembly Kit B12B813561 100,000 To replace the Roller Assembly Kit, follow the steps below. - Page 48 DS-510 User’s Guide Maintenance Important: Do not place too much force on the arm when replacing the pickup roller. Doing so may break the arm. Slide and remove the installed pickup roller. Attach the new lower pickup roller in the correct position.
- Page 49 DS-510 User’s Guide Maintenance Attach the new upper pickup roller in the correct position. Align the notches, and check that the smaller roller is on the bottom. Important: Do not touch the surface of the roller. Close the pickup roller cover.
- Page 50 DS-510 User’s Guide Maintenance Slide and remove the installed separation roller. Remove the roller from the axis. Attach the new separation roller to the axis, and make sure the notches align. Check that there are no gaps. Make sure the roller does not come off the axis.
-
Page 51: Energy Saving
Plug the AC adapter, and then turn on the scanner. Start Epson Scan Settings. Windows: Start > All Programs or Programs > EPSON > EPSON Scan > Epson Scan Settings. Mac OS X: Select Applications > EPSON Software > EPSON Scan Settings. -
Page 52: Transporting The Product
DS-510 User’s Guide Maintenance Mac OS X: Select Applications > EPSON Software > EPSON Scan Settings. Click Energy Saving. Set the Sleep Timer or Power Off Timer, and then click OK. Note: If you want to turn off the Power Off Timer, set it to 0. -
Page 53: Updating The Firmware
User’s Guide Maintenance http://www.kensington.com/ & Updating the Firmware Check the Epson home page for the latest firmware update releases. If there is no firmware information on the home page, you are already using the latest firmware. http://www.epson.com & Important: Do not turn off the product while the firmware is updating. Otherwise, the firmware may not be updated correctly. -
Page 54: Troubleshooting
“Uninstalling Your Software” on page 42 & ❏ If the light source has reached the end of its service life, it must be replaced by a professional. For details, contact your dealer. “Contacting Epson Support” on page 62 &... -
Page 55: Using The Button
& ❏ Mac OS X: Make sure you are logged on as the user who installed the scanning software. Other users must first start Epson Scanner Monitor in the Applications folder and then press a button to scan. Using the Network Interface Unit ❏... -
Page 56: Using Scanning Software Other Than Epson Scan Driver
“How to unblock Document Capture Pro” on page 56 & ❏ Check that the IP address for the scanner being used is set correctly. “Setting Up Client Computers with Epson Scan Settings” on page 36 & How to unblock Document Capture Pro Display the Control Panel. -
Page 57: Problems When Feeding Paper
❏ When scanning plastic cards and special documents (folded documents, envelopes, and so on), clear Detect Double Feed in Epson Scan. & See the Epson Scan Help for details. & When scanning documents using a job registered in Document Capture Pro, you need to edit the job. Select the job from the Job Management window in Document Capture Pro, and then click Edit to open the Job Settings window. -
Page 58: Paper Jams In The Product
DS-510 User’s Guide Troubleshooting Paper jams in the product If paper jams inside the product, follow the steps below to remove jammed paper. Turn off the product. Remove all paper from the input tray. Pull the cover open lever and open the scanner cover. -
Page 59: Problems With Scanning Time
DS-510 User’s Guide Troubleshooting If there is paper jammed in the output tray, gently pull the paper out in the direction shown. Close the scanner cover. Problems With Scanning Time ❏ Computers with Hi-Speed external USB ports can scan faster than those with external USB ports. If you are using a Hi-Speed external USB port with your product, make sure it meets the system requirements. -
Page 60: The Scanning Area Is Unsatisfactory
If the edges of your original are not scanned correctly, set the Size to Auto Detect, click the Configuration button, and then adjust the cropping area in Crop Margins for Size “Auto”. Problems Remain After Trying All Solutions If you have tried all the solutions and have not solved the problem, initialize the Epson Scan settings. - Page 61 DS-510 User’s Guide Troubleshooting Click Configuration, select the Other tab, and then click Reset All.
-
Page 62: Where To Get Help
Epson support services for assistance. If Epson support for your area is not listed below, contact the dealer where you purchased your product. Epson support will be able to help you much more quickly if you give them the following information: ❏ Product serial number (The serial number label is usually on the back of the product.) -
Page 63: Help For Users In Latin America
Visit Epson’s support website at http://epson.com/support and select your product for solutions to common problems. You can download drivers and documentation, get FAQs and troubleshooting advice, or e-mail Epson with your questions. Speak to a Support Representative Dial: (562) 276‐1300 (U.S.), or (905) 709-9475 (Canada), 6 am to 6 pm, Pacific Time, Monday through Friday. Days and hours of support are subject to change without notice. -
Page 64: Help For Users In Europe
(51 1) 418-0210 Venezuela (58 212) 240-1111 Help for Users in Europe Check your Pan-European Warranty Document for information on how to contact Epson support. Help for Users in Taiwan Contacts for information, support, and services are: World Wide Web (http://www.epson.com.tw) Information on product specifications, drivers for download, and products enquiry are available. -
Page 65: Help For Users In Australia
Epson Helpdesk Epson Helpdesk is provided as a final backup to make sure our clients have access to advice. Operators on the Helpdesk can aid you in installing, configuring and operating your Epson product. Our Pre-sales Helpdesk staff can provide literature on new Epson products and advise where the nearest dealer or service agent is located. -
Page 66: Help For Users In Singapore
User’s Guide Where To Get Help Help for Users in Singapore Sources of information, support, and services available from Epson Singapore are: World Wide Web (http://www.epson.com.sg) Information on product specifications, drivers for download, Frequently Asked Questions (FAQ), Sales Enquiries, and Technical Support via e-mail are available. -
Page 67: Help For Users In Indonesia
Where To Get Help Help for Users in Indonesia Contacts for information, support, and services are: World Wide Web (http://www.epson.co.id) ❏ Information on product specifications, drivers for download ❏ Frequently Asked Questions (FAQ), Sales Enquiries, questions through e-mail Epson Hotline ❏... -
Page 68: Help For Users In Hong Kong
To obtain technical support as well as other after-sales services, users are welcome to contact Epson Hong Kong Limited. Internet Home Page Epson Hong Kong has established a local home page in both Chinese and English on the Internet to provide users with the following information: ❏ Product information ❏... -
Page 69: Help For Users In India
603-56288333 Help for Users in India Contacts for information, support, and services are: World Wide Web (http://www.epson.co.in) Information on product specifications, drivers for download, and products enquiry are available. Epson India Head Office - Bangalore Phone: 080-30515000 Fax: 30515005 Epson India Regional Offices:... -
Page 70: Help For Users In The Philippines
For Service (CDMA & Mobile Users) - 3900 1600 (9AM - 6PM) Prefix local STD code Help for Users in the Philippines To obtain technical support as well as other after sales services, users are welcome to contact the Epson Philippines Corporation at the telephone and fax numbers and e-mail address below:... -
Page 71: Technical Specifications
See your system documentation for details.) Note: Epson Scan does not support the UNIX File System (UFS) for Mac OS X. You must install Epson Scan on a disk or in a partition that does not use UFS. Product Specifications Note: Specifications are subject to change without notice. -
Page 72: Mechanical
DS-510 User’s Guide Technical Specifications Photoelectric device 5,100 21,600 pixels at 600 dpi Effective pixels Max: 215.9 914.4 mm Document size (8.6 36.0 inches) Min: 52 50.8 mm (2.0 2 inches) Paper input Face-down loading... -
Page 73: Environmental
DS-510 User’s Guide Technical Specifications Note: Power consumption varies depending on operating conditions and whether an option is installed. AC Adapter AC adapter model A441H Rated input voltage AC 100 to 240 V Rated input current AC 0.6 A - AC 0.3 A... -
Page 74: Standards And Approvals
DS-510 User’s Guide Technical Specifications Standards and approvals Product U.S. model: FCC Part 15 Subpart B Class B CAN/CSA-CEI/IEC CISPR22 Class B European model: EMC Directive 2004/108/EC EN 55022 Class B EN 55024 EN 61000-3-2 EN 61000-3-3 Australian model: AS/NZS CISPR22 Class B AC adapter U.S.