Table of Contents
Advertisement
Quick Links
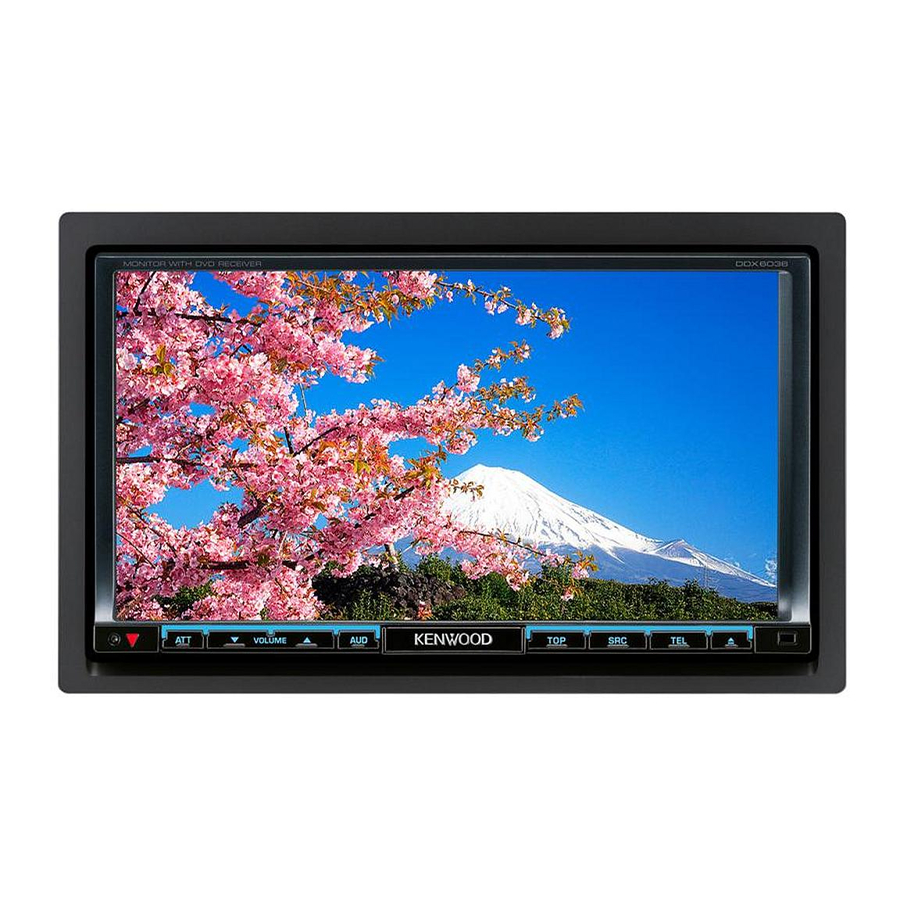
MONITOR WITH DVD RECEIVER
DDX6036
DDX6036M
INSTRUCTION MANUAL
This instruction manual is used to describe models listed below.
Model availability and features (functions) may differ depending on the country and
sales area.
• Region 2 (DVD Region Code 2 area)
• Region 3 (DVD Region Code 3 area)
• Region 4 (DVD Region Code 4 area)
• Region 6 (DVD Region Code 6 area)
© B64-4565-00/00 (MW/M2W/XW)
Advertisement
Table of Contents

Related Manuals for Kenwood DDX6036


Summary of Contents for Kenwood DDX6036
- Page 1 MONITOR WITH DVD RECEIVER DDX6036 DDX6036M INSTRUCTION MANUAL This instruction manual is used to describe models listed below. Model availability and features (functions) may differ depending on the country and sales area. • Region 2 (DVD Region Code 2 area) •...
-
Page 2: Table Of Contents
Other Functions Movie Menu Control How To Use the Character Entry Screen iPod Control Muting Audio Volume upon Reception of Phone Call Playback Screen Easy Control Screen Screen Control Source Control Screen Screen Control iPod List Link search (Music file) DDX6036/DDX6036M... - Page 3 Setup Menu Hands Free Unit Control How to Display SETUP Menu Screen Before Use DivX Setup Downloading the Phonebook Software Information Receiving a Call User Interface During a Call Language Setting Call Waiting Touch Panel Adjustment Making a Call Clock Setup Calling by Phonebook Security Indicator Setup Calling by Entering a Phone Number...
-
Page 4: Before Use
• When you purchase optional accessories, check wipe it again with a clean soft dry cloth. with your Kenwood dealer to make sure that they ¤ work with your model and in your area. -
Page 5: Notes
% : Playback is partly possible. An online manual about audio files is put on the × : Playback is impossible. site, www.kenwood.com/audiofile/. On this online ⁄ manual, detailed information and notes which are not written in this manual are provided. Make sure •... - Page 6 Changing the browse item will display a correct title, etc. • When the iPod is connected to this unit, "KENWOOD" or "✓" is displayed on the iPod to indicate that you cannot operate the iPod. DDX6036/DDX6036M...
-
Page 7: Region Codes In The World
Region codes in the world The DVD players are given a region code according to the country or area it is marketed, as shown in the following map. DVD disc marks Operation regulatory marks With this DVD, some functions of this unit such as the Symbol Description play function may be restricted depending on the... -
Page 8: How To Read This Manual
Next page 3 C ontinue to the next page The instruction continues to the next page. Make sure to flip the page for the rest of the truction. The above operation example with the mark differs from the actual operation. DDX6036/DDX6036M... - Page 9 Function Icon Icons representing available functions are shown below. : Function of DVD-VIDEO playback. D D D EO E DEO O O O EO : Function of DVD-VR playback. -V -V V R : Function of Video CD playback. o CD o C C D : Function of CD (CD-DA) playback.
-
Page 10: Functions Of The Buttons On The Front Panel
Functions of the buttons on the front panel VOLUME Reset button (page 4) Remote control Security indicator sensor (page 60) DDX6036/DDX6036M... - Page 11 Functions of the buttons on the front panel 1 sec. : Press for more than 1 second Attenuation of the volume On/Off. 1 sec. Switches the source that is output at the AV OUTPUT terminal. Volume adjustment. ⁄ Displays Tone Control screen.* The display may not switch to Tone 1 sec.
-
Page 12: Getting Started
\ Page 28 iPod \ Page 22 \ Page 31 TUNER \ Page 36 \ Page 40 Bluetooth ⁄ • For Disc media, iPod and USB, the input is switched to the source as the media or the device is set. DDX6036/DDX6036M... -
Page 13: How To Set A Medium / A Device
Getting Started How to Set a Medium / a Device 7 Disc media Press the [0] button to open/close the front panel. If a disc is already inserted, it is ejected by pressing the [0] button. 7 iPod To disconnect the iPod, stop the playback by touching the [38] button on the source control screen, and then disconnect the iPod. -
Page 14: Basic Operation
Source Control Screen 1 sec. • For how to use each button, see the operation pages of each source. How to display the Source Control screen The Source Control Screen appears. The Source Control Screen appears. DDX6036/DDX6036M... -
Page 15: How To Display Top Menu Screen
Basic Operation How to Display Top Menu Screen Buttons on the Top Menu screen [NAV V ] Switches to the navigation screen. Top Menu Screen is the entrance to all the [SRC ] Switches to the source control screen functions. You can enter source operation screen of the selected source. -
Page 16: Operation On The Playback Screen Of Visual Sources
3 Forward search. 4 Displays/ Clears source information screen.* • For the function of each touching area, see the pages of each source. * Source information screen ⁄ • The information display is cleared automatically after approximately 5 seconds. DDX6036/DDX6036M... -
Page 17: How To Display The Easy Control Screen
Basic Operation How to Display the Easy Control Screen Basic operation buttons of the selected source can be displayed on the playback screen of visual sources so that you can control the source without switching the screen. Easy Control Screen Buttons on the Easy Control Screen [∞] Changes the function as follows by touching the [∞] button. -
Page 18: Watching Dvd/Video Cd
Source Control Screen • The information display is cleared automatically after Switches to the source control screen to use approximately 5 seconds. various playback functions. Display the Source Control Screen See <How to Display the Source Control Screen> (page 14). DDX6036/DDX6036M... - Page 19 Operation on the Source Control Screen Multi Function DVD-VIDEO/DVD-VR DVD-VIDEO/DVD-VR ] Closes the multi function bar. DVD-VIDEO DVD-VIDEO [REP] Switches the Repeat Play operations in the following sequence. Video CD Video CD Title Repeat, Chapter Repeat, Repeat Off [TIME] Switches the play time display in the following sequence.
-
Page 20: Dvd-Video Disc Menu
[Exit] Exits the Menu Control 2 screen. [Exit] Exits the Menu Control 1 screen. Operation on the Zoom Control screen Operation on the Highlight Control Highlight control lets you control DVD Menu by touching the menu button directly on the screen. DDX6036/DDX6036M... -
Page 21: Dvd-Vr Menu Control
[Zoom] Changes the zoom ratio at 4 levels (2 times, 3 times, 4 times, or off ) each time you touch. [2], [3], [5], [∞] Scrolls the screen in the direction you touch. [Return] Returns to the previous screen. [Exit] Exits the Zoom Control screen. [Zoom] Changes the zoom ratio at 4 levels (2 times, 3 times, 4 times, or off ) each time you DVD-VR Menu Control... -
Page 22: Music Disc/ Audio File Listening & Video File/ Picture File Watching
Fast Forwards or Fast Backwards. [REP] Repeats the present file or data. [4], [¢] Selects a track/ file. [FREP] Repeats the music or data of the ], [ MPEG/DivX® MPEG/DivX® JPEG JPEG Audio File Audio File present folder. Selects a folder. DDX6036/DDX6036M... -
Page 23: List Select
[RDM] Starts or stops Random Play (to play List Select files of the present folder in random order). Folder list: Searches folders and Audio/ Video/ [4Line]/ [2Line] Switches the number of lines Picture files stored in media and devices displayed in the Information Display. according to hierarchy. -
Page 24: Usb Device Select
Scrolls to the position of the specified initial 1 Selects a device or partition. [ UP] Returns to the Device Selection screen. ] The text display is scrolled by touching it. [CTRL] Returns to the Source Control screen. Scrolls to the selected initial. DDX6036/DDX6036M... -
Page 25: Link Search (Audio File In Usb)
Link search (Audio File in USB) Playback Screen (Video file, Picture file) Searches for another song of the currently Basic functions are available even when the selected artist. playback screen is displayed. Display the Source Control Screen Display the Playback Screen See <Source Control Screen>... -
Page 26: Easy Control Screen (Video File, Picture File)
Disc When touched twice, the disc is played from its beginning when you play it in the next time. [38] Plays or pauses. ] Reverses the picture horizontally. ] Rotates counter clockwise. ] Rotates clockwise. [Exit] Ends Picture Control. DDX6036/DDX6036M... -
Page 27: Movie Menu Control
Movie Menu Control Selects an option from the Movie Menu. Display the playback screen See <Operation on the Playback Screen of Visual Sources> (page 16). Display the Menu Control screen Operation on the Menu Control screen [SUB] Switches the subtitle language. [Audio] Switches the voice language. -
Page 28: Ipod Control
When you connect an iPod to this unit, playback starts from the song you were playing on the iPod itself (Resume Function). • If the played song is not a video content, "No Video Signal" is displayed on the video screen. DDX6036/DDX6036M... -
Page 29: Source Control Screen
Source Control Screen [ARDM] Starts or stops Album Random Play (plays randomly from current album).* Switches to the source control screen to use [INFO] Displays information screen of music/ various playback functions. video being played. Display the Source Control Screen [LINK] Searches for another song of MUSIC... -
Page 30: Link Search (Music File)
] The text display is scrolled by touching it. TOP] Moves to the top category. CUR] Displays the currently playing category. [CTRL] Returns to the Source Control screen. Scrolls to the position of the specified initial Scrolls to the selected initial. DDX6036/DDX6036M... -
Page 31: Radio Listening
Radio Listening Various control screens appear in the Tuner Source mode. • Set the remote controller mode switch to "AUD" mode before starting operation, see <Remote Controller mode switch> (page 75). Source Control Screen Multi Function Switches to the source control screen to use various functions. -
Page 32: Preset Select
1 Memorized stations are displayed. Touch to tune in. Auto Memory terminates when 6 stations are [CTRL] Returns to the Source Control screen. stored or when all stations are tuned in. ⁄ • The operation ends automatically if you do not operate within 10 seconds. DDX6036/DDX6036M... -
Page 33: Manual Memory
Manual Memory Radio Text (Region 2/ 3 models) Stores the current receiving station in memory. You can display the radio text. (Only when receiving the FM broadcast) Display the Source Control Screen Select a station See <Source Control Screen> (page 31). See <Source Control Screen>... -
Page 34: Set Station Name(Region 4/ 6 Models)
• It is necessary to have Traffic Information function set to On in order to have the Traffic Information screen appear automatically. • During reception of traffic information the adjusted volume is automatically remembered, and the next time it switches to traffic information it's automatically the remembered volume. DDX6036/DDX6036M... -
Page 35: Search By Program Type (Region 2/ 3 Models)
Search by Program Type Frequency Step Setting (Region 2/ 3 models) (Region 4/ 6 models) A program is tuned when you set its program Changing the tuning frequency step. The original type. (Only when receiving the FM broadcast) setting is FM band 50 kHz, and AM band 9 kHz. Display the Source Control Screen Switch the frequency step... -
Page 36: Tv Watching
[4], [¢] Selects a channel. Use the [SEEK] to change the channel tuning • The information display is cleared automatically after sequence. approximately 5 seconds. Also, the information can be displayed automatically when it is updated. [SEEK] Switches the Seek mode. (page 37) DDX6036/DDX6036M... -
Page 37: Source Control Screen
Source Control Screen [SEEK] Switches the Seek mode. The mode is switched in the following order Switches to source control screen to use various each time you touch the button. functions. Display Setting "AUTO1" Tunes in a station with good reception automatically. Display the Source Control Screen "AUTO2"... -
Page 38: Auto Memory
Start Auto Memory Continue to touch until the memory number appears. Auto Memory terminates when 6 stations are stored or when all stations are tuned in. ⁄ • The operation ends automatically if you do not operate within 10 seconds. DDX6036/DDX6036M... -
Page 39: Preset Select
Preset Select Set Station Name Lists and selects memorized station. Assigns a name to a station. Display the Source Control Screen Tune in to the station to name See <Source Control Screen> (page 37). See <Source Control Screen> (page 37). Start Preset Select Start Name set Select a station... -
Page 40: Bluetooth Audio Control
Operation on the Source Control screen [3] Plays. [7] Stops playing. [8] Pauses. [4], [¢] Selects a file. ⁄ • If the Bluetooth Audio player does not support AVRCP profile, buttons are not displayed. Operate from the Audio player. DDX6036/DDX6036M... -
Page 41: Other Functions
Other Functions Muting Audio Volume upon Reception of How To Use the Character Entry Screen Phone Call Character Entry screen When the telephone is called... The Phone Call ("CALL") screen appears, and system is paused. Phone Call ("CALL") screen 1 Enters characters. [2], [3] Shifts the cursor. -
Page 42: Screen Control
Displayed on Video, iPod, USB or Rear View Camera screen only. [Dimmer] Dimmer Mode Setup "ON": The display dims. "OFF": The display doesn’t dim. "SYNC": Turning the Dimmer function On or Off when the vehicle light control switch is turned On or Off. DDX6036/DDX6036M... -
Page 43: Hands Free Unit Control
Hands Free Unit Control Various functions can be used in the Hands Free control mode. (with the optional accessory Bluetooth unit connected only) • You need to register your cell-phone to your Bluetooth Unit beforehand. Make sure to read the instruction manual of the Bluetooth Unit as well. -
Page 44: During A Call
Calls screen. See <Making a Call Using Call terminating the current call Records> (page 46). [Direct Number] Displays the Dialing Display screen. See <Calling by Entering a Phone Number> (page 46). [Voice] Starts voice recognition. See <Calling by Voice Recognition> (page 47). DDX6036/DDX6036M... -
Page 45: Calling By Phonebook
Calling by Phonebook [BT SETUP] Displays the Bluetooth SETUP screen. See <Registering Bluetooth Unit> You can call a person using his/her phone (page 64). number that you have registered in the [TEL SETUP] Displays the Hands Free Setup Phonebook. screen. See <Setting Up the Hands-Free Display the Hands-Free Control screen Phone>... -
Page 46: Calling By Entering A Phone Number
You can input up to 32 digits. ⁄ • The Outgoing Calls list screen, Incoming Calls list, or Missed Calls list screen shows the list of the calls originated from or received at this unit. They are not the ones stored in the cell-phone memory. DDX6036/DDX6036M... -
Page 47: Calling By Voice Recognition
Calling by Voice Recognition Make a call Calls by recognizing the registered voice. ⁄ ⁄ • In order to perform voice recognition, voice must be registered in the Phonebook data. See <Voice • A message is displayed if the voice is not recognized. Registration>... -
Page 48: Setting Up The Hands-Free Phone
[SMS Receive Beep] Sets the beep of the incoming SMS. ( "ON") "ON": Beep is heard. "OFF": Beep is canceled. [Phone Information Use] Sets whether to use cell-phone phonebook, outgoing calls list, incoming calls list and missed calls list. "ON") "ON": Yes. "OFF": No. DDX6036/DDX6036M... -
Page 49: Voice Registration
Voice Registration End voice registration Registers voice for voice recognition in Phonebook. Up to 35 voices can be recorded in one cell-phone. Display the Phonebook Detail screen Go through the procedure of <Calling by Phonebook> (page 45). ⁄ Select the name to register •... -
Page 50: Key Word Voice Registration
Phone number category. [Play] Plays voice registered for the selected Phone number category. [Delete] Deletes voice registered for the selected Phone number category. Touch to display the confirmation screen. Touch [Yes] to delete or [No] to cancel. Display voice registration screen DDX6036/DDX6036M... -
Page 51: Phone Number Preset
Phone Number Preset Search phone number to register with each function Registers frequently used phone number to Hands Free control screen preset button. Register phone number Display the Hands-Free Control screen See <Making a call> (page 44). Select the Preset number to register SMS (Short Message Service) 1 sec. - Page 52 [Direct Number] Enter the phone number. [SET] Display the Create SMS Message screen. [Send] Sends the message. [Delete] Deletes the Draft message. Touching the screen displays a confirmation message. Touch [Yes]. To cancel clearing, touch [No]. Display the Create SMS Message screen DDX6036/DDX6036M...
-
Page 53: Audio Control
Audio Control Audio Control Menu Audio Control Displays the Audio Control menu to set the sound You can adjust the front/rear and right/left audio effect function of this unit. balance. Display the Source Select Screen Display the Audio Control screen >... -
Page 54: Equalizer Control
[Bass] can be set) If turned "ON", it extends the bass center frequency to the low register by approximately 20%. [SW Level] Adjusts the subwoofer volume. The setting is available when subwoofer is set to "ON". See <Speaker Setup> (page 69). DDX6036/DDX6036M... -
Page 55: Zone Control
Zone Control You can set the front and rear audio source. Display the Zone Control screen > > Touch [ [Zone Control]. (page 53) Set the Zone Control [Single Zone] Turns off the dual zone. [Front Source] Sets the front audio source. [Rear Source] Sets the rear audio source. -
Page 56: Setup Menu
Select the setup item [5], [∞] Scrolls the setup menu. ⁄ • [AV-IN SETUP], [Navigation] and [Audio SETUP] options can be locked. The key mark ( ) is displayed in reverse video for the locked option. See <Setup Memory> (page 61). DDX6036/DDX6036M... -
Page 57: Divx Setup
DivX Setup Software Information Checks the registration code. This code is needed Checks the software version of this unit. when making a disc which has DRM (Digital Display the Software Information screen Rights Management). > > > Touch [ [Information] Display the DivX Setup screen [Software]. -
Page 58: User Interface
[AUD] button. (page 11) "V.OFF" : Press the [AUD] button for more than 1 second to turn the display off. "R-CAM" : Press the [AUD] button for more than 1 second to switch to rear view. DDX6036/DDX6036M... -
Page 59: Touch Panel Adjustment
Touch Panel Adjustment Clock Setup You can adjust the touch panel operations. You can adjust the clock time. Display the Touch panel Adjustment screen Display the Clock Setup screen > > > > > > Touch [ [System] [Touch]. Touch [ [System] [Clock]. -
Page 60: Security Indicator Setup
1 Sets the Monitor angle. [SI] Turns the SI function on or off. [Memory] Stores the current monitor angle as If turned "ON", the Security indicator on the the angle during power off. front panel flashes when the vehicle ignition is off. "ON") DDX6036/DDX6036M... -
Page 61: Setup Memory
Setup Memory Memorize or recall the settings Audio Control, AV-IN SETUP, AV Interface, When memorizing the Audio Setup and AV Navigation, and Audio SETUP settings can be Interface settings: memorized. The memorized settings can be recalled at any time. For example, even when the settings are cleared due to replacement of the If settings have already been memorized, a battery, the settings can be restored. -
Page 62: Entering Background
Select the image to load 1 Returns to the initial background. Set the image as the background 1 Lists the files. ] The text display is scrolled by touching it. ROOT] Moves to the top hierarchy level. UP] Moves up a hierarchy level. DDX6036/DDX6036M... -
Page 63: Panel Color Coordinate
Panel Color Coordinate To register your original color Start the RGB coordinate Sets the screen and button illumination color. Display the Color screen > > > Touch [ [Display] [Color]. (page 56) Adjust the each color value Display the Panel Color Coordinate screen 1 Selects a preset number to register. -
Page 64: Screen Adjustment
[SP DEV] Registers a Bluetooth unit that cannot be registered by normal register (paring) operation. ⁄ • A new device cannot be registered if there are 5 registered Bluetooth units. Delete unnecessary registration. See <Bluetooth Unit Connection> (page 66). DDX6036/DDX6036M... - Page 65 Select the Bluetooth unit to register Registering Special Bluetooth Unit Registers Special Bluetooth unit that results in error by normal operation by selecting from model name. Display the Special Device List screen 1 Displays the searched Bluetooth unit. Select a model name [Search] Searches for a Bluetooth unit.
-
Page 66: Registering Bluetooth Unit Pin Code
[Clear] Clears the code number. [TEL (HFP)] Connects/disconnects cell-phone to use for Hands Free. [Audio (A2DP)] Connects/disconnects Audio player to use for Bluetooth Audio. [Remove] Deletes registration (pairing). Touching the screen displays a confirmation message. Touch [Yes]. To cancel clearing, touch [No]. DDX6036/DDX6036M... -
Page 67: Av Input Setup
AV Input Setup AV Interface Setup You can set AV input parameters. You can set audio and visual (AV) interface parameters. Display the AV-IN Setup screen > > Display the AV Interface screen Touch [ [AV-IN SETUP]. (page > > Touch [ [AV Interface]. -
Page 68: Navigation Setup
When turned "ON", the volume level drops for voice guidance. [Navigation Input] Selects a navigation system connection. ( "RGB") "RGB": Allows the Kenwood’s Navigation System to connect via its interface cable. "AV-IN": Allows a third-party navigation system to connect via the AV INPUT1 port. -
Page 69: Speaker Setup
Speaker Setup Crossover Network Setup You can set a crossover frequency of speakers. You can select a speaker type and its size to get the best sound effects. Select the speaker to set the crossover Display the Speaker Select screen >... -
Page 70: Dvd Setup
"Wide" and "Normal", allowing you to listen to the movie's dialog more clearly. This is effective only when you are using a Dolby Digital software. The operation is available during the play stop mode. [Angle Mark] Sets an angle mark display. "ON") DDX6036/DDX6036M... -
Page 71: Dvd Language Setup
DVD Language Setup DVD Parental Level Setup Sets a parental level. Selects a language you use for the speech and menus. Display the DVD Setup screen Display the DVD Setup screen > > Touch [ [DVD SETUP]. (page 56) > >... -
Page 72: Disc Setup
Also, you may not play some music CDs in the "2" position. [On Screen DVD] Sets an on-screen display of the DVD Playback screen. ( "Manual") "Auto": Information is displayed for 5 seconds when updated. "Manual": Information is displayed when you touch on the screen. DDX6036/DDX6036M... -
Page 73: Usb Setup
iPod Setup USB Setup Performs setup when using iPod. Performs setup when using USB. Display the iPod Setup screen Display the USB Setup screen > > > > Touch [ [iPod SETUP]. (page 56) Touch [ [USB SETUP] (page 56) Set each item Set each item [AudioBook Speed] Sets the Audio book... -
Page 74: Tuner Setup (Region 2/ 3 Models)
Sets the present TV1 or TV2 receiving area. better. ( "ON") [Language Select] Selects a display language for the PTY function. [Antenna Control] Allows you to turn off the RDS function to prevent the motor-driven antenna from extending. ( "ON") DDX6036/DDX6036M... -
Page 75: Remote Controller
Remote Controller This unit can be operated using the Remote Controller supplied with this unit. ¤ CAUTION • Put the Remote Controller in a place where it will not move during braking or other operations. A dangerous situation could result, if the Remote Controller falls down and gets wedged under the pedals while driving. •... -
Page 76: Common Operations (Aud Mode)
Screen mode changes each time you press this key. CLEAR DIRECT DISP V.SEL V.SEL MODE FNC/PBC Switches to the navigation screen. TOP MENU MENU DVD SETUP RETURN AUDIO SUBTITLE ANGLE ZOOM DISP V.SEL MODE FNC/PBC TOP MENU MENU DVD SETUP RETURN AUDIO SUBTITLE ANGLE ZOOM DDX6036/DDX6036M... -
Page 77: Dvd/Vcd (Dvd Mode)
DVD/VCD (DVD mode) VCD 1.X, VCD 2.X (PBC OFF) Track number Track search and file search Cancel Selects the track or file to be played. VCD 2.X (PBC ON) − OPEN Scene number 2 ZONE Number Cancel Play/Pause Pauses the track. Once you have switched to the direct search Press again to resume playing. - Page 78 Track search and file search Selects the track or file to be played. − OPEN 2 ZONE Play/Pause Pauses the track. Press again to resume playing. TOP MENU MENU DVD SETUP RETURN AUDIO SUBTITLE ANGLE ZOOM AUD• DVD• ENTER T V• DDX6036/DDX6036M...
-
Page 79: Radio (Aud Mode)
Radio (AUD mode) TV (TV mode) Band switching Switching Band/Video Switches to bands received by the unit. It switches between the station of the TV band to receive and video input. − OPEN − OPEN 2 ZONE 2 ZONE Station selection Switches to broadcast stations received by the unit. -
Page 80: Initial Setup
"Reverse". "OFF": The monitor does not switch to the rear view camera video display even when engaging the shift knob of car to "Reverse". [Color] Sets the screen and button illumination color. See <Panel Color Coordinate> (page 63). DDX6036/DDX6036M... -
Page 81: Status Bar Indicator Items
Status bar Indicator items Source Display Overview Shown below is a list of indicators displayed on "FO-REP" Indicates that the Folder repeat function is ON. the Status bar. "MOVIE" Identifies the video file. "MUSIC" Identifies the music file. "PICTURE" Identifies the image file. "RDM"... -
Page 82: Dvd Language Codes
Yoruba French (Afan) Oromo Frisian Chinese Oriya Irish Zulu Punjabi Scots Gaelic Polish Galician Pashto, Pushto Guarani Portuguese Gujarati Quechua Hausa Rhaeto-Romance Hebrew Kirundi Hindi Romanian Croatian Russian Hungarian Kinyarwanda Armenian Sanskrit Interlingua Sindhi Interlingue Sangho Inupiak Serbo-Croatian Indonesian DDX6036/DDX6036M... -
Page 83: Help? Troubleshooting
Help? Troubleshooting Some functions of this unit may be disabled by What might seem to be a malfunction in your unit some settings made on this unit. may just be the result of slight misoperation or miswiring. Before calling service, first check the •... -
Page 84: Help? Error
➡ Change the source to any source other than USB. ➡ Eject the disc and try inserting it again. Contact Remove the USB device. the Kenwood dealer if this indicator continues blinking or the disc cannot be ejected. "Not supported USB1.1 device.": The connected USB device is compliant with USB "Disc Error"... -
Page 85: Specifications
Specifications Monitor section USB interface section Picture Size USB Standard : 6.95 inches (diagonal) wide : USB 2.0 High speed : 156.2 mm (W) x 82.4 mm (H) File System Display System : FAT 16/ 32 : Transparent TN LCD panel Maximum Power Supply Current Drive System : 500 mA... -
Page 86: Video Section
Middle : 1 kHz ± 8 dB Treble : 10 kHz ± 8 dB Specifications subject to change without notice. Although the effective pixels for the liquid crystal panel is given as 99.99% or more, 0.01% of pixels may not light or may light incorrectly. DDX6036/DDX6036M... - Page 87 The marking of products using lasers (Except for some areas) The label is attached to the chassis/case and says that the component CLASS 1 uses laser beams that have been classified as Class 1. It means that the unit is utilizing laser beams that are of a weaker class. There is no danger LASER PRODUCT of hazardous radiation outside the unit.
- Page 88 Declaration of Conformity with regard to the EMC Directive 2004/108/EC Manufacturer: Kenwood Corporation 2967-3 Ishikawa-machi, Hachioji-shi, Tokyo, 192-8525 Japan EU Representative's: Kenwood Electronics Europe BV Amsterdamseweg 37, 1422 AC UITHOORN, The Netherlands This symbol mark indicates that Kenwood manufactured this product so as to decrease harmful infl uence on...