Advertisement
Table of Contents
- 1 Table of Contents
- 2 Important Precautions
- 3 Before You Begin
- 4 Assembly
- 5 Proper Exercise Form
- 6 To Plug in the Power Cord
- 7 Operation and Adjustment
- 8 Trouble-Shooting and Storage
- 9 Conditioning Guidelines
- 10 Part List
- 11 Exploded Drawing
- 12 Ordering Replacement Parts
- 13 Limited Warranty
- Download this manual
Model No. WCTL39100
USER'S MANUAL
Serial No.
Serial Number Decal
QUESTIONS?
As a manufacturer, we are com-
mitted to providing complete
customer satisfaction. If you
have questions, or if there are
missing or damaged parts, we
will guarantee complete satisfac-
tion through direct assistance
from our factory.
TO AVOID UNNECESSARY
DELAYS, PLEASE CALL DIRECT
TO OUR TOLL-FREE CUSTOMER
HOT LINE. The trained techni-
cians on our Customer Hot Line
will provide immediate assis-
tance, free of charge to you.
CUSTOMER HOT LINE:
1-888-936-4266
Mon.–Fri., 8 a.m.–6:30 p.m. EST
(excluding holidays)
CAUTION
Visit our website at
Read all precautions and instruc-
tions in this manual before
www.weslo.com
using this equipment. Save this
new products, prizes,
manual for future reference.
fitness tips, and much more!
Advertisement
Table of Contents

Related Manuals for Weslo Cadence 391 Treadmill

Summary of Contents for Weslo Cadence 391 Treadmill
- Page 1 Mon.–Fri., 8 a.m.–6:30 p.m. EST (excluding holidays) CAUTION Visit our website at Read all precautions and instruc- tions in this manual before www.weslo.com using this equipment. Save this new products, prizes, manual for future reference. fitness tips, and much more!
-
Page 2: Table Of Contents
TABLE OF CONTENTS IMPORTANT PRECAUTIONS ..............2 BEFORE YOU BEGIN . - Page 3 9. Use only a CUL-listed surge protector, rated continuously for longer than 1 hour. at 15 amps, with a 14-gauge cord of five feet or less in length. Do not use an extension 18. Never leave the treadmill unattended while it cord.
-
Page 4: Before You Begin
BEFORE YOU BEGIN Thank you for selecting the WESLO CADENCE ® please call our Customer Service Department toll-free treadmill. The natural motion and versatility of tread- at 1-888-936-4266, Monday through Friday, 8 a.m. mills have made them the most popular way to get an until 6:30 p.m. -
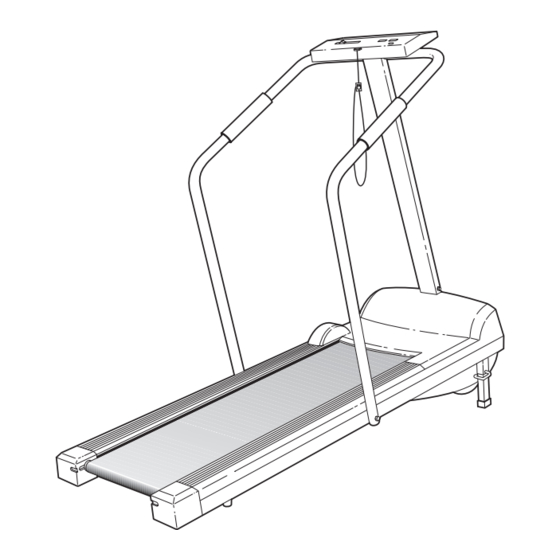
Page 5: Assembly
ASSEMBLY Set the treadmill in a cleared area and remove all packing materials. Do not dispose of the packing materials until assembly is completed. Refer to the drawings below to identify small parts used in assembly. Assembly requires an adjustable wrench (not included). -
Page 6: Proper Exercise Form
5. The Console (3) requires two "AA" batteries (not included). Alkaline batteries are recommended. Slide the Battery Cover (15) up as shown. Press two batteries into the battery compartment, with the negative (–) ends of the batteries touching the springs. Close the battery cover. Batteries 6. -
Page 7: Operation And Adjustment
OPERATION AND ADJUSTMENT THE PERFORMANT LUBE WALKING BELT risk of electric shock. This product is equipped with a cord having an equipment-grounding conductor and a Your treadmill features a walking belt coated with grounding plug. Plug the power cord into a surge PERFORMANT LUBE , a high-performance lubricant. - Page 8 DIAGRAM OF THE CONSOLE Speed Control Monitor Display Pulse Display On/Off Scan Button Button Note: If there is a thin sheet of clear Clip Pulse Sensor plastic on the console, remove it. Insert the key fully into the power switch. CAUTION: Before operating the con- sole, read the following important precautions.
- Page 9 the walking belt, slide the speed control to the pulse display flashes steadily. Hold your thumb at "RESET" position. this level. After 5 to 10 seconds, your pulse will be displayed. Hold your thumb on the sensor for Press the MODE button to select the desired another 15 seconds for the most accurate reading.
-
Page 10: Trouble-Shooting And Storage
TROUBLE-SHOOTING AND STORAGE Most treadmill problems can be solved by following the simple steps below. Find the symptom that applies to your treadmill and follow the steps listed. If further assistance is needed, please call our Customer Service Department toll-free at 1-888-936-4266, Monday through Friday, 8 a.m. until 6:30 p.m. Eastern Standard Time (excluding holidays). - Page 11 5. SYMPTOM: THE WALKING BELT IS OFF-CENTER a. If the walking belt has shifted to the left, first remove the key and UNPLUG THE POWER CORD. Using the allen wrench, turn the rear roller adjustment bolt clockwise 1/4 of a turn. Plug in the power cord, insert the key and run the treadmill for a few min- utes.
-
Page 12: Conditioning Guidelines
CONDITIONING GUIDELINES Training Zone (Beats/Min.) WARNING: Before beginning Unconditioned Conditioned this or any exercise program, consult your physician. This is especially important for 138-167 133-162 individuals over the age of 35 or individuals with pre-existing health problems. 136-166 132-160 135-164 130-158 The pulse sensor is not a medical device. - Page 13 Training Zone Exercise to cool down. This will increase the flexibility of your muscles and will help to prevent post-exercise problems. After warming up, increase the intensity of your exer- cise until your pulse is in your training zone for 20 to Exercise Frequency 60 minutes.
-
Page 14: Part List
PART LIST—Model No. WCTL39100 R0900A Key No. Qty. Description Key No. Qty. Description Left Handrail Foot Rail 3/8” x 1 3/4” Bolt Pulley/Flywheel Console 3/8” Flange Nut Upright Wire Harness 3/8” x 2 3/4” Bolt Console Cage Nut Controller Console Screw Controller Plate Pot Wire Plastic Stand-Off... -
Page 15: Exploded Drawing
EXPLODED DRAWING—Model No. WCTL39100 R0900A... -
Page 16: Ordering Replacement Parts
ICON OF CANADA, INC. 900 de l’Industrie, St. Jérôme, QC J7Y 4B8 WESLO is a registered trademark of ICON Health & Fitness, Inc. Part No. 167312 R0900A Printed in Canada © 2000 ICON Health & Fitness, Inc.