Table of Contents
Advertisement
Quick Links
Advertisement
Table of Contents

Related Manuals for Mark Levinson 380


Summary of Contents for Mark Levinson 380
- Page 1 Owner’ s Manual Nº380 Preamplifier Madrigal Audio Laboratories...
- Page 2 WARNING: TO REDUCE THE RISK OF FIRE OR ELECTRIC SHOCK, DO NOT EXPOSE THIS APPLIANCE TO RAIN OR MOISTURE. CAUTION RISK OF ELECTRIC SHOCK DO NOT OPEN CAUTION: TO REDUCE THE RISK OF ELECTRICAL SHOCK, DO NOT REMOVE COVER. NO USER-SERVICEABLE PARTS INSIDE. REFER SERVICING TO QUALIFIED PERSONNEL.
-
Page 3: Important Safety Instructions
Important Safety Instructions Please read all instructions and precautions carefully and completely before operating your Mark Levinson ® preamplifier. 1. ALWAYS disconnect your entire system from the AC mains before connecting or dis- connecting any cables, or when cleaning any component. 2. - Page 4 From all of us at Madrigal Audio Laboratories, thank you for choosing your Mark Levinson Nº380 Preamplifier. A great deal of effort went into the design and construction of this precision device. Used properly, it will give you many years of enjoyment.
-
Page 5: Table Of Contents
SSP must not come before the preamp ........35 the SSP must not be in a tape loop ........... 36 the SSP & the Nº380 ................. 36 wiring diagram using an SSP ............37 noise in a/v systems ................37 Linked Functions .............. -
Page 6: Unpacking And Placement
“off ” mode—it is designed to standby be connected to the AC mains at all times for the best performance. Be sure to allow 3 to 4 inches of clearance above the Nº380 to allow ventilation heat dissipation through air circulation. - Page 7 Caution! It is extremely important that all components in your system be properly grounded. Under no circumstances should you defeat a three-prong AC cord with a “ground-lifter” or “cheater” adaptor, as doing so may allow dangerous voltages to build up between components.
-
Page 8: Operating Voltage
50Hz only in European Union countries, in compliance with CE regula- tions.) This voltage setting cannot be changed by the user. Make sure that the label on the bottom panel of the Nº380 (adjacent to the AC cord) indicates the correct AC operating voltage for your loca- tion. -
Page 9: A Quick Start
1 XLR jacks on the rear panel of your Nº380 preamplifier. (Use the Input 3 RCA jacks if your source is single-ended. If used, press the Input 3 button on the face of the Nº380 to select this input.) High quality interconnecting cables such as Madrigal CZ Gel will yield superior results, and are strongly recommended. - Page 10 Plug the Nº380 into the wall outlet Connect the AC cord to the male IEC connector on the center of the bottom panel of the Nº380, then connect the AC cord to the AC mains. When power is first applied, the Nº380 will initialize (showing all current input names), automatically select the first available input (CD1), and set its output level to OFF.
-
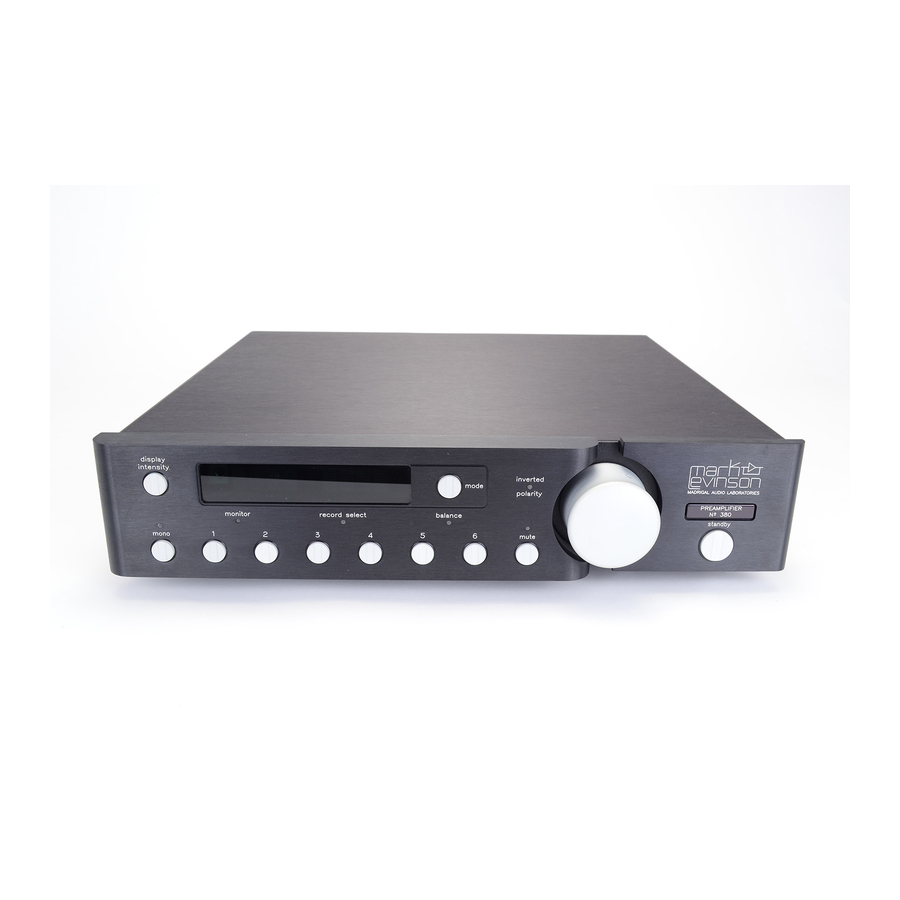
Page 11: Front Panel
(For more infor- mation, see “Linked Functions.”) Alphanumeric Display Provides a wide range of information concerning the operational status of the Nº380. The information displayed depends on the operating mode the Nº380 is in (determined by the but- mode ton). - Page 12 Inverted Polarity Indicator (sometimes inaccurately called “absolute phase”) of polarity the output of the Nº380 may be inverted via the Nº380 remote control, in which case this LED will light as confirmation. A sec- ond press of the button on the remote control will re- polarity store the polarity of the output to its original, non-inverted state.
- Page 13 Nº380 is in , indicating that power is still being provided standby to the unit. (If the Nº380 is Linked to other Mark Levinson com- ponents which are also in , they will blink in unison.) standby...
-
Page 14: Rear Panel
If your power amplifier is equipped with balanced (sometimes called “differential”) inputs, it is best to use these balanced outputs on your Nº380. A balanced signal from preamplifier to power am- plifier will offer the highest possible performance with the best immunity from common-mode noise, such as radio frequency in- terference (RFI). - Page 15 Refer to the operating manuals of your balanced-output line-level sources to verify that the pin assignments of their output connec- tors correspond to the Nº380. If not, wire the cables so that the appropriate output pin connects to the equivalent input pin.
- Page 16 A M P L I F I E R A M P L I F I E R cations bus.) In turn, the Nº380 can serve as a master to an associ- N º 3 3 N º 3 3 ated compatible Mark Levinson power amplifier—hence its “Mas-...
-
Page 17: Building A Link Cable
Nº380’s port using a “straight-through” RJ-45 cable. slave If there are additional Mark Levinson Link-compatible compo- nents in the system, place the Nº380 at the end of the chain by connecting the last port to the Nº380’s port. See... -
Page 18: Using A Turntable
If a turntable is to be used with the Nº380, it must be used in con- using a turntable junction with a phono preamp such as the Mark Levinson Nº25. The phono preamp used should provide RIAA equalization and deliver a line-level signal to the input of the Nº380 (both standard functions of a phono preamplifier).. -
Page 19: Remote Control
Nº380. Pressing any of these buttons (or the buttons) volume +/- while the Nº380 is in standby will bring it fully on and opera- tional. These buttons are gray instead of black to serve as a re- minder of this secondary function. - Page 20 Inverts the (sometimes inaccurately called “absolute polarity phase”) of the outputs of the Nº380. A second press of this button will restore the outputs to their original, non-inverting polarity. Mode Duplicates the function of the Mode button on the front panel, cycling through modes.
-
Page 21: Setup And Installation
See your Mark Levinson dealer for more information. Connect the AC cord to the male IEC connector on the center of the bottom panel of the Nº380, then connect the AC cord to the AC mains. To Nº380 To AC mains... -
Page 22: Setup Overview
Note: If AC mains power to the Nº380 is interrupted, the main output will be muted. When power is restored, the initialization sequence described above will restore the preamplifier to normal operation, with the main output muted and the display indicating OFF . -
Page 23: Naming An Input "Eq
Each name is normally followed by a number corresponding to the number of the input being used. (The exceptions being the names like “No30” and “No35” for the corresponding Mark Levinson products.) Thus, a DAT in Input 3 would normally display a . -
Page 24: Programming Input Names
To change the name of any particular input, follow these steps: programming input names In the Monitor Mode, Select the input you wish to rename press and hold the Mode button… on the front panel until the display reads SET DATA, as below: Release the Mode button;... -
Page 25: Results Of Unrealistic Tests
Nº380 is used correctly. Moreover, even under these unrealistic test conditions, any resulting noise is small and poses no... -
Page 26: Programming Input Offsets
We recommend using the input name for all unused inputs. NOT USED The Nº380 allows you to adjust the relative outputs of your various programming sources with respect to one another, so as to avoid disturbing and/or input offsets potentially dangerous changes in output levels as you switch from one source to the next. - Page 27 Press and hold the Mode button on the front panel After a few seconds the display will change to show , as SET DATA below. Release the button. mode Raise the volume to match your reference Using the volume knob, raise the volume of your “quieter” source until it subjectively matches the volume level of your “loudest”...
-
Page 28: Programming An Automatic Volume Level
The Nº380 also features the ability to remember a “preferred” output programming an level setting, to which it will return whenever you select a particular in- automatic volume level put. This capability is a great convenience when used with tuners, for... -
Page 29: Programming The Mute Function
(in “programming input offsets”). Note: It is necessary for the Nº380 to have an Input Offset of 0.0 in order to access the AUTO setting. As a result, it will be necessary to save a 0.0 Input Offset before selecting AUTO if a higher offset was previously saved. -
Page 30: Volume Lock
The Nº380 also allows a “maximum volume setting” to be established. volume lock Using this feature, it now becomes possible to “lock out” volume set-... -
Page 31: Standby Timer
Linked) go into after a certain period of time, standby much like a “Sleep Timer” on many alarm clocks. To engage the on the Nº380: standby timer press and hold the standby button until the display reads TIME OFF . -
Page 32: Operational Modes
Operational Modes The majority of time you spend with your Nº380 will be spent in the the monitor mode mode. In this mode, the display indicates the name of the in- monitor put you have selected and the listening volume (in decibels). The out- put control acts as a volume knob, increasing or decreasing the volume in 0.1 dB increments above 39.0 (with gradually increasing increments... -
Page 33: The Balance Mode
To select a different input for recording, simply press the appropriate Input Selection button while in this mode. Note that the Nº380 will not allow a recording device to serve as its own source while monitoring itself, as this would allow potentially dangerous feedback to be repro- duced by the loudspeakers. -
Page 34: Balance Control Tip
Output imbalances due to asymmetrical placement of the loudspeakers in the room are common, and degrade imaging accuracy. To correct this problem, place the Nº380 in mode and center the mono resulting image (which should be quite small) directly between the loudspeakers, using the control. -
Page 35: Using Surround Sound Processors
This simple fact has made combining a high quality two-channel preamp with an outboard surround sound processor extremely diffi- cult over the years. In fact, until the Mark Levinson Nº38 was intro- duced in 1993, it was virtually impossible to combine the two and have the system work reliably well. -
Page 36: The Ssp Must Not Be In A Tape Loop
Left and Right outputs through the Nº380 (and on to the power amplifier for the main front speakers). Since the output level of these channels cannot be changed by the Nº380 while in “ssp” mode, the preamplifier cannot corrupt the careful calibration of the processor’s output levels. -
Page 37: Wiring Diagram Using An Ssp
Note: the Nº380 will not allow an input with an “ssp” name to be selected during initialization, since allowing a line level signal to pass through unattenuated at start- up presents a potential hazard to your loudspeakers. wiring diagram video 1... - Page 38 Ground Isolation Adaptor place in-line with your cable feed, prior to the system connection The assembly shown above may cause some loss of video signal strength and/or bandwidth, and should be used as a temporary fix. It is useful in determining the cause of some video-related noise problems, however, and costs only a few dollars.
-
Page 39: Linked Functions
Linked Functions The Nº380 has the ability to “link” several of its functions to certain compatible Mark Levinson components (such as the Nº30.5 or Nº36S digital processors and the Nº31.5 and Nº37 CD transport). Note: To take advantage of linked functions, you must connect the Nº380 to the other, compatible Mark... -
Page 40: Record Link
Mark Levinson digital au- record link standby dio processor is in mode and a Mark Levinson transport is in record Record Link mode will cause a warning to be displayed on the digital component. Both digital components will be prevented from going... -
Page 41: Care And Maintenance
Care and Maintenance To remove dust from the cabinet of the Nº380, use a feather duster. To remove dirt and fingerprints, we recommend isopropyl alcohol and a soft cloth. Apply the alcohol to the cloth first and then lightly clean the surface of the Nº380, going with the grain of the brushed aluminum. -
Page 42: U.s. And Canadian Warranty
Madrigal Audio Labo- ratories, Inc., P. O. Box 781, Middletown, CT 06457. The extended warranty for this Mark Levinson product is five (5) five year years from the date of purchase. During the warranty period, any Mark... -
Page 43: Obtaining Service
If your Mark Levinson component must be serviced, please contact your dealer. Your dealer will then decide whether the problem can be remedied locally, or whether to contact Madrigal for further service in- formation or parts, or to obtain a Return Authorization. -
Page 44: Specifications
All technical measurements must be subject to quali- tative as well as quantitative interpretation. Measurements of the Nº380 yield excellent results by any standards. However, only those specifications that apply to its actual operation are included here. -
Page 45: Dimensions
Dimensions 13.38" 34 cm 0.425" 7.68" 2.85" 1.1 cm 19.5 cm 7.24 cm 0.10" 2.00" 5.1 cm 4.45" 11.3 cm 7.34" 18.6 cm 2.00" 5.1 cm 15.55" 39.5 cm 11.55" 29.3 cm 1.19" 6.5" 0.875" 15.75" 3 cm 16.5 cm 2.2 cm 40 cm 7.34"... - Page 46 Madrigal Audio Laboratories, Inc. 2081 South Main Street, P.O. Box 781 Middletown, Connecticut 06457 USA Telephone: (860) 346-0896 Fax: (860) 346-1540 http://www.madrigal.com/ MADRIGAL AUDIO LABORATORIES is a registered trademark of Madrigal Audio Laboratories, Inc. a Harman International company 630371 © 5/1999 Madrigal Audio Laboratories, Inc. All rights reserved. Printed in U.S.A.