Table of Contents
Advertisement
Advertisement
Chapters
Table of Contents

Related Manuals for Navman MOVE-30/MOVE-50


Summary of Contents for Navman MOVE-30/MOVE-50
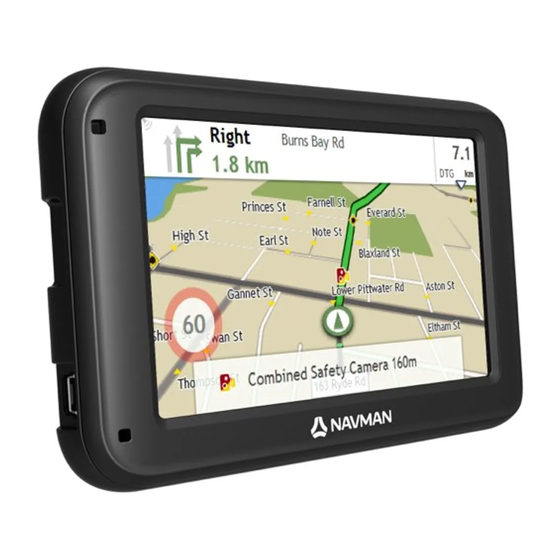
- Page 1 MOVE-Series ₃₀ ₅₀ MOVE- / MOVE- Hardware User Manual...
-
Page 2: Important Safety Information
It is your sole responsibility to place, secure and use your Navman in a manner that will not cause accidents, personal injury or property damage. Always observe safe driving practices. Do not mount your Navman in a way that may interfere with the safe operation of the vehicle, the deployment of air bags or other safety equipment. -
Page 3: Home Charger-Specific Safety Information
Home charger-specific safety information To charge your Navman from the mains power, use the home charger (sold separately) supplied by Navman as an accessory. Using other home chargers with your Navman could result in serious injury or property damage. Never use the charger if the plug or cord is damaged. -
Page 4: Compliance
Navman and refer to the corresponding statements in this chapter. Some notices apply to specific models only. The user needs to switch off the Navman when exposed to areas with potentially explosive atmospheres such as petrol stations, chemical storage depots and blasting operations. -
Page 5: Table Of Contents
How do I charge the battery via my computer? ..............11 How do I charge the battery at home or work? ..............11 How do I connect my Navman to my computer? ..............12 Reference ............................13 What is GPS? ..........................13 How does my Navman receive GPS signals?.............. -
Page 6: Welcome
Welcome Thank you for purchasing this Navman. Please read this manual carefully before using your Navman for the first time. Keep this manual in a safe place and use as your first point of reference. Important information for using the manual It is important to understand the terms and typographical conventions used in this manual. -
Page 7: Mounting Your Navman In A Vehicle
Never mount your Navman where the driver’s field of vision is blocked. If the windscreen is tinted with a reflective coating, it may be athermic and impact the GPS reception. In this instance, please mount your Navman where there is a “clear area” - usually just beneath the rear-view mirror. -
Page 8: Enabling Traffic (Tmc) Reception
Traffic information is not available on all models and is only available in selected countries. Depending on the model of your Navman you can receive live traffic information via the in-car charger which is used as an antenna. Please ensure your car charger is connected to your Navman and power source to receive TMC live traffic information. -
Page 9: Getting To Know Your Navman
Getting to know your Navman MOVE-Series Item Description Power button Reset button Speaker Battery indicator Touch screen Connector for in-car charger, USB cable, home charger* and TMC accessory kit* * may be sold separately... -
Page 10: How Do I Turn On My Navman
How do I turn on my Navman? Using the Power button For the initial start-up, press and hold the Power button for 2 seconds to turn on your Navman. 2 sec For normal operation, turn off the device by briefly pressing the Power button. Your Navman will enter a suspended state. -
Page 11: How Do I Charge The Battery
How do I charge the battery? Your Navman has an internal battery that when fully charged, should provide power for up to 1.5 hours. The battery can take up to 4 hours to fully charge. The battery may not be fully charged when you use your Navman for the first time. -
Page 12: How Do I Connect My Navman To My Computer
When your Navman is turned on and connected to the computer, you can select the desired connection type from the pop-up message screen: Charge only: You will be able to continue using your Navman with the battery in charging mode via the computer. -
Page 13: Reference
Your Navman receives GPS signals via the internal GPS antenna. To guarantee the optimum GPS signal strength, ensure your Navman is outdoors, or in a vehicle outdoors, and has an unobstructed view of the sky. GPS reception is not usually affected by weather, however, very heavy rain or snow may have a negative effect on your reception. -
Page 14: Troubleshooting
Never clean your Navman when it is turned on. Use a soft, lint-free cloth to wipe the screen and the exterior of your Navman. Do not use paper towels to clean the screen. Never attempt to disassemble, repair or make any modifications to your Navman. Disassembly, modification or any attempt at repair could cause damage to your Navman and even bodily injury or property damage and will void any warranty. - Page 15 MOVE-Series ₃₀ ₅₀ MOVE- / MOVE- Software User Manual...
- Page 16 Contents Contents ............................2 How do I get started? ........................4 How do I use the touch screen?....................5 Navigating on the screen ......................5 Main Menu............................ 6 How do I navigate through the menu screens?..............6 How do I use the Keyboard screen?..................7 How do I go from A-B? ........................
- Page 17 Image Search..........................42 Unlock Features.........................43 My Places ............................43 MY NAVMAN..........................45 For more information........................49 Online support...........................49 Navman Customer Support....................49 Speed Limit..........................49 Safety Camera POIs .........................49 Point of Interest categories ....................49 Traffic and other TMC Events....................52 Third party recipient terms and conditions.................53...
-
Page 18: How Do I Get Started
How do I get started? The first time you use your Navman it may take several minutes to establish a GPS connection. How do I turn my Navman on for the first time? To get started for the first time, complete the following steps:... -
Page 19: How Do I Use The Touch Screen
How do I use the touch screen? Navigating on the screen To operate your Navman, touch the screen with your fingertip. You can perform the following actions: Press and release an item displayed on the touch screen. Select Tap an item in a list or tap a command from a menu. -
Page 20: Main Menu
The Main Menu is your starting point for searching for a destination. The Main Menu also allows you to customise your Navman, view saved locations as My Place/Home, and search for POIs nearby, and so on. Search for places, areas and streets to help plan your route. -
Page 21: How Do I Use The Keyboard Screen
How do I use the tabs in the title bar? In some menu screens, the system provides the tab buttons in the title bar that allow you to enter the additional page in the menu screen. Simply tap the desired tab to change the view. The selected tab will be highlighted as a darker-colour tab. -
Page 22: How Do I Go From A-B
How do I use the FIND wizard? Your Navman is equipped with maps that provide street-level detail for door-to-door navigation, including Points of Interest such as accommodation, parking areas, petrol stations, railway stations and airports. The FIND wizard allows you to search the location easily. -
Page 23: How Do I Plan My First Trip
Menu display may differ from the below, depending on the model of Navman. Using your Navman to plan your first trip is easy. There are several ways to select your destination. The following steps will show you how to plan your route by searching the address. -
Page 24: How Do I Preview The Destination On Map
How do I preview the destination on map? After searching an address (or a POI), you can preview the destination on map to explore the area near the location. On the Destination screen, tap the button to display the destination preview map as below. On the Preview map screen, you can: Tap the button to zoom in/out the map. -
Page 25: How Do I View My Route
How do I view my route? How do I select the route type using Trip Select? The Trip Select screen will be displayed when you tap from the Destination screen. All of the four route types (Fastest, Economical, Easiest, and Shortest) will be calculated. On the Trip Select screen, select your preferred route and tap to start navigating. -
Page 26: How Do I Change The Route Configuration
Item Description Direction and distance of The direction and distance to your next turn. next turn to repeat the vocal instruction. Current route Your current route is highlighted. Current position Your current position is marked with Address bar The current address will be displayed in the text box at the bottom of the Map screen. - Page 27 How do I view my route statistics? From the Map options screen, tap Tap the tabs in the title bar to view the additional information in the different screens. Your Navman provides information on your: time to destination time taken for trip...
- Page 28 Complete the following: If you want to … Then … increase/decrease the volume, The volume bar indicates the current volume level. mute/unmute, The speaker icon indicates the status: : muted : unmuted The volume buttons will automatically disappear after the map is idled for 5 seconds. How do I zoom in/out the map? From the Map options screen, tap The zoom buttons will be displayed on the Map screen in translucent mode.
-
Page 29: My Places
Tap the Sort by button on the top of the scrolling buttons to change the sorting order of the items: : by time : by name : by type Tap the favourite destination you want to travel to. The Preview screen will display. . Your Navman will calculate the route from your current location. The Map screen will display. -
Page 30: How Do I Navigate To Home
. Your Navman will calculate the route from your current location. The Map screen will display. How do I navigate to a recent place? To make navigating to an address easier, your Navman will automatically save all your start locations and destinations in a list of recent places. -
Page 31: How Do I Search For A Poi
How do I search for a POI? A POI (Point of Interest) is a named site, feature, landmark or public venue which can be displayed as an icon on the map. POIs are grouped by category, such as petrol stations, parks, beaches and museums. How do I find the nearest POIs using NEAR ME? NEAR ME is not available on all models. -
Page 32: How Do I Search For A Poi By Type
How do I search for a POI by type? On the Main Menu, tap . The Find a POI screen will display. Complete the following: If you want to … Then … search for the POIs near your current location, search for the POIs in a specified city or area, The Keyboard screen will display. -
Page 33: How Do I Search For A Poi By Smart Find Keyword
The POI List screen will display. Tap the desired item from the list. Complete the following: If you want to … Then … calculate the route and start navigating, The Map screen will display. save the location as a favourite, The location will be saved in My Places immediately. - Page 34 Complete the following: If you want to … Then … calculate the route and start navigating, The Map screen will display. save the location as a favourite, The location will be saved in My Places immediately. explore the map,...
-
Page 35: How Do I Receive Current Traffic Information Via Tmc
How will I know when a Traffic Event occurs? When travelling through an area in which you can receive traffic updates, your Navman will decode these events and display them on-screen. An icon will display at the event location on the Map screen, and an audible warning is given if an event is on your route. -
Page 36: Traffic Overview Screen
To zoom in or out, tap and hold How do I view a list of all events on my route? Your Navman creates a list of events as they are received, which is displayed on the All traffic events screen. On the Traffic screen, tap... -
Page 37: How Do I View Traffic Details
Item Description Tap to return to the previous screen. Event icon Displays an icon to indicate type of event. Event description Displays details of the Event, including: Name of road and direction in which Event is taking place. Location of where Event begins and ends. o >... -
Page 38: Traffic Messages
If a detour is recommended, one of the following messages will display: Message Description Finding detour … Your Navman is calculating a new route. During calculation, the % complete will display. Recalculating route … Exiting this screen before the new route is calculated will cancel the operation. -
Page 39: Traffic Preferences
Traffic preferences You can view your current traffic system status and change options by customising the traffic preferences. TMC Service On the Traffic Options screen, tap Traffic Service. The Traffic Service screen will display. The TMC service screen displays the frequency of the radio station currently used to receive traffic event information. -
Page 40: What Can I Customise
What can I customise? Depending on your Navman model, certain setting options may not be available. There are various customisation options available to enhance your navigation experience. On the Main Menu, tap . The Settings screen will display. Select the option you want to customise from the Settings screen. -
Page 41: Screen
/night mode, The brightness bar indicates the brightness level. Warning: Your Navman can heat up when the brightness scale is set high, therefore, use lower brightness whenever acceptable. You can simply tap on the brightness bar so that the screen brightness will be set immediately at the position you tapped. -
Page 42: Route Options
Set manual speed alert to select the speed limit or turn it off. enable/disable a visual warning if tap Warn me not to operate my Navman while driving to turn it the screen is accessed in a moving on or off. -
Page 43: Map Display
If you want to … Then … set types of road options for your tap Types of road. route, The Types of road screen will display. Select your road preference from the list. Avoiding ferry routes may prevent you from navigating between certain countries, even when a bridge or tunnel exists. -
Page 44: My Maps
Map set, then select your preference from the list. Language The available settings of the Language option can be customised by adding/deleting the voice file through NavDesk when your Navman is connected to the computer. Complete the following: If you want to …... -
Page 45: Units
Units Complete the following: If you want to … Then … change the distance units, tap Distance Units and then select your preferred distance unit type. change the time format, tap Time format and then select your preferred time format. change the date format, tap Date Format and then select your preferred date format type. -
Page 46: Device
GPS log of your trip, tap GPS logging to turn it on or off. Demo Demo will begin when the device is connected to power via genuine Navman AC Chargers. -
Page 47: Help
Start. Navman Spirit to be played, Tap OK. Your Navman will restart. When your Navman is in Shop demo mode, you will see the navigation demonstration of the pre-defined route without having to set a destination. -
Page 48: What Is Navdesk
(for Windows XP users) Ensure that Windows XP Service Pack 2 or higher has been applied before you install NavDesk. CAUTION: When your Navman is turned on and connected to a computer, it is recognised as an external mass-storage device. Do NOT delete any files that are pre-installed on your Navman. Deleting the files can cause your Navman to crash. -
Page 49: How Do I Get Started
) on the bottom of your Navman. Where possible, plug the USB cable into a USB port at the back of your computer. Press the Power button for 2 seconds to turn on your Navman, and then select the Computer option from the pop-up message screen. -
Page 50: My Subscriptions
The First Use Date information Once your Navman is connected and the system retrieves the device’s data from the server, the First Use Date (FUD) information will be displayed in the status bar (at the bottom of the NavDesk window). - Page 51 Select a type of subscription. A list of regions will display. Select a region. A list of available subscriptions will display. Select a subscription or offer, then click Purchase an activation key from the Navman store. The Navman Store website will open.
-
Page 52: My Maps
You can install maps from the following: DVD that came with your Navman. You may need to purchase a Map Product Key to activate maps on the DVD that came with your Navman. The downloaded map update. For more information about downloading the free map update, refer to the “How do I update my Navman?”... - Page 53 Your computer will connect to the Internet and activate your Map Product Key. When activation has completed, the map will change colour to yellow; continue to step 6. Click the map you want to install to your Navman. The map will change colour to a brighter yellow indicate it has been selected.
-
Page 54: Custom Pois
The Custom POIs (Points of Interest) application allows you to create or import your own POI files. These are called custom POIs. Unlike preinstalled POIs, custom POIs can be removed from your Navman and can have audio as well as visual alerts associated with them. - Page 55 Click Add to device to add the POI to your Navman. Each file corresponds to a POI category; for example, Hotels.csv will be listed on your Navman as the Hotels category. How do I delete a Custom POI file/category from my Navman? In the Installed POIs section, click Delete next to the file name.
-
Page 56: Image Search
Image Search is a NavDesk application powered by Flickr™ allowing you to download photos. You can then upload the photo to the Flickr website, transfer photos to your Navman, export pictures to Google Earth or search for other NavPix™ near the longitude and latitude of your NavPix™. -
Page 57: Unlock Features
Unlock Features If you have purchased a map unlock code or subscriptions for your Navman, you have to enter the activation key using the Unlock Features application. The activation key will be sent to you by email, or printed on the inside cover of the box if you purchase the map update DVD. - Page 58 You can select, modify and delete places. You can also add locations from Connect and Image Search to My Places. You can install a maximum of 99 locations on your Navman via My Places. How do I sort My Place locations? You can sort My Place locations by type and name: If you want to …...
-
Page 59: My Navman
Export the location, click The Save as dialog box will open. Enter a descriptive name for the file and then click Save. MY NAVMAN NavDesk MY NAVMAN How do I change the displayed language for NavDesk? You can change the language for NavDesk. - Page 60 My Voices is a NavDesk application that allows you to install or remove voice files on your Navman. Voice files take up space on your Navman’s internal memory. If you do not use a voice file, you can remove it to free up space.
- Page 61 In some certain updates, you must upgrade your system to the latest version (including the NavDesk and your Navman) before you can use the updates. If the new version is detected, a message will display to ask you to upgrade the system. When prompted, click Yes to start upgrading the system.
- Page 62 How do I recover keys on my Navman? The Recover keys application allows you to fix your Navman if a problem occurs during operation. Click the Recover keys option in the menu and then follow the prompts to complete the process.
-
Page 63: For More Information
Safety Camera POIs Navman products are designed to be used as an aid to safer driving. You can receive messages to alert you to locations of safety cameras, which will enable you to monitor your speed through these areas. Navman does not warrant that all types and locations of safety camera data are available, as cameras may be removed, relocated or new cameras installed. - Page 64 Icon Description Icon Description Bowling centre Business facility or company Business office Bus station Camping ground Car dealer/Automobile dealer Casino Cemetery Church Cinema City hall City, town or village Coffee shop College/University Community centre Commuter railway station Courthouse Dentist Doctor Embassy Exhibition centre Ferry terminal...
- Page 65 Veterinarian Winery The POI categories and the order may differ, depending on your region, maps installed or model of Navman. Branded Points of Interest Branded Points of Interest are available on some maps. These include well known restaurants, accommodation providers, tourist attractions, Petrol stations, etc. The icon will usually display the company logo.
-
Page 66: Traffic And Other Tmc Events
Traffic and other TMC Events Each TMC Event is sorted in to one of nine categories. When an Event is received, one of the following icons will display: Event Avoided Message Type Event Description Event Danger There is a dangerous situation on the route; for example, people are on the road. -
Page 67: Third Party Recipient Terms And Conditions
Third party recipient terms and conditions The Legal Stuff By activating, using and/or accessing the SUNA Traffic Channel, SUNA Predictive or other content or material provided by Intelematics (together, SUNA Products and/or Services), you must accept certain terms and conditions. The following is a brief summary of the terms and conditions that apply to you. To view the full terms and conditions relevant to your use of the SUNA Products and/or Services, please consult www.sunatraffic.com.au/termsandconditions/ 1. -
Page 68: Copyright
Copyright © 2013 MiTAC International Corporation. Navman is either a registered trademark or trademark of MiTAC International Corporation and is used under licence by Navman Technology Limited. All rights reserved. The software contains proprietary information of MiTAC International Corporation; it is provided under a licence agreement containing restrictions on use and disclosure and is also protected by copyright law.