Honeywell TE923W User Manual
Professional weather station with remote control
Hide thumbs
Also See for TE923W:
- User manual (49 pages) ,
- User manual (8 pages) ,
- User manual (11 pages)
Table of Contents
Advertisement
Quick Links
Download this manual
See also:
User Manual
Advertisement
Table of Contents

Related Manuals for Honeywell TE923W


Summary of Contents for Honeywell TE923W
- Page 1 HONEYWELL PROFESSIONAL WEATHER STATION WITH REMOTE CONTROL TE923W USER MANUAL...
-
Page 2: Table Of Contents
Table of Contents Introduction Standard Package Contents Installation Before you begin UV (Ultraviolet) Sensor Thermo-Hygrometer Sensor Rain Gauge Anemometer (wind sensor) Main Unit Battery installation Buttons and Controls Navigating through the modes Customizing your Weather Station LED Backlight Options Connecting the Weather Station to a PC Using Different Weather Modes Pressure and Weather Forecast Mode UV Mode... -
Page 3: Introduction
Introduction Thank you for selecting the Honeywell Professional Weather Station with remote control. This compact and easy-to-use product features a wide variety of time and weather data, such as precise atomic time, perpetual calendar, air temperature, relative humidity, barometric pressure, wind speed and direction, rainfall, UV levels and etc. -
Page 4: Standard Package Contents
Standard Package Contents Picture Components Main Unit Remote Control AC/DC 7.5V power adaptor UV Sensor consists of: Sensor Unit U-Shaped Sensor holder Circular Ground Stand Stake Base Wall-Mounting Base Thermo Hygrometer Sensor Rain Gauge consists of: Funnel shaped top with battery compartment Rain Gauge bucket Bucket see-saw mechanism... -
Page 5: Installation
2m (6ft) USB cable PC connection cable Installation The Honeywell Professional Weather Station TE923W operates at 433MHz radio frequency, so no wire installation is required between the main unit (receiver) and the remote weather sensors (transmitters). The remote weather sensors include a thermo-hygrometer (temperature and humidity) sensor, UV (ultraviolet) sensor, anemometer (wind sensor) and a rain gauge (rain sensor). -
Page 6: Before You Begin
Before you begin • We recommend using alkaline batteries for the remote weather sensors and the main unit when temperatures are above 32°F (0°C). We recommend using lithium batteries for the remote weather sensors when temperatures are below 32°F (0°C). •... -
Page 7: Uv (Ultraviolet) Sensor
UV (Ultraviolet) Sensor FEATURES • Ultraviolet light levels measurement • Remote UV levels data transmission to the main unit via 433MHz signal • 328 feet (100 meters) transmission range • Low battery indicator • Three different placement options – ground, stake and wall A. - Page 8 Assembly • Snap the U-shaped sensor holder onto the UV sensor unit side grooves • Insert the round end of the U-shaped holder into one of the mounting hardware pieces provided Battery installation • Unscrew the lid on top of the UV sensor unit. •...
-
Page 9: Thermo-Hygrometer Sensor
Thermo-Hygrometer Sensor FEATURES • Remote data transmission to the main unit via 433 MHz signal • 328 feet (100 meters) transmission range without interference • LCD display of measured temperature and humidity • Five (5) transmission channels selection • Case can be wall mounted using built-in hanger A. - Page 10 • The remote thermo-hygrometer sensor can be placed on the flat surface or mounted on the wall in vertical position • Use the wall mount hardware and screws provided when mounting the thermo-hygrometer sensor on the wall Placement tips: • The remote thermo-hygrometer sensor should be placed in the area with a free air circulation and sheltered from the direct sunlight and an extreme weather conditions.
-
Page 11: Rain Gauge
Rain Gauge FEATURES • Precipitation measurement • Remote rainfall data transmission to the main unit via 433 MHz signal • 100 feet (30 meters) transmission range without interference • Built-in installation level • Non-corrosive protective screen A. Rain gauge bucket Holds all rain gauge components B. - Page 12 G. Built-in leveler Allows leveling rain gauge on the surface H. Bucket see-saw mechanism Collects the rainfall in one of its containers and self-empties once full I. Protective screen Protects the rain gauge funnel from debris Battery installation • Unlock the funnel-shaped top on the rain gauge by turning both knobs on the sides in an anti-clockwise direction.
-
Page 13: Anemometer (Wind Sensor)
Anemometer (wind sensor) FEATURES • Wind speed and wind direction measurement • Remote wind speed and wind direction data transmission to the main unit via 433 MHz signal • Operating range 100 feet (30 meters) • Wall or pole mount A. - Page 14 E. WIND CUPS SHAFT Holds wind cups on the anemometer arm F. BATTERY COMPARTMENT Holds 2 AA-size batteries G. WALL MOUNT SCREW OPENINGS Allows securing the anemometer in place H. BATTERY COVER Allows securing 2 AA size batteries on the anemometer base Assembly •...
-
Page 15: Main Unit
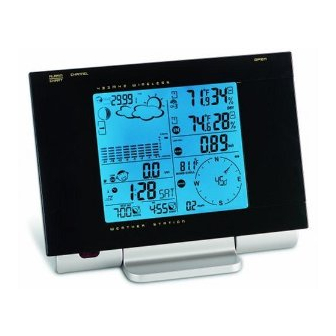
Main Unit The main unit measures pressure, indoor temperature, humidity, and receives atomic time data from the US Atomic Clock and all remote weather sensors. It should be placed indoors. FEATURES Time • Precise time and date set via RF signals from US Atomic clock •... -
Page 16: Battery Installation
• 4 AA batteries Battery installation • Open the battery compartment door on the back of the main unit. • Insert four (4) AA size batteries according to the polarities shown and replace the battery compartment door. • Connect 7.5 V AC/DC adapter provided to the main display unit and plug into to the wall power outlet. -
Page 17: Buttons And Controls
any other time. In order to set the altitude, you will have to restart the main unit completely. To set the pressure & altitude units and program your altitude, use the handheld remote control or main unit control panel: Buttons and Controls Most of the handheld remote control buttons are corresponding to the main unit controls. - Page 18 Allows displaying the sea-level pressure history E. HISTORY Allows displaying the time alarms and alerts for the temperature, rainfall and wind. F ALARM/CHART If depressed and hold, allows entering into the alarm/alert programming mode When depressed and hold in pressure and forecast mode, allows viewing of the different bar charts Changes the temperature and humidity channel G.
-
Page 19: Navigating Through The Modes
Recalls the Pressure and Weather Forecast Mode Pressure and Weather Forecast Mode Recalls the Rain Mode Rain Mode Recalls the Sunrise/Sunset Mode Sunrise/Sunset Mode Recalls the Clock and Alarm Mode Clock and Alarm Mode Changes bar-chart display to history for Sea-level pressure, channel 1 temperature or channel 1 relative Change Bar-chart humidity... - Page 20 UV Window Displays: • UV index or Minimum Ultraviolet Exposure • Daily Maximum • Weekly Maximum • Remote UV sensor battery status Clock and Alarms Window Displays: • US Atomic Time clock with time and calendar • Single alarm, weekday alarm and ice warning alarm (pre-alarm) Sunrise/Sunset Window...
- Page 21 Displays: • Sunrise and sunset times • Longitude and Latitude Temperature and Humidity Window Displays: • Temperature and humidity readings for indoor and selected channel • Comfort level indication • Dew point temperature • High and Low temperature alerts • Remote Thermo-Hygrometer sensor battery status Rain Window Displays:...
-
Page 22: Customizing Your Weather Station
Wind Window Displays: • Wind Chill temperature • Temperature at place of anemometer • Wind direction • Wind speed • Wind gust speed • Alert for wind speed and wind gust speed • Remote anemometer battery status Customizing your Weather Station It is required to program: •... -
Page 23: Led Backlight Options
LED Backlight Options The main unit backlight can be turned on, off or automatically toggled depending on the environment light conditions. Use the light sensor switch at the back of the main unit to select a desired backlight setting. For the automatic backlight control, the sensitivity of the light sensor can be adjusted to high or low using the switch, located on the back panel. - Page 24 • Press UP or DOWN button selecting the pressure in inHg, hPa/mBar or mmHg • Press SET to confirm and move to the altitude unit selection mode • Press UP or DOWN button selecting the altitude unit in feet or meters. •...
- Page 25 Viewing the Pressure, Temperature and Humidity Bar Charts The bar chart in Pressure and Weather forecast window can be configured to display a historical data for the sea level pressure and temperature or humidity for channel 1. After selecting the Pressure and Weather Forecast Mode, press and hold ALARM/CHART button, or press on the handheld remote control to toggle the bar chart between the sea level pressure with a word “PRESSURE”...
-
Page 26: Uv Mode
Snow Note: The weather forecast accuracy is approximately 70%. Display shows forecasted, not current conditions. The SUNNY icon indicates clear weather, even when displayed during the night-time. Understanding the Moon Phase Diagram UV Mode The current UV intensity is indicated by the numerical value and more intuitive display, by categorizing it into the levels “LOW”, “MED”, HIGH”, V. -
Page 27: Clock And Alarm Mode
In UV Mode, press and hold SET to convert units between MED/h and UVI. Clock and Alarm Mode Manual Settings The main unit can be manually set to display the time, calendar or UTC time. There are three time alarms available on the main unit: Weekday alarm (W), Single alarm (S) and Ice Warning Alarm (Pre-Al). - Page 28 longitude, Time Zone and select the Daylight Savings Time on or off. • Press UP or DOWN to adjust the latitude. Press and hold either button for quick digits advance. • Press SET to confirm the selection. • Continue setting the longitude using the same technique. •...
- Page 29 • Set the alarm hour using the UP or DOWN. Press and hold either button for quick digit advance. • Press ALARM/CHART to confirm selection. • Set the alarm minutes using UP or DOWN. Press and hold either button for quick digit advance.
-
Page 30: Sunrise/Sunset Mode
• Make sure the unit is positioned at 8 feet (2 meters) distance from any interference source such as a TV, computer monitor, microwave, etc. • Within concrete wall rooms such as basements or office buildings, the received signal may be weakened. Always place the Projection Clock near the window for better reception. - Page 31 dates. Accessing Sunrise/Sunset Mode From the main unit: Press UP or DOWN until the sunrise and sunset icons on the lower left of the display will start flashing. From the remote control: Press Programming the Location Data • In Sunrise/Sunset Mode, press and hold SET to enter the location programming mode until the city code in the Time and Alarm display will flash.
-
Page 32: Temperature And Humidity Mode
• The corresponding sunrise and sunset times will be displayed for the selected date. • Press MEMORY or SET to return display to the Sunrise/Sunset Mode. Understanding of the Sunrise/Sunset Display The sunrise time displayed in the morning will be different from the one displayed in the afternoon/night: From 12 am to 12 pm the current day sunrise time will be displayed. - Page 33 flash. From the remote control: Press Viewing Temperature and Humidity for each Channel Static Display: In Temperature and Humidity Mode, press the CHANNEL button to recall a different channel. Channel Auto-Scan Display: To enable automatic scan of the different channels, press and hold CHANNEL, until the icon is displayed.
-
Page 34: Rain Mode
Disabling Temperature Alarm(s) In the Temperature & Humidity Mode press the ALARM/CHART to disable the alarm(s). Viewing the Max/Min Channel Temperature and Humidity In the Temperature & Humidity Mode press the MEMORY button to recall a current temperature and humidity, minimum temperature and humidity or maximum temperature and humidity at the remote location. -
Page 35: Wind Mode
Viewing Rain Statistics In the Rain Mode, press either SET or MEMORY button to recall a rain statistics for the past hour, past 24 hours, yesterday, past week or past month. Tip: For the rain rate estimate the Last Hour rainfall value is understood as “inch/hr” or “mm/hr”. - Page 36 The wind speed and gust alert functions can be programmed to alert you if the wind speed or gust exceeds a pre-configured limit. The wind speed can be displayed in km/h, mph, m/s or knots. Note: The wind speed alert has a 5 mph deviation and the wind gust speed alert has a 7 mph deviation.
-
Page 37: Maintenance
flash. • Set the alert using the UP or DOWN. Press and hold either button for fast digits advance. • Press ALARM/CHART to confirm your selection and return to the wind alert selection screen. Disabling the Wind Alert To disable wind alert press ALARM/CHART. Maintenance Changing Batteries The battery status of each weather sensor is checked every hour. -
Page 38: Troubleshooting
• Clean small holes and parts with Q-tips or pipe-cleaner. • Watch out for spiders or insects that might have crawled into the funnel. • Clean the swinging mechanism with a damp cloth. Troubleshooting Q: “The display shows dashes “---” for weather parameter(s)” A: The display will show “- - -”... -
Page 39: Precautions
PRECAUTIONS This product is engineered to give you years of satisfactory service if handled carefully. Here are a few precautions: • Do not immerse the units in water. • Do not clean the units with abrasive or corrosive materials. They may scratch the plastic parts and corrode the electronic circuits. -
Page 40: Appendix - City Codes
Appendix - City Codes US and Canadian Cities City Code Zone City Code Zone Atlanta, Ga. Memphis, Tenn. Austin, TX Miami, Fla. Baltimore, Md. Milwaukee, Wis. Birmingham, Ala. Minneapolis, Minn. Boston, Mass. Montreal, Que., Can. Calgary, Alba., Nashville, Tenn. Chicago, IL New Orleans, La. - Page 41 World Cities City Code Time City Code Time Addis Ababa, Cairo, Egypt Adelaide, Calcutta, India Cape Town, Algiers, Algeria Amsterdam, Caracas, Chihuahua, Ankara, Turkey Asunción, Copenhagen, Córdoba, Athens, Greece Bangkok, Dakar, Senegal Barcelona, Dublin, Ireland Durban, South Beijing, China Belgrade, Frankfurt, Berlin, Glasgow,...
-
Page 42: Specifications
Singapore, Milan, Italy Montevideo, Sofia, Bulgaria Stockholm Moscow, Russia Munich, Sydney, Australia Nairobi, Kenya Tokyo, Japan Nanjing Tripoli, Libya Naples, Italy Vienna, Austria New Delhi, Warsaw, Poland Zürich, Odessa, Ukraine Osaka, Japan DST (Daylight Savings Time) definitions: SA = Australian DST. SB = South Brazilian DST. - Page 43 Accuracy: 0.015 inHg (5 Hpa; 0.38 mmHg) Sampling interval: 20 minutes Altitude Compensation Range: -657 ft to 16404 ft (-200m to +5000 m) Temperature (Indoor) Operating Range: 14.2°F to 140°F (-9.9°C to 60°C) Resolution: 0.2°F (0.1°C) Accuracy: 2°F (1°C) Sampling Interval: 10 seconds Temperature (remote) Range: -40°F to 176°F (-40°C to 80°C) Resolution: 0.2°F (0.1°C)
- Page 44 Resolution: 0.1mph (0.16 Km/h) Accuracy: (2mph + 5%) Starting Threshold: 3mph (4.8 Km/h) Wind/Gust Speed Display Update Interval: 33 seconds Wind/Gust Sampling Interval: 11 seconds Rainfall 1h/24h/yesterday range: 0 to 78.73 inch (0 to 1999.9 mm) Last week/ last month range: 0 to 787.3 inch (0 to 19999 mm) Resolution: 0.03 inch (0.6578 mm) Accuracy: +/- 5% +/- 0.03 inch (+/-5%mm +/-0.6875) Transmitting Interval: 183 seconds...
-
Page 45: Fcc Statement
Consult the dealer or an experienced radio / TV technician for help. DECLARATION OF CONFORMITY Name: Hideki Electronics, Inc. Address: 7865 SW Mohawk, Tualatin, OR 97062 Telephone No.: 1-503-612-8395 declare that the product Product No.: TE923W Product Name: Professional Weather Station with Remote Control... -
Page 46: Standard Warranty Information
Copyright (2006) Hideki Electronics Inc. All Rights Reserved. The Honeywell Trademark is used under license from Honeywell Intellectual Properties Inc. Honeywell International Inc. makes no representations or warranties with respect to this product. All user manual contents and information are subject to change.