Table of Contents
Advertisement
Advertisement
Table of Contents

Related Manuals for Insignia NS- DPF0812W


Summary of Contents for Insignia NS- DPF0812W
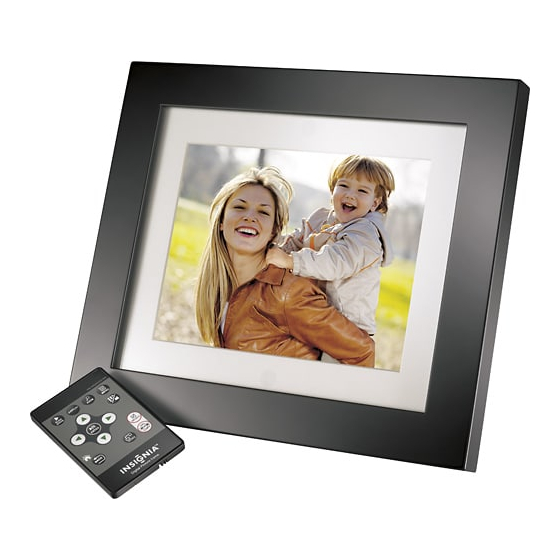
- Page 1 User Guide 8" Digital Picture Frame NS- DPF0812W...
-
Page 2: Table Of Contents
6-month limited warranty..... . . 32 Introduction Congratulations on your purchase of a high-quality Insignia product. Your new digital picture frame is designed for reliable and trouble-free performance. -
Page 3: Safety Information
8" Digital Picture Frame Safety information Always follow these basic safety precautions when using your digital picture frame. This will reduce the risk of fire, electric shock, and injury. Warnings To reduce the risk of fire or shock hazard, do not expose the frame to rain or moisture and unplug the frame during lightning storms. -
Page 4: Features
NS- DPF0812W Features • Displays digital pictures (JPEG format) and picture slideshows without a computer • Displays pictures directly from a portable memory device (not included) • Bright, clear TFT LCD screen • Compatible with a wide variety of memory cards, including: •... -
Page 5: Package Contents
Landscape Model: NS-DPF0812W Power: 5VDC, 1.0A (5W) Tested to Comply with FCC Standards FOR HOME OR OFFICE USE Manufactured for Insignia Products Portrait 7601 Penn Avenue South Richfield MN USA 55423 THIS CLASS (B) DIGITAL APPARATUS COMPLIES WITH CANADIAN ICES-003. - Page 6 NS- DPF0812W Sides Description Memory card slot, supports: • Secure Digital™ (SD) • SDHC™ • MultimediaCard (MMC™) • Memory Stick® • Memory Stick Pro Duo™ (adapter required - not included) • xD™ • microSD™ (adapter required - not included) USB (type A) port...
- Page 7 8" Digital Picture Frame Top (buttons) You can access most of the frame’s features by using either the buttons on top of the frame or by using the remote control. Selecting files for copying or deleting requires the remote control, and the instructions in this guide refer to remote control buttons (except where noted).
-
Page 8: Remote Control
NS- DPF0812W Remote control RM-NSDPF0812W DISPLAY ZOOM MENU Digital Picture Frame Button Description DISPLAY Press to toggle the multi-image display mode. SLIDESHOW Press to start a slideshow. (Up) Press to move the selection up. /ENTER Press to select the highlighted option or to pause and resume the slideshow. - Page 9 8" Digital Picture Frame Button Description (Left) PREV Press to move the menu selection left, display the previous picture, or select the previous file. (Down) Press to move the menu selection down. BACK Press to go back a screen. ZOOM Press to magnify the picture.
-
Page 10: Setting Up Your Picture Frame
NS- DPF0812W Setting up your picture frame Setting up the remote control To set up the remote control: • Remove the plastic tab that extends past the bottom edge of the remote control. This tab protects the battery. The remote control will not work until it is removed. -
Page 11: Setting Up The Frame
Power: 5VDC, 1.0A (5W) Tested to Comply with FCC Standards Tested to Comply with FCC Standards FOR HOME OR OFFICE USE FOR HOME OR OFFICE USE Manufactured for Insignia Products Manufactured for Insignia Products 7601 Penn Avenue South Portrait 7601 Penn Avenue South... -
Page 12: Using Your Picture Frame
NS- DPF0812W Extend the stand from the back of the frame, then place the frame on a flat surface. Push or pull the stand to adjust the viewing angle. Slide the power switch to the ON position. The frame automatically turns on and starts playing a slideshow of the pictures stored in internal memory. -
Page 13: Memory Device
8" Digital Picture Frame Playing slideshows To play an instant slideshow from a portable memory device: Insert a portable memory device into one of the available memory slots or the USB port. A slideshow of pictures from the portable memory device automatically starts to play. - Page 14 NS- DPF0812W To manually play a slideshow from a portable memory device or from internal memory: If the pictures you want to use are on a portable memory device, insert the device into one of the available memory slots or the USB port. A slideshow of pictures from the portable memory device automatically starts to play.
-
Page 15: Copying Pictures To Internal Memory
8" Digital Picture Frame Copying pictures to internal memory You can copy a single picture, multiple pictures, or all pictures from a portable memory device to the frame’s internal memory. Notes Using the frame alone, you cannot copy pictures from the internal memory to a portable memory device, and you cannot copy pictures from one portable memory device to another. - Page 16 NS- DPF0812W Press to highlight the portable memory device you want to copy from, then press ENTER/ . The Thumbnail screen opens. You can press (thumbnail/file list) to switch between thumbnail mode and file list mode. Thumbnail mode displays all files in the selected portable memory device, and file list mode displays files and folders.
- Page 17 8" Digital Picture Frame Press , press to select Yes, then press ENTER/ . The pictures are copied. To copy pictures from your computer to internal memory or portable memory device: Make sure that your computer has been started before you begin.
- Page 18 NS- DPF0812W On a Mac computer, the frame’s internal memory or a portable memory device appears as a USB drive. Use your computer's standard drag and drop or copy and paste procedures to move pictures from the frame's internal memory or portable memory device to your computer.
- Page 19 8" Digital Picture Frame Press to highlight Internal Memory, then press ENTER/ . The Thumbnail screen opens. Press / / / to highlight each picture you want to delete, then press SELECT to mark it. A check mark appears in the upper-right corner of each marked thumbnail.
- Page 20 NS- DPF0812W To delete pictures with your PC: Make sure that your computer is on before you begin. Connect the mini plug of the supplied USB cable to the mini USB port on the digital picture frame, and connect the other end to an available USB port on your computer.
- Page 21 8" Digital Picture Frame Customizing slideshows You can set up a slideshow using either all of the pictures or selected pictures. To set up a slideshow of selected pictures: A slideshow of selected pictures can only be set up by using the remote control. Press (thumbnails).
- Page 22 NS- DPF0812W Press to highlight the picture you want to include in the slideshow, then press SELECT. A check mark appears at the upper-right corner of the thumbnail. Repeat until all pictures you want to add to the slideshow are selected.
- Page 23 8" Digital Picture Frame To rotate a picture based on orientation: MENU, then press Frame Orientation. Press Press to select Landscape or Portrait. Pictures are rotated based on the Frame Orientation setting. While a picture is displayed full screen (not as a thumbnail), use the adjustable stand to set the frame in landscape orientation or turn the stand counter-clockwise by 90°...
-
Page 24: Setting Viewing Options
NS- DPF0812W Setting viewing options You can change all of the viewing options in the Setup menu using the buttons on the top of the frame or on the remote control. You can display the Setup menu at any time by pressing MENU. - Page 25 8" Digital Picture Frame Setup options The following table lists and describes Setup menu options: Menu Settings Description option Slideshow Slideshow interval Sets the interval between each Settings picture transition in a • 5 Seconds slideshow. • 10 Seconds • 30 Seconds •...
- Page 26 NS- DPF0812W Menu Settings Description option Slideshow Panorama Scroll When Panorama Scroll is Settings enabled, pictures that were • (continued) taken in panorama mode are • scrolled across the screen during slideshows rather than resized to fit the screen. Frame...
- Page 27 8" Digital Picture Frame Menu Settings Description option Power saving Sets the power save option. If the buttons on the frame or 15 Minutes remote control are not used 30 Minutes for the specified time, the 1 Hour frame enters Power Saving 2 Hours (Standby) mode.
-
Page 28: Maintaining
NS- DPF0812W Maintaining Cleaning the digital picture frame Make sure the frame is unplugged from the power source. Use the supplied cleaning cloth, or a cloth slightly dampened with water, for cleaning the exterior of the frame only. Replacing the remote control battery To replace the remote control battery: Turn the remote control over. -
Page 29: Troubleshooting
8" Digital Picture Frame Troubleshooting Problem Solution The frame will not The power adapter is not securely connected to turn on. the picture frame, or the power switch is not on. Check power adapter connections, then switch the power on. A portable memory •... -
Page 30: Specifications
NS- DPF0812W Specifications Screen size 8" (203 mm) Screen format Memory card formats • Secure Digital™ (SD) • SDHC™ • MultimediaCard (MMC™) ® • Memory Stick • Memory Stick PRO Duo™ (requires an adapter - not included) • xD™ •... -
Page 31: Legal Notices
8" Digital Picture Frame Legal notices FCC Statement This equipment has been tested and found to comply with the limits for a Class B digital device, pursuant to part 15 of the FCC Rules. These limits are designed to provide reasonable protection against harmful interference in a residential installation. -
Page 32: 6-Month Limited Warranty
Product is determined to be defective by an authorized Insignia repair center or store personnel, Insignia will (at its sole option): (1) repair the Product with new or rebuilt parts; or (2) replace the Product at no charge with new or rebuilt comparable products or parts. - Page 33 Products where the factory applied serial number has been altered or removed REPAIR REPLACEMENT AS PROVIDED UNDER THIS WARRANTY IS YOUR EXCLUSIVE REMEDY. INSIGNIA SHALL NOT BE LIABLE FOR ANY INCIDENTAL OR CONSEQUENTIAL DAMAGES FOR THE BREACH OF ANY EXPRESS OR IMPLIED WARRANTY ON THIS PRODUCT, INCLUDING, BUT NOT LIMITED TO, LOST DATA, LOSS OF USE OF YOUR PRODUCT, LOST BUSINESS OR LOST PROFITS.
- Page 34 7601 Penn Avenue South, Richfield, Minnesota, U.S.A. 55423-3645 © 2011 BBY Solutions, Inc. All rights reserved. INSIGNIA is a trademark of BBY Solutions, Inc. Registered in some countries. All other products and brand names are trademarks of their respective owners.
- Page 35 8" Digital Picture Frame www.insigniaproducts.com...
- Page 36 7601 Penn Avenue South, Richfield, MN 55423-3645 USA © 2011 BBY Solutions, Inc. All rights reserved. INSIGNIA is a trademark of BBY Solutions, Inc. Registered in some countries. All other products and brand names are trademarks of their respective owners.