Panasonic SC-HTB770 Owner's Manual
Home theater audio system
Hide thumbs
Also See for SC-HTB770:
- Owner's manual (44 pages) ,
- Operating instructions manual (44 pages) ,
- Quick start manual (2 pages)
Table of Contents
Advertisement
Quick Links
Panasonic
Home
Owner's Manual
Theater Audio System
Model No.
SC-HTB770
gluetooth °
Thank you for purchasing this product.
Please read these instructions carefully before using this product,
and save this manual for future use.
If you have any questions, contact:
U.S.A. and Puerto Rico: 1-800-211-PANA
(7262)
Canada: 1-800-561-5505
Register online at www.panasonic.com/reqister
(U.S. customers only)
[_
[_
RQT9778-1P
Advertisement
Table of Contents

Related Manuals for Panasonic SC-HTB770


Summary of Contents for Panasonic SC-HTB770
- Page 1 Thank you for purchasing this product. Please read these instructions carefully before using this product, and save this manual for future use. If you have any questions, contact: U.S.A. and Puerto Rico: 1-800-211-PANA (7262) Canada: 1-800-561-5505 Register online at www.panasonic.com/reqister (U.S. customers only) RQT9778-1P...
-
Page 2: Important Safety Instructions
IMPORTANT SAFETY INSTRUCTIONS Read these operating instructions carefully before using the unit. Follow the safety instructions on the unit and the applicable safety instructions listed below. Keep these operating instructions handy for future reference. Read these instructions. Keep these instructions. Unit Heed all warnings. - Page 3 Responsible Party: • When disposing the batteries, please contact your local Panasonic Corporation of North America authorities or dealer and ask for the correct method of One Panasonic Way, disposal. Secaucus, NJ 07094 Support Contact:...
-
Page 4: Unit Care
GHz band. Btuetooth SIG, Inc. and any use of such marks by • This system may not function properly if radio waves Panasonic Corporation is under license. Other trademarks from a nearby broadcasting station, etc. are too strong. and trade names are those of their respective owners. -
Page 5: Table Of Contents
Table of contents IMPORTANT SAFETY INSTRUCTIONS ................Unit care ........................... About Bluetooth ®......................Before Supplied items ......................... This system (SC-HTB770) ......................Accessories ..........................Control reference guide ....................This system (Front) ........................This system (Rear) ........................Remote control ........................... Getting started... -
Page 6: Supplied Items
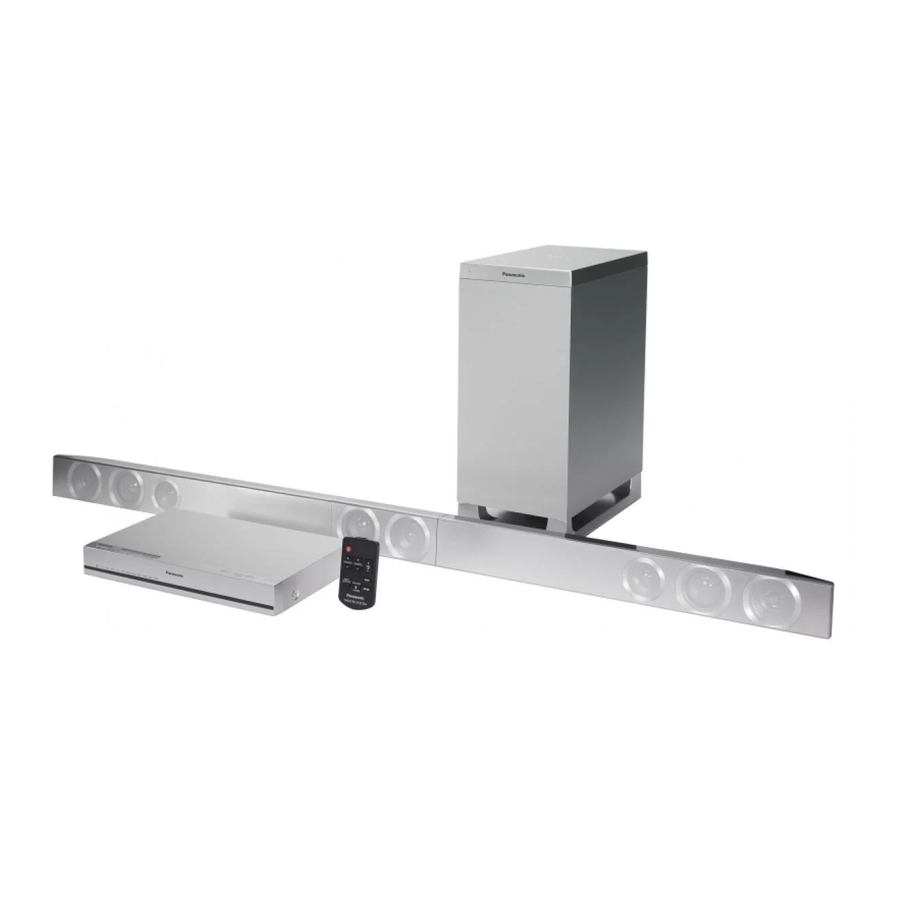
Supplied items 1 Main unit 1 Active 1 Center speaker 2 Front speakers subwoofer SU-HTB770) (SB-HTB770) (SB-HTB570) (SB-HWA770) Check the supplied accessories before using this system. 1 Remote control 2ACpowersupply 3 Speaker cables 1 Metal bracket (with a battery) cords (REEl789: RED) (RML0760A) -
Page 7: Control Reference Guide
Control reference guide This system (Front)..® ® ® ® ® ® ® ® © Main unit Active subwoofer Standby/on switch (POll) Sound mode indicators _ Press to switch the unit from on to standby @ STANDARD indicator mode or vice versa. In standby mode, the unit Lights when STANDARD is the current sound mode... -
Page 8: This System (Rear)
This system (Rear)....DIGITAL ff_,o AUX2 AUXI BD/DVD (HDMI3) (HDMI2) (HDMH) AUX3 ....I _llrlrl| AVIN AVOUT AC IN terminal (_ 28) AUX2 terminal (_ 27) Speaker terminals (_ 28) AUX1 terminal (_ 27) TV terminal (_ 26) BD/DVD terminal (_ 27) AUX3 terminal (_ 27) HDMI OUT terminal (ARC compatible) (_ 26) USB port (for service use only) -
Page 9: Remote Control
Remote control Remove the ]nsu!ati0nsheet • To replaceabutton-type battery iHliii!i! ili ! 5 Battery type; CR2025 (Lithium battery) ....... _i_iiiiiiiiiiiiiiii/iiiiiill Turn the main unit on or off (_ 30) Adjust the dialog effect level (_ 30) Adjust the output level of the active subwoofer (bass sound) (_ 30) Adjust the volume of this system(_ Mute the sound (=>... -
Page 10: Step 1 Selecting The Placement Method
Step Selecting placement method • Choose a placement method that suits you best. vertically Place the speakers using the leg stands Page 19 Place the speakers using the support legs and speaker feet Pag 0 P Place the front speakers using the speaker bases "-'_ Page 2... -
Page 11: The Speaker System
Caution amplifier and/or the speakers, and may resutt in the risk of fire. Consutt a qualified service person if damage • This system is to be used only as indicated in these instructions. Failure to do so may lead to damage to the has occurred or if you experience a sudden change in performance. -
Page 12: Step 2 Assembling The Speakers
Step 2 Assembling the speakers The speakers can be wall mounted by drilling screws into the wall, etc. Make sure that the screw used and the wall are strong enough to support the weight of at least 33 kg (72.8 Ibs). The screws and other items are not supplied as the type and size will vary with each installation. - Page 13 Connect the speaker cables. Push White Green , Red Insert the wire fully. Right speaker connector 4-: White Center speaker connector --: Blue line Left speaker connector • Insertthewire futty,takingcarenot to insert beyondthewire insulation. Press into the groove. ÷ If you have difficulty inserting the cable, try straightening the speaker cable and then bending the cable about 20 mm (2:/32")from the tip, at an angle of approx.
- Page 14 mount the speakers: _Wall Fit the speaker securely onto the screw(s). Red connector: The speaker attached to the red connector cable is to be placed on the right side. White connector: The speaker attached to the white connector cable s to be p aced on the eft s de. White Right speaker connector Left speaker connector...
- Page 15 Place the front speakers vertically The speakers can be wall mounted by drilling screws into the wall, etc. Make sure that the screw used and the wall are strong enough to support the weight of at least 33 kg (72.8 Ibs). The screws and other items are not supplied as the type and size will vary with each installation.
- Page 16 ssemble the center speaker: Connect the speaker cable. • Insertthewire fully,takingcarenot to insertbeyondthe wire insulation. Center speaker connector O Insert the wire fully. 4-: White -: Blue line Green Push Assemble the front speakers: Attach stand neck, • The twofront speakersare interchangeable. •...
- Page 17 screw Drive into the wall. • Usethe measurementsindicatedbelow to identifythe screwingpositionson the watt. • Leaveat least20 of spaceaboveand on each sideof the to allow spacefor mm (25/32") speaker enough fitting the speaker. • Keep the screws out of reach of children to prevent swallowing.
- Page 18 Fit the speaker(s) securely onto the screw(s). Red connector: The speaker attached to the red connector cable is to be placed on the right side. White connector: The speaker attached to the white connector cable s to be paced on the eft s de. bWhite Left speaker connector Right speaker connector...
-
Page 19: When Placing The Speakers On A Table
When placing speakers on a table Place the speakers using the leg stands 2 Front 1 Center speaker 3 Speaker cables WHITE: Left speakers RED: Right GREEN: Center 1 Metal 2 Leg stands 6 Screws bracket • For a safety measure to prevent the speakers from falling, refer to page 24. •... - Page 20 Place the speakers using the support legs and speaker feet 2 Front 1 Center speaker 3 Speaker cables WHITE: Left speakers RED: Right GREEN: Center 2 Support legs 6 Screws 1 Metal bracket 2 Speaker feet • For a safety measure to prevent the speakers from falling, refer to page 24. •...
- Page 21 Place the front speakers using the speaker bases 2 Front 1 Center speaker 3 Speaker cables WHITE: Left speakers RED: Right GREEN: Center 2 Stand necks 2 Speaker bases 2 Side caps 6 Screws 2 Speaker feet • For a safety measure to prevent the speakers from falling, refer to page 24. •...
- Page 22 Assemble the front speakers: Attach the stand neck, • The two front speakers are interchangeable. • Keep the screws out of reach of children to prevent swallowing. Screw (supplied) • Tighten securely. Assemble the front speakers: Insert speaker cable through the speaker base connect...
- Page 23 the front speakers: Assemble Attach the speaker base, • The two front speakers are interchangeable. • Keep the screws out of reach of children to prevent swallowing. _! Screw (supplied) • Tighten securely. Align the projecting parts with the holes on the speaker.
-
Page 24: Additional Speaker Fall Prevention Measures
Additional speaker fall prevention measures To prevent the speakers from falling, it is recommended, as an additional protection measure, to attach the speakers to the wall or table with a fall prevention cord (hereafter "cord"). • Consultation with a quatified installation specialist concerning... - Page 25 iiiiii!i w .o.att.o.i.gt.os.o..ers ver.o.l'y Wall mountinq _iii/iHii_!iiii!!iH/iiiiiiiii!!iHiHiHHiii On a table ÷2 Cord_'2 Wall Screweye (D Approx. 150 mm (5 29/32") ÷1 If the cord cannot be threaded through the holes, try bending the cord in 2 locations, about 10 mm (_3/32") a part from the tip, at an angle of 45 ° (as illustrated above). ÷2 When attaching the cord to the center speaker, make sure that the cord does not touch the speaker cable lead wire.
-
Page 26: Step 3 Connections
• HDMI • The HDMI connection supports VIERA Link 'HDAVI Control" (_ 32) when used with a compatible Panasonic TV. • Use the ARC compatible High Speed HDMI cables. Non-HDMI-compliant cables cannot be utilized. • It is recommended that you use Panasonic's HDMI cable. -
Page 27: Connection With Other Devices
Connection with other devices You can direct the audio signal from the connected Blu-ray Disc player, DVD player, Set Top Box, etc. to this system. e.g., Blu-ray Disc player I < e.g., Set top 3 "< e.g., Video game console HDMI cable •... -
Page 28: Speaker Cable Connection
Speaker cable connection Match the connector shape and connect to the terminals of the same color. (_) GREEN WHITE Right speaker connector Center speaker connector Left speaker connector power supply cord connection • Connect only after all other connections are completed. To a household AC outlet AC power supply cord (supplied) -
Page 29: Active Subwoofer Wireless Connection
"0" indicator flashes quickly. • If the "g" indicatorflashesslowiy,repeatstep 2. Active subwoofer on/off button [.I. _ ._ I] Select "SC-HTB770" from Use this button to turn the active subwoofer on and Bluetooth ® device's Bluetooth ® off. menu. -
Page 30: Using This System
Using this system Adjust the volume and sound effect level. Preparation • Turn on the active subwoofer. • To adjust the volume of this system • Turn on the TV and/or connected device. Press[+ • Volume range: Oto 100 • To adjust the dialog effect level This setting... -
Page 31: 3D Sound
Speaker 5.1ch. "STADIUM" Produces a highly realistic sound Adding to the Dolby Virtual for live broadcasts of sports. Speaker effect, Panasonic has Re-creates the sound of musical applied its own sound field "MUSIC" instruments and songs with an 3D surround... -
Page 32: Linked Operations With The Tv (Viera Link Tm"Hdavi Control Tm'')
(for HDAVI Control 3 or later) • This unit supports "HDAVI Control 5" function. "HDAVl Control 5" is the standard for Panasonic's HDAVI Delay between audio and video is automatically adjusted Control compatible equipment. This standard is compatible by adding time-lag to the audio output, enabling you to with Panasonic's conventional HDAVI equipment. -
Page 33: Advanced Operations
Advanced operations Auto gain control ! !i I Audio format indicator To display the current audio format. With this function, you can prevent sudden loud sounds. The output will be reduced automatically when the input Press and hold [SOUND] for more than exceeds a certain level. - Page 34 Using the Dolby Virtual Bluetooth ® communication mode Speaker effect You can select different modes to suit the type of Depending on your preference, It is possible to turn offthe connections with emphasis on connectivity or high quality 3D surround effect and the clear-mode dialog effect, audio.
- Page 35 Remote control code • To turn offVIERA Link "HDAVI Control" When other Panasonic devices respond to this system's remote control, change the remote control code on this When "HDAVI Control" compatible equipment does not system and the remote control. work well with this system, for example, it is possible to...
-
Page 36: Troubleshooting
Control 4 or later). Please read the operating instructions For some built-in Bluetooth _ devices, you have to set the for the TV for details about its power save feature. (=;. 32) audio output to "SC-HTB770" manually. Read the operating instructions for the device for details. - Page 37 "HDMI (ARC)". If not, connect using the optical is connected properly. digital audio cable. (=_ 26) • If the main unit is connected to a Panasonic TV and turned on using the button on the main unit or the After turning the subwoofer on, it immediately remote control, sound might not be output from this turns off.
-
Page 38: Specifications
Specifications iii l s..KE.SECT,O. RMS output power: Dolby Digital Mode Front speakers Front ch (L, R ch) 3 way, 3 speaker system (Bass reflex type) 60 W per channel (6 £3), 1 kHz, 10 % THD Speaker unit(s) Impedance 6 [Q Center ch (C ch) Woofer 5.7 cm (2 1/4")cone type... - Page 39 SPEAKE. OENE." sss_ Power consumption Main unit: 37 For wall mounting layout Active subwoofer: 20 Horizontal placement In standby condition Dimensions 1230 ram×68 ram×41 turn Main unit (When the other connected devices (WXHXD) (48 7110"×2 W1e"× 1 10116") are turned off): Approx.
-
Page 40: Indicator Illumination
Indicator illumination The indicators display the condition of this system by flashing. indicator patterns illustrated below are displayed during normal operational conditions. They do not refer to the indications of a problem. Indicator Description The BD/DVD indicator blinks _2and sound mode ...... - Page 41 RQT9778...
-
Page 42: Limited Warranty (Only For U.s.a. And Puerto Rico)
BB CHARGED Or, send your request by E-mail THE REPAIR OF ANY UNIT RECBIVBD WITHOUT SUCH PROOF n pcpa rts(_,us.panasonic.com OF PURCHASE. You may also contact us directly Limited Warranty Limits And Exclusions 1-800-332-5368 (Phone) 1-800-237-9080 (Fax Only) (Monday-Friday 9am-9pm... -
Page 43: Limited Warranty (Only For Canada)
Product - One (1) year, parts and labour This warranty is given only to the original purchaser, or the person for whom it was purchased as a gift, of a Panasonic brand product mentioned above sold by an authorized Panasonic... - Page 44 "Partner". Panasonic Canada Inc. Panasonic Consumer Marketing Company of North America, 5770 Ambler Drive Division of Panasonic Corporation Mississauga, Ontario L4W 2T3 North America www.panasonic.ca One Panasonic Way, Secaucus, New Jersey 07094 http ://www.panasonic.com...