Table of Contents
Advertisement
Advertisement
Table of Contents

Related Manuals for Westinghouse VR-5525Z


Summary of Contents for Westinghouse VR-5525Z
- Page 1 USER’S MANUAL MANUEL DE L’UTILISATEUR MANUAL DEL USUARIO VR-5525Z...
-
Page 2: Table Of Contents
Contents IMPORTANT SAFETY 2. Sound menu ..........34 INSTRUCTION ......2 Sound Settings .............34 PREFACE ........4 Surround Mode ............35 SAFETY PRECAUTIONS ...4 AVL ................35 Analog Sound ............35 Headphone Warning ........6 Digital Sound ............35 Where to install ..........6 Mount the TV stand ....7 Digital Audio Output ..........35 Unit and Accessories ....8 Equalizer Settings ..........36... -
Page 3: Important Safety Instruction
The lightning flash with arrowhead symbol, within an equi- lateral triangle, is intended to alert the user to the presence of un-insulated dangerous voltage within the products enclosure that may be of sufficient magnitude to constitute a risk of electric to persons. The exclamation point within an equilateral triangle is in- tended to alert the user to the presence of important operat- ing and maintenance (servicing) instruction the literature... - Page 4 8. Do not install near any heat sources such as radiators, heat registers, stoves, or other apparatus (including amplifiers) that produce heat. 9. Do not defeat the safety purpose of the polarized or grounding-type plug. A polarized plug has two blades with one wider than the other. A grounding type plug has two blades and a third grounding prong.
-
Page 5: Preface
PREFACE Thank you for buying this TV! Please read this manual thoroughly before op- erating the TV. Make sure the TV was not damaged in transit. Should the TV be damaged, do not install it and contact your dealer. Check that you have all the accessories according to the model. - Page 6 Keep the TV dry and away from humidity. Keep the TV away from heat sources. Unplug the TV before cleaning it. Do not use solvent or liquid to clean the TV. Only clean the TV with a soft and dry cloth. In case of troubleshooting, do not use spare parts other than those suggested by the manufacturer.
-
Page 7: Headphone Warning
Headphone Warning Loud music can damage your hearing irreversibly, therefore do not set the volume to a high level when listening through headphones, particularly for lengthy listening periods. Where to install Locate the television away from direct sunlight and strong lights, soft indirect lighting is recommended for comfortable viewing. -
Page 8: Mount The Tv Stand
Mount the TV stand Before performing work spread cushioning over the base area to lay the TV on, making sure the area is completely flat. This will prevent it from being damaged. Before attaching stand, unplug the AC cord from the AC INPUT terminal. 1. -
Page 9: Unit And Accessories
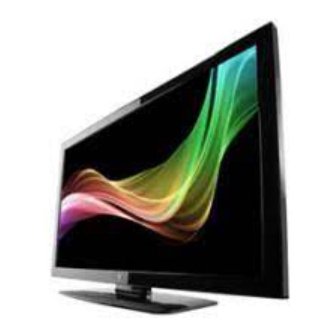
Unit and Accessories Front View Remote Control Sensor LED Indicator Side View The functions of the TV buttons are described below: STANDBY: Press to switch on or off the TV. INPUT: Select a TV input source. MENU: Press to display the OSD menu, press again to exit the menu. CH ◀/▶: Press to skip through the channels. -
Page 10: Rear View
Unit and Accessories (Continued) Rear View Supplied Accessories Make sure the following accessories are provided with the product. Quick Connect Guide RSC8-A-_GB_27 Apr 11.indd 9 2011-4-27 10:55:35... -
Page 11: Remote Control
Remote Control Functions of remote control buttons Depend on the model of the TV, some keys will have no function. - 10 RSC8-A-_GB_27 Apr 11.indd 10 2011-4-27 10:55:35... - Page 12 Input the channel number or 1. Mute button ( password. When switch to a Mutes or unmutes audio. digital channel, usually should 2. YPbPr1 button be followed by Dot button and Quickly switch input to YPbPr 1 minor channel number. Enter source.
-
Page 13: Quick Installation Tips
Quick Installation Tips 1. Attach your antenna to the back of the television. 2. Connect the AC plug for the television into the AC outlet. AC Outlet • Place the TV close to the AC outlet, and keep the power plug within reach. -
Page 14: Using The Remote Control Unit
Using the Remote Control Unit Use the remote control unit by pointing it towards the remote control sen- sor on the TV. Objects between the remote control unit and the remote control sensor may prevent proper operation. 30° 0° Horizontal & •... - Page 15 Installing Batteries in the Remote Control Unit If the remote control fails to operate TV functions, replace the batteries in the remote control unit. 1. Open the battery cover. 2. Insert two “AA” size batteries (supplied with the product). • Place the batteries with their terminals corresponding to the (+) and (-) indications in the battery compartment.
-
Page 16: Connections
Connections device Output to Audio amplifier TV Signal Satellite Box or Blue Ray DVD 15 - RSC8-A-_GB_27 Apr 11.indd 15 2011-4-27 10:55:41... -
Page 17: Connecting The Antenna Or Cable
WARNING! ENSURE THE TV AND ALL ANCILLARY EQUIPMENT IS UN- PLUGGED FROM THE MAINS BEFORE MAKING ANY CONNECTIONS! Connecting the Antenna or Cable Connect to an antenna Any DTV programs that are broadcast in your area can be received for free through an antenna connection. - Page 18 Contact your local DBS provider for more information about the connections and the TV channels. Connect to a set-top box A cable box or satellite set-top box can be connected to the TV through the following connections: • • A/V (Composite Video and Audio) •...
-
Page 19: Connecting External Devices
Connecting external devices This instruction manual shows the simplest and most effective way of con- necting your TV to ancillary equipment. Alternate methods are listed below. HDMI Lead You can connect this TV to a compatible device using a HDMI lead. This method will give the best picture. - Page 20 Connecting external devices (continued) AV Connection Connect the VIDEO and AUDIO output jack of the DVD or VCR to the CVBS jacks on the set using the RCA cable. Match the jack colors: Video is yellow, Audio left is white, and the Audio right is red. Select the AV input source us- ing the INPUT button on the remote control.
- Page 21 Connecting external devices (continued) PC(VGA) Connection Connect the RGB output of the PC to the PC(VGA) jack on the set. Connect the AUDIO output of the PC to the PC AUDIO jack on the set. Select the PC input source with using INPUT button on the remote control. HDMI Connection HDMI plug which replaces the HDMI connection allows transfer of all audio/ video/control signals through one cable only.
- Page 22 Connecting external devices (continued) LINE OUT Connection Connect the LINE OUT (R-AUDIO-L) jacks of the set and your device using the audio cable. You can output TV sound through these jacks. COAX Connection If your AV amplifier (receiver) has digital decoder and a digital input jack, you can enjoy digital surround effects through this jack.
-
Page 23: Initial Setup
Initial Setup When you turn on the TV for the first time, the Initial Setup will guide you through the setup process. Perform the following steps before you press POWER on the remote control unit. 1. Language setting The Initial Setup screen display at the first use. Select the OSD menu language from English, French, or Spanish. -
Page 24: Location Setting
Initial Setup (continued) 3. Location setting Press ▲ and ▼ button to select “Home” or “Showroom” and press ENTER button to the next step. Power On Mode Use the up/down key arrows on you remote control to select power on mode. Home optimizes the video setting for ENERGY STAR®... - Page 25 Initial Setup (continued) 5. Cable or Satellite Box Input selection Make sure what kind of connection is made with your TV when selecting for Source select item. Press ▲ and ▼ button to select “Next” and then press ENTER button to continue.
- Page 26 Antenna users need a Channel Access Code in order to perform a channel scan and receive broadcast signals. To access channel scan you will need the following access Info: Web: www.westinghousedigital.com/support; Model: VR-5525Z select Channel Access and enter Access Info Serial No.: XXXXXXXXXXXXX Channel Scan Type: ATSC Text Message: Text Tuner to 95495 Provide these items to Westinghouse’s channel access service...
- Page 27 Initial Setup (continued) 9. Auto Channel Search Highlight and press ENTER button to start the auto searching. It will search analog channels first, then digital channels. Before execute auto channel search, please confirm your antenna type is Air or Cable. Wrong setting of Signal Type maybe cause finding no channel. Found numbers do not include encryption programs.
-
Page 28: Source Menu
Source Menu Press INPUT button to display the input source list. Press ▲ and ▼ button to select the input source and press ENTER button to confirm. Main Menu Press MENU button to display the main menu or return to the previous menu or close the main menu. -
Page 29: Main Menu Description
Main Menu Description Picture Menu Adjust your picture settings. The op- eration are slightly different among different source. Sound Menu Adjust the sound settings. Channel Menu Customize your channel settings. Parental Control Menu Set program rating control and in- put source, keypad lock function. V-CHIP - 28 RSC8-A-_GB_27 Apr 11.indd 28... - Page 30 Main Menu Description (Continued) Setup Menu Select closed caption options, lan- guage and time. Others Menu Set the OSD blue background, whether auto power off if no signal or no operation, clear all user set- tings, etc.. 29 - RSC8-A-_GB_27 Apr 11.indd 29 2011-4-27 10:55:47...
-
Page 31: Menu Settings
Menu Settings 1. Picture menu 1. Press ▲ and ▼ button to highlight one of the following options, then press ENTER or ▶ button to enter next sub-menu to adjust it. 2. Press MENU button back to the previous menu. Picture Settings Adjust the picture quality including brightness, contrast, color, tint, sharp- ness. -
Page 32: Screen Size
Menu Settings (continued) Picture Mode Highlight the item and press ◀ and ▶ button to select “Movie, Dynamic, Standard, or User”. Brightness/Contrast/Color/Tint/Sharpness Highlight the item and press ▶ button, and a process bar appears, then press ◀ or ▶ button to adjust the value. Tint is available when analog TV or NTSC - system AV. -
Page 33: Pc Settings
Menu Settings (continued) PC Settings When DVI signal input, only Horizontal Position and Vertical Position can be adjusted. Press ▲ and ▼ button to highlight one of the following options, then press ENTER button to select it. Auto Adjust: Automatically adjust Clock, Phase, H - Position and V - Position settings. -
Page 34: Color Temperature
Menu Settings (continued) Color Temperature Press ◀ and ▶ button to select the color temperature that you feel com- fortable. Normal: Basically will be accepted by most people. Cool: Means a high color temperature that will feel cool. Warm: Means a low color temperature that will feel warm. Advanced Picture Settings The item is some special picture feature. -
Page 35: Sound Menu
Menu Settings (continued) 2. Sound menu 1. Press ▲ and ▼ button to highlight one of the following options, then press ENTER or ▶ button to enter next sub-menu to adjust it. 2. Press MENU button back to the previous menu. Sound Settings Set the sound mode, and Bass/Treble/Balance. -
Page 36: Surround Mode
Menu Settings (continued) Adjust the Bass/Treble/Balance 1. Set Sound Mode to User. 2. Highlight the item and press ◀ and ▶ button to display the sub-menu, then press ◀ and ▶ button to adjust the value. Surround Mode Set to enjoy the virtual surround sound. Press ENTER button to set or cancel. Auto Volume Level. -
Page 37: Equalizer Settings
Menu Settings (continued) Equalizer Settings Adjust the curve of 7 bands equalizer. Mode: Off/Rock/Pop/Jazz/User (only in User mode, the following can be manually adjusted.) Adjust Equalizer Settings Based on your favourites about which frequency band need to be adjusted, make small adjustment with certain frequency band at a time. Suggest NOT making too large changes. -
Page 38: Channel Menu
Menu Settings (continued) 3. Channel menu Note: The menu is available only at TV source. 1. Press ▲ and ▼ button to highlight one of the following options, then press ENTER or ▶ button to enter next sub-menu to adjust it. 2. -
Page 39: Favourite List
Menu Settings (continued) Favourite List All of you favourite channels are listed in this menu, and you can choose them quickly.. Page 1/1 The list shows channels that you set as favourite. See “Channel Settings” to understand how to set channels be favourite. Channel Settings Set the favourite channels, skipped channels, label of channels. -
Page 40: Signal Type
Menu Settings (continued) Change the settings Skip & Favourite 1. Press ▲ and ▼ button to select the channel you want to set. 2. Press ◀ and ▶ button to highlight corresponding item, and press ENTER button to set or cancel. Label 1. -
Page 41: Parental Control Menu
Menu Settings (continued) 4. Parental Control menu V-CHIP Note: The default user password is “0000”, and if forget what you set, try “1470”. Lock Parental Control The following items are only available if the password input is correct. V-CHIP Include below settings: V-CHIP US V-Chip Canada V-Chip... -
Page 42: Movie Rating
Menu Settings (continued) Movie Rating This system defines the rating control which come from MPAA rules. Rating Define General audience. All ages admitted. Parental guidance suggested. Some material may not be suitable for children. Parents strongly cautioned. Some material may be inappropriate for PG-13 children under 13. - Page 43 Menu Settings (continued) TV Rating The TV rating compose of two aspects: age-based and content-based. Define Content Define General audience Fantasy violence TV-Y TV-Y7 Parental guidance suggested Suggestive dialogue TV-G Parents strongly cautioned Strong language TV-PG Restricted Sexual situations TV-14 No one 17 and under admitted V Violence TV-MA...
- Page 44 Menu Settings (continued) Canada V-Chip : Rating system used at Canada. For Canada, the rating setting include the following options: English Rating, French Rating. English Rating These ratings are for programs which are using English rating system. Rating Defined as Children Children 8 years and older General programming...
-
Page 45: Change Password
Menu Settings (continued) Change Password At first you should enter the correct old password then enter new password twice. If you lost your password, try to enter “1470”. Keypad Lock Press to lock the front panel keypad, press again to release. Source Lock Press ▲... -
Page 46: Setup Menu
Menu Settings (continued) 5. Setup menu Closed Caption CLOSED CAPTION Closed Caption (CC) Include below options: Caption Display: Display or hide the CC. Analog Caption Type: Select from below closed-caption modes for analog programs. CC1,2,3,4: Displays corresponding caption channel of analog program. -
Page 47: Digital Cc Style
Menu Settings (continued) Digital CC Style Digital Caption Type: Applies only to digital channels with closed caption. Service1,2,3,4,5,6: These are different service data channels. Digital CC Preset: Default/Custom If set to Custom, Digital CC Style is available. Digital CC Style This menu is valid only for digital closed caption of digital channels. -
Page 48: Clock
Menu Settings (continued) Clock Set the Time Zone/Auto Clock/Day of time/Daylight Saving. Daylight Saving Time Time Zone: Hawaii/Alaska/Pacific/Central/Mountain/Eastern/Samoa/New- foundland/Atlantic. Auto Clock: If set it to ON, the TV will sync the local clock according to the DTV broadcasting time automatically. Otherwise you can set the time manu- ally. -
Page 49: Others Menu
Menu Settings (continued) 6. Others menu Blue Back: Set the screen background colour blue or not when no vaild signal input. When analog TV input and has no signal, snow noise will display if this op- tion is cleared. No Signal Power Off: If it is set, TV will automatically enter standby after 10 minutes without signal input. -
Page 50: Simple Troubleshooting
Simple Troubleshooting Please check if you can solve problems by troubleshooting yourself. Troubleshooting Control No signal Please check that all cables are correctly plugged in. No color shades Adjust the contrast, the color or the brightness. Stain on the Maybe the result from a lighting signal from car, motor, screen neon light and other electrical devices or appliances. -
Page 51: Technical Specifications
Technical Specifications This manual is only for your reference, any changes to the design and spleni- fication will not be advised. Screen Size 55 Inch Display Type TFT LCD Resolution(Pixel) 1920 x 1080 Aspect Ratio 16:9 Power Supply AC 100-240V 50/60Hz Power Consumption ≤... - Page 52 S/N: Westinghouse Digital, LLC Orange, CA SE-UM-5502-0101...