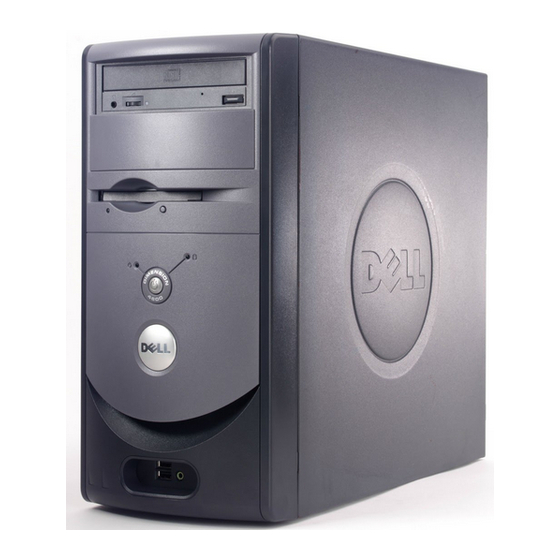
Dell Dimension 4600 Series Service Manual
Hide thumbs
Also See for Dimension 4600 Series:
- Installation manual (28 pages) ,
- Setup manual (2 pages) ,
- Owner's manual (148 pages)
Table of Contents
Advertisement
Quick Links
Dell™ Dimension™ 4600 Series Service Manual
Before You Begin
Removing the Computer Cover
Technical Overview
Technical Specifications
Advanced Troubleshooting
System Setup
Removing and Installing Parts
Replacing the Computer Cover
Notes, Notices, and Cautions
NOTE:
A NOTE indicates important information that helps you make better use of your computer.
NOTICE:
A NOTICE indicates either potential damage to hardware or loss of data and tells you how to avoid the problem.
CAUTION:
A CAUTION indicates a potential for property damage, personal injury, or death.
Abbreviations and Acronyms
For a complete list of abbreviations and acronyms, see the Tell Me How help file.
If you purchased a Dell™ n Series computer, any references in this document to Microsoft® Windows® operating systems are not applicable.
Information in this document is subject to change without notice.
© 2003–2004 Dell Inc. All rights reserved.
Reproduction in any manner whatsoever without the written permission of Dell Inc. is strictly forbidden.
Trademarks used in this text: Dell, the DELL logo, and Dimension are trademarks of Dell Inc.; Intel, Pentium, and Celeron are registered trademarks of Intel Corporation; Microsoft
and Windows are registered trademarks of Microsoft Corporation.
Other trademarks and trade names may be used in this document to refer to either the entities claiming the marks and names or their products. Dell Inc. disclaims any
proprietary interest in trademarks and trade names other than its own.
August 2004 Rev. A02
Advertisement
Table of Contents

Related Manuals for Dell Dimension 4600 Series


Summary of Contents for Dell Dimension 4600 Series
-
Page 1: Abbreviations And Acronyms
Windows are registered trademarks of Microsoft Corporation. Other trademarks and trade names may be used in this document to refer to either the entities claiming the marks and names or their products. Dell Inc. disclaims any proprietary interest in trademarks and trade names other than its own. -
Page 2: Diagnostic Lights
3. Repeat this process for each card. If the computer starts normally, troubleshoot the last card removed from the computer for resource conflicts (see "Resolving Software and Hardware Incompatibilities" in your Owner's Manual). 4. If the problem persists, see "Contacting Dell" in your Owner's Manual for instructions on obtaining technical assistance. ... -
Page 3: Beep Codes
One possible beep code (code 1-3-1) consists of one beep, a burst of three beeps, and then one beep. This beep code tells you that the computer encountered a memory problem. Reseating the memory modules may fix the beep code errors in the following table. If the problem persists, see "Contacting Dell" in your Owner's Manual for instructions on obtaining technical assistance. Code Cause 1-3-1 through 2-4-4 Memory not being properly identified or used... -
Page 4: System Messages
C: Drive Failure Cache Memory Bad, Do The cache memory is not operating. See "Contacting Dell" in your Owner's Manual for instructions on obtaining technical assistance. Not Enable Cache CH-2 Timer Error An error is occurring on the timer on the system See "Contacting Dell"... - Page 5 Back to Contents Page ...
-
Page 6: Shutting Down Your Computer
Before you begin any of the procedures in this section, follow the safety instructions in your Owner's Manual or Product Information Guide. NOTICE: Only a certified service technician should perform repairs on your computer. Damage due to servicing that is not authorized by Dell is not covered by your warranty. NOTICE: Handle components and cards with care. - Page 7 CAUTION: To guard against electrical shock, always unplug your computer from the electrical outlet before removing the cover. Remove the computer cover. NOTICE: Before touching anything inside your computer, ground yourself by touching an unpainted metal surface, such as the metal at the back of the computer.
-
Page 8: Replacing The Computer Cover
Back to Contents Page Replacing the Computer Cover Dell™ Dimension™ 4600 Series Service Manual 1. Ensure that all cables are connected, and fold cables out of the way. 2. Ensure that no tools or extra parts are left inside the computer. 3. Place the cover on the computer. -
Page 9: Removing The Computer Cover
Back to Contents Page Removing the Computer Cover Dell™ Dimension™ 4600 Series Service Manual CAUTION: Before you begin any of the procedures in this section, follow the safety instructions in your Owner's Manual or Product Information Guide. CAUTION: To guard against electrical shock, always unplug your computer from the electrical outlet before removing the cover. -
Page 10: Pci Cards
Back to Contents Page Removing and Installing Parts Dell™ Dimension™ 4600 Series Service Manual PCI Cards Microprocessor AGP Card Fan Assembly Memory System Board Front Panel Power Supply Drives Battery PCI Cards CAUTION: Before you begin any of the procedures in this section, follow the safety instructions in your Owner's Manual or Product Information Guide. -
Page 11: Removing An Agp Card
CAUTION: To guard against electrical shock, always unplug your computer from the electrical outlet before removing the cover. Your Dell™ computer provides a connector for an AGP card. 1. Follow the procedures in "Before You Begin." 2. Lay the computer on its side so that the system board is on the bottom of the inside of the computer. -
Page 12: Installing An Agp Card
Installing an AGP Card 1. To add or replace the card, press the card lever toward the PCI connector and gently press the card into the AGP connector until it clicks into place. 2. Release the card lever, ensuring that the tab fits into the notch on the front end of the card. 3. -
Page 13: Ddr Memory Overview
If you remove your original memory modules from the computer during a memory upgrade, keep them separate from any new modules that you may have, even if you purchased the new modules from Dell. You should install your original memory modules in pairs either in connectors DIMM1 and DIMM2 or connectors DIMM3 and DIMM4. -
Page 14: Front Panel
If the module is difficult to remove, gently ease the module back and forth to remove it from the connector. 4. To insert a module, press out the securing clip at each end of the memory module connector. 5. -
Page 15: Removing The Front Panel
Removing the Front Panel CAUTION: Before you begin any of the procedures in this section, follow the safety instructions in your Owner's Manual or Product Information Guide. CAUTION: To guard against electrical shock, always unplug your computer from the electrical outlet before removing the cover. 1. -
Page 16: Removing The Front-Panel Insert
Removing the Front-Panel Insert CAUTION: Before you begin any of the procedures in this section, follow the safety instructions in your Owner's Manual or Product Information Guide. CAUTION: To guard against electrical shock, always unplug your computer from the electrical outlet before removing the cover. 1. - Page 17 CAUTION: To guard against electrical shock, always unplug your computer from the electrical outlet before removing the cover. NOTICE: To avoid damage to the drive, do not set it on a hard surface. Instead, set the drive on a soft surface, such as a foam pad, that will sufficiently cushion it.
-
Page 18: Adding Or Replacing A Second Hard Drive
NOTICE: Match the colored strip on the cable with pin 1 on the drive (pin 1 is marked as "1"). 6. Connect the power and data cables to the back of the replacement drive. Replace the computer cover. NOTICE: To connect a network cable, first plug the cable into the network wall jack and then plug it into the computer. - Page 19 NOTICE: Ground yourself by touching an unpainted metal surface on the back of the computer. NOTICE: When you unpack the drive, do not set it on a hard surface, which may damage the drive. Instead, set the drive on a soft surface, such as a foam pad, that will sufficiently cushion it.
-
Page 20: Adding A Floppy Drive
9. Connect the power and data cables to the back of the drives. Replace the computer cover. NOTICE: To connect a network cable, first plug the cable into the network wall jack and then plug it into the computer. 11. -
Page 21: Adding A Second Cd Or Dvd Drive
forward into position. NOTE: The top of the floppy drive bracket has two slots that fit into two clips on the bottom of the upper drive bay. When the floppy drive bracket is properly mounted, it remains in place without support. 7. - Page 22 NOTE: Drives sold by Dell come with their own operating software and documentation. After you install a drive, see the documentation that came with the drive for instructions on installing and using the drive software. 2. Release and remove the front panel.
-
Page 23: Removing The Microprocessor
NOTICE: Match the colored strip on the cable with pin 1 on the drive (pin 1 is marked as "1"). 9. Connect the power cable to the system board. 10. Locate the data cable from the CD or DVD drive in the upper drive bay and connect its middle data connector to the new drive. 11. - Page 24 NOTICE: If you are installing a microprocessor upgrade kit from Dell, discard the original heat sink. If you are not installing a microprocessor upgrade kit from Dell, reuse the original heat sink when you install your new microprocessor. ...
-
Page 25: Installing The Microprocessor
If you are not installing a microprocessor upgrade kit from Dell, reuse the original heat sink assembly when you replace the microprocessor. If you installed a microprocessor replacement kit from Dell, return the original heat sink assembly and microprocessor to Dell in the same package in which your replacement kit was sent. -
Page 26: Removing The Fan Assembly
b. Lower the heat sink until it fits securely in the module. c. When the heat sink is secured, pivot the retention module clip down until the tab snaps into place to secure the heat sink. 7. Lower the airflow shroud over the heat sink. 8. -
Page 27: Replacing The Fan Assembly
6. Remove the fan assembly from the computer. Replacing the Fan Assembly 1. Align the fan assembly tabs with the holes in the back of the computer. 2. Slide the fan assembly away from the fan release lever until it clicks in place. 3. -
Page 28: Installing The System Board
9. Lift the system board out from the computer. 10. Place the system board that you just removed next to the replacement system board. Visually compare the replacement system board to the existing system board to ensure that you have the correct part. ... -
Page 29: Replacing The Power Supply
CAUTION: Before you begin any of the procedures in this section, follow the safety instructions in your Owner's Manual or Product Information Guide. CAUTION: To guard against electrical shock, always unplug your computer from the electrical outlet before removing the cover. 1. -
Page 30: Replacing The Battery
If you have to repeatedly reset time and date information after turning on the computer, replace the battery. CAUTION: A new battery can explode if it is incorrectly installed. Replace the 3-V CR2032 battery only with the same or equivalent type recommended by the manufacturer. -
Page 31: Technical Specifications
Back to Contents Page Technical Specifications Dell™ Dimension™ 4600 Series Service Manual Microprocessor Audio System Information Network Expansion Bus Controls and Lights Memory Power Drives Physical Ports and Connectors Environmental Video Microprocessor Microprocessor type Intel® Pentium® 4 that runs at 2.26, 2.4, 2.533, 2.66, 2.8, or 3.06 GHz internally and 533 MHz externally, or 2.4, 2.6, 2.8, 3.0, 3.2,... - Page 32 Ports and Connectors Externally accessible: Serial 9-pin connector; 16550C- compatible Parallel 25-hole connector (bidirectional) Video 15-hole connector Keyboard 6-pin mini-DIN connector Mouse 6-pin mini-DIN connector USB two front-panel and six back-panel USB 2.0–compliant connectors Network RJ-45 connector Audio Five back miniature connectors for line-in, line-out, microphone, surround and center/Low-Frequency Effects (LFE) channel...
- Page 33 Environmental Temperature: Operating 10º to 35ºC (50º to 95ºF) NOTE: At 35°C (95°F), the maximum operating altitude is 914 m (3000 ft). Storage –40º to 65ºC (–40º to 149ºF) Relative humidity 20% to 80% (noncondensing) Maximum vibration: Operating 0.25 G at 3 to 200 Hz Storage 2.20 Grms at 10 to 500 Hz Maximum shock:...
-
Page 34: Entering System Setup
Entering System Setup Viewing Settings 1. Turn on (or restart) your computer. 2. When the blue DELL™ logo appears, press <F2> immediately. If you wait too long and the operating system logo appears, continue to wait until you see the Microsoft® Windows® desktop. Then shut down your computer and try again. -
Page 35: System Setup Options
<Page Down> or <Page Up> Scrolls through help information. <Enter> Enters the selected field's pop-up options menu. spacebar, <=> or <-> In the selected field's pop-up options menu, cycles through the options in a field. <Alt> <x> Exits system setup without restarting the computer and returns the computer to the boot routine. <Alt>... - Page 36 System Memory Channel Mode Displays the mode of your system memory. AGP Aperture Displays the amount of aperture memory. The default setting is 128 MB. CPU Information CPU Speed The processor speed at which the computer boots. Press the left- or right-arrow key to toggle the CPU Speed option between the resident processor's rated speed (the default speed) and a lower-compatibility speed.
-
Page 37: Boot Sequence
Suspend Mode The options are S1 or S3. AC Power Recovery Determines what happens when AC power is restored to the computer. Off (default) — The computer remains off when AC power is restored. On — The computer starts when AC power is restored. Last —... -
Page 38: Clearing Forgotten Passwords
Option Settings Normal — (Available only for the current boot process) The computer attempts to boot from the sequence of devices specified in system setup. Diskette Drive — The computer attempts to boot from the floppy drive. If the floppy disk in the drive is not bootable, or if no floppy disk is in the drive, the computer generates an error message. - Page 39 6. Turn off the monitor and disconnect it from the electrical outlet. 7. Disconnect the computer power cable from the electrical outlet, and press the power button to ground the system board. Remove the computer cover. 9. Locate the 3-pin password jumper (CLR PASSWRD) on the system board and attach the jumper to pins 1 and 2 to reenable the password feature.
-
Page 40: Technical Overview
Back to Contents Page Technical Overview Dell™ Dimension™ 4600 Series Service Manual Inside View of Your Computer System Board Components Power Supply DC Connector Pin Assignments Inside View of Your Computer CAUTION: Before you begin any of the procedures in this section, follow the safety instructions in your Owner's Manual or Product Information Guide. -
Page 41: Power Supply Dc Connector Pin Assignments
Power Supply DC Connector Pin Assignments The 250-W power supply can operate from an AC power source of 115 VAC at 60 Hz or 230 VAC at 50 Hz. The power supply provides the DC operating voltages and currents listed in the following table. ... -
Page 42: Dc Power Connector P1
+12 VDC 0.0 14.0 +5 VDC 1.0 22.0 +3.3 VDC 0.1/0.0 18.0 –12 VDC 0.0 1.0 +5 VFP 0.0 2.0 When the current load is outside of the ranges listed, but within each specified output current range, the +5-V, +12-V, and +3.3-V outputs are allowed to regulate at +/–10% of nominal DC voltages. -
Page 43: Dc Power Connector P4
3 +12 VDC Yellow 4 +12 VDC Yellow DC Power Connectors P3, P5, P6, P8 and P9 Pin Number Signal Name 18-AWG Wire 1 +12 VDC Yellow 2 COM Black 3 COM Black 4 +5 VDC Red ... - Page 44 Windows are registered trademarks of Microsoft Corporation. Other trademarks and trade names may be used in this document to refer to either the entities claiming the marks and names or their products. Dell Inc. disclaims any proprietary interest in trademarks and trade names other than its own.