Dell Inspiron 8100 Service Manual
Hide thumbs
Also See for Inspiron 8100:
- Service manual (130 pages) ,
- Solution manual (118 pages) ,
- User manual (158 pages)
Table of Contents
Advertisement
Quick Links
Advertisement
Table of Contents

Related Manuals for Dell Inspiron 8100


Summary of Contents for Dell Inspiron 8100
- Page 1 Thank you for purchasing this Factory Service Manual CD/DVD from servicemanuals4u.com. Please check out our eBay auctions for more great deals on Factory Service Manuals: servicemanuals4u...
- Page 2 Reproduction in any manner whatsoever without the written permission of Dell Computer Corporation is strictly forbidden. Trademarks used in this text: Dell, Dell TravelLite, Inspiron, AccessDirect, and TrueMobile are trademarks of Dell Computer Corporation; Intel and Pentium are registered trademarks; GeForce2 Go is a trademark of NVIDIA Corporation; Microsoft and Windows are registered trademarks of Microsoft Corporation.
- Page 3 Macrovision Corporation and other rights owners. Use of this copyright protection technology must be authorized by Macrovision Corporation, and is intended for home and other limited viewing uses only unless otherwise authorized by Macrovision Corporation. Reverse engineering or disassembly is prohibited. August 2001 file:///I|/SERVICE%20MANUALS/DELL%20MANUALS/LA...%20ok/Inspiron/8100/8100_SERVICE_MAN/index.htm (2 of 2)6/21/2004 1:08:52 AM...
-
Page 4: A Tour Of Your Computer
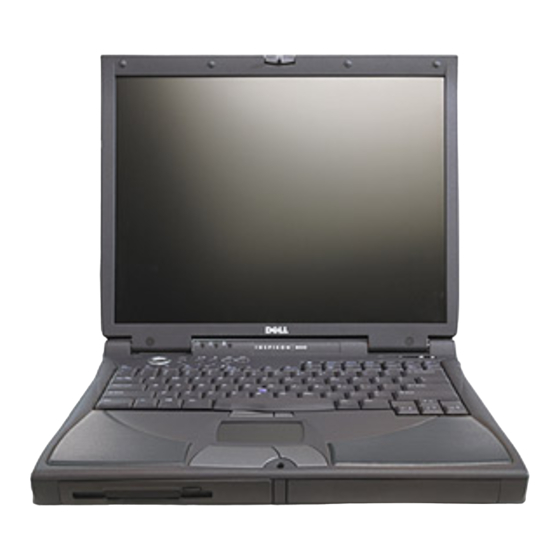
A Tour of Your Computer : Dell Inspiron 8100 Back to Contents Page A Tour of Your Computer Dell™ Inspiron™ 8100 Front View Left Side View Right Side View Back View Front View file:///I|/SERVICE%20MANUALS/DELL%20MANUALS/LA...d%20ok/Inspiron/8100/8100_SERVICE_MAN/tour.htm (1 of 17)6/21/2004 1:08:54 AM... -
Page 5: Display Latch
A Tour of Your Computer : Dell Inspiron 8100 Display Latch This latch keeps the display locked in place when the display is closed. Display The computer has a color LCD. Device Status Lights file:///I|/SERVICE%20MANUALS/DELL%20MANUALS/LA...d%20ok/Inspiron/8100/8100_SERVICE_MAN/tour.htm (2 of 17)6/21/2004 1:08:54 AM... - Page 6 A Tour of Your Computer : Dell Inspiron 8100 The lights below the display indicate the following: The light labeled turns on when the computer is turned on and blinks when the computer is in standby mode. The light labeled turns on when the computer reads data from or writes data to the hard drive.
-
Page 7: Keyboard Status Lights
A Tour of Your Computer : Dell Inspiron 8100 NOTICE: To avoid data loss, never turn off the computer while the green light labeled flashing. Air Intake HINT: The computer turns on the fans only when the computer gets hot. They may run most of the time or very seldom, depending on your use of the computer. - Page 8 A Tour of Your Computer : Dell Inspiron 8100 The green lights located above the keyboard indicate the following: The light labeled turns on when you press to enable the numeric keypad. The light labeled turns on when you press to enable the uppercase letter function.
-
Page 9: Touch Pad
With a charged battery in this bay, you can use the computer without plugging it in to an electrical outlet. Media Bay You can install devices such as a CD drive, DVD drive, CD-RW and CD-R drive, second battery, or Dell TravelLite™ travel module in the media bay. Touch Pad/Track Stick Buttons These buttons correspond to the left and right buttons on a standard mouse. - Page 10 To launch the Dell Solution Center, the computer must be turned on and functioning properly. 1 Press this button to launch the Dell Solution Center, where you can find support and educational tools that Dell has installed on your computer.
-
Page 11: Left Side View
A Tour of Your Computer : Dell Inspiron 8100 2 Press this button to launch your default Internet browser. 3 Press this button to launch http://www.dell.com, or reprogram the button to launch a program of your choice. 4 Press this button to open your default e-mail program, or reprogram the button to launch a program of your choice. -
Page 12: Security Cable Slot
A Tour of Your Computer : Dell Inspiron 8100 Security Cable Slot The slots (one on each side of the computer) let you attach a commercially available antitheft device to the computer. Complete instructions for installing antitheft devices are usually included with the device. -
Page 13: Audio Connectors
A Tour of Your Computer : Dell Inspiron 8100 Audio Connectors file:///I|/SERVICE%20MANUALS/DELL%20MANUALS/LA...d%20ok/Inspiron/8100/8100_SERVICE_MAN/tour.htm (10 of 17)6/21/2004 1:08:54 AM... -
Page 14: Ieee 1394 Connector
A Tour of Your Computer : Dell Inspiron 8100 Attach record/playback devices such as a cassette player or CD player to the connector. Attach headphones or speakers to the connector. Attach a microphone to the connector. IEEE 1394 Connector Use this connector to attach IEEE 1394-compatible devices such as a digital camera to your computer. -
Page 15: Hard Drive
A Tour of Your Computer : Dell Inspiron 8100 Hard Drive The hard drive reads and writes data on a hard disk. Modem Connector If you ordered the optional internal modem, use this connector to plug in the telephone connector. -
Page 16: Pc Card Slot
A Tour of Your Computer : Dell Inspiron 8100 If you ordered the optional integrated network adapter, use this connector to connect the computer to a network. Security Cable Slot The slots (one on each side of the computer) let you attach a commercially available antitheft device to the computer. -
Page 17: Ac Adapter Connector
A Tour of Your Computer : Dell Inspiron 8100 Fan Exhausts HINT: The computer turns on the fan only when the computer gets hot. It may run most of the time or very seldom, depending on your use of the computer. Because the fan spins at a high rate of speed, it may make a noise. -
Page 18: Usb Connectors
A Tour of Your Computer : Dell Inspiron 8100 HINT: Although the AC adapter works worldwide, power connectors vary among countries. Before using the AC adapter in a foreign country, you may need to obtain a new power cable designed for use with the electrical outlets in that country. -
Page 19: Serial Connector
A Tour of Your Computer : Dell Inspiron 8100 Serial Connector Use this connector to attach a serial device to the computer. HINT: The port replicator may not be available in certain countries. Refer to the documentation that came with your port replicator for instructions on attaching external devices to the port replicator and connecting your computer to it. - Page 20 A Tour of Your Computer : Dell Inspiron 8100 file:///I|/SERVICE%20MANUALS/DELL%20MANUALS/LA...d%20ok/Inspiron/8100/8100_SERVICE_MAN/tour.htm (17 of 17)6/21/2004 1:08:54 AM...
-
Page 21: Power Conservation
Power Conservation : Dell Inspiron 8100 Back to Contents Page Power Conservation Dell™ Inspiron™ 8100 Conservation Tips Power Conservation Modes Power Options Properties Conservation Tips You automatically conserve battery power each time you attach your computer to an electrical outlet. When the AC adapter is attached, the battery is charged while the computer uses AC power. -
Page 22: Hibernate Mode
Hibernate mode requires a special file on your hard drive with enough disk space to store the contents of the computer memory. Dell creates an appropriately sized hibernate mode file before shipping the computer to you. -
Page 23: Power Schemes Tab
The Low battery alarm and Critical battery alarm settings alert you with a message when the battery charge falls below a certain percentage. When you receive your computer, the Lower battery alarm and Critical battery alarm check boxes are selected. Dell recommends that you continue to use these defaults. -
Page 24: Hibernate Tab
Power Conservation : Dell Inspiron 8100 Activate hibernate mode (the default for the power button). Shut down Windows and turn off the computer. Choose no action (None). HINT: If you are going to connect your computer to a port replicator, click None when you program the display-close option. -
Page 25: Solving Problems
Solving Problems : Dell Inspiron 8100 Back to Contents Page Solving Problems Dell™ Inspiron™ 8100 Accessing Help Files Unexpected Characters Power Problems Drive Problems Start-Up Error Messages Network Problems Video and Display Problems Windows® Error Messages Sound and Speaker Problems... -
Page 26: Power Problems
Solving Problems : Dell Inspiron 8100 To access Windows Me Help 1. Click the Start button and then click Help. 2. Type a word or phrase that describes your problem in the Search box and then click Go. 3. Click the topic that describes your problem and then click Display. -
Page 27: Video And Display Problems
Start-Up Error Messages Operating system not found— Contact Dell for technical assistance. See "Contacting Dell" in the Dell Solutions Guide that came with your computer for contact information. Insert bootable media— The operating system is trying to boot to a nonbootable floppy disk or CD. -
Page 28: Sound And Speaker Problems
Solving Problems : Dell Inspiron 8100 Eliminate possible interference— Turn off nearby fans, fluorescent lights, or halogen lamps to check for interference. Rotate the computer to face a different direction— Eliminate sunlight glare, which can cause poor picture quality. Restore the recommended settings—... -
Page 29: Printer Problems
If you cannot print to a parallel port printer Verify the printer cable connections— Ensure that the printer cable is connected (see "Connecting a Printer" in the Dell Solutions Guide that came with your computer). Test the electrical outlet— Ensure that the electrical outlet is working by testing it with another device, such as a lamp. -
Page 30: If You Cannot Print To A Usb Printer
2. Ensure that the Print to the following port: setting is LPT1 (Printer Port). Reinstall the printer driver— See "Installing the Printer Driver" in the Dell Solutions Guide that came with your computer. If you cannot print to a USB printer Verify the printer cable connections—... -
Page 31: Scanner Problems
Solving Problems : Dell Inspiron 8100 Check the telephone jack— Disconnect the telephone line from the modem and connect it to a telephone. Listen for a dial tone. Connect the modem directly to the telephone wall jack— If you have... -
Page 32: Touch Pad Problems
Solving Problems : Dell Inspiron 8100 Touch Pad Problems Check the touch pad settings— Click the Start button, point to Settings, click Control Panel, and then double-click the Mouse icon. Try adjusting the settings. External Keyboard Problems HINT: If you connect an external PS/2 keyboard or keypad to the computer, the numeric keypad on the integrated keyboard is disabled. - Page 33 Solving Problems : Dell Inspiron 8100 Cannot save files to a floppy disk— Ensure that the floppy disk is not full or write-protected (locked). See the following figure. Test the drive with another floppy disk— Insert another floppy disk to eliminate the possibility that the original floppy disk is defective.
-
Page 34: If You Cannot Play A Dvd Movie
Solving Problems : Dell Inspiron 8100 If you have one CD in the fixed optical drive and one CD in the media bay drive— Identify which CD is not playing: 1. Double-click the My Computer icon on your desktop. 2. Double-click the drive letter of the device the you are verifying. -
Page 35: Network Problems
Solving Problems : Dell Inspiron 8100 Check the hard drive for errors— Windows Me: Click the Start button, point to Programs—> Accessories—> System Tools, and then click ScanDisk. Windows 2000: 1. Double-click the My Computer icon. 2. Right-click the Local Disk icon and then click Properties. -
Page 36: General Program Problems
Solving Problems : Dell Inspiron 8100 Not enough memory or resources. Close some programs and try again— You have too many programs open. Close all windows and open the program that you want to use. The file being copied is too large for the destination drive—... -
Page 37: If Your Computer Gets Wet
Perform this procedure only after you are certain that it is safe to do so. If the computer is connected to an electrical outlet, Dell recommends that you turn off AC power at the circuit breaker before attempting to remove the power cables from the electrical outlet. -
Page 38: If You Drop Or Damage Your Computer
4. Remove and reinstall the battery. 5. Turn on the computer. If the computer does not turn on, or if you cannot identify the damaged components, contact Dell for technical assistance. See "Contacting Dell" in the Dell Solutions Guide that came with your computer for contact information. -
Page 39: Resolving Other Technical Problems
E-mail Dell— Go to http://support.dell.com and then click E-Mail Dell in the Communicate list. Send an e-mail message to Dell about your problem; you can expect to receive an e-mail message from Dell within hours. Call Dell—... -
Page 40: System Specifications
System Specifications : Dell Inspiron 8100 Back to Contents Page System Specifications Dell™ Inspiron™ 8100 Microprocessor Keyboard System Information Touch Pad PC Card Track Stick Memory Modem Ports and Connectors Battery Video AC Adapter Audio Environmental Display Fixed Optical Drives... - Page 41 System Specifications : Dell Inspiron 8100 PC Card CardBus controller Texas Instruments PCI 4450/4451 CardBus controller PC Card connectors two (supports two Type I or Type II cards or one Type III card) Cards supported 3.3 V and 5 V...
- Page 42 System Specifications : Dell Inspiron 8100 PS/2 keyboard/mouse 6-pin mini-DIN connector two USB-compliant connectors Infrared sensor compatible with both IrDA Standard 1.1 (Fast IR) and IrDA Standard 1.0 (Slow IR) Docking 200-pin connector for Dell advanced port replicator S-video TV-out...
- Page 43 System Specifications : Dell Inspiron 8100 External stereo (line-in), microphone, headphones/speaker (line-out) Display Type 256-bit hardware-accelerated video support Response time (typical) 50 ms Operating angle 0º (closed) to 180º Dot pitch 0.20 mm Panel (typical) 1.3 W Backlight 3.4 W using battery; 4.9 W using...
- Page 44 System Specifications : Dell Inspiron 8100 Width 64.88 mm (2.55 inch) Height 48.88-mm (1.92-inch) rectangle with 0.5-mm (0.02-inch) tabs Weight 6.5 g (0.23 ounce) ± 0.5 g (0.001 ounce) Power: Supply voltage 5 V ± 0.5 VDC Supply current 25 mA (maximum operating...
- Page 45 System Specifications : Dell Inspiron 8100 Type 8-cell lithium ion (dual battery support is available via the media bay) Dimensions: Depth 88.5 mm (3.48 inches) Height 21.5 mm (0.83 inch) Width 139.0 mm (5.47 inches) Weight 8 cell; 0.39 kg (0.87 lb) Voltage 14.8 VDC...
- Page 46 System Specifications : Dell Inspiron 8100 Weight (with cables) 0.4 kg (0.9 lb) Temperature range: Operating 0º to 40ºC (32º to 104ºF) Storage –40º to 65ºC (–40º to 149ºF) Environmental Temperature range: Operating 0º to 35ºC (32º to 95ºF) Storage –40º...
- Page 47 System Specifications : Dell Inspiron 8100 Supported drives 12.5-mm drives: CD, CD-RW, and DVD Back to Contents Page file:///I|/SERVICE%20MANUALS/DELL%20MANUALS/LA...%20ok/Inspiron/8100/8100_SERVICE_MAN/specs.htm (8 of 8)6/21/2004 1:08:58 AM...
-
Page 48: Reinstalling Software
Dell provides software utilities and drivers that help you control certain features of your computer. The utilities and drivers for Dell-installed devices are installed and operative when you receive the computer. If you ever need to reinstall any of these drivers, you can use the Dell™ Drivers and Utilities CD that came with your computer. -
Page 49: Reinstalling Drivers And Utilities
Reinstalling Software : Dell Inspiron 8100 HINT: For more information on using the operating system installed on your computer by Dell, see the operating system documentation that came with your computer. You can also access system tools and documentation from http://support.dell.com by entering your service tag... - Page 50 Reinstalling Software : Dell Inspiron 8100 If you have an internal modem, you need to reinstall the modem driver. If you have the combination modem/network adapter, you need to reinstall both the modem and network adapter drivers. To reinstall a modem or network adapter driver, use the appropriate following procedure, depending on your operating system.
- Page 51 To prevent conflicts with Windows Me, you must disable any virus protection software installed on your computer before you reinstall Windows. 1. Turn on the computer, and enter the system setup program as directed by a Dell technical support representative.
- Page 52 2. In the system setup program Boot menu, change the boot sequence so that the CD or DVD drive boots first as directed by a Dell technical support representative. Then place the Operating System CD in the drive and close the drive tray.
-
Page 53: Enabling Hibernate Support
Reinstalling Software : Dell Inspiron 8100 18. Reinstall the appropriate drivers (see "Reinstalling Drivers and Utilities"). 19. Reenable your virus protection software. Enabling Hibernate Support 1. Click the Start button, point to Settings, and click Control Panel. 2. Double-click the Power Options icon. - Page 54 Reinstalling Software : Dell Inspiron 8100 computer. Then click Next. 14. When the Computer Name and Administrator Password window appears, enter a name for your computer and a password, if desired. Then click Next. 15. Enter the date and time in the Date and Time Settings window, and then click Next.
-
Page 55: System Setup Program
System Setup Program : Dell Inspiron 8100 Back to Contents Page System Setup Program Dell™ Inspiron™ 8100 Standard Settings System Setup Program Pages Viewing the System Setup Program Pages Standard Settings The system setup program contains the standard settings for your computer. - Page 56 Viewing the System Setup Program Pages 1. Turn on (or restart) your computer. 2. When the Dell™ logo appears, press <F2> immediately. If you wait too long and the Windows® logo appears, continue to wait until you see the Windows desktop.
- Page 57 Ports and Connector Pin-Outs : Dell Inspiron 8100 Back to Contents Page Ports and Connector Pin-Outs Dell™ Inspiron™ 8100 Serial Connector Parallel Connector PS/2 Connector USB Connectors S-Video TV-Out Connector Video Connector Docking Connector IEEE-1394 Connector Serial Connector Signal RXDA TXDA file:///I|/SERVICE%20MANUALS/DELL%20MANUALS/LAP...20ok/Inspiron/8100/8100_SERVICE_MAN/pinouts.htm (1 of 9)6/21/2004 1:09:00 AM...
- Page 58 Ports and Connector Pin-Outs : Dell Inspiron 8100 Shell N/A Parallel Connector Pin Signal Signal STB#/5V BUSY/MTR# PDO/INDEX# PE/WDATA# PD1/TRK0# SLCT/WGATE# PD2/WP# AFDF# PD3/RDATA# ERROR#HDSEL# PD4/DSKCHG# 16 INIT#/DIR# PD5F SLCT_IN#STEP# PD6F 18-23 GND PD7F ACK#/DRV# file:///I|/SERVICE%20MANUALS/DELL%20MANUALS/LAP...20ok/Inspiron/8100/8100_SERVICE_MAN/pinouts.htm (2 of 9)6/21/2004 1:09:00 AM...
- Page 59 Ports and Connector Pin-Outs : Dell Inspiron 8100 PS/2 Connector Signal DAT_KBD DAT_SM1 PS2VCC CLK_KBD CLK_SM1 Shell N/A USB Connectors file:///I|/SERVICE%20MANUALS/DELL%20MANUALS/LAP...20ok/Inspiron/8100/8100_SERVICE_MAN/pinouts.htm (3 of 9)6/21/2004 1:09:00 AM...
- Page 60 Ports and Connector Pin-Outs : Dell Inspiron 8100 Pin Signal –Data +Data Ground S-Video TV-Out Connector file:///I|/SERVICE%20MANUALS/DELL%20MANUALS/LAP...20ok/Inspiron/8100/8100_SERVICE_MAN/pinouts.htm (4 of 9)6/21/2004 1:09:00 AM...
- Page 61 Ports and Connector Pin-Outs : Dell Inspiron 8100 Pin Signal DLUMA-L DCRMA-L SPDIF DCMPS-L SPGND Video Connector Signal GREEN BLUE file:///I|/SERVICE%20MANUALS/DELL%20MANUALS/LAP...20ok/Inspiron/8100/8100_SERVICE_MAN/pinouts.htm (5 of 9)6/21/2004 1:09:00 AM...
- Page 62 Ports and Connector Pin-Outs : Dell Inspiron 8100 CRTVCC M-SEN# DAT_DDC2 HSYNC VSYNC CLK_DDC2 Shell N/A Docking Connector Pin Signal Pin Signal Signal Signal STRB#/5V HSYNC VGA_GRN VSYNC CLK_SPCI VGA_RED DOCKED SAD0 USB_VD1+ VGA_BLU SAD1 USB_VD1- DOCK_SD/ SAD2 MODE D_IRTX...
- Page 63 Ports and Connector Pin-Outs : Dell Inspiron 8100 USB_VD2- SAD5 DOCKOC1# SPIRQB# SAD6 DOCK_SPKR RUN_ON# SPIRQC# DOCK_MIC DAT_DDC2 SAD7 DOCK_LINE CLK_DDC2 SAD8 DOCK_CDROM DOCK_SCLK SPAR SC/BE0# DOCK_LRCK SPME# SAD9 M_SEN# DOCK_MCLK SAD10 POWER_SW# SSERR# SAD11 QPCIEN# +12V SPERR# SAD12 S1.6M_EN#...
- Page 64 Ports and Connector Pin-Outs : Dell Inspiron 8100 DOCK_PWR_SRC CTS0 SSTEP# SAD26 RTS0 SDRV1# SAD27 DOCK_+DC_IN DSR0 SAD28 DOCK_+DC_IN SMRT1# SAD29 DOCK_+DC_IN DTR0 SWRDATA# SAD30 DOCK_+DC_IN TXD0# SWGATE# SAD31 DOCK_+DC_IN RXD0# SRDATA# DOCK_+DC_IN DCD0 SINDEX# DOCK_+DC_IN DOCK_+DC_IN +5VSUS +5VALW LOW_PWR...
- Page 65 Ports and Connector Pin-Outs : Dell Inspiron 8100 TPA+ Back to Contents Page file:///I|/SERVICE%20MANUALS/DELL%20MANUALS/LAP...20ok/Inspiron/8100/8100_SERVICE_MAN/pinouts.htm (9 of 9)6/21/2004 1:09:00 AM...
-
Page 66: Removing And Replacing Parts
NOTICE: Only a certified service technician should perform repairs on your computer. Damage or inoperability due to servicing not authorized by Dell is not covered by your warranty. NOTICE: Unless otherwise noted, each procedure in this manual assumes that a part can be replaced by performing the removal procedure in reverse order. -
Page 67: Recommended Tools
Removing and Replacing Parts : Dell Inspiron 8100 HINT: Make sure the computer is turned off and not in standby or hibernate mode. If you cannot shut down the computer using the computer's operating system, press and hold the power button for 4 seconds. -
Page 68: Screw Identification
NOTICE: If the computer is running Microsoft® Windows® Millennium Edition (Me), you need to download the operating system update utility for Windows Me from http://support.dell. com and install it before you upgrade the BIOS. Screw Identification Before removing and replacing components, photocopy the screw placemat as a tool to lay out and keep track of the screws. - Page 69 Removing and Replacing Parts : Dell Inspiron 8100 Hard Drive Door Security: Keyboard to Bottom Case Display to Base: M3 x 5 mm (1 each) Assembly:M2.5 x 20 mm M2.5 x 6 mm (3 (4 each; plus one in each; 2 at back of memory module cover and computer;...
-
Page 70: System Components
Removing and Replacing Parts : Dell Inspiron 8100 System Components file:///I|/SERVICE%20MANUALS/DELL%20MANUALS/LA...20ok/Inspiron/8100/8100_SERVICE_MAN/remove.htm (5 of 52)6/21/2004 1:09:07 AM... -
Page 71: Removing The Hard Drive
Removing and Replacing Parts : Dell Inspiron 8100 Hard Drive NOTICE: Disconnect the computer and attached devices from electrical outlets and remove any installed batteries. NOTICE: To avoid ESD, ground yourself by using a wrist grounding strap or by periodically touching an unpainted metal surface on the computer. -
Page 72: Replacing The Hard Drive
Removing and Replacing Parts : Dell Inspiron 8100 NOTICE: The disk drive is very sensitive to shock. Handle the assembly by its edges (do not squeeze the top of the hard drive case), and avoid dropping it. 1. Follow the instructions in "Preparing to Work Inside the... -
Page 73: Media Bay Devices
Removing and Replacing Parts : Dell Inspiron 8100 NOTICE: Disconnect the computer and attached devices from electrical outlets and remove any installed batteries. NOTICE: To avoid ESD, ground yourself by using a wrist grounding strap or by periodically touching an unpainted metal surface on the computer. -
Page 74: Removing Media Bay Devices
Removing and Replacing Parts : Dell Inspiron 8100 NOTICE: Disconnect the computer and any attached devices from electrical outlets, and remove any installed batteries. NOTICE: To avoid ESD, ground yourself by using a wrist grounding strap or by periodically touching an unpainted metal surface on the computer. -
Page 75: Removing Memory Modules
Removing and Replacing Parts : Dell Inspiron 8100 Removing Memory Modules file:///I|/SERVICE%20MANUALS/DELL%20MANUALS/LA...20ok/Inspiron/8100/8100_SERVICE_MAN/remove.htm (10 of 52)6/21/2004 1:09:07 AM... -
Page 76: Replacing Memory Modules
Removing and Replacing Parts : Dell Inspiron 8100 1. Remove the memory module cover. 2. To release a memory module from its connector, spread apart the tabs at each side of the module until the module pops up slightly. 3. Lift the memory module out of its connector. - Page 77 Removing and Replacing Parts : Dell Inspiron 8100 Mini PCI Card Assembly NOTICE: Disconnect the computer and attached devices from electrical outlets and remove any installed batteries. NOTICE: To avoid ESD, ground yourself by using a wrist grounding strap or by periodically touching an unpainted metal surface on the computer.
- Page 78 Removing and Replacing Parts : Dell Inspiron 8100 3. To release the Mini PCI card assembly, spread the metal securing tabs until the assembly pops up slightly. 4. Disconnect the assembly from the wiring harness or internal antenna. 5. Lift out the assembly and disconnect any attached cables.
-
Page 79: Keyboard Assembly
Removing and Replacing Parts : Dell Inspiron 8100 NOTICE: If a wireless network adapter card contains two mini-coax antenna connectors, connect the mini-coax cable to the outermost antenna connector as shown. NOTICE: If you are installing a wireless network adapter, fold and tuck the unused wiring harness into the slot so that it does not interfere with the cover. -
Page 80: Removing The Keyboard Assembly
Removing and Replacing Parts : Dell Inspiron 8100 Removing the Keyboard Assembly 1. Follow the instructions in "Preparing to Work Inside the Computer." 2. Turn the computer over and remove the four screws labeled with a "circle K." 3. Turn the computer over and open the display. - Page 81 Removing and Replacing Parts : Dell Inspiron 8100 5. Lift the right end of the keyboard, and slide it slightly to the right to disengage the tabs at the left end. 6. Pivot the keyboard and balance it upright on the left side of the computer.
-
Page 82: Replacing The Keyboard Assembly
Removing and Replacing Parts : Dell Inspiron 8100 7. Disconnect the keyboard cable and lay the keyboard assembly aside. Replacing the Keyboard Assembly 1. While bracing the keyboard assembly upright on its left end, connect the keyboard cable to the interface connector on the system board. - Page 83 Removing and Replacing Parts : Dell Inspiron 8100 Display and Bezel Assembly NOTICE: Disconnect the computer and attached devices from electrical outlets and remove any installed batteries. file:///I|/SERVICE%20MANUALS/DELL%20MANUALS/LA...20ok/Inspiron/8100/8100_SERVICE_MAN/remove.htm (18 of 52)6/21/2004 1:09:07 AM...
-
Page 84: Removing The Hinge Cover
Removing and Replacing Parts : Dell Inspiron 8100 NOTICE: To avoid ESD, ground yourself by using a wrist grounding strap or by periodically touching an unpainted metal surface on the computer. Removing the Hinge Cover 1. Follow the instructions in "Preparing to Work Inside the... - Page 85 Removing and Replacing Parts : Dell Inspiron 8100 1. Remove the hinge cover. 2. Remove the M2.5 x 6-mm screw that secures the flex cable to the strain relief, and then use the pull loop to remove the flex cable from the video card.
- Page 86 Removing and Replacing Parts : Dell Inspiron 8100 NOTICE: When reconnecting the flex cable, press down on both ends of the connector, not in the middle. Pressing the middle of the connector can damage fragile components. 3. Open the display and remove the two screws (marked with a "circle D") that secure the display assembly to the bottom case assembly.
- Page 87 Removing and Replacing Parts : Dell Inspiron 8100 NOTICE: Disconnect the computer and attached devices from electrical outlets and remove any installed batteries. NOTICE: To avoid ESD, ground yourself by using a wrist grounding strap or by periodically touching an unpainted metal surface on the computer.
-
Page 88: Removing The Display Panel
Removing and Replacing Parts : Dell Inspiron 8100 Removing the Display Assembly Bezel 1. Follow the instructions in "Preparing to Work Inside the Computer." 2. Use a scribe to pry loose the four rubber screw covers located across the top of the bezel. - Page 89 Removing and Replacing Parts : Dell Inspiron 8100 NOTICE: When reconnecting the flex cable, press down on both ends of the connector, not in the middle. Pressing the middle of the connector can damage fragile components. 3. Remove the display assembly bezel.
-
Page 90: Replacing The Display Panel
Removing and Replacing Parts : Dell Inspiron 8100 Replacing the Display Panel HINT: Use a magnetic screwdriver to reassemble the display panel in the display. 1. Connect the flex cable to the two connectors on the back of the display panel. - Page 91 Removing and Replacing Parts : Dell Inspiron 8100 4. Starting on the left side, use a magnetic screwdriver to reinstall the six M2 x 3-mm screws that secure the display panel in the top cover. 5. Reinstall the display assembly bezel.
-
Page 92: Microprocessor Thermal Cooling Assembly
Removing and Replacing Parts : Dell Inspiron 8100 3. Remove the display assembly bezel. 4. Remove the display panel from the top cover. 5. Remove the display latch by unsnapping the latch and captive spring. NOTICE: When replacing the display assembly latch, it may help to flex the cover slightly to allow more space while seating the latch. -
Page 93: Removing The Microprocessor Thermal Cooling Assembly
Removing and Replacing Parts : Dell Inspiron 8100 NOTICE: Disconnect the computer and attached devices from electrical outlets and remove any installed batteries. NOTICE: To avoid ESD, ground yourself by using a wrist grounding strap or by periodically touching an unpainted metal surface on the computer. -
Page 94: Microprocessor Module
Removing and Replacing Parts : Dell Inspiron 8100 1. Follow the instructions in "Preparing to Work Inside the Computer." 2. Remove the keyboard assembly. 3. Remove the hinge cover. NOTICE: To ensure maximum cooling for the microprocessor, do not touch the heat transfer areas on the thermal cooling assembly. -
Page 95: Removing The Microprocessor Module
Removing and Replacing Parts : Dell Inspiron 8100 NOTICE: Disconnect the computer and attached devices from electrical outlets and remove any installed batteries. NOTICE: To avoid ESD, ground yourself by using a wrist grounding strap or by periodically touching an unpainted metal surface on the computer. -
Page 96: Replacing The Microprocessor Module
CD that came with the replacement microprocessor. NOTICE: If the computer is running Microsoft® Windows® Millennium Edition (Me), you need to download the operating system update utility for Windows Me from http://support.dell. com and install it before you upgrade the BIOS. NOTICE: Proper seating of the microprocessor module does not require force. - Page 97 Removing and Replacing Parts : Dell Inspiron 8100 1. Align the pin-1 triangle on the microprocessor toward the pin-1 triangle in the connector, insert the microprocessor into the socket, and move it around slightly until you feel it settle into the socket.
-
Page 98: Video Card
Removing and Replacing Parts : Dell Inspiron 8100 Video Card file:///I|/SERVICE%20MANUALS/DELL%20MANUALS/LA...20ok/Inspiron/8100/8100_SERVICE_MAN/remove.htm (33 of 52)6/21/2004 1:09:07 AM... -
Page 99: Removing The Video Card
Removing and Replacing Parts : Dell Inspiron 8100 NOTICE: Disconnect the computer and attached devices from electrical outlets and remove any installed batteries. NOTICE: To avoid ESD, ground yourself by using a wrist grounding strap or by periodically touching an unpainted metal surface on the computer. -
Page 100: Replacing The Video Card
Removing and Replacing Parts : Dell Inspiron 8100 Replacing the Video Card 1. Align the three screw holes and press down firmly on the top of the connector to seat the card in its connector. NOTICE: Make sure the card is correctly and firmly seated before continuing. Failure to do so will cause intermittent video failures. -
Page 101: Removing The Palm Rest Assembly
Removing and Replacing Parts : Dell Inspiron 8100 2. Keep the display open, and tilt the computer back so that you can access the bottom of the computer. 3. Slide and hold the latch release on the left side, and remove any device installed in the media bay. - Page 102 Removing and Replacing Parts : Dell Inspiron 8100 NOTICE: Disconnect the computer and attached devices from electrical outlets and remove any installed batteries. NOTICE: To avoid ESD, ground yourself by using a wrist grounding strap or by periodically touching an unpainted metal surface on the computer.
-
Page 103: Reserve Battery
Removing and Replacing Parts : Dell Inspiron 8100 6. Turn the computer over. 7. Remove the nine M2.5 x 20-mm screws (labeled with a "circle P") that secure the palm rest to the computer. 8. Turn the computer over. 9. Use the pull loop to disconnect the palm rest flex cable from the touch-pad connector on the system board. -
Page 104: Removing The Reserve Battery
Removing and Replacing Parts : Dell Inspiron 8100 NOTICE: Disconnect the computer and attached devices from electrical outlets and remove any installed batteries. NOTICE: To avoid ESD, ground yourself by using a wrist grounding strap or by periodically touching an unpainted metal surface on the computer. -
Page 105: Replacing The Reserve Battery
Removing and Replacing Parts : Dell Inspiron 8100 7. Remove the two M2.5 x 4-mm screws securing the palm rest bracket. 8. While supporting the flex cable, lift out the palm rest bracket and turn it over. NOTICE: The reserve battery provides power to the computer's RTC and NVRAM when the computer is turned off. -
Page 106: System Board Assembly
Removing and Replacing Parts : Dell Inspiron 8100 4. Replace the two M2.5 x 4-mm screws that secure the palm rest bracket to the palm rest. System Board Assembly NOTICE: Disconnect the computer and attached devices from electrical outlets and remove any installed batteries. -
Page 107: Removing The System Board
Removing and Replacing Parts : Dell Inspiron 8100 The system board's BIOS contains the system service tag number, which is also visible on a bar-code label on the bottom of the computer. The replacement kit for the system board assembly includes a floppy disk or CD that provides a utility for transferring the service tag number to the replacement system board assembly. - Page 108 Removing and Replacing Parts : Dell Inspiron 8100 Battery and Media Bay Latch Assemblies file:///I|/SERVICE%20MANUALS/DELL%20MANUALS/LA...20ok/Inspiron/8100/8100_SERVICE_MAN/remove.htm (43 of 52)6/21/2004 1:09:07 AM...
- Page 109 Removing and Replacing Parts : Dell Inspiron 8100 NOTICE: Disconnect the computer and attached devices from electrical outlets and remove any installed batteries. NOTICE: To avoid ESD, ground yourself by using a wrist grounding strap or by periodically touching an unpainted metal surface on the computer.
- Page 110 Removing and Replacing Parts : Dell Inspiron 8100 2. Remove the keyboard assembly. 3. Remove the hinge cover. 4. Remove the display assembly. 5. Remove the palm rest assembly. 6. Remove a latch button from the bottom case assembly by squeezing the snap tabs in the center of the latch.
- Page 111 Removing and Replacing Parts : Dell Inspiron 8100 NOTICE: Disconnect the computer and attached devices from electrical outlets and remove any installed batteries. NOTICE: To avoid ESD, ground yourself by using a wrist grounding strap or by periodically touching an unpainted metal surface on the computer.
-
Page 112: Led Board
Removing and Replacing Parts : Dell Inspiron 8100 Align the screw holes on the battery charger board with the screw holes on the bottom case assembly, and then press the battery charger board down into its connector. LED Board NOTICE: Disconnect the computer and attached devices from electrical outlets and remove any installed batteries. -
Page 113: Replacing The Led Board
Removing and Replacing Parts : Dell Inspiron 8100 1. Follow the instructions in "Preparing to Work Inside the Computer." 2. Remove the hinge cover. 3. Remove the two M2 x 4-mm screws. 4. Pull the LED board away from its connector. - Page 114 Removing and Replacing Parts : Dell Inspiron 8100 1. Follow the instructions in "Preparing to Work Inside the Computer." 2. Remove the system board. 3. Remove the three M2 x 4-mm screws from the fan assembly. 4. Disconnect the two fan cables from the system board.
- Page 115 Removing and Replacing Parts : Dell Inspiron 8100 1. Follow the instructions in "Preparing to Work Inside the Computer." 2. Remove one or both of the plastic connector covers (one or both of the covers may be installed) by slipping a nonmarring tool into the cutout at the top and pivoting the tool up to disengage the inner securing tab.
- Page 116 Removing and Replacing Parts : Dell Inspiron 8100 1. Follow the instructions in "Preparing to Work Inside the Computer." 2. Remove the system board. 3. Remove the M2.5 x 4-mm screw from the RJ-11/RJ-45 board. NOTICE: The plastic tab is fragile; pull it back only far enough to remove the board assembly.
- Page 117 Removing and Replacing Parts : Dell Inspiron 8100 Back to Contents Page file:///I|/SERVICE%20MANUALS/DELL%20MANUALS/LA...20ok/Inspiron/8100/8100_SERVICE_MAN/remove.htm (52 of 52)6/21/2004 1:09:07 AM...