Table of Contents
Advertisement
Quick Links
Advertisement
Table of Contents

Related Manuals for Pioneer SC-1223-K


Summary of Contents for Pioneer SC-1223-K
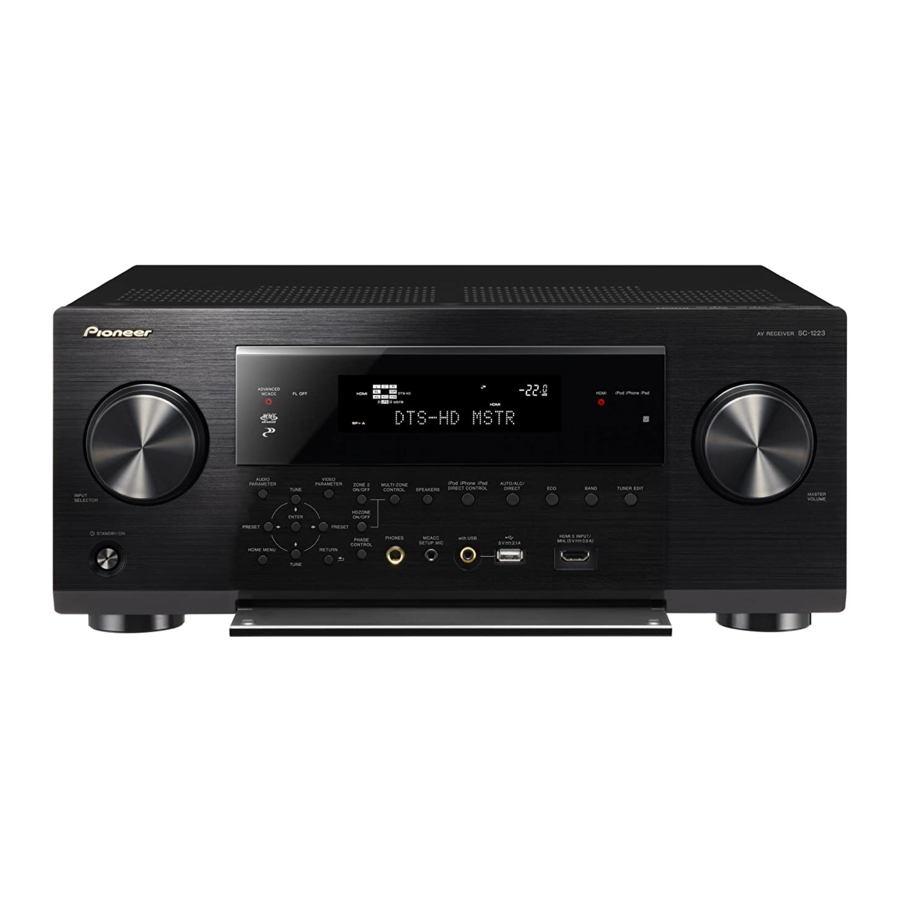
- Page 1 Operating Instructions 1223 AV Receiver...
- Page 2 IMPORTANT CAUTION Read these instructions. Only use attachments/accessories specified by RISK OF ELECTRIC SHOCK the manufacturer. Keep these instructions. DO NOT OPEN Use only with the cart, stand, tripod, bracket, or Heed all warnings. table specified by the manufacturer, or sold with The lightning flash with arrowhead symbol, CAUTION: The exclamation point within an equilateral...
- Page 3 The Safety of Your Ears is in Your Hands IMPORTANT NOTICE Get the most out of your equipment by playing it at a THE MODEL NUMBER AND SERIAL NUMBER OF safe level – a level that lets the sound come through THIS EQUIPMENT ARE ON THE REAR OR BOTTOM.
-
Page 4: Table Of Contents
Thank you for buying this Pioneer product. Please read through these operating instruc- 04 Basic Setup Automatically conducting optimum sound tuning (Full Auto MCACC) ..............38 tions so you will know how to operate your model properly. The Input Setup menu ..............................39 Contents Operation Mode Setup ..............................40... - Page 5 10 Controlling the rest of your system 14 Additional information About the Remote Setup menu............................73 Surround sound formats ...............................104 Operating multiple receivers ............................73 About HDMI ..................................104 Setting the remote to control other components ......................73 HTC Connect ...................................104 Selecting preset codes directly ............................73 About iPod ..................................105 Programming signals from other remote controls .......................74 Windows 7 ..................................105...
- Page 6 Flow of settings on the receiver Basic playback (page 10 Adjusting the sound and picture quality as desired ! Using the various listening modes (page Flow for connecting and setting the receiver ! Better sound using Phase Control (page The unit is a full-fledged AV receiver equipped with an abundance of functions and terminals. It can be used eas- ! Measuring the all EQ type (SYMMETRY/ALL CH ADJ/FRONT ALIGN) (page ily after following the procedure below to make the connections and settings.
- Page 7 Before you start Checking what’s in the box ......................8 Our philosophy ..........................8 Features ............................8 Installing the receiver ........................9 Loading the batteries ........................9 Operating range of remote control unit ..................9 About using AVNavigator (included CD-ROM) ................10...
-
Page 8: Checking What's In The Box
Apple AirPlay ® With AirPlay you can stream music from iTunes to the SC-1223-K and play it through your home theater system. Tuning that transmits soul You can even use the receiver to view metadata including song title, artist as well as album art on a connected display. -
Page 9: Installing The Receiver
The Auto Sound Retriever feature employs DSP technology to restore sound pressure and smooth jagged arti- facts left over after compression. Sound Retriever Link By connecting a Pioneer player supporting the Sound Retriever Link function, compressed audio files played on WARNING the player can be corrected automatically to play the sound with higher density. -
Page 10: About Using Avnavigator (Included Cd-Rom)
! PIONEER CORPORATION does not guarantee the operation of this CD-ROM with respect to personal com- puters using any of the applicable OS. In addition, PIONEER CORPORATION is not liable for any damages The included AVNavigator CD-ROM contains Wiring Navi allowing you to easily make the receiver’s connections incurred as a result of use of this CD-ROM and is not responsible for any compensation. - Page 11 Delete “AVNavigator 2013”. The file is located in the “Applications” folder just under the hard disk (Macintosh HD). Delete the “jp.co.pioneer.AVNavigator 2013” folder. The folder is located in the hard disk (Macintosh HD) d “Library” folder d “Application Support” folder.
- Page 12 Controls and displays Remote control ..........................13 Display ............................15 Front panel ............................. 16 ...
-
Page 13: Remote Control
Controls and displays The remote has been conveniently color-coded according to component control using the following system: Remote control ! White – Receiver control, TV control ! Blue – Other controls (See pages 44, 45, 47, and 76.) This section explains how to operate the remote control for the receiver. u STANDBY/ON This switches between standby and on for this receiver. - Page 14 Controls and displays 10 MULTI-ZONE select buttons Switch to perform operations in ZONE 2 and HDZONE (page 69). ! The ZONE 3 button is not used with this unit. 11 Remote control LED Lights when a command is sent from the remote control. Switches the remote to control the receiver (used to select the white commands).
-
Page 15: Display
Controls and displays Listening mode indicators Display ! AUTO SURROUND – Lights when the Auto Surround feature is switched on (page 51). ! ALC – Lights when the ALC (Auto level control) mode is selected (page 51). 10 11 ! STREAM DIRECT –... -
Page 16: Front Panel
Controls and displays MASTER VOLUME dial Front panel Front panel controls To access the front panel controls, catch the sides of the door with your fingers and pull forward. INPU SELE ADVANCED STAN MCACC FL OFF HDMI iPod iPhone iPad ... - Page 17 Controls and displays 21 iPod/iPhone/iPad terminals Use to connect your Apple iPod/iPhone/iPad as an audio and video source (page 34), or connect a USB device for audio and photo playback (page 35). 22 HDMI input/MHL connector Use for connection to a compatible HDMI device (Video camera, etc.) (page 35).
- Page 18 Connecting your equipment Connecting your equipment ......................19 Rear panel ............................19 Determining the speakers’ application ..................20 Placing the speakers ........................21 Connecting the speakers ....................... 22 Installing your speaker system ..................... 22 Selecting the Speaker system ....................... 24 About the audio connection ......................
-
Page 19: Connecting Your Equipment Connecting Your Equipment
Connecting your equipment Connecting your equipment Note This receiver provides you with many connection possibilities, but it doesn’t have to be difficult. This chapter The input functions below are assigned by default to the receiver’s different input terminals. Refer to The Input explains the kinds of components you can connect to make up your home theater system. -
Page 20: Determining The Speakers' Application
Connecting your equipment [B] 7.2 channel surround system (Front wide) Determining the speakers’ application ! Speaker System setting: Normal(SB/FW) This unit permits you to build various surround systems, in accordance with the number of speakers you have. ! Be sure to connect speakers to the front left and right channels (L and R). ! It is also possible to only connect one of the surround back speakers (SB) or neither. -
Page 21: Placing The Speakers
Connecting your equipment [D] 5.2 channel surround system & Front Bi-amping connection (High quality Placing the speakers surround) Refer to the chart below for placement of the speakers you intend to connect. ! Speaker System setting: Front Bi-Amp Bi-amping connection of the front speakers for high sound quality with 5.2-channel surround sound. SW 2 SW 1 ... -
Page 22: Connecting The Speakers
Connecting your equipment Connecting the speakers Installing your speaker system Each speaker connection on the receiver comprises a positive (+) and negative (–) terminal. Make sure to match At the very least, front left and right speakers only are necessary. Note that your main surround speakers should these up with the terminals on the speakers themselves. - Page 23 Connecting your equipment Bi-amping your speakers Bi-wiring your speakers Bi-amping is when you connect the high frequency driver and low frequency driver of your speakers to different Your speakers can also be bi-wired if they support bi-amping. ! With these connections, the Speaker System setting makes no difference. amplifiers for better crossover performance.
-
Page 24: Selecting The Speaker System
Connecting your equipment Selecting the Speaker system About the audio connection The front height terminals can be used for front wide and Speaker B connections, in addition to for the front Types of cables and terminals Transferable audio signals height speakers. -
Page 25: About The Video Converter
Connecting your equipment About the video converter About HDMI The video converter ensures that all video sources are output through the HDMI OUT terminal. The HDMI connection transfers uncompressed digital video, as well as almost every kind of digital audio. If the TV is only connected to the receiver’s composite VIDEO MONITOR OUT jacks, all the other video devices This receiver incorporates High-Definition Multimedia Interface (HDMI ®... -
Page 26: Connecting Your Tv And Playback Components
Connecting your equipment ! When connecting to an HDMI/DVI-compatible monitor using the HDMI OUT 2 terminal, switch the HDMI Connecting your TV and playback components output setting to OUT 2 or OUT 1+2. See Switching the HDMI output page Also, MAIN/HDZONE must be set to MAIN beforehand (page 91). - Page 27 Connecting your equipment Connecting your DVD player with no HDMI output Connecting your TV with no HDMI input This diagram shows connections of a TV (with HDMI input) and DVD player (or other playback component with no This diagram shows connections of a TV (with no HDMI input) and DVD player (or other playback component) to HDMI output) to the receiver.
-
Page 28: Connecting An Hdd/Dvd Recorder, Bd Recorder And Other Video Sources
Connecting your equipment ! In order to listening to HD audio with this receiver, connect an HDMI cable, and use analog video cable for Connecting an HDD/DVD recorder, BD recorder and other video video signal input. sources Depending on the player, it may not be possible to output video signals to both HDMI and other video output (composite, etc.) simultaneously, and it may be necessary to make video output settings. -
Page 29: Connecting A Satellite/Cable Receiver Or Other Set-Top Box
Connecting your equipment ! Even if your set-top box is equipped with an HDMI output terminal, in some cases the sound is output from Connecting a satellite/cable receiver or other set-top box the digital audio output (optical or coaxial) and only the video is output from the HDMI output terminal. In this case, make the HDMI and digital audio connections as shown below. -
Page 30: Connecting Other Audio Components
Connecting your equipment Connecting other audio components Connecting additional amplifiers This receiver has both digital and analog inputs, allowing you to connect audio components for playback. This receiver has more than enough power for any home use, but it’s possible to add additional amplifiers to front When you set up the receiver you’ll need to tell the receiver which input you connected the component to (see and subwoofer channels of your system using the pre-outs. -
Page 31: Connecting Am/Fm Antennas
Connecting your equipment Connecting external antennas Connecting AM/FM antennas To improve FM reception, connect an external FM antenna to FM UNBAL 75 W. Connect the AM loop antenna and the FM wire antenna as shown below. To improve reception and sound quality, connect external antennas (see Connecting external antennas page... -
Page 32: Multi-Zone Setup
Connecting your equipment Basic MULTI-ZONE setup (ZONE 2) MULTI-ZONE setup Connect a separate amplifier to the AUDIO ZONE 2 OUT jacks on this receiver. This receiver can power up to two independent systems in separate rooms after you have made the proper MULTI- You should have a pair of speakers attached to the sub zone amplifier as shown in the following illustration. -
Page 33: Connecting To The Network Through Lan Interface
Connecting your equipment MULTI-ZONE setup using HDMI terminal (HDZONE) Connecting to the network through LAN interface By connecting this receiver to the network via the LAN terminal, you can listen to Internet radio stations. To listen Important to Internet radio stations, you must sign a contract with an ISP (Internet Service Provider) beforehand. ! The settings must be change at ZONE Setup in order to use the HDZONE function (page 91). -
Page 34: Connecting Optional Bluetooth Adapter
(OUTPUT 5 V 0.1 A MAX) ! The iPod cable is not included with this receiver. The optional iPod cable from Pioneer is sold separately under the part number ADE7136. Contact the Pioneer Customer Support division for more information on obtaining an optional iPod cable. -
Page 35: Connecting A Usb Device
Connecting your equipment Connecting a USB device Connecting an HDMI-equipped component to the front panel input It is possible to play audio and photo files by connecting USB devices to this receiver. iPod iPhone iPad AUTO/ALC/ DIRECT CONTROL DIRECT BAND TUNER EDIT... -
Page 36: Connecting An Ir Receiver
A damaged power cord can cause a fire or give you an electric shock. Check the power cord once sensor on the front panel. in a while. If you find it damaged, ask your nearest Pioneer authorized independent service company for a Connect the IR receiver sensor to the IR IN jack on the rear of this receiver. - Page 37 Basic Setup Automatically conducting optimum sound tuning (Full Auto MCACC) ........38 The Input Setup menu ........................39 Operation Mode Setup ......................... 40 Changing the OSD display language (OSD Language)............... 41 About the Home Menu ......................... 41 ...
-
Page 38: Automatically Conducting Optimum Sound Tuning (Full Auto Mcacc)
Basic Setup The Full Auto MCACC display appears once the microphone is connected. Automatically conducting optimum sound tuning (Full Auto MCACC) 1a.Full Auto MCACC A/V RECEIVER Speaker System : Normal(SB/FH) The Full Auto MCACC Setup measures the acoustic characteristics of your listening area, taking into account EQ Type : SYMMETRY MCACC... -
Page 39: The Input Setup Menu
Basic Setup Wait for the test tones to finish, then confirm the speaker configuration in the GUI screen. Problems when using the Auto MCACC Setup A progress report is displayed on-screen while the receiver outputs test tones to determine the speakers present If the room environment is not optimal for the Auto MCACC Setup (too much background noise, echo off the in your setup. -
Page 40: Operation Mode Setup
Basic Setup Input function default and possible settings Operation Mode Setup The terminals on the receiver generally correspond to the name of one of the input functions. If you have con- This receiver is equipped with a great number of functions and settings. The Operation Mode feature is provided nected components to this receiver differently from (or in addition to) the defaults below, see The Input Setup for users who find it difficult to master all these functions and settings. -
Page 41: Changing The Osd Display Language (Osd Language)
Basic Setup Operable settings/items Descriptions Page About the Home Menu Other functions This receiver’s Home Menu (HOME MENU) can be used to make various settings and to check and adjust items INPUT SELECT (INPUT SELECTOR) Switches the input. that have been set. VOLUME +/–, MUTE Use to set the listening volume. -
Page 42: Basic Playback
Basic playback Playing a source ..........................43 Playing an iPod ..........................44 Playing a USB device ........................45 Playing an MHL-compatible device ....................46 Listening to the radio ........................47 Bluetooth ADAPTER for Wireless Enjoyment of Music .............. 48 ... -
Page 43: Playing A Source
Basic playback Turning off the sound Playing a source Mutes the sound or restores the sound if it has been muted (adjusting the volume also restores the sound). Here are the basic instructions for playing a source (such as a DVD disc) with your home theater system. Press MUTE. -
Page 44: Playing An Ipod
Pioneer (http://pioneer.jp/homeav/support/ios/na/). Use i/j to browse the selected category (e.g., albums). ! Installing software versions other than indicated on the website of Pioneer to your iPod/iPhone/iPad may result ! Use k/l to move to previous/next levels. in incompatibility with this receiver. -
Page 45: Playing A Usb Device
! For high resolution files, some time may be required for the photo to appear. ! Pioneer cannot guarantee compatibility (operation and/or bus power) with all USB mass storage devices and ! To return to the previous level any time, press RETURN. -
Page 46: Playing An Mhl-Compatible Device
The USB function of this receiver supports the following file formats. Note that some file formats are not available c Uncompressed FLAC files are not supported. Pioneer does not guarantee playback. for playback although they are listed as playable file formats. -
Page 47: Listening To The Radio
Basic playback Saving station presets Listening to the radio If you often listen to a particular radio station, it’s convenient to have the receiver store the frequency for easy The following steps show you how to tune in to FM and AM radio broadcasts using the automatic (search) and recall whenever you want to listen to that station. -
Page 48: Bluetooth Adapter For Wireless Enjoyment Of Music
Basic playback Pairing the Bluetooth ADAPTER and Bluetooth wireless technology device Bluetooth ADAPTER for Wireless Enjoyment of Music “Pairing” must be done before you start playback of Bluetooth wireless technology content using the Bluetooth ADAPTER. Make sure to perform pairing the first time you operate the system or any time pairing data is cleared. Device not equipped with The pairing step is necessary to register the Bluetooth wireless technology device to enable Bluetooth communi- Bluetooth... - Page 49 ® word mark and logos are registered trademarks owned by Bluetooth SIG, Inc. and any use of such marks by PIONEER CORPORATION is under license. Other trademarks and trade names are those of their respective owners. ! When Air Jam is set to Air Jam ON, playback is not possible with the above procedure. Set Air Jam to...
-
Page 50: Listening To Your System
Listening to your system Enjoying various types of playback using the listening modes ..........51 Selecting MCACC presets ......................53 Choosing the input signal ......................53 Better sound using Phase Control ....................53 ... -
Page 51: Enjoying Various Types Of Playback Using The Listening Modes
Listening to your system With two channel sources, you can select from: Enjoying various types of playback using the listening modes ! 2 Pro Logic IIx MOVIE – Up to 7.1 channel sound (surround back), especially suited to movie sources ! 2 Pro Logic IIx MUSIC –... - Page 52 Listening to your system Using the Advanced surround effects Using Stream Direct The Advanced surround effects can be used for a variety of additional surround sound effects. Most Advanced Use the Stream Direct modes when you want to hear the truest possible reproduction of a source. All unneces- Surround modes are designed to be used with film soundtracks, but some modes are also suited for music sary signal processing is bypassed, and you’re left with the pure analog or digital sound source.
-
Page 53: Selecting Mcacc Presets
Listening to your system Selecting MCACC presets Better sound using Phase Control ! Default setting: MEMORY 1 This receiver’s Phase Control feature uses phase correction measures to make sure your sound source arrives at If you have calibrated your system for different listening positions, you can switch between settings to suit the the listening position in phase, preventing unwanted distortion and/or coloring of the sound. - Page 54 Playback with NETWORK features Introduction ........................... 55 Playback with Network functions ....................56 About network playback ......................58 About playable file formats ......................59 ...
-
Page 55: Introduction
! AirPlay provided on this receiver has been developed and tested based on the software versions for the iPod, Notes iPhone, iPad and the software versions for iTunes that are indicated on the Pioneer website. AirPlay may not ! To listen to Internet radio stations, you must sign a contract with an ISP (Internet Service Provider) beforehand. -
Page 56: Playback With Network Functions
! Press NET to switch the remote control to the network operation mode. HTC Connect Certified Smartphones +Favorite The HTC Connect-compatible smartphones, Please check Pioneer website for up to date information about com- TOP MENU TOOLS patible devices and audio format support. - Page 57 Select ‘OK’ on the software keyboard, then press ENTER. The access code required for registration on the special Pioneer Internet radio site is displayed. Make a memo of ! To quit inputting characters using the software keyboard, press the TOOLS button.
-
Page 58: About Network Playback
! Some functions may not be supported depending on the server type or version used. Pioneer is not responsible for any malfunction of the player and/or the NETWORK features due to communica- ! Supported file formats vary by server. As such, files not supported by your server are not displayed on this unit. -
Page 59: About Playable File Formats
c Uncompressed FLAC files are not supported. Pioneer does not guarantee playback. — Gapless playback is not possible when the format is being converted (transcoded) by the server. -
Page 60: Control With Hdmi Function
Control with HDMI function About the Control with HDMI function ..................61 Making Control with HDMI connections ..................61 HDMI Setup ............................ 61 Before using synchronization ....................... 62 About synchronized operations ....................62 Setting the PQLS function ......................62 ... -
Page 61: About The Control With Hdmi Function
About the Control with HDMI function Select ‘HDMI Setup’, then press ENTER. Synchronized operations below with a Control with HDMI-compatible Pioneer TV or Blu-ray Disc player are pos- Select the ‘Control’ setting you want. sible when the component is connected to the receiver using an HDMI cable. -
Page 62: Before Using Synchronization
To activate the Sound Retriever Link function, make the setting below. The operations below can also be used on Pioneer Control with HDMI-compatible TVs. ! When the receiver’s volume is adjusted or the sound is muted, the volume status is displayed on the TV’s Set the HDMI Setup’s Control to ON, and set the Control Mode setting to ON. -
Page 63: Cautions On The Control With Hdmi Function
Control with HDMI function Cautions on the Control with HDMI function ! Connect the TV directly to this receiver. Interrupting a direct connection with other amps or an AV converter (such as an HDMI switch) can cause operational errors. ! Only connect components (Blu-ray Disc player, etc.) you intend to use as a source to the HDMI input of this ... -
Page 64: Using Other Functions
Using other functions Setting the Audio options ......................65 Setting the Video options ......................67 Switching the speaker terminals ....................69 Using the MULTI-ZONE controls ....................69 Network settings from a web browser ..................70 Using the sleep timer ........................70 ... -
Page 65: Setting The Audio Options
Using other functions Setting What it does Option(s) Setting the Audio options With the Auto Sound Retriever function, DSP processing is used to There are a number of additional sound settings you can make using the AUDIO PARAMETER menu. The compensate for the loss of audio data upon compression, improving defaults, if not stated, are listed in bold. - Page 66 Using other functions Setting What it does Option(s) Setting What it does Option(s) Some audio sources include ultra-low bass tones. Set the LFE attenu- When you’re not using front wide speakers, selecting this mode ator as necessary to prevent the ultra-low bass tones from distorting c OFF/ –20dB/ –15dB/ V.WIDE allows you to hear a virtual front wide channel through your front...
-
Page 67: Setting The Video Options
Using other functions Setting What it does Option(s) Setting the Video options Sets the optimum picture quality for the type of monitor that is con- There are a number of additional picture settings you can make using the VIDEO PARAMETER menu. The nected. - Page 68 Using other functions Setting What it does Option(s) Setting What it does Option(s) Adjusts the overall brightness. Specifies the aspect ratio when input signals are output at the HDMI THROUGH output. Make your desired settings while checking each setting on (Aspect) your display (if the image doesn’t match your monitor type, cropping NORMAL...
-
Page 69: Switching The Speaker Terminals
Using other functions Switching the speaker terminals Using the MULTI-ZONE controls If you selected Normal(SB/FH), Normal(SB/FW) or Speaker B at Speaker system setting page 86, you can The following steps use the front panel controls to adjust the sub zone volume and select sources. See ZONE 2 switch between speakers using the SPEAKERS button. -
Page 70: Network Settings From A Web Browser
Using other functions ZONE 2 remote controls Using the sleep timer Press the remote control’s ZONE 2 to operate the corresponding zone. The sleep timer switches the receiver into standby after a specified amount of time so you can fall asleep without The following table shows the possible ZONE 2 remote controls: worrying about the receiver being left on all night. -
Page 71: Resetting The System
Using other functions Setting Default Resetting the system iPod/USB, INTERNET RADIO, PANDORA, Use this procedure to reset all the receiver’s settings to the factory default. Use the front panel controls to do this. MEDIA SERVER, FAVORITES, ADAPTER Auto Sound Retriever Set MULTI-ZONE to MULTI ZONE OFF. -
Page 72: Controlling The Rest Of Your System
Controlling the rest of your system About the Remote Setup menu ....................73 Operating multiple receivers ......................73 Setting the remote to control other components............... 73 Selecting preset codes directly ..................... 73 Programming signals from other remote controls ..............74 Erasing one of the remote control button settings .............. -
Page 73: About The Remote Setup Menu
See Resetting the remote control settings page SPEAKERS DIMMER SLEEP If you have multiple Pioneer receivers, amplifiers, etc., this setting can be used to prevent other units from iPod TUNER Change RC D.ACCESS HDMI OUT CLASS operating simultaneously when the remote control unit is operated. -
Page 74: Programming Signals From Other Remote Controls
(buttons not covered in the presets) after assigning a preset code. The remote can store about 120 preset codes from other components (this has been tested with codes of Pioneer Press the corresponding button on the other remote control that is sending (teaching) the format only). -
Page 75: Erasing All Learnt Settings That Are In One Input Function
The All Zone Standby can be used to turn all zones to OFF when the receiver’s power is switched to standby. 0305 Also, when using separate Pioneer amplifiers/receivers for the sub zones, they can also be set to standby simultaneously. -
Page 76: Controlling Components
Controlling the rest of your system TV and Audio/Video components Controlling components This remote control can control components after entering the proper codes (see Setting the remote to control HDD/BDR/ Button(s) TV (Monitor) BD/DVD SAT/CATV other components page 73 for more on this). - Page 77 Controlling the rest of your system Audio/Video components TV (Projector) Button(s) CD/CD-R/SACD MD/DAT TAPE Button(s) TV (Projector) u SOURCE POWER ON/OFF POWER ON/OFF POWER ON/OFF POWER ON/OFF u SOURCE POWER ON Number buttons numerics numerics numerics — MOVIE CLEAR STANDARD !/CLR...
-
Page 78: The Advanced Mcacc Menu
The Advanced MCACC menu Making receiver settings from the Advanced MCACC menu ............ 79 Automatic MCACC (Expert)......................79 Manual MCACC setup ........................80 Checking MCACC Data ........................83 Data Management ......................... 83 ... -
Page 79: Making Receiver Settings From The Advanced Mcacc Menu
— When data measurement is taken (after selecting ALL or Keep SP System), the reverb characteristics The Advanced MCACC (Multi Channel ACoustic Calibration) system was developed in Pioneer’s laboratories with data (both before- and after-calibration) that this receiver had been storing will be overwritten. -
Page 80: Manual Mcacc Setup
The Advanced MCACC menu Connect the microphone to the MCACC SETUP MIC jack on the front panel. Make sure ‘OK’ is selected, then press ENTER. Make sure there are no obstacles between the speakers and the microphone. A progress report is displayed on-screen while the receiver outputs more test tones to determine the optimum receiver settings. - Page 81 The Advanced MCACC menu Select the setting you want to adjust. ! If you can’t seem to achieve this by adjusting the distance setting, you may need to change the angle of your speakers very slightly. If you’re doing this for the first time, you might want to make these settings in order. ! The subwoofer’s test tone differs in tone from other channels.
- Page 82 The Advanced MCACC menu Select ‘EQ Adjust’ from the Manual MCACC setup menu. — If the Reverb View procedure is performed after the Automatically conducting optimum sound tuning (Full Auto MCACC) page 38 or Reverb Measurement operation, depending on the standing wave Select the channel(s) you want and adjust to your liking.
-
Page 83: Checking Mcacc Data
The Advanced MCACC menu Standing Wave Checking MCACC Data Use this to display the standing wave related adjustment values for the various MCACC memories. See Standing At the procedure of Automatically conducting optimum sound tuning (Full Auto MCACC) page 38, the proce- Wave page 81... - Page 84 The Advanced MCACC menu Renaming MCACC presets If you have several different MCACC presets that you’re using, you may want to rename them for easier identification. Select ‘Memory Rename’ from the Data Management setup menu. Select the MCACC preset you want to rename, then select an appropriate preset name. Use i/j to select the preset, then k/l to select a preset name.
-
Page 85: The System Setup And Other Setup Menus
The System Setup and Other Setup menus Making receiver settings from the System Setup menu ............86 Manual speaker setup ........................86 Network Setup menu ........................88 Checking the Network Information ..................... 89 MHL Setup ............................89 The Other Setup menu ........................ -
Page 86: The System Setup And Other Setup Menus Making Receiver Settings From The System Setup Menu
88). Using the MULTI-ZONE controls page 69). ! HDMI Setup – Synchronizes this receiver with your Pioneer component supporting Control with HDMI (page If you selected Normal(SB/FH), Normal(SB/FW), or Speaker B in Step 2, select the placement 60). of the surround speakers. - Page 87 The System Setup and Other Setup menus ! Front – Select LARGE if your front speakers reproduce bass frequencies effectively, or if you didn’t connect a Channel Level subwoofer. Select SMALL to send the bass frequencies to the subwoofer. Using the channel level settings, you can adjust the overall balance of your speaker system, an important factor ! Center –...
-
Page 88: Network Setup Menu
The System Setup and Other Setup menus Proxy Hostname/Proxy Port Network Setup menu This setting is required when you connect this receiver to the Internet via a proxy server. Enter the IP address Make the settings for connecting the receiver to the Internet and using the network functions. of your proxy server in the ‘Proxy Hostname’... -
Page 89: Checking The Network Information
The System Setup and Other Setup menus Parental Lock MHL Setup Set restrictions for using Internet services. Also set the password accompanying the usage restrictions. Select whether or not to switch the input automatically to the MHL input when an MHL-compatible device is ! Upon shipment from the factory, the password is set to “0000”. - Page 90 Select ‘Volume Setup’ from the Other Setup menu. update file from the Pioneer website onto your computer, the file will be in ZIP format. Unzip the ZIP file before saving it on the USB memory device. If there are any old downloaded files or downloaded files for other models Select the Power ON Level setting you want.
- Page 91 The System Setup and Other Setup menus Software Update messages Select the Volume Level setting you want. ! Variable (default) – The Zone 2 volume is adjusted from the receiver. Status messages Descriptions ! –40 dB Fixed/0 dB Fixed – The Zone 2 volume level output from the receiver is fixed to the value set here. Try disconnecting then reconnecting the USB device or storing the update file again.
-
Page 92: Making Network Settings Using Safari
The System Setup and Other Setup menus Input a friendly name, then press Apply. Making network settings using Safari Launch Safari on your computer. Press Bookmark icon. Click Bonjour list (a), and then select this receiver's name (Friendly Name) (b) in Bookmark. If Bonjour list is not displayed, access the IP address“http://(the receiver's IP address)”... - Page 93 The System Setup and Other Setup menus Browse the latest firmware on your computer (a) and then press Upload (b). Firmware files have the extension “fw”. Select a file with the extension “fw”. The confirmation screen is displayed. If you continue the firmware update, press OK. Once the firmware update process starts, you cannot stop it.
- Page 94 Troubleshooting ..........................95 Power ..............................95 No sound ............................95 Other audio problems ........................96 ADAPTER PORT terminal ....................... 97 Video ...............................97 Settings ............................97 Professional Calibration EQ graphical output ................98 Display ............................98 Remote control ..........................98 HDMI ...............................99 MHL ..............................99 AVNavigator ..........................
-
Page 95: Faq Troubleshooting
Wait at least 1 minute, then try turning the power on again. ing the checks listed below, ask your nearest Pioneer authorized independent service company to carry out repair The temperature within the unit has exceeded the allowablevalue. work. -
Page 96: Other Audio Problems
HOME MENU. Certain listening modes or When Operation Mode is set to Basic, the Pioneer-recommended settings are made and HOME MENU items cannot be not all of the functions can be used. To use all of the functions without restrictions, set selected. -
Page 97: Adapter Port Terminal
Symptom Remedy ADAPTER PORT terminal Video signals are not output from the When a monitor only compatible with resolutions of 480i is connected to the component Symptom Remedy component terminal. terminal and another monitor is connected to the HDMI terminal, the video signals may not be output to the monitor connected to the component terminal. -
Page 98: Professional Calibration Eq Graphical Output
Certain listening modes or When Operation Mode is set to Basic, the Pioneer-recommended settings are made and Check that the player isn’t set up so that Dolby Digital and DTS sources are converted to HOME MENU items cannot be not all of the functions can be used. -
Page 99: Hdmi
Symptom Remedy HDMI Synchronized operation not possible Check the HDMI connections. Symptom Remedy using Control with HDMI function. The cable may be damaged. The HDMI indicator blinks continu- Check all the points below. Select ON for the Control Mode with HDMI setting (see HDMI Setup page 61). -
Page 100: Usb Interface
Symptom Causes Remedy USB interface AVNavigator does not inter- The receiver’s power is not turned Turn the receiver’s power on. (Wait about 60 seconds after act well with the receiver. the power turns on for network functions to start.) Symptoms Causes Remedies... -
Page 101: Network
Symptoms Causes Remedies Network Audio playback is undesir- The audio file currently being played Check whether the audio file was recorded in a format sup- Symptoms Causes Remedies ably stopped or disturbed. back was not recorded in a format ported by this receiver. -
Page 102: Web Control
1. Check that the wireless LAN converter’s power is on. with the receiver or the USB cable. Unplug the receiver from the wall and call a Pioneer authorized inde- 2. Press the wireless LAN converter’s reset button for at least 3 seconds. - Page 103 Additional information Surround sound formats ......................104 About HDMI ..........................104 HTC Connect ..........................104 About iPod ...........................105 Windows 7 ...........................105 MHL ...............................105 Software license notice .......................105 Auto Surround, ALC and Stream Direct with different input signal formats ......106 Speaker Setting Guide ........................
-
Page 104: Surround Sound Formats
Additional information Surround sound formats About HDMI Below is a brief description of the main surround sound formats you’ll find on BDs, DVDs, satellite, cable and HDMI (High-Definition Multimedia Interface) is a digital transfer standard for receiving video and audio data with terrestrial broadcasts, and video cassettes. -
Page 105: About Ipod
Additional information About iPod Software license notice About Apple Lossless Audio Codec Copyright © 2011 Apple Inc. All rights reserved. Licensed under the Apache License, Version 2.0. You may obtain a copy of the License at http://www.apache.org/licenses/LICENSE-2.0 AirPlay works with iPhone, iPad, and iPod touch with iOS 4.3.3 or later, Mac with OS X Mountain Lion, and Mac About FLAC ... -
Page 106: Auto Surround, Alc And Stream Direct With Different Input Signal Formats
Dolby Digital EX Dolby Digital EX Dolby Digital EX (6.1 channel flagged) towards the listening position, the sound field will seem cramped. Testing by the Pioneer Multi-channel Research 2 Pro Logic IIx MOVIE 2 Pro Logic IIx MOVIE Dolby TrueHD EX (6.1 channel flagged) Group has shown that a good sense of sound positioning can be achieved by pointing all the speakers towards <a>... -
Page 107: About Messages Displayed When Using Network Functions
Additional information Also note that placing it near a wall may result in sympathetic vibrations with the building that could excessively About messages displayed when using network functions amplify the bass sound. If the subwoofer must be installed near a wall, place it at an angle so that it is not parallel to the wall surface. This Refer to the following information when you come up with a status message while operating the Network can help reduce any sympathetic vibrations, but depending on the shape of the room this could result in stand- functions. -
Page 108: Important Information Regarding The Hdmi Connection
Additional information Important information regarding the HDMI connection There are cases where you may not be able to route HDMI signals through this receiver (this depends on the HDMI-equipped component you are connecting-check with the manufacturer for HDMI compatibility information). -
Page 109: The Advanced Mcacc Menu Glossary
Additional information Decoding Glossary A technology for converting digital signals that have been compressed upon recording by a digital signal process- ing circuit, etc., into the original signals. The term “decoding” (or “matrix decoding”) is also used for the technol- ogy which converts 2-channel sound sources into multiple channels or expands 5.1-channel signals into 6.1 or Audio formats/Decoding 7.1 channels. - Page 110 Windows Media is a multimedia framework for media creation and distribution for Microsoft Windows. Windows Synchronized operations below with a Control with HDMI-compatible Pioneer TV or Blu-ray Disc player are pos- Media is either a registered trademark or trademark of Microsoft Corporation in the U.S. and/or other countries.
- Page 111 Additional information Bluetooth function Bluetooth wireless technology A short-range wireless communications standard for digital devices. Information is exchanged between devices several meters to several tens of meters apart using radio waves. It uses radio waves on the 2.4 GHz band which ...
-
Page 112: Features Index
Additional information Slideshow Features index Playing back photo files stored on a USB memory device page Bluetooth ADAPTER Operation Mode Bluetooth ADAPTER for Wireless Enjoyment of Music page Operation Mode Setup page ARC (Audio Return Channel) AVNavigator HDMI Setup page About using AVNavigator (included CD-ROM) page... -
Page 113: Specifications
Additional information Digital In/Out Section Specifications HDMI terminal ............................19-pin (Not DVI) HDMI output type .............................. 5 V, 55 mA Amplifier section HDMI input/MHL terminal ..........................5 V, 900 mA Continuous average power output* USB terminal ....................... USB2.0 High Speed (Type A) 5 V, 2.1 A ... -
Page 114: Preset Code List
TNCi 0099 Proview 0068 Toshiba 0026, 0028, 0036, Pulsar 0004, 0011, 0099 0038, 0040, 0043, 0102 Pioneer 0004, 0006, 0113, Concerto 0004, 0006 GFM 0080, 0084 Luxman 0004, 0006 Quasar 0003, 0010, 0105 Vector Research 0100 0233, 0252, 0275, 0291, 0305... - Page 115 BD, DVR (BDR, HDR). ABS 1017 Gateway 1017 Mind 1017 Sansui 1014, 1019 Adventura 1005 GE 1002, 1004 Mitsubishi 1010 Sanyo 1001, 1002 Pioneer 2014, 2197, 2256 Daewoo 2021, 2087 KLH 2070, 2080 Rowa 2071 ...
- Page 116 Jebsee 6122 Myrio 6077, 6078 AV Receiver Bell & Howell 6122 Director 6073 Jerrold 6073, 6072, 6122 Noos 6040 Bright House 6074, 6029 Emerson 6122 Knology 6029 Pioneer 5096 (ID 1), 5097 (ID 2), 5098 (ID 3), 5099 (ID 4),...
- Page 117 253 Alexandra Road, #04-01, Singapore 159936 TEL: 65-6472-7555 PIONEER ELECTRONICS AUSTRALIA PTY. LTD. 5 Arco Lane, Heatherton, Victoria, 3202, Australia, TEL: (03) 9586-6300 PIONEER ELECTRONICS DE MEXICO S.A. DE C.V. Blvd.Manuel Avila Camacho 138 10 piso Col.Lomas de Chapultepec, Mexico, D.F. 11000 TEL: 55-9178-4270 K002_B3_En ©...