
Related Manuals for LG STB1000


Summary of Contents for LG STB1000
- Page 1 STB1000 HD Commercial Interface Set-top Box for use in Lodging Environments Installation & Setup Guide Warranty P/N: 206-4147 (Rev A) © Copyright 2011, LG Electronics U.S.A., Inc.
-
Page 2: Safety Warnings
• Consult the dealer or an experienced radio/TV technician for help. CAUTION: Do not attempt to modify this product in any way without written authorization from LG Electronics U.S.A., Inc. Unauthorized modification could void the user’s authority to operate this product. -
Page 3: Important Safety Instructions
IMPORTANT SAFETY INSTRUCTIONS 1. Read these instructions. 14. Never touch this apparatus or antenna during a thunder or lighting storm. 2. Keep these instructions. 15. When mounting an STB on the wall, make sure not to 3. Heed all warnings. install the STB by the hanging power and signal 4. -
Page 4: Important Safety Instructions
IMPORTANT SAFETY INSTRUCTIONS 23. Cleaning (Continued from previous page) When cleaning, unplug the power cord and rub gently 20. Grounding with a soft cloth to prevent scratching. Do not spray Ensure that you connect the earth ground wire to water or other liquids directly on the STB as electric prevent possible electric shock (i.e., an STB with a shock may occur. -
Page 5: Table Of Contents
RS-232 Display Panel Requirements....68 STB1000 Setup Menus ......15 Display Panel Type Specifications . -
Page 6: Setup Checklist
• 5 ft Audio cable with 3.5 mm stereo plugs • IR receiver with attached 3.5 mm stereo plug cable (3 ft), plus mounting bracket • 5 wall mount brackets with 5 screws for attaching the STB1000 to a wall • Installer Remote with batteries __ Determine the installation location for the STB1000, display panel stand, or mount. -
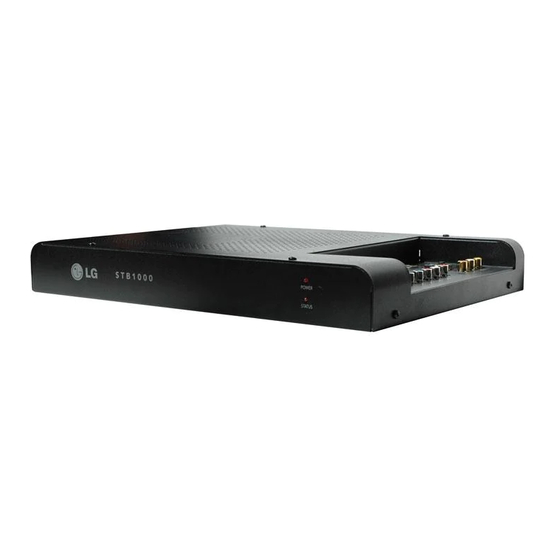
Page 7: Stb1000 Rear And Front Panel Overview
STB1000 Front Panel POWER STB1000 STATUS POWER LED: Lit while the STB1000 and display panel are turned ON. STATUS LED: Blinks rapidly if there is no Channel Map defi ned; blinks slowly if a Channel Map is defi ned. 206-4147... -
Page 8: Stb1000 Jack Panel Overview
STB1000 Jack Panel Overview UPDATE Restricted to software updates. TV-LINK CFG Use for local FTG configuration. MPI/GAME CONTROL When the EBL is in Pass-through Mode, the MPI function enables an external MPI control RESET device (i.e., clone programmer, VOD/PPV Press to re-initialize STB, etc.) to control the STB. -
Page 9: Ventilation / Mounting The Stb1000
Vertical Installation (Wall Mount) Using Supplied Angled L-Brackets Angled brackets are provided so that the STB1000 can be mounted on a fl at vertical surface, like a wall. Install the angled brackets with the screws provided. Then, mount the STB1000 on the wall using appropriate screws. -
Page 10: Stb1000 Cabling Connections
STB1000 Cabling Connections Refer to the cabling diagram below, and complete the procedure on page 11 to connect the STB1000 to a compatible LG display panel. Notes: OPTICAL MPI/GAME DIGITAL • This diagram shows a typical CONTROL AUDIO OUT TV-LINK... -
Page 11: Stb1000 Cabling Connections
2. Make the appropriate IR connection: • If the LG display panel supports IR pass-through and you are using the null-modem RS-232 cable with 3.5 mm stereo plug, connect the 3.5 mm plug to the DISPLAY IR IN jack on the STB1000 rear panel. -
Page 12: Stb1000 Installer Remote
STB1000 Installer Remote The LG Installer Remote is supplied with and dedicated to operate the STB1000. See next POWER page for typical key functions. Some DVD and VCR controls may be available for selected LG DVD/VCR products. GUIDE PORTAL INFO Installing Batteries in Installer Remote Open the battery compartment cover on the back side of the remote. -
Page 13: Installer Remote Control Typical Key Functions
Installer Remote Control Typical Key Functions The LG Installer Remote illustrated below shows typical remote control functions and is provided for reference only. This Installer Remote may vary from the Installer Remote supplied with the STB1000. GUIDE TV/STB/DVD/VCR Displays and removes the electronic POWER Select the remote’s operating mode: TV,... -
Page 14: Pro:centric Interactive Menu Functions
Pro:Centric Interactive Menu Features Important: Pro:Centric operation requires that Installer Menu item 119 DATA CHANNEL be set appropriately and that the STB1000 be in PPV or FTG Mode. The interactive Pro:Centric STB enables guests—from the comfort of their rooms—to Channel Guide view and select from a complete listing of hotel/institution services and amenities. -
Page 15: Stb1000 Setup Menus
On-screen setup menus control the basic features of the STB1000/display. Press MENU on the Installer Remote to access the STB1000 setup menus. Setup menu options are described in detail on pages 16 to 38. Note that on-screen displays (OSDs) shown in this manual may differ from those shown on the display panel. -
Page 16: Channel Setup Options
Tuning. to select Yes, and then press ENTER to initiate the channel search. 4. The STB1000 will search for digital channels fi rst. After the digital channel search is completed, the STB will search for Notes: analog channels as well. - Page 17 Tuning if the Lock System is turned ON. • If you are/will be setting up this STB1000 as a 5. Repeat steps 3 and 4 to add/delete additional channels. Master STB, complete any manual channel tuning/ 6.
-
Page 18: Channel Setup Options
Channel Setup Options (Cont.) Edit Channels / Channel Labels Edit Channels Use this option to add or delete channels from the channel CHANNEL Move Enter lineup. Auto Tuning Manual Tuning 1. Press MENU on the Installer Remote, and use the arrow Channel Edit navigation keys to select/highlight the CHANNEL menu Channel Label... -
Page 19: Picture Setup Options
Picture Setup Options Aspect Ratio (Picture Size) Control Aspect Ratio (Picture Size) Control PICTURE Move Enter This option enables you to choose the appropriate picture aspect ratio depending on the input source. Use the RATIO Aspect Ratio : 16:9 Picture Mode : Standard button on the Installer Remote or use the procedure below. - Page 20 Picture Mode is set to Intelligent Sensor—see description. Preconfi gured Picture Mode Options • The Backlight option is not applicable for the STB1000. Intelligent Sensor: Enables the STB to adjust to the • most suitable, optimal picture settings based on sur- rounding conditions.
- Page 21 Picture Setup Options (Cont.) Advanced Control Advanced Control PICTURE Move Enter 1. Press MENU on the Installer Remote, and use the arrow navigation keys to select/highlight the Picture Mode : Standard • Backlight PICTURE menu option. Then, press ENTER. Color Temperature Medium •...
- Page 22 RGB-PC Screen Menu options. SCREEN Screen Resolution Move Prev. Where possible, the resolution setting on the STB1000 should 1024 x 768 Resolution match the PC’s resolution setting. This option is only available 1280 x 768 when the PC’s resolution is set to: 1024 x 768, 1280 x 768, or Auto Confi...
-
Page 23: Picture Setup Options
Picture Setup Options (Cont.) RGB-PC Screen Settings (Cont.) Screen Auto Confi guration SCREEN Move Prev. This option automatically adjusts the picture position and mini- mizes image instability. Resolution 1. In the Screen Menu, use the Up/Down arrows to select Auto Auto Confi... -
Page 24: Option Settings
Option Settings Menu Language / Audio Language Menu Language OPTION Use this option to select the language of on-screen menus. Move Enter Menu Language : English 1. Press MENU on the Installer Remote, and use the arrow Audio Language : English navigation keys to select/highlight the OPTION menu option. - Page 25 Option Settings (Cont.) Captions Captions OPTION Move Enter Use this option to select the appropriate mode for displaying captions. Caption text, if provided by the broadcaster, is avail- Menu Language : English able for both digital and analog channels on the antenna/cable. Audio Language : English Caption...
-
Page 26: Option Settings
Option Settings (Cont.) Set ID / Demo Mode Set ID OPTION Move Enter 1. Press MENU on the Installer Remote, and use the arrow navigation keys to select/highlight the OPTION menu option. Menu Language : English Then, press ENTER. Audio Language : English Caption : Off... -
Page 27: Audio Setup Options
Each broadcasting station has its own signal conditions, which may result in different volume levels for different programs/ Auto Volume : On channels. This option enables the STB1000 to make automatic Clear Voice II : Off adjustments to maintain a consistent volume level between •... - Page 28 Audio Setup Options (Cont.) Sound Mode Sound Mode AUDIO Move Enter This feature enables you to select a preset Sound Mode option and/or customize sound settings manually. Auto Volume : On Clear Voice II : Off 1. Press MENU on the Installer Remote, and use the arrow •...
-
Page 29: Audio Setup Options
4. Press MENU to return to TV viewing, or press RETURN to return to the previous menu level. Secondary Audio Program (SAP) Setup For analog signal: The STB1000 can receive MTS stereo • programs and any SAP that accompanies the stereo program if the station transmits an additional sound signal. -
Page 30: Time Setup Options
STB On and Off Time Settings TIME Move Enter These options enable you to set times for the STB1000 to Clock automatically turn Off or On. Off Time : Off 1. Press MENU on the Installer Remote, and use the arrow... -
Page 31: Time Setup Options
Time Setup Options (Cont.) Sleep Timer Sleep Timer TIME Move Enter 1. Press MENU on the Installer Remote, and use the arrow navigation keys to select/highlight the TIME menu option. Clock Then, press ENTER Off Time : Off On Time : Off 2. -
Page 32: Lock Setup Options
● ● ● ● Close The STB1000 is set up with the initial password: 0-0-0-0. • If you forget your password, press 7-7-7-7 ENTER, and set a new password at the system prompts. • Enable or Disable the Lock System LOCK This option allows you to enable or disable a blocking scheme. - Page 33 Lock Setup Options (Cont.) Set Password / Channel Blocking Set Password LOCK Move Enter Use the following procedure to set a new password for the Lock System : Off Lock System. Set Password 1. Press MENU on the Installer Remote, and use the arrow Block Channel navigation keys to select/highlight the LOCK menu option.
- Page 34 Lock Setup Options (Cont.) Movie Rating / TV Rating-Children Movie Rating (MPAA) (for USA) LOCK Move Enter This option blocks movies according to movie ratings limits. You Lock System : Off can set the ratings limit by blocking out all movies with ratings Set Password above a specifi...
- Page 35 Lock Setup Options (Cont.) TV Rating-General Blocking off : Permits all programs LOCK Move Enter Lock System : Off TV-G Set Password TV-PG Block Channel TV-14 Movie Rating TV-MA TV Rating-Children Dialogue Blocking Off TV Rating-General Language Downloadable Rating Blocking off : Permits all programs Input Block Violence TV-PG...
- Page 36 Lock Setup Options (Cont.) TV Rating-English / TV Rating-French TV Rating-English (for Canada) This option blocks TV programs based on the Canadian English LOCK Move Enter rating system. Lock System : Off Set Password 1. Press MENU on the Installer Remote, and use the arrow Blocking off : Permits all programs Block Channel navigation keys to select/highlight the LOCK menu option.
-
Page 37: Lock Setup Options
Lock Setup Options (Cont.) Downloadable Rating / Input Block Downloadable Rating LOCK Move Enter This option is available only for digital channels and operates Lock System : Off only when the STB has received Region 5 rating data. Set Password 1. -
Page 38: Input Settings
Input Settings Select the Input Source INPUT Move Enter 1. Press MENU on the Installer Remote, and use the arrow navigation keys to select/highlight the INPUT menu option. Then, press ENTER. 2. Use the Up/Down arrows to select the appropriate input Component source (see descriptions below). -
Page 39: Commercial Mode Setup Overview
Installation & Setup manual for the FMA device. Installer Menu To set up a Master STB1000, you will need to know how to enter the STB Installer Menu and make changes to the default values as required. Similarly, to configure an STB1000’s Installer Menu settings in FTG Mode, you will need to know how to access and use the FTG Configuration Application utilities. -
Page 40: Commercial Mode Setup For Master Stb1000
Commercial Mode Setup for Master STB1000 This section describes how to set up a Master STB1000 when the EBL is in Pass-through Mode. Note: Disconnect all Aux inputs. Under certain conditions, Auto Tuning (Channel Search) is disabled if there is an Aux input active. -
Page 41: Commercial Mode Setup For Master Stb1000
ENTER to lock the channel lineup and restrict access to the STB1000 setup menus. Press ENTER again to save your changes and exit the Installer Menu.* The Master STB1000 Setup is now ready to be copied to a USB memory device or a clone programmer (see cloning information in this document). -
Page 42: Installer Menu
Typical STB1000 Installer Menu items, including item numbers, functions, ranges, and default values. Installer Menu items not relevant to the STB1000 are not present on the Installer Menu; therefore, some numbers are missing. For example, item 006 will not appear. - Page 43 Installer Menu (Cont.) Installer Menu Items 000 through 071 Menu Function Value Range Default Value Brief Description of Function and Comments Item INSTALLER SEQ 0 ~ 3 Leave default set to 0. POWER MANAGE 0 ~ 7 Sets number of hours of no activity before automatic shutoff. AC ON 0 / 1 Set to 1 to enable Auto Turn ON when AC power is applied.
- Page 44 Installer Menu (Cont.) Installer Menu Items 073 through 119 Menu Function Value Range Default Value Brief Description of Function and Comments Item If set to 1 and Channel Override is 0, “NOT AVAILABLE” message is displayed CH NOT AVBLE 0 / 1 when directly accessing a channel not in the favorite Channel List.
- Page 45 Installer Menu (Cont.) Detailed Descriptions of Installer Menu Items NOTE: For items 007, 008, and 009 For legacy reasons, the scale used is 0 – 63. The PTC software 000 - INSTALLER SEQUENCE will translate this to the 0 – 100 scale used by the STB. Specifi...
- Page 46 Installer Menu (Cont.) 016 - EN TIMER (Enable On/Off Timers) * 035 - COMPPORT EN. (Computer Port Enable) If set to 1, the Timer function is available to the end user and Enable/disable STB HDMI 1 input jack. Set to 0 to disable HDMI1. enabled continuously.
- Page 47 Installer Menu (Cont.) 070 - FOR. CH-TIME (Channel-Time Display Foreground Color) 084 - PERMANENT BLK (Permanent Block) Set according to Color Chart: Allows Lock (Parental Control) blocking schemes to be permanent by disabling the blocking hours function. Set to 1 to install Parental 0 = Black 3 = Cyan 6 = Yellow...
- Page 48 Installer Menu (Cont.) • 6 = Scaler Model RJPs: DVI Mode 110 - PANEL DELAY Enables RJP feature for use with reduced cable bundle models. Sets the delay time in seconds before the STB initiates RS-232 In this mode, when an HDMI/DVI source is connected to the communication with the display panel after the STB/display is RJP, only digital video is expected via the HDMI cable.
-
Page 49: (2-5-4 + Menu Mode)
Changing a Channel’s Icon on Changing/Adding Channel Changing Source Labels on the the Master STB1000 Labels on the Master STB1000 Master STB1000 1. Use Channel Up/Down to select 1. Use Channel Up/Down to select 1. Press INPUT to select the desired the desired channel. -
Page 50: Cloning Overview / Clonable Menu Features
(if set) will be lost (see page 56 for information on the clone Warning: Do not connect a clone programmer clock). programmer to the STB1000 MPI/ Do not unplug the STB1000 power cord or remove/disconnect the • GAME CONTROL port while the STB USB memory device/clone programmer while Learning or Teach-... -
Page 51: Cloning Procedures
You may edit a fi lename as part of the Learning procedure; however, a fi le with edited contents will not • be recognized. It is not possible to clone a Master STB1000’s clock using a USB memory device. Either set a Target • STB’s clock manually, or use the Auto Clock setting in the STB setup menus. -
Page 52: Learning / Teaching A Master Stb1000 Setup Using A Tll-1100A Clone Programmer
Learning / Teaching a Master STB1000 Setup using a TLL-1100A Clone Programmer Warning: Do not connect a clone programmer to the STB1000 MPI/GAME CONTROL port while the STB is in LodgeNet PPV Mode, as this will damage the clone programmer. - Page 53 Learning / Teaching a Master STB1000 Setup using a TLL-1100A Clone Programmer (Cont.) Learn Setup from Master STB1000 1. Ensure the Master STB1000 is set up completely and the EBL is in Pass-through Mode. 2. If an analog channel is not available, direct tune the Master STB1000 to an Aux source, or select an Aux source, such as AV-1, from the Input Menu.
-
Page 54: Using A Tll-1100A Clone Programmer
Cloning Procedures (Cont.) Learning / Teaching a Master STB1000 Setup using a TLL-1100A Clone Programmer (Cont.) Teach Master STB1000 Setup to Target STB1000 1. Ensure the Target STB1000 EBL is in Pass-through Mode, and then use the Installer Remote to enter the Target STB Installer Menu: Press MENU repeatedly until the on-screen setup menus lock up, and then press 9-8-7-6 + ENTER. -
Page 55: Learning / Teaching A Master Stb1000 Setup Using An Lt2002 Clone Programmer
Read the IMPORTANT CLONING INFORMATION on page 50 before beginning any cloning procedures. • A slow fl ashing green light indicates that there are communication problems between the STB1000 and • the LT2002. If this is the case, check for a damaged cable, poor contacts, or other connection troubles. - Page 56 Cloning Procedures (Cont.) Learning / Teaching a Master STB1000 Setup using an LT2002 Clone Programmer (Cont.) Learn Setup from Master STB1000 THE CLONE HAS CONTROL OF THE TV 1. Ensure the Master STB is set up completely and the EBL is in Pass- through Mode.
-
Page 57: Cloning Procedures
Cloning Procedures (Cont.) Learning / Teaching a Master STB1000 Setup using an LT2002 Clone Programmer (Cont.) Teach Master STB1000 Setup to Target STB1000 1. Ensure the Target STB1000 EBL is in Pass-through Mode, and then CLONE SELECTION MENU use the Installer Remote to enter the Target STB Installer Menu: Press... -
Page 58: Ftg Mode Of Operation
Utility (or, if applicable, open an existing FTG Configuration (.rml) file). 3. Connect the PC to the TV-LINK CFG jack on the STB1000 jack panel using a USB-to-TTL serial cable (TTL-232R-5V-AJ). If necessary, install the device driver on the PC. - Page 59 ASPECT RATIO Move Enter To determine the operating mode of the Function Menu STB1000, press MENU on the Installer Set By Program Shows that the EBL is in Remote. If the end user Function Menu FTG Mode . While this menu...
- Page 60 FTG Mode of Operation (Cont.) FTG Channel Map Confi guration Utility / FTG Channel Map Editor Overview The FTG Channel Map Editor shows a single Logical Channel’s Data and the FTG Channel Map. LOGICAL CHANNEL MAPPING CUSTOM CHANNEL LABELS/ICONS SET CHANNEL ATTRIBUTES Select a Logical Channel number, then Enter custom labels and select icons by Check/select Encrypted, OSD, or...
-
Page 61: Ftg Mode Of Operation
FTG Mode of Operation (Cont.) FTG Installer Menu Confi guration Utility Overview CONFIGURATION SETTINGS HOSPITAL-GRADE STB ONLY Select tabs for categories of Installer Set Hospital items on Installer Menu Menu items to set up STB. for hospital-grade STBs. INSTALLER DEFAULTS LEARN Click to reset FTG Installer Menu Click to transfer Installer... -
Page 62: Remote Jack Pack Connections & Setup
Refer to the figure below, and connect the RJ-45 Control cable from the RJP cable bundle to the RJP INTERFACE port on the STB1000’s jack panel. Then, connect HDMI, RGB, and Composite Video/Audio connectors, as applicable, for the cable bundle. -
Page 63: External Equipment Setup
Digital Audio Optical Connections 1. Connect an optical cable between the OPTICAL DIGITAL AUDIO OUT con- nector on the STB1000 jack panel and the digital audio input connector on the external Digital Audio Amplifi er System. 2. Select the Optical Digital Audio input source on the amplifi... -
Page 64: Hdmi/Dvi Connections / Rgb Hookup To Pc
R-AUDIO- COMPONENT IN INTERFACE tween the audio output on the external equipment and the AUDIO (RGB/DVI) input jack on the STB1000 jack panel. Note: A separate audio connection is not required for HDMI. DVI Cable HMDI Cable 3. If not already done, turn ON the STB/dis- play panel and external equipment. -
Page 65: Composite Connections
AUDIO ..1(DVI) CONTROL OUT ..(RGB/DVI) ....and Audio jacks on either the STB1000 jack panel or the STB1000 rear panel. Match the cable/jack colors. VIDEO AUDIO L/MONO VIDEO R-AUDIO- COMPONENT IN INTERFACE 2. -
Page 66: Memory Device
Also, ensure the USB device has been formatted with FAT format. Upgrade PTC Software Note for STB1000 Software Upgrade only: If the STB detects a later Teach To TV version of software on the USB device, it will automatically display a dialog from which you can start the software upgrade immediately. -
Page 67: Downloading A Splash Screen Using A Usb Memory Device
Reference: Downloading a Splash Screen using a USB Memory Device Splash Screen Image File Guidelines The splash screen image must be a 24-bit (RGB 8 x 8 x 8) BMP. • The image should be no larger than 3 MB. •... -
Page 68: Display Panel Requirements
No Connection No Connection No Connection Some LG monitors/displays may require LG monitors/displays listed below require an RS-232 an RS-232 straight-through DB9 cable serial null-modem DB9 cable with female connectors at each end. with a male connector on one end and a female connector on the other end. -
Page 69: Display Panel Type Specifications
Reference: Display Panel Type Specifi cations The following table identifies the Installer Menu item 113 PANEL TYPE setting for each of the compatible monitors/TVs listed in the “RS-232 Display Panel Requirements” Reference. PANEL TYPE Setting Monitor/Display M3203CCBA M3204C LD350C series LD450C series 55LD520C LG30DC series... -
Page 70: Stb1000 Aux Input Configuration
Reference: STB1000 Aux Input Confi guration ENABLE MPI DATA MPI DATA DATA STATUS DIRECT ACCESS START AUX STATUS TYPE TYPE 0xD2 Tuning DATA STATUS SOURCE Installer Menu 0x41 SOURCES CURRENT AV TYPE 0x0D ASSIGN- ENABLED (R/W) SOURCE (R) MENT SOURCE (R) -
Page 71: Stb1000 Camport Auto Sense Operation
Reference: STB1000 Camport Auto Sense Operation The Camport Auto Sense function is enabled when: CAMPORT (AV IN 2 Video) Functionality Control 1. Installer Menu item 034 CAMPORT EN is set to 1 AND Item 034 Item 040 Side Video 2. Installer Menu item 040 AUTO CAMPORT is enabled (1). -
Page 72: B-Lan Setup & Overview
The control device at the head end, for example, an FMA-LG101 or a PCS150R, can control multiple STBs. When the STB1000 is first installed, it must be turned ON in order for the head end to be able to communicate with the b-LAN. -
Page 73: Rjp Model List And Input Auto-Sensing Hierarchy
Reference: RJP Model List and Input Auto-sensing Hierarchy RJP Model List Legacy Models Scaler Models RJP-101M RJP-201M RJP-101ML RJP-110F RJP-110FW RJP-110W RJP-110WBR RJP-110S RJP-120G RJP-120T RJP-201B RJP-301B, RJP-401W RJP-202B RJP Input Auto-sensing Hierarchy Priority Video Audio 1st (Highest) Digital Video In Audio In (3.5mm) PC Video In Audio In (L/R) -
Page 74: Programming The Installer Remote
Reference: Programming the Installer Remote The Installer Remote can be programmed to operate most remote-controllable devices. Note that the Installer Remote may not control all models of other brands. 1. Test the remote to fi nd out whether it can operate other components without programming. For exam- ple, turn ON a component such as a DVD player, and press the corresponding Mode button (DVD) on the remote, while pointing at the component. - Page 75 003, 008, 010, 014, 053, 054, 131 047, 048 031, 033, 034, 040, YAMAHA 012, 034, 039, 043 053, 054, 101 001, 012, 013, 020, LG (GOLDSTAR) ZENITH 034, 048, 056, 058, 101, 106, 114, 123 RICO 072, 080, 101 206-4147...
- Page 76 Reference: Remote Control Codes (Cont.) DVD Codes Brand Code(s) APEX DIGITAL 022 ONKYO 008, 017 PANASONIC 003, 009 PHILIPS PIONEER 004, 026 PROCEED PROSCAN 005, 006 005, 006 SAMSUNG 011, 015 SONY THOMPSON 005, 006 TOSHIBA 008, 019 YAMAHA 009, 018 ZENITH 010, 016, 025 206-4147...
-
Page 77: Remote Control Codes
Reference: IR Codes Remote Control Connection Connect your wired remote control to the REMOTE CONTROL OUT port on the STB1000 jack panel. Remote Control IR Codes Output Waveform Single pulse, modulated with 37.917KHz signal at 455KHz Carrier Frequency FCAR = 1/TC = fOSC/12 Duty ratio = T1/TC = 1/3 Confi... -
Page 78: Ir Codes
Reference: IR Codes (Cont.) Code Function Note Code Function Note (Hexa) (Hexa) POWER Remote Control Button (Power On/Off) Discrete IR Code (TV Input Selection) Remote Control Button Discrete IR Code INPUT Remote Control Button (AV1 Input Selection) Remote Control Button Discrete IR Code RATIO Remote Control Button... -
Page 79: Troubleshooting
Wrong battery polarity. Check that “+” and “-” match in battery compartment. Too much light in room. Dim room light. Wrong Installer Remote. Requires compatible Installer Remote. Contact your LG dealer. Picture Reception Normal picture, Audio muted. Press MUTE or use Volume Up key to increase sound level. -
Page 80: Troubleshooting Flow Chart
Press VOLUME UP/ Check the IR connection LED on front DOWN or MUTE key on the STB. of STB lit? on LG Installer Remote. Make sure the display panel is plugged in to the STB. responded? Display Check the RS-232 cable panel ON? and connections. -
Page 81: Commercial Mode Check / Ftg Operation
Troubleshooting (Cont.) Commercial Mode Check / FTG Operation Troubleshooting Commercial Mode Check Press POWER on Installer Remote. responded? Leave the STB ON. Go to Installer Menu by pressing MENU until the on-screen setup menus lock up (i.e., stop responding). stopped Stopped STB is in responding or... -
Page 82: Clone Programmer Troubleshooting
Troubleshooting (Cont.) Clone Programmer Troubleshooting Warning: Do not connect a clone programmer to the STB1000 MPI/GAME CONTROL port while the STB is in LodgeNet PPV Mode, as this will damage the clone programmer. Reset Clone Programmer After Static Shock After replacing exhausted batteries (LT2002 only), or if the clone programmer behaves strangely after a static shock: TLL-1100A: Turn the TLL-1100A OFF and then ON. -
Page 83: Specifications
Specifications Dimensions Height: 1.77 inches (45 mm) Width: 13.875 inches (352.42 mm) Depth: 9.72 inches (247 mm) Weight: 6.4 pounds (2.90 kgrms) Environmental Storage Conditions Temperature: -20 to 50 degrees Celsius -4 to 122 degrees Fahrenheit Humidity: 10% to 90% Environmental Operating Conditions Temperature: 0 to 40 degrees Celsius... -
Page 84: Glossary Of Terms
Glossary of Terms A list of defi nitions for some of the words found in this guide. 75 OHM RF CABLE COMPOSITE VIDEO PHYSICAL CHANNEL NUMBER The wire that comes from an off-air Typical video jack, uses one wire for The actual channel number. -
Page 85: Document Revision History / Notes
Product documentation is available online at: www.LGsolutions.com/products. From the Products page, select TVs, Systems & Solutions, then Interface / Control Boxes & Cards, then STB1000. Click the Literature & Downloads tab at the bottom of the STB1000 page, and select the required document(s) from the Downloads list. -
Page 86: Warranty
LG STB1000 HD Commercial Interface STB Warranty Broadcast Products Welcome to the LG family! We believe that you will be pleased with your new STB1000 HD Commercial Interface STB. Please read this warranty carefully, it is a “LIMITED WARRANTY” as defined under Federal Law. This warranty gives you specific legal rights, and you may also have other rights that vary from state-to-state within the U.S.A.