Table of Contents
Advertisement
Quick Links
- 1 Introduction
- 2 Rear Panel Connections
- 3 Connections
- 4 Changing Dab Region (Dr30 Only)
- 5 For Accuracy at the Time of Printing; However, Cambridge Audio's Policy Is One of Continuous Improvement, Therefore Design and Specifications Adjusting the Audio Settings
- 6 Troubleshooting
- 7 Technical Specifications
- Download this manual
Advertisement
Table of Contents

Related Manuals for Cambridge Audio Sonata AR30


Summary of Contents for Cambridge Audio Sonata AR30
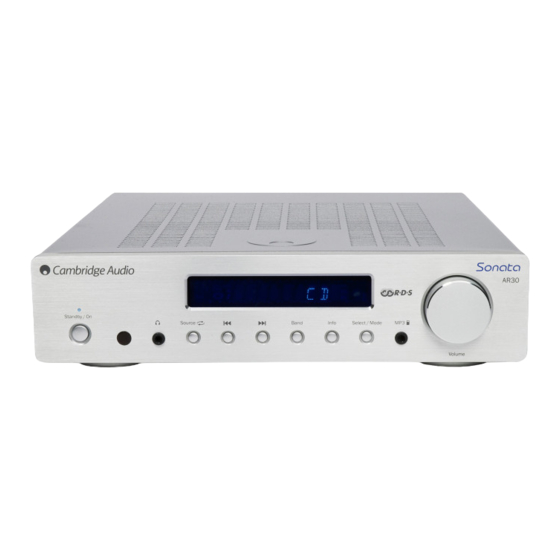
- Page 1 Stereo Receiver User’s manual AR30/DR30 Your music + our passion...
-
Page 2: Table Of Contents
This guide is designed to make installing and using this product as easy as possible. Information in this document has been carefully checked Adjusting the volume ....................17 for accuracy at the time of printing; however, Cambridge Audio's policy Adjusting the audio settings.................17 is one of continuous improvement, therefore design and specifications Tuning and listening....................17... -
Page 3: Introduction
DR30 Introduction Thank you for purchasing your Sonata AR30/DR30. We are confident that you will enjoy many years of listening pleasure from it. Like all Cambridge Audio products, the Sonata AR30/DR30 adheres to three core principles – stunning performance, ease of use and incredible value. -
Page 4: Important Safety Instructions
Important safety instructions For your own safety please read the following important safety instructions carefully 14. Refer all servicing to qualified service personnel. Servicing is required when the before attempting to connect this unit to the mains power supply. They will also enable apparatus has been damaged in any way, such as the power-supply cord or plug you to get the best performance from and prolong the life of the unit: having been damaged, liquid has been spilled or objects have fallen into the... - Page 5 For continued compliance only receiver is connected. Cambridge Audio accessories should be used with this product and servicing must be - Consult the dealer or an experienced radio/TV technician for help. referred to qualified service personnel.
- Page 6 Important safety instructions (continued) Ventilation This unit has been designed to be left in standby mode when not in use as this will increase the life of the unit (this is true with all electronic equipment). To turn the unit IMPORTANT - The unit will become hot when in use.
-
Page 7: Limited Warranty
If your dealer is not equipped to perform the repair of your Cambridge Audio product, it can be returned by your dealer to Cambridge Audio or an authorised Cambridge Audio service agent. You will need to ship this... -
Page 8: Rear Panel Connections
Rear panel connections Power Tuner AM Loop 300Ω FM 75Ω Designed and engineered in London, England Sonata AR30 Stereo Receiver Right Left Power AC Trigger Out Loudspeaker Terminals DD30 Dock Rec Out Audio In * US version only Power Designed and engineered in London, England... - Page 9 Power On/Off Trigger Out Switches the unit on or off. Sonata AR30/DR30 produces trigger outputs that can be used to control the On/Standby status of other connected Cambridge Audio Sonata range source AC power socket components (such as the CD30 CD player and DV30 DVD player) if desired. See 'Connections' section.
-
Page 10: Visit: Www.cambridge-Audio.com/Sts Front Panel Controls
Front panel controls Standby/On Phones Switches the unit between a low power standby mode (indicated by dim power LED) Allows for the connection of stereo headphones with a 3.5mm jack plug. Headphones and on (indicated by bright power LED). Standby is a low power mode where the power with an impedance of between 32 and 600 ohms are recommended. - Page 11 DR30 Skip/Scan Select/Mode Sonata AR30 In tuner mode, pressing once will toggle the tuning mode between preset and manual. – In preset mode, steps up or down through the user-stored presets. In presets mode, the unit will automatically tune to the first available preset in the band.
-
Page 12: Remote Control
Remote control The Sonata AR30 and DR30 are both supplied with a Navigator remote Select control that operates the units. Press to accept the item/function highlighted in the display menu, or while navigating your iPod. Standby/On In tuner mode, press and hold to store the current station in the preset Switches the unit between Standby and On mode. -
Page 13: By Registering, You'll Be The First To Know About: Ipod Compatibility
AR30 DR30 iPod compatibility Alarm/Clock The supplied remote can also control the basic functions of an iPod when mounted in the DD30 docking station. Refer to 'Using the supplied DD30 docking station for iPod' Press once to enter the Alarm menu. Press and hold to enter the Sleep menu. Refer on how to connect your DD30 docking station. -
Page 14: Connections
Active subwoofer In/Out Outputs Connect the output to an active subwoofer using a standard RCA/phono cable (if Powered required). The input allows the Sonata AR30/DR30 to pass through the subwoofer subwoofer Sonata DV30 output (LFE) of an attached Sonata DV30 DVD player. -
Page 15: Aerials
(require subscription). Consult your dealer for more information. source is selected, the appropriate Sonata source will go into Standby, also when the Sonata AR30 or DR30 is put in standby mode, all the Sonata units will also go into Standby. -
Page 16: Operating Instructions
Operating instructions DAB aerial After making the connections to your unit, activate the Sonata AR30/DR30 by switching the power button on the rear panel to 'On', then press the Standby/On button The Sonata DR30 has an F-type screw connection aerial for both FM and DAB signals. -
Page 17: As Possible. Information In This Document Has Been Carefully Checked Adjusting The Volume
Note: Before tuning your Sonata AR30/DR30, make sure that the stereo receiver is set to 'Manual mode'. Press the Select/Mode button on the front of the unit to select the correct mode. -
Page 18: Setting Presets
Operating instructions (continued) Sonata DR30 Setting presets 1. In tuner mode press the Band button to toggle between DAB/FM modes. Radio stations can be stored into the memory presets for easy access. You can store up to 20 presets for each band (for example, 20 presets for the AM band plus 20 2. -
Page 19: Setting The Clock
By default, the clock will set itself according to the clock data transmitted by SIRIUS, If the Sonata AR30 is configured for automatic time-set, and the unit is connected to DAB or RDS enabled FM broadcasts. If you are not in a region where you can receive a SIRIUS tuner module, it is important to specify the appropriate time-zone for your these transmissions, you can set the clock manually. -
Page 20: Setting The Alarm
Operating instructions (continued) Setting the alarm 8. Press the button to finish setting the alarm. 'Alarm set' will be displayed briefly before the unit goes to standby mode. The alarm function can turn on the unit at a chosen time. When the alarm activates it will either select the MP3 source and play your iPod, or select the tuner band of your Note: Preset 1 in the selected band will always be used, so make sure this is your choice and preset 1 in that band. -
Page 21: Ipod Is A Trademark Of Apple Inc., Registered In The U.s. And Other Advanced Settings
AR30 DR30 Advanced settings To re-name the Aux input The advanced settings menu allows you to adjust the input gain for the Aux and MP3 The aux input can be renamed thereby allowing you to more easily identify the external sources, set the clock, and assign a custom name to the Aux input. connected source equipment. -
Page 22: Using The Supplied Dd30 Docking Station For Ipod
4. Use the navigator buttons on your remote to browse through the menu. The Sonata AR30/DR30 comes with a supplied DD30 docking station for iPod. 5. Press the Select button on the remote to choose a menu item. Connect the DD30 to the connector located on the back of the unit and insert an 6. -
Page 23: Connecting And Using A Sirius Connect Home Tuner (Us Version Only)
3. To store a station as a preset, hold down the Select/Mode button on the front of the unit, or the Select button on your remote control. Ensure your Sonata AR30 is powered Off using the switch on the rear panel. Connect the SIRIUS module using the supplied DIN cable. Connect the AC power supply to the 4. -
Page 24: Factory Reset
Factory reset Troubleshooting To clear all presets, and restore all settings to the factory defaults: There is no power 1. Turn off the unit from the main power switch at the back. Ensure the AC power cord is connected securely. 2. -
Page 25: Technical Specifications
AR30 DR30 Technical specifications AR30/DR30 specifications Distortion <0.01% @1kHz 2V rms o/p (DAB) <0.2% @ 1kHz 50kHz deviation (FM mono) Amplifier section <0.6% @ 1kHz 50kHz deviation (FM stereo) Power output 40 watts per channel (into 8Ω) DD30 docking station for iPod <0.05% 20Hz-20kHz @ 80% max power <0.009% @ 1kHz <0.009% @ 1kHz 10w... - Page 26 Cambridge Audio is a brand of Audio Partnership Plc Registered Office: Gallery Court, Hankey Place, London SE1 4BB, United Kingdom Registered in England No. 2953313 www.cambridge-audio.com © 2009 Cambridge Audio Ltd...