Table of Contents
Advertisement
Advertisement
Table of Contents

Related Manuals for FoodSaver Vac 550


Summary of Contents for FoodSaver Vac 550
- Page 1 The Original Home Vacuum Packaging System ™ Vac550 User Manual...
-
Page 2: Table Of Contents
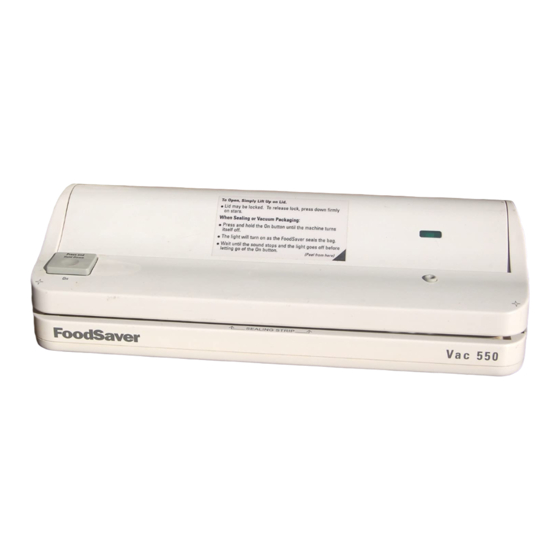
You have just purchased an appliance that will soon have you wondering how you ever got by without it. The FoodSaver Vac 550 is so convenient and versatile, you’ll find yourself using it every day. We guarantee that if you make room for it on your countertop, you will quickly see how indispensable it becomes in your kitchen. -
Page 3: The Foodsaver Vac 550
Vac 550 removes the air from our FoodSaver Bags and then seals the bags so that air cannot reenter. The Vac 550 is also designed to be used with a wide range of FoodSaver accessories that will keep a variety Patented FoodSaver Bags are designed to remove air and seal in freshness. -
Page 4: Foodsaver Accessories
Purchasing FoodSaver Bags, you don’t have to transfer many Rolls, and FoodSaver Accessories foods out of their ◗ Your Vac 550 kit includes FoodSaver original containers. Bags and Rolls and may include Vacuum package some accessories. Additional sup- and extend the life of foods in their plies and accessories are available original glass jars and metal cans. -
Page 5: To Make A Custom-Made Bag With Foodsaver Rolls
3" intervals and will assist you in cutting straight. Open the lid of the Vac 550. If the lid is locked, release locks by pressing down firmly on the stars. Place one end of the bag on the sealing strip. -
Page 6: Vacuum Package Using Ready-Made And Custom-Made Foodsaver Bags
How to Vacuum Package Using Ready-Made and Custom-Made FoodSaver Bags If you have not already done so, place the Vac 550 on a flat, dry surface and plug the power cord into a standard electrical outlet. Open the lid of the Vac 550. If the lid is locked, release locks by pressing down firmly on the stars. -
Page 7: Vacuum Package Using Foodsaver Designer Canisters
However, do not put the lids in the dishwasher. Place the Vac 550 on a flat, dry surface and plug the power cord into a standard electrical outlet. Place the item(s) to be vacuum packaged inside the canister. Leave at least one inch between the contents and the rim of the canister. -
Page 8: Vacuum Package Using Foodsaver Bulk Storage And Square Canisters
Do not put the lids in the microwave or dishwasher. Place the Vac 550 on a flat, dry surface and plug the power cord into a standard electrical outlet. Place the item(s) to be vacuum packaged inside the canister. Leave at least one inch between the contents and the rim of the canister. -
Page 9: Vacuum Package Using The Foodsaver Jar Sealer With Mason Jars
NOTE: Always pre-soak new metal lids. Bring water to a boil, then turn off. Pre-soak lids 5-10 minutes. Place the Vac 550 on a flat, dry surface and plug the power cord into a standard electrical outlet. Place the item(s) to be vacuum packaged inside the mason jar. -
Page 10: Vacuum Package Using Foodsaver Universal Lids
CAUTION: FoodSaver Universal Lids are not to be used with thin glass, crystal, plastic, or aluminum containers. The vacuum force exerted by the Vac 550 is very powerful and could implode a thin glass or a non-rigid container. Place the Vac 550 on a flat, dry surface and plug the power cord into a standard electrical outlet. -
Page 11: Vacuum Package Using Foodsaver Bottle Stoppers
Place the Vac 550 on a flat, dry surface and plug the power cord into a standard electrical outlet. Insert the bottle stopper into the neck of the bottle. Leave at least one inch between the contents and the bottom of the bottle stopper. -
Page 12: Care And Cleaning Instructions
Always unplug the Vac 550 before cleaning. Do not immerse the Vac 550 in water. Do not use abrasive products or materials to clean any of the Vac 550 components. Such cleaners can scratch the surfaces and damage the black foam rubber pads, preventing a vacuum from forming. - Page 13 Vac 550 after each use. repackage. Allow approximately one Make your original FoodSaver Bag inch of bag material for each time the extra long.
- Page 14 Keep berries fresh longer in the refrigerator by repackaging them in a FoodSaver Canister. You can open the canister and take what you need for snacks or fruit salad, then reseal to maintain freshness.
- Page 15 Keep nuts fresh by material for each time the bag will vacuum packaging them with the be opened and repackaged. Vac 550. You can open the container Vacuum Normal Storage Packaged Life...
-
Page 16: Food Preparation And Storage
NOTE: Placing a box inside a FoodSaver Bag may puncture the bag. Therefore, it is best to use the inner bag in which most powdery foods are generally packaged. Where to... -
Page 17: Important Safeguards
Precautions When Using the FoodSaver Vac 550: Read the instructions carefully. Do not use the Vac 550 on wet or hot surfaces, or near a heat source. Do not immerse any part of the Vac 550, power cord or plug into water or other liquid. - Page 18 The Bag Will Not Seal: Wait 20 minutes to allow the Vac 550 to cool off, then try using it again. The Vac 550 will shut off automatically if it is becomes too hot. To help prevent the machine from becoming too hot:...
-
Page 19: Marinating Recipes
T H E F O O D S AV E R U S E R M A N U A L Marinating Recipes You can marinate in a fraction of the usual time with FoodSaver Canisters. What usually takes hours to marinate takes only about 20 minutes when you vacuum package your food. - Page 20 In a 2-quart sauce pan combine water, brown sugar, salt, bay leaves, ginger, and allspice. Bring to rapid boil; stir until brown sugar is dissolved. Remove from heat. Let cool completely. In a FoodSaver Canister, place filet of salmon skin down. Poor cooled brine liquid over salmon to cover.
-
Page 21: Vacuum Packaging Non-Food Items
4 tablespoons olive oil ⁄ cup minced cilantro In FoodSaver Canister, combine onion, garlic, lime juice, and tomato until smooth. Slowly add oil until completely combined, then add cilantro. Salt to taste. Add shrimp to canister. Vacuum package. Marinate 15-20 minutes in the refrigerator. -
Page 22: Warranty And Service Information
If you have any questions concerning service of this product, please contact: Tilia, Inc. Toll-Free Consumer P.O. Box 194530 Services Support San Francisco, CA 94119-4530 United States: 1.800.777.5452 www.foodsaver.com Canada: 1.877.804.5383 cust_service@tilia.com Evidence of original purchase is required, so it is important to hold onto your sales receipt or packing slip. - Page 23 This material may not be copied or reproduced in any fashion without written permission from the publisher. ® FoodSaver is a registered trademark of Tilia, Inc. First printing, June 2000 Printed in the United States of America FoodSaver Patent 4,941,310 FoodSaver Bag Patent RE: 34,929 Item# 18-0501 (10/00)