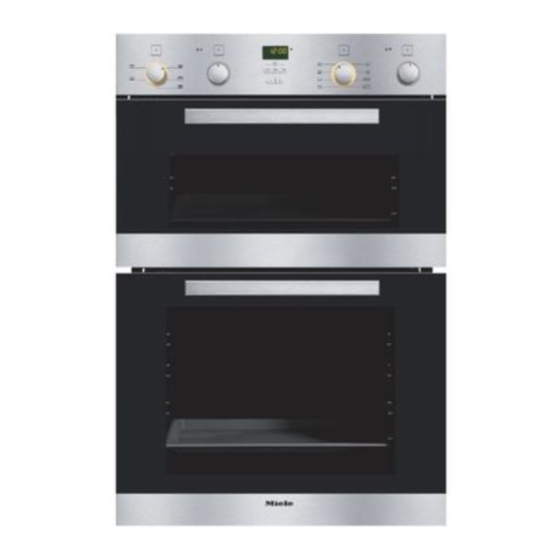

Related Manuals for Miele H 348 B2


Summary of Contents for Miele H 348 B2
-
Page 1: Operating Instructions
Operating instructions Double Oven H 348 B2 H 349 B2 To avoid the risk of accidents or damage to the appliance, it is essential to read these instructions before it is installed and used for the first time. M.-Nr. 07 030 770... -
Page 2: Table Of Contents
Contents Description of the appliance ......... 4 Energy efficiency rating according to EN 50304 . - Page 3 Contents Grilling ............33 Grill chart .
-
Page 4: Description Of The Appliance
Description of the appliance... -
Page 5: Energy Efficiency Rating According To En 50304
These and other accessories are also Oven function selector, available to order from your Dealer, the Oven heating indicator light, Miele Spare Parts Department or via the Temperature control* Internet (depending on country). See b Clock and timer for the "Extra Accessories"... -
Page 6: Roasting Filter
Description of the appliance Roasting filter The anti-splash tray should be placed inside the deep sided grill pan when grilling or roasting. The juices from the food being cooked collect under the anti-splash tray. This prevents them from spitting and making the oven dirty. -
Page 7: Caring For The Environment
Caring for the environment Disposal of the packing Disposal of your old appliance material Electrical and electronic appliances often contain materials which, if The transport and protective packing handled or disposed of incorrectly, has been selected from materials which could be potentially hazardous to are environmentally friendly for disposal human health and to the environment. -
Page 8: Warning And Safety Instructions
Warning and Safety instructions Children should be supervised to This appliance complies with all ensure that they do not play with relevant legal safety requirements. the appliance. Improper use of the appliance can, however, present a risk of both Technical safety personal injury and material Before connecting the appliance to damage. - Page 9 If the supply cord is damaged, it must be replaced by a Miele approved service technician in order avoid a hazard. Caution, danger of burning.
- Page 10 Warning and Safety instructions When cleaning the roof of the oven Moisture in the oven could lead to wait until the grill element has condensation forming on the control cooled down before lowering it, to panel and surrounding kitchen furniture avoid the danger of burning.
- Page 11 Warning and Safety instructions Protective aluminium foil panels are It is important that the heat is allowed to available in retail outlets which are spread evenly throughout the food supposed to protect the oven cavity being cooked. from soiling and reduce the need for This can be achieved by stirring and/or cleaning.
-
Page 12: Safety Feature
Safety feature Operating lock for the bottom To cancel the operating lock: oven It does not matter which oven function has been selected. The operating lock can be activated to prevent the bottom oven being ^ Press the "f" button until the key switched on unintentionally, by children symbol "o--§"... -
Page 13: Before Using For The First Time
Before using for the first time Setting the clock Before using the oven for the first time – take all accessories out of the oven When the appliance is first connected and wash them. to the power supply, or after a power –... -
Page 14: Description Of The Systems
"Baking", "Roasting" and "Grilling" keep it succulent and tasty. sections of this book and in the Miele As soon as the high temperature has cookbook supplied with this oven. been reached, the oven temperature is... -
Page 15: Oven - Use
Oven - use This appliance has a choice of two Function selector ovens with different heating systems. The function selector can be turned The top oven - uses a top and bottom clockwise or anti-clockwise. heating system. – Top oven - It is suitable for preparing thinner items of food (e.g. -
Page 16: Selecting An Oven Setting
Oven - use – Grill n Selecting an oven setting For grilling fish and cuts such as The following functions are available for chops, steaks, poultry pieces, and either one or both ovens: kebabs . – Light H Grill with the oven door closed. Turns on the oven light –... -
Page 17: Temperature Selector -E
Oven - use Temperature selector -e The indicator light is always on when the heating is on. (depending on model) When the temperature is reached, the heating element switches itself off. When the temperature falls below that selected, the heating element switches on again automatically. -
Page 18: Cancelling A Process / Switching Off The Oven
Oven - use Cancelling a process / With "Rapid heat-up Ä" switching off the oven (Bottom oven only) Turn the function selector and the Do not switch on "Rapid heat-up Ä" temperature selector to "0". for pre-heating the oven when The oven is switched off;... -
Page 19: Using The Clock / Timer
Using the clock / timer Functions A corresponding symbol for each push button appears in the display when appropriate. The symbol lights up when an oven function has been selected and the relevant button pressed in. All data input or alteration is done with the "+"... -
Page 20: Time Of Day
Using the clock / timer Time of day To cancel the time of day display (24 hour display) The time of day display can be switched off to save energy. When the appliance is first connected to the power supply, or after a power cut "12:00"... -
Page 21: Programming Cooking Time For The Bottom Oven E
Using the clock / timer Programming cooking time for If the audible tone is not switched off it the bottom oven e will continue to sound at 5 minute intervals as a reminder that cooking With the timer it is possible for the time as finished. -
Page 22: To Delay Cooking Time
Using the clock / timer To delay cooking time Delaying the start of cooking time ^ Select the function and temperature There are several ways of delaying the start of a cooking process. required. You can delay either the end or the First enter the start of cooking time: beginning of cooking time. -
Page 23: Checking, Altering Times Or Cancelling Times Entered
Using the clock / timer Checking, altering times or To change cancelling times entered ^ Press the relevant button. Times which have been entered for a The indicator light in the "+/–" button process can be called up at any time. lights up. -
Page 24: To Cancel Programmed Processes
Using the clock / timer To cancel programmed processes ^ Press the "g" button. ^ Use the "–" button to set the time to "0:00" Cancelling a cooking time also cancels the beginning and end of the cooking time and vice versa. As soon as the indicator light between the "+"... -
Page 25: Baking
Baking Fan Heat D When choosing which oven to use Several levels can be used at the same take into account both the height of time for baking. The recommended the baking tin and the height that the positions are: baking will reach once it has risen. -
Page 26: Tips On Baking
Baking Conventional A Tips on baking Only one shelf should be used for this Refer to the baking chart and the function. If more than one shelf position cookery book supplied with this is needed use Fan heat instead. oven for suggestions of This function is particularly good for temperatures, shelf levels and times. - Page 27 Baking Frozen food Handling and preparing food When baking frozen products such as correctly is essential for maintaining cakes, pizza and baguettes, use the good health. lowest temperature quoted on the manufacturer’s packaging. Place such Only bake cakes, pizza, chips etc items on baking parchment directly on until they are golden brown.
-
Page 28: Baking Chart
Baking chart Fan Heat D Temperature rec. runner from Time in °C bottom in mins. Creamed mixture Madeira cake 150 – 170 50 – 60 Rich fruit cake (20 cm) – – Victoria sandwich (tin) 160 – 170 20 – 25 Fudge brownies (tray) 160 –... - Page 29 Baking chart Conventional heat A Temperature Recommended runner Time in °C height from bottom in mins. 160 – 180 50 – 60 130 – 150 100 – 140 105 – 120 180 – 200 12 – 15 20 – 25 180 –...
-
Page 30: Roasting In The Oven
Roasting in the oven The bottom oven is normally more Browning only occurs towards the end appropriate for roasting. of the roasting time. Remove the lid The top oven is not so suitable, except about halfway through the roasting time if a more intensive browning effect is for small roasts, preferably covered. - Page 31 Roasting in the oven Calculating the roasting time The traditional British method is to allow 15 to 20 minutes to the lb, according to type of meat, plus approx. 20 minutes, adjusting length of time as roasting proceeds, to obtain the required result. Temperature See the Roasting chart for suggested temperatures.
-
Page 32: Oven Roasting Chart
Oven roasting chart Auto roast E Conventional A rec. runner Temp. Time Temp. Time from in °C in mins. in °C in mins. bottom Beef, approx. 1 kg 1 3) 60 – 80 70 – 90 Venison, approx. 1 kg 75 –... -
Page 33: Grilling
Grilling Clean flat fish and slices of fish in the When choosing which oven to use normal way. To enhance the taste add a take into account the height of the little salt or squeeze a little lemon juice food to be grilled. over the fish. - Page 34 Grilling Grilling time Useful grilling hints Flat pieces of fish and meat usually One way of finding out how far through need about 5-6 minutes a side a piece of meat has been cooked is to depending on their texture. press down on it with a spoon.
-
Page 35: Grill Chart
Grill chart Pre-heat the grill for at least 5 minutes with the door shut before using. Grill n Food to be grilled Runner Fan grill N from Temperature Grilling time Temperature Grilling time bottom in °C (mins) in °C (mins) Flat items of food Beef steaks 3 or 4/5... -
Page 36: Defrosting
Defrosting To defrost select "Fan heat D" with a Do not refreeze food once it has temperature setting of up to a maximum thawed. of 50 °C. The time needed for defrosting For defrosting meat and delicate foods depends on the type and weight of the do not set a temperature. -
Page 37: Cooking
Cooking Cooking ready made meals Observe recommended The "Rapid heat-up Ä" function can temperatures, cooking times and be used on its own for preparing ready position in the oven given on made meals such as pizza, manufacturer's packaging. pre-prepared lasagne, filled baguettes, etc. -
Page 38: Cleaning And Care
To prevent the risk of scratches and the Miele Spare Parts Dept. or via the damage to the surface structure of Internet on www.miele.co.uk. glass, stainless steel and aluminium... - Page 39 Stainless steel surfaces powder cleaners and cream cleaners, Stainless steel surfaces can be cleaned – abrasive sponges, e.g. pot scourers using a Miele E-Cloth or with a or sponges which have been proprietary non-abrasive cleaning previously used with abrasive agent designed specifically for use on cleaning agents, stainless steel.
-
Page 40: Accessories
Cleaning and care Accessories Oven interior Always remove all accessories, trays Allow the oven to cool down before and racks which are not being used cleaning. when using the oven to get the best Danger of burning! results and to keep cleaning of the trays to a minimum. -
Page 41: Perfectclean
Cleaning and care PerfectClean Normal soiling Clean as soon as possible after each Before using for the first time remove use with a dishcloth, soft sponge or a any stickers from PerfectClean soft nylon brush, and a solution of hot surfaces. - Page 42 Cleaning and care Remove the catalytic back panel, The following cause lasting damage roof liner and side liners (if fitted) to the surface structure and reduce before using oven sprays. The the anti-stick effect and must not be chemicals used in oven sprays will used on PerfectClean surfaces: damage catalytic enamel rendering it ineffective.
-
Page 43: Catalytic Enamel Surfaces
Miele dealer or heated to a high temperature. To do the Miele Spare Parts dept. this: ^ Take all accessories out of the oven. -
Page 44: To Remove The Oven Door
Cleaning and care The bottom oven is illustrated however the procedure is generally the same for the top oven. Any steps which differ are described in detail. To remove the oven door Please note : the oven door is heavy. It should be gripped firmly at the sides when being removed or re-fitted. -
Page 45: To Remove The Runners
Cleaning and care To remove the runners ^ Gently lift and pull out the catalytic side liners. Make sure the oven heating Reassemble in the reverse order, elements are switched off and cool carefully ensuring all parts are correctly to avoid the danger of being burnt. in place. -
Page 46: To Remove The Back Panel
Cleaning and care To remove the back panel – Bottom oven e ^ Loosen the screws in the back panel and take it out. The oven must not be used without the back panel fitted. This could lead to injuries. Reassemble in the reverse order, carefully ensuring all parts are correctly in place. -
Page 47: To Lower The (Upper Heating) Grill Element
Cleaning and care To lower the (upper heating) If the roof liner is dirty it can also be removed for cleaning: grill element The oven heating elements must be switched off and cool to avoid being burnt. ^ Take out the runners. ^ Hold the roof liner firmly and unscrew the knurled knob. -
Page 48: Problem Solving Guide
Some minor problems can be corrected without contacting the Miele Service Dept. What to do if ..the oven does not heat up. Check whether, ^ Lift the lamp cover from its retainers. - Page 49 Problem solving guide Fan Heat D: . . . no noise is heard when the oven – whether the temperature was set too door is opened during operation. This is not a fault. high, If the door is opened during operation, –...
-
Page 50: After Sales Service
– your Miele Dealer which are shown on the data plate, visible on the oven trim, with the oven door open. – the Miele Service Department (see back cover for contact details). Please note that telephone calls may be monitored and recorded for... -
Page 51: Extra Accessories
They overview of cooking in progress. following accessories are available at extra cost from your Miele Dealer, the Pizza pan Miele Spare Parts Department or via the Internet (depending on country). - Page 52 Extra accessories Gourmet oven dish Catalytic side panels If you roast or grill frequently catalytic coated side panels can be fitted in the sides of the oven to help keep it clean. When ordering please state the model number of your oven and whether it is fitted with side runners or a telescopic carriage.
-
Page 53: Electrical Connection Uk, Irl, Za
Please quote In other countries check these details these data, and the model and serial with your supplier. number when contacting the Miele Ser- vice dept. WARNING THIS APPLIANCE MUST BE Connection of this appliance should be... - Page 54 Electrical connection UK, IRL, ZA The voltage and rated load are given Data relating to electrical connection on the data plate, visible when the oven will be found on the data plate, visible door is open. Please ensure that these when the oven door is open.
-
Page 55: Installing The Oven
Installing the oven The appliance must not be operated Turn off the mains electricity supply until it has been correctly installed in to the isolator. its housing unit. Otherwise it poses ^ Connect the oven to the electricity an electric shock hazard. supply by the isolator. - Page 56 Alteration rights reserved / 22 / 1607 M.-Nr. 07 030 770 / 00 en - GB (H 348 B2, H 349 B2)