
Related Manuals for Miele H 310


Summary of Contents for Miele H 310
-
Page 1: Operating Instructions
Operating instructions Ovens and cookers H 310, H 320 H 316, H 326 It is to read these operating instructions before installing or using the machine, to avoid the risk of accident, or damage to the machine. M.-Nr. 05 389 880... -
Page 2: Table Of Contents
Contents ......... 5 Accessories . - Page 3 ............28 Functions .
- Page 4 PerfectClean ........... . . 49 Catalytic enamel surfaces .
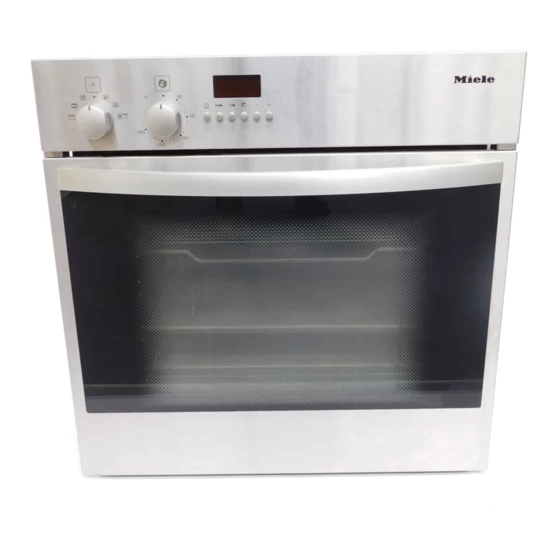
- Page 5 Description of the appliance Oven function selector Heating element for top heat and Oven temperature selector grilling with roof liner Indicator light for oven heating Air inlet for fan Timer * Runner heights 1, 2, 3, 4, 5 Cooking zone controls Oven door Indicator light for hob cooking areas * depending on model...
- Page 6 Oven function selector Heating element for top heat and Oven temperature selector grilling Indicator light for oven heating Air inlet for fan Timer* Runner heights 1, 2, 3, 4, 5 Oven door * depending on model...
-
Page 7: Accessories
Dealer or "After Sales Service" page of your hob the Miele Spare Parts Department. See instruction booklet for future reference. “Accessories” and “Extra Accessories” If contacting the Service Department,... - Page 8 Vario cooking zone: 14.5 cm / 21 cm Ø Cooking zone: 14.5 cm Ø Cooking zone / Extended cooking zone: 17 cm Ø / 17 cm x 26 cm * Cooking zone: 14.5 cm Ø Hob display field, residual heat indicator * Cooking zone: 18 cm Ø...
- Page 9 Cooking zone: 18 cm Ø Cooking zone: 14.5 cm Ø Cooking zone: 18 cm Ø Cooking zone: 14.5 cm Ø Cooking zone control: front left Cooking zone control: back left Cooking zone control: back right Cooking zone control: front right...
- Page 10 Caring for the environment Old machines contain materials which can be reclaimed or recycled. Please The transport and protective packing contact your dealer, your local waste has been selected from materials collection centre or scrap merchant which are environmentally friendly for about potential recycling schemes, disposal and can normally be recycled.
- Page 11 Warning and Safety instructions This appliance complies with all rele- vant legal safety requirements. Im- Before connecting the appliance to proper use of the appliance can, the mains supply make sure that however, present a risk of both per- the voltage and frequency correspond sonal injury and material damage.
- Page 12 Miele Spare Parts dept. This equipment is not designed for Use of heat-resistant oven gloves maritime use or for use in mobile in-...
- Page 13 Do not use plastic containers. Never add water to food on a hot These melt at high temperatures baking tray or grill pan/oven tray or and could damage the oven. directly onto food in a hot oven. The steam created could cause serious Do not heat up unopened tins or jars burns or scalding and the sudden of food in the oven, as pressure can...
-
Page 14: Ceramic Hobs
In the event of any breakages or Do not use any pots or pans on the cracks occurring in the ceramic ceramic hob with bases with pro- hob it must be switched off immediately nounced edges or ridges, or which are and disconnected from the electricity poorly enamelled. - Page 15 Under no circumstances use a steam cleaner to clean this ap- Do not leave the appliance unat- pliance. The steam could attack the tended when cooking with oils and electrical components and cause a fats as these can be a fire hazard if short circuit.
- Page 16 Before using for the first time Depending on model, your appliance may be fitted with a timer. If there are any stickers on the floor of the oven, baking trays, oven/grill pan etc. these must be removed be- fore use. Wipe out the using warm water and a little washing-up...
- Page 17 Thoroughly clean the ceramic hob be- For the first few times of using a smell fore first use, then clean regularly after will occur. use when just warm to the touch, or Heat the hotplates for about cold (see the section on "Cleaning and 5 minutes at the highest setting.
-
Page 18: Residual Heat Indicator
Hobs Turn the control in a clockwise direc- tion until a resistance is felt. Other- wise the control can be damaged. The cooking zones are clearly marked Turn the control in a clockwise direc- on the hob. Only the zone that is tion only to the symbol "n". - Page 19 Hobs - use The controls for the cooking zones / hot- plates regulate the heat output. Melting butter, Chocolate Dissolving gelatine Only turn the controls in a clockwise Preparing junket and yoghurt direction until a resistance is felt, Keeping food warm and back again.
- Page 20 Attention to correct choice and use of pans – will help you obtain the best cooking result most economically, – and generally avoid food boiling over and sticking. The diameter of the saucepan or frying pan should be very slightly larger than that of the hotplate/cooking area.
- Page 21 Aluminium or stainless steel pans with aluminium bases can leave marks with a metallic sheen on the ceramic surface. Clean these away at the earliest opportunity, (see Sec- Before switching on, place a saucepan tion on Cleaning and Care). containing water or food to be cooked on the hotplate or cooking area.
- Page 22 Description of the systems This system works by the circulation of With the conventional method of heat- heated air. ing, radiant heat is directed onto the food from above and below. It is useful A fan situated on the back wall of the where a fairly long cooking time is re- oven sucks in the air, heats it over a quired and a deep colour and good...
- Page 23 Ovens - use – Light H Turns on the oven light inde- There is an oven function selector and pendently. a temperature selector. – Conventional A Top and bottom heat for baking / roasting traditional recipes, for fruit Turn the function selector cake.
- Page 24 The "@" symbol must show in the timer display if you wish to operate the oven manually, i.e. using the temperature and function selectors without the timer. Press "i" to allow you to do this. Place the food in the oven. Turn the oven selector to the re- quired function.
- Page 25 Ä Pre-heating is only necessary in a few Do not switch on "Rapid heat-up Ä" cases e.g: for pre-heating the oven when bak- ing biscuits and small cakes, par- ticularly when batch baking be- cause the top tray will brown too –...
- Page 26 Accessories The roasting filter must be fitted in front of the fan when: The baking tray, grill pan / oven tray – using Fan heat D for roasting on the and rack are fitted with non-tip safety rack or in an open pot or roasting tin. notches which prevent them being –...
- Page 27 To be placed in the grill pan/oven tray when grilling and roasting. The juices from the food being cooked collect under the anti-splash tray, rather than being dried out, and they can then be used in sauces etc. To take baking trays or the grill pan / oven try out of the oven, or to put them into it.
- Page 28 Timer Depending on model, your appliance may be fitted with a timer. The following symbols appear: – lights up when a short time is set. AUTO – lights up when a cooking process is selected. – flashes when the cooking time is complete.
- Page 29 (24 hour display) The minute minder can be used to time any activity in the kitchen, e.g. boiling When the appliance is first con- eggs. nected to the power supply, or after The short time can be entered inde- a power cut "0 ·...
- Page 30 For baking do not delay the start too long. This may affect the rising proper- ties of the dough or cake mixture, as it will dry out. Turn the oven function and tempera- ture selectors to the required set- tings. When the Press the "g"...
- Page 31 It is possible to check or change times Press the i button. entered for a cooking process, or with the minute minder at any time. As soon as the process has been cancelled, the oven heating and lighting come on again. Switch the oven off if you no longer Press the button of the time which is need it.
- Page 32 Baking The following settings are recom- mended for baking: Several levels can be used at the same – Fan Heat D time for baking. The recommended po- – Conventional A sitions are: 1 tray = 1st runner from the bottom 2 trays = 1st and 3rd runners from For the best baking results make sure the bottom...
- Page 33 Bake any such as pizzas on baking paper on the rack it- self. Do not place them on the baking Use dark metal or enamel tins with tray or in the grill pan/oven tray. a matt finish. This could cause the metal to distort to Bright, shiny metal tins result in such an extent that it might be im- uneven or poor browning and in...
- Page 34 Baking chart Madeira cake 150 – 170 50 – 60 Rich fruit cake (20 cm) – – Victoria sandwich (tin) 160 – 170 20 – 25 Fudge brownies (tray) 160 – 170 25 – 30 Date and walnut cake Cookies 150 –...
- Page 35 160 – 180 50 – 60 150 – 130 100 – 140 105 – 120 180 – 200 12 – 15 25 – 30 180 – 200 15 – 20 190 – 210 1 or 2 15 – 20 180 – 200 1 or 2 15 –...
- Page 36 Roasting We recommend the following settings for roasting in the oven: for roasting. – Fan Heat D Exception: With Conventional A use – Conventional A shelf position 2 when roasting poultry weighing up to 1 kg, a cut of meat, or fish.
- Page 37 The traditional British method is to allow Season the meat and place in the pot. 15 to 20 minutes to the lb, according to Add some knobs of butter or margarine type of meat, plus approx. 20 minutes, or a little oil or cooking fat. Add about adjusting length of time as roasting pro- 1/8 litre of water when roasting a big ceeds, to obtain the required result.
- Page 38 Oven roasting chart Beef apprx. 1 kg 180-200 100-120 220-240 100-120 Sirloin, Steak apprx. 1 kg 190-210 35-45 240-260 35-45 Venison, game apprx. 1 kg 180-200 90-120 220-240 90-120 Leg of pork apprx. 1 kg 170-190 100-120 210-230 100-120 Rolled pork apprx.
- Page 39 Defrosting You can also use the oven for defrost- ing. To defrost select "Fan heat D" with a The time needed for defrosting de- temperature setting of up to a maxi- pends on the type and weight of the mum of 50 °C. food, and at what temperature it was deep frozen.
- Page 40 Cooking When choosing which oven level to which are to be cooked use, take into account the size of the in their own juice and/or steam, e.g. dish with its lid. The following oven set- potatoes or vegetables, so that they do tings are recommended: not dry out.
- Page 41 Observe recommended tempera- tures, cooking times and position in Ä function can the oven given on manufacturer’s be used on its own for preparing ready packaging. made meals such as pizza, pre-pre- pared lasagne, filled baguettes, etc. You can also programme the oven to However, when used on its own it is not end or delay the start of a cooking pro- suitable for baking and conventional...
- Page 42 Grilling Pre-heat the grill for at least 5 minutes with the oven door shut. Grilling with the oven door shut saves energy and minimizes cooking smells. The oven has two grill settings: Assemble the grill pan, anti-splash For grilling thin cuts and for browning. tray and rack as shown.
- Page 43 Pre-heat the grill for at least 5 minutes with the oven door shut. It is best to grill food of a similar thick- Place the grill pan under the grill. ness at the same time so that the for each item does not vary Make sure you insert the grill pan at the too greatly.
- Page 44 Grill chart Pre-heat the grill for at least 5 minutes with the door shut before using. Beef steaks 4 or 5 max. 10 – 16 10 – 16 Kebabs 25 – 30 25 – 30 Chicken kebabs 20 – 25 200 –...
- Page 45 Cleaning and care Treat the surface of your ceramic hob with the same care as any other glass surface. Never use scouring agents or pads, or strong cleaners such as oven sprays or stain removers, as these could harm the surface. There is a seal between the hob frame and worktop and between the frame and the ceramic plate.
- Page 46 Some cleaners incorporate a silicone ingredient which acts as a protective film on the hob. It makes the hob sur- face smoother and prevents water and If such problems occur, switch off soiling adhering to the surface. the hob, but do not let it cool down. Scrape the sugar or other residue However, cooking at high temperatures thoroughly from the hob with a...
- Page 47 Cleaning and care Do not use any knives, hard brushes, scouring agents or pads Wipe off any spilt food with a damp as these could scratch. cloth after the hotplates have cooled off. Use a plastic scouring pad if Never use cleaning agents contain- necessary for stubborn spills.
- Page 48 Cleaning and care Do not leave accessories in the Wipe down the appliance front and the oven when not in use. control panel with a mild cleaning agent or a solution of hot water with a little washing up liquid. Wipe dry with a Clean in a solution of hot water and a soft cloth.
- Page 49 Clean as soon as possible after each Before using for the first time use with a dishcloth, soft sponge (e.g. remove any stickers from Perfect- the Vileda sponge as supplied with the Clean surfaces. oven) or a soft nylon brush, and a solu- tion of hot water and a little washing up The enamelled surfaces of the oven in- liquid.
- Page 50 Remove the catalytic back panel The following cause lasting damage and roof panels before using oven to the surface structure and reduce sprays. The chemicals used in oven the anti-stick effect and must not be sprays will damage catalytic ena- used on PerfectClean surfaces: mel rendering it ineffective.
- Page 51 Cleaning and Care The removable back panel and roof Allow the oven to cool down before liner are coated with a dark grey cata- cleaning. Danger of burning! lytic enamel. Catalytic enamelled panels should During fan operated cooking circulat- be cleaned using a solution of hot ing air in the oven deposits oil and fat water with a little washing up liquid splashes predominantly on the back...
- Page 52 Miele dealer or the Miele Spare Parts dept.
- Page 53 Cleaning and care To make cleaning easier you can – remove the oven door, – take out the runners, – take out the rear wall, – lower the top heating element. Please note: the oven door is heavy. It should be gripped firmly at the sides when being removed or re- fitted.
- Page 54 Make sure the oven heating ele- ments are switched off and cool to avoid the danger of being burnt. Pull on the fixing knob to release it. Carefully locate the door over the hinge guides. Make sure that the door goes back on straight.
- Page 55 the catalytic side panels, ensure they sit correctly. (depending on model) Make sure the oven heating ele- ments are switched off and cool to avoid the danger of being burnt. Take out the runners. Gently lift and pull out the catalytic side panels.
- Page 56 Loosen the screws in the back panel and take it out. The oven must not be used without the back panel fitted. This could lead to injuries. in the reverse order, care- fully ensuring all parts are correctly in place. Put the runners back into place.
- Page 57 If the is dirty it can also be removed for cleaning: The oven heating elements must be switched off and cool to avoid the danger of being burnt. Take out the runners. Hold the roof liner firmly and un- screw the knurled knob. Take out the roof liner.
- Page 58 Check whether, Unscrew the light cover and the seal. the mains fuse has blown. Contact a qualified electrician or the Miele Ser- Change the bulb: vice Department. 230-240°V, 25 W, E 14, heat resistant to 300°C.
- Page 59 This is not a fault. There will always be a slight uneven- The cooling fan continues to run for a ness. Product information sheets give a short time after the oven has been percentage result for standard brown- switched off to prevent any humidity ing tests.
- Page 60 · · · · When roasting on the rack, the circulat- This is not a fault. ing air sometimes picks up spices, The time of day will shortly reappear in which are then deposited on the oven the display field. interior walls.
- Page 61 Always remove the oven door before dismantling it. Depending on model the oven door is The oven door has seals on all sides to fitted wth two or three glass panes. protect it. If, however, condensate has worked its way in between the glass panes, the door can be dismantled in order to clean in between the panes.
- Page 62 Clean the glass pane and other middle pane can also be taken out. parts and then put the oven door back together again. Pull the pane forwards to remove. Push the middle pane (where pres- Take care when doing this to prevent ent) into the frame almost to the end.
- Page 63 Fit the trim with the seal in front of Fit the side seals for the inner pane the glass panes. in the grooves provided. Make sure that the seal is sitting cor- rectly to prevent any steam penetrat- ing inside the door. Insert the inner pane with the printed text facing downwards.
- Page 64 – the nearest Miele Service Depart- ment, (see address on the back If you have an oven and hob combina- tion also give the number of your hob.
- Page 65 The following accessories may come as standard with some models. They are available at extra cost from your Dealer or the Miele Spare Parts dept. The deep sided universal oven dish can be placed in the oven directly on the runners. It has non-tip safety not- ches like the oven tray to prevent it being pulled out too far.
- Page 66 Ensure that these match the household mains supply. Please quote these data, and the model and serial number when contacting the Miele Ser- vice dept. Connection of this appliance should be made either via a fused connection unit...
-
Page 67: Hob Controls
Service Dept. In other countries check these details Possible combinations: with your supplier. Miele built-in ovens may only be com- bined with hobs as specified by Miele for use with that oven. Contact your Miele Dealer for further information on suitable combinations. - Page 68 are given Data relating to electrical connection on the data plate, visible when the will be found on the data plate, visible oven door is open. Please ensure that when the oven door is open. Make sure these match the household mains sup- that these figures comply with the main ply.
- Page 69 Installation - Ceramic hobs When installing a hob there may be a wall at the back and a wall or tall unit at one side. On the other side there must not be a unit or wall which stands higher than the hob. Because of the heat given off, there must be a minimum distance as fol- lows:...
- Page 70 Set the ceramic hob in the cut-out and centre it. (The Miele inscription must be legible at the front). Turn the clamps outwards tighten the screws Check that the hob unit fits tightly Sealing strip on to the worktop.
- Page 71 * Space for fixing and cable Prepare the worktop cut-out as illus- trated. Lay the spring clamps supplied on the top edge of the cut-out in the positions indicated and secure with 2 screws each. With the spring clamps must be positioned and se- cured with strong double-sided ad- hesive tape.
- Page 72 This is important to ensure an effec- for the worktop. tive seal on all sides. Lightly position the hob. (The "Miele" The hob can now only be removed logo must be visible at the front). with a special tool.
-
Page 73: Enclosed Hotplates
Installation - Hobs with enclosed hotplates When installing a hob there may be a wall at the back and a wall or tall unit at one side. On the other side there must not be a unit or wall which stands higher than the hob. - Page 74 Installing the cooker Turn off the mains electricity supply to the isolator. Follow connection diagram sup- plied with the cooker. Connect cooker cable to isolator. Align the cooker in front of the base unit. Connect the hob plug to the socket on the cooker.
- Page 75 Installing the oven If the oven is to be built into a base Turn off the mains electricity supply unit, a cut-out is required in the in- to the isolator. terim shelf as close as possible to the wall or unit back panel to ensure Connect the oven to the electricity that there is sufficient ventilation for supply by the isolator.
- Page 76 Alteration rights reserved / 22 / 001 GB / IRL / ZA – 0701 M.-Nr. 05 389 880 (H 310; H 320; H 316; H 326) This paper consists of cellulose which has been bleached without the use of chlorine.