HP Integrity rx1620 Operation Manual
Rsvla-0406
Hide thumbs
Also See for Integrity rx1620:
- Operation manual (136 pages) ,
- Deployment manual (105 pages) ,
- Software manual (96 pages)

Related Manuals for HP Integrity rx1620

Summary of Contents for HP Integrity rx1620
- Page 1 HP Integrity rx1620 Operations Guide Regulatory Model Number: RSVLA-0406 HP Part Number: AB430-96005-ed4 Published: October 2009 Edition: Fourth Edition...
- Page 2 Legal Notices The information contained herein is subject to change without notice. The only warranties for HP products and services are set forth in the express warranty statements accompanying such products and services. Nothing herein should be construed as constituting an additional warranty. HP shall not be liable for technical or editorial errors or omissions contained herein.
-
Page 3: Table Of Contents
About This Document.......................13 Intended Audience..........................13 New and Changed Information in This Edition...................13 Publishing History..........................13 Document Organization........................13 Typographic Conventions........................14 HP-UX Release Name and Release Identifier..................14 Related Documents..........................15 HP Encourages Your Comments......................15 1 Controls, Ports and Indicators..................17 Control Panel............................17 Additional Controls and Indicators......................18 Hard Disk Drive Indicators......................18... - Page 4 Operation............................36 default..............................36 Syntax............................36 Parameters..........................36 Operation............................36 errdump............................36 Syntax............................36 Parameters..........................36 Operation............................37 info..............................37 Syntax............................37 Parameters..........................37 lanaddress............................43 Syntax:............................43 Parameters..........................43 monarch............................43 Syntax............................43 Parameters..........................43 Operation............................44 pdt..............................44 Syntax............................44 Parameters..........................44 Operation............................44 sysmode............................45 Syntax............................45 Parameters..........................45 Operation............................45 Specifying SCSI Parameters........................46 Using the SCSI Setup Utility......................47 Using the Boot Option Maintenance Menu..................53 Paths..............................53 Boot from a File..........................53 Add a Boot Option........................54...
- Page 5 Console............................64 Connect to Service Processor......................64 Date..............................65 Default Configuration........................65 Display FRUID..........................65 Disconnect Remote or LAN Console....................65 MP Firmware Update........................65 Help..............................65 Display System ID...........................66 Inactivity Timeout...........................66 Configure LAN Console........................66 Locator LED Status..........................66 LAN Status............................66 Return to Main Menu........................67 Modem Reset...........................67 Modem Status..........................67 Power Control..........................67 Configure Paging..........................67 Power Status............................67...
- Page 6 LAN A Connector LEDs........................90 LAN B Connector LEDs........................90 Optional Management Processor LAN C Connector LEDs............91 System Board Diagnostic LEDs......................91 Running Diagnostic Software Tools......................92 HP e-DiagTools Hardware Diagnostics...................92 Starting HP e-DiagTools ......................93 Producing a Support Ticket.......................94 Offline Diagnostics Environment (ODE)..................95 Tools Provided..........................95 running ODE from the offline Diagnostics and Utilities DVD..........95...
- Page 7 Internal Removable Media Options....................112 System Board............................112 System Board Components......................113 Intel Itanium 2 Processor.......................113 Processor Bus..........................114 I/O and Memory Controller......................114 Memory Architecture........................114 Architecture..........................114 DIMMs............................115 Chip Spare Functionality......................115 Serial Presence Detect (SPD)....................116 I/O Bus Interface..........................116 Processor Dependent Hardware Controller..................116 Dual Serial Controller........................116 Field Programmable Gate Array....................117 Baseboard Management Controller....................117 SCSI Controller..........................117...
- Page 8 List of Figures Front View.............................17 Control Panel..........................17 Hard Disk Drive LED Indicators....................18 DVD...............................18 Rear View............................19 10/100/1000 base-T ethernet LAN A 1Gb Connector LEDs............20 10/100/1000 base-T ethernet LAN B 1Gb Connector LEDs............20 Optional Management Processor Card LAN C 10/100 Connector LEDs........21 Rear View of Server........................23 Dual USB Port Connector......................23 Serial Port Connector........................24...
- Page 9 10/100/1000 base-T ethernet LAN B 1Gb Connector LEDs............26 Optional Management Processor Card LAN C 10/100 Connector LEDs........27 EFI Commands..........................30 Communications Parameters......................34 hp Integrity rx1620 Server Sockets....................53 hp Integrity rx1620 Server Drives....................53 Console Output Devices........................57 Console Input Devices........................59 Management Processor Commands and Descriptions..............62 Alert Levels............................69...
- Page 10 Missing Components........................106 Chassis Control Commands......................107 Sensor Numbers..........................107 IPMI Origins..........................107 Events Without Sensors.......................108 Memory Array Capacities......................115 Data Pathing - Part 1........................118 Data Pathing - Part 2........................119 Data Pathing - Part 3........................120 List of Tables...
- Page 11 2 Command......................36 info all Command........................38 3-10 info cpu Command........................41 3-11 info mem Command........................41 3-12 info io Command........................42 3-13 info boot Command.........................43 3-14 lanaddress Command.......................43 3-15 monarch Command........................44 3-16 pdt Command..........................45 3-17 pdt clear Command.........................45 3-18 sysmode Command........................46 3-19 HP-UX............................64...
-
Page 13: About This Document
About This Document This document describes how to operate your hp Integrity rx1620 Server, Regulatory Model Number: RSVLA-0406. The document printing date and part number indicate the document’s current edition. The publish date changes when a new edition is published. Minor changes can be made at reprint without changing the publishing date. -
Page 14: Typographic Conventions
The preceding element may be repeated an arbitrary number of times. Separates items in a list of choices. HP-UX Release Name and Release Identifier Each HP-UX 11i release has an associated release name and release identifier. The uname(1) command with the -r option returns the release identifier. Table 2 shows the releases available for HP-UX 11i. -
Page 15: Related Documents
Web Site for HP Technical Support: http://us-support2.external.hp.com/ Books about HP-UX Published by Prentice Hall http://www.hp.com/hpbooks/ site lists the HP books that Prentice Hall currently publishes, such as HP-UX books including: • HP-UX 11i System Administration Handbook http://www.hp.com/hpbooks/prentice/ptr_0130600814.html •... -
Page 17: Controls, Ports And Indicators
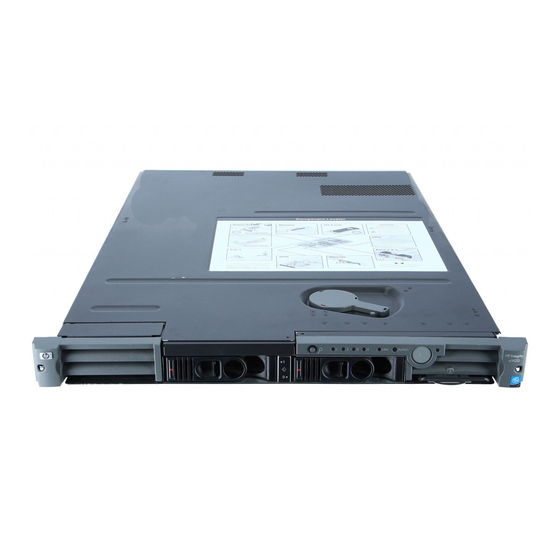
1 Controls, Ports and Indicators This chapter describes the controls, ports, and indicators found on the front panel, rear panel, and internal locations of the hp Integrity rx1620 Server. The hp Integrity rx1620 Server is designed to be rack mounted. -
Page 18: Additional Controls And Indicators
Troubleshooting, for details on information provided by the system and diagnostic LEDs. Additional Controls and Indicators The hp Integrity rx1620 Server can have up to two low-voltage differential (LVD), 3.5 inch form factor hard disk drives installed. These hard disk drives have LEDs that provide status and activity information. -
Page 19: Rear Panel
Description Activity LED Flashing green Drive activity Rear Panel The hp Integrity rx1620 Server rear panel includes communication ports, I/O ports, AC power connector, and the locator LED/button. Figure 1-5 Rear View Table 1-4 Rear Panel Connectors and Switches Connector/Switch... -
Page 20: 10/100/1000 Base-T Ethernet Lan A 1Gb Connector
10/100/1000 base-T ethernet LAN A 1Gb Connector The rear panel 10/100/1000 base-T ethernet LAN A 1Gb connector has the following status and activity LEDs. Figure 1-6 10/100/1000 base-T ethernet LAN A 1Gb Connector LEDs Table 1-5 10/100/1000 base-T ethernet LAN A 1Gb Connector LEDs LAN LED Location Color... -
Page 21: Optional Management Processor Card Lan C 10/100 Connector Leds
Table 1-6 10/100/1000 base-T ethernet LAN B 1Gb Connector LEDs Location Status Left 1000 MHz no link1000 MHz with Ethernetand twisted-pair wiring enabled Green Right No link10/100/1000 MHz with Ethernetand twisted-pair wiring enabled (link LED) Optional Management Processor Card LAN C 10/100 Connector LEDs The optional management processor LAN C uses an RJ-45 type connector. -
Page 23: External Connectors
2 External Connectors This chapter describes the external connectors provided on the hp Integrity rx1620 Server. Connector Pinouts The following ports and connectors are found on the rear panel of the hp Integrity rx1620 Server. • Dual USB 2.0 •... -
Page 24: Serial Port
Table 2-1 USB Pinouts (continued) Pin Number Signal Description Ground Serial Port Figure 2-3 Serial Port Connector Table 2-2 Serial Port Pinouts Pin Number Signal Description Data Carrier Detect Receive Data Transmit Data Data Term Ready Ground Data Set Ready Request to Send Clear to Send Ring Indicator... -
Page 25: Lan Connectors
S33 (DB 10) S67 (-DB 10) S34 (DB 11) S68 (-DB 11) LAN Connectors The hp Integrity rx1620 Server has 3 different LAN connectors. They are: • 10/100/1000 base-T ethernet LAN A Gb connector • 10/100/1000 base-T ethernet LAN A Gb connector •... -
Page 26: 10/100/1000 Base-T Ethernet Lan A 1Gb Connector
10/100/1000 base-T ethernet LAN A 1Gb Connector The rear panel 10/100/1000 base-T ethernet LAN A 1Gb connector has the following status and activity LEDs. Figure 2-5 10/100/1000 base-T ethernet LAN A 1Gb Connector LEDs Table 2-4 1Gb LAN A Connector LEDs LAN LED Location Color... -
Page 27: Optional Management Processor Card Lan C 10/100 Connector Leds
Optional Management Processor Card LAN C 10/100 Connector LEDs The optional management processor LAN C uses an RJ-45 type connector. This connector has four LEDs that signal status and activity. Figure 2-7 Optional Management Processor Card LAN C 10/100 Connector LEDs Table 2-6 Optional Management Processor Card LAN C 10/100 Connector LEDs LAN LED Location... -
Page 29: Utilities
NOTE: EFI and Pre-OS System Environment (POSSE) are similar. EFI is an Intel specification, whereas POSSE is the HP implementation that aids HP support. EFI consolidates boot utilities similar to those found in PA-RISC based systems, such as the Boot Console Handler (BCH), and platform firmware into a single platform firmware. -
Page 30: Efi Commands
(if the implementation is so constructed). EFI Commands Table 3-1 lists EFI commands for the hp Integrity rx1620 Server. The equivalent BCH commands found in PA-RISC based systems are also listed. Table 3-1 EFI Commands... - Page 31 Table 3-1 EFI Commands (continued) EFI Shell Command BCH Command BCH Command Parameters (PA-RISC) Definition Equivalent (PA-RISC) COnfiguration autoboot AUto [BOot|SEarch|STart] [ON|OFF] Display or set the auto start flag info boot BootID [<processor #>[<bootid #>]] Display or set processor boot identifier EFI boot manager Boot info...
-
Page 32: Efi/Posse Commands
NOTE: EFI and Pre-OS System Environment (POSSE) are similar. EFI is an Intel specification, whereas POSSE is the HP implementation that aids HP support. help Provides information on the EFI shell commands. It also has an additional feature to aid those familiar with the BCH menus to adjust to their equivalent functions in EFI. -
Page 33: Help Command
Example 3-1 help Command Shell> help List of classes of commands: boot -- Booting options and disk-related commands configuration -- Changing and retrieving system information devices -- Getting device, driver and handle information memory -- Memory related commands shell -- Basic shell navigation and customization scripts -- EFI shell-script commands Type "help"... -
Page 34: Baud
Example 3-4 help cpuconfig Command Shell> help cpuconfig CPUCONFIG [cpu] [on|off] Specifies which cpu to configure on|off Specifies to configure or deconfigure a cpu Notes: 1. Cpu status will not change until next boot Examples: * To deconfigure CPU 0 fs0:\>... -
Page 35: Syntax
Syntax boottest Displays status of all speedy boot bits boottest on Run all tests (for a normal boot time) boottest off Skip all tests (for a faster boot time) boottest [test] Displays status of specific Speedy Boot bit boottest [test] [on|off] Sets or clears a specific Speedy Boot bit Parameters [test]... -
Page 36: Operation
Operation Issuing cpuconfig with no parameters displays the config/deconfig status of all processors. A user can reconfigure CPUs by specifying a CPU number and a state (on or off). If a valid state is entered and is different from the current state of a CPU, its status changes on the next boot. The last remaining configured CPU in a system cannot be deconfigured. -
Page 37: Operation
dumps the Corrected Machine Check log init dumps the Initialization log dumps the Logic Analyzer log clear erases all of the logs (mca, cpe, cmc, init, la) Operation If a user enters no parameters, the usage is displayed. Otherwise, the specified error log is displayed. -
Page 38: Info All Command
Example 3-9 info all Command Shell> info all SYSTEM INFORMATION Date/Time: Oct 31, 2003 22:03:39 (20:03:10:31:22:03:39) Manufacturer: Product Name: server rx1620 Product Number: A9901A Serial Number: MYJ3350026 UUID: 48B4F371-E34C-11D6-A8D6-07A8C14CB68B System Bus Frequency: 200 MHz PROCESSOR MODULE INFORMATION # of Family/ Logical Cache Cache... - Page 39 ------ ------ ----------- 0x1033 0x0035 Acpi(HWP0002,0)/Pci(1|0) 0x1033 0x0035 Acpi(HWP0002,0)/Pci(1|1) 0x1033 0x00E0 Acpi(HWP0002,0)/Pci(1|2) 0x1095 0x0649 Acpi(HWP0002,0)/Pci(2|0) 0x8086 0x1229 Acpi(HWP0002,0)/Pci(3|0) 0x1000 0x0030 Acpi(HWP0002,100)/Pci(1|0) 0x1000 0x0030 Acpi(HWP0002,100)/Pci(1|1) 0x14E4 0x1645 Acpi(HWP0002,100)/Pci(2|0) BOOT INFORMATION Monarch CPU: Current Preferred Monarch Monarch Possible Warnings ------- --------- ----------------- AutoBoot: OFF - Timeout is disabled Boottest: BOOTTEST Settings Default Variable...
- Page 40 *Mac(00306E4C0FF2) Acpi(HWP0002,100)/Pci(2|0)/Mac(00306E4C0FF2)) FIRMWARE INFORMATION Firmware Revision: 1.10 [4341] PAL_A Revision: 7.31/5.37 PAL_B Revision: 5.37 SAL Spec Revision: 3.01 SAL_A Revision: 2.00 SAL_B Revision: 1.10 EFI Spec Revision: 1.10 EFI Intel Drop Revision: 14.61 EFI Build Revision: 1.10 POSSE Revision: 0.10 ACPI Revision: 7.00 BMC Revision: 2.24 IPMI Revision: 1.00...
-
Page 41: Info Cpu Command
Example 3-10 info cpu Command Shell> info cpu PROCESSOR MODULE INFORMATION # of Family/ Logical Cache Cache Model Processor Slot CPUs Speed Size Size (hex.) State ---- ------- -------- ------ ------ ------- ------------ 1 GHz 1.5 MB None 1F/01 Active 1 GHz 1.5 MB None... -
Page 42: Info Io Command
Example 3-12 info io Command I/O INFORMATION BOOTABLE DEVICES Order Media Type Path ----- ---------- --------------------------------------- CDROM Acpi(HWP0002,0)/Pci(2|0)/Ata(Primary,Master)/CDROM(Entry0) Vendor Device Slot Path ------ ------ ----------- 0x1033 0x0035 Acpi(HWP0002,0)/Pci(1|0) 0x1033 0x0035 Acpi(HWP0002,0)/Pci(1|1) 0x1033 0x00E0 Acpi(HWP0002,0)/Pci(1|2) 0x1095 0x0649 Acpi(HWP0002,0)/Pci(2|0) 0x8086 0x1229 Acpi(HWP0002,0)/Pci(3|0) 0x1000 0x0030 Acpi(HWP0002,100)/Pci(1|0) -
Page 43: Lanaddress
Example 3-13 info boot Command Shell> info boot BOOT INFORMATION Monarch CPU: Current Preferred Monarch Monarch Possible Warnings -------- --------- ------------------ AutoBoot: on - Timeout is : 7 SEC Boottest: boottest Settings Default Variable OS is not speedy boot aware. Selftest Setting ----------... -
Page 44: Operation
Operation If specified with no parameters, monarch displays the Monarch processor for the system. Specifying a processor number alters the preferred Monarch processor. None of these changes takes affect until after a reboot. Example 3-15 monarch Command Shell> monarch Current Preferred Monarch Monarch... -
Page 45: Sysmode
Example 3-16 pdt Command Shell> pdt PDT Information Last Clear time: PDT has not been cleared Number of total entries in PDT: Number of used entries in PDT: Number of free entries in PDT: Number of single-bit entries in PDT: Number of multi-bit entries in PDT: Address of first multi-bit error: x0000000000000000... -
Page 46: Specifying Scsi Parameters
Example 3-18 sysmode Command Shell> sysmode System Mode: NORMAL Shell> sysmode admin You are now in admin mode. Shell> sysmode service You are now in service mode. Shell> sysmode normal You are now in normal mode Specifying SCSI Parameters The following SCSI parameters may be configured for the SCSI board: •... -
Page 47: Using The Scsi Setup Utility
Using the SCSI Setup Utility Specifying SCSI Parameters... - Page 48 At the EFI shell prompt, type this command to map the parameters for all PCI cards installed in the system: info io A list of all the devices that are installed in the hp Integrity rx1620 Server and managed by EFI drivers is displayed. The output may look like this: Vendor...
- Page 49 • Path—identifies the device’s path; for the SCSI interface, this is the same for both channels. In this example, the SCSI interface path is Acpi(HWP0002,200)/Pci(1|0) for channel A and Acpi(HWP0002,200)/Pci(1|1) for channel B. Using the SCSI interface information from the example above, the pieces of information that, combined, tell you this is a SCSI interface are the following (shown in bold, for highlighting purposes): 0x1000...
- Page 50 Ctrl[1A] Acpi(HWP0002,700)/Pci(1|0) Ctrl[1B] Acpi(HWP0002,700)/Pci(1|1) Ctrl[36] 16550 Serial UART Driver Ctrl[37] VT-100+ Serial Console Ctrl[31] Primary Console Input Device Ctrl[32] Primary Console Output Device Ctrl[30] Primary Standard Error Device Ctrl[1C] Acpi(HWP0002,700)/Pci(2|0) Ctrl[32] Primary Console Output Device Ctrl[30] Primary Standard Error Device Ctrl[33] Acpi(PNP0501,0) Ctrl[34] 16550 Serial UART Driver Ctrl[35] VT-100+ Serial Console...
- Page 51 NOTE: The EFI driver’s handle values will change on every boot. TIP: From this command (drvcfg), we recommend you record these two pieces of information for each channel of each SCSI interface for parameters to be changed: • Drv (the EFI driver’s handle) •...
- Page 52 comparing the values shown for PCI Bus, PCI Device, and PCI Function to the Bus #, Dev #, and Fnc # values from the info io command. CAUTION: Do not change the value for any of these fields on the “Adapter Properties” screen: •...
-
Page 53: Using The Boot Option Maintenance Menu
Paths All devices in the hp Integrity rx1620 Server are represented by paths in the EFI shell. To identify the correct socket or disk drive, use the following tables. Table 3-3 hp Integrity rx1620 Server Sockets... -
Page 54: Add A Boot Option
NOTE: This option boots the selected application or driver one time only. When you exit the application, you return to this menu. This option displays the file systems that are on your server or workstation and lets you browse these file systems for applications or drivers that are executable. Executable files end with the.efi extension. -
Page 55: Delete Boot Option(S)
Exit In this example: • Most of the items are the same options in Boot From a File. • NO VOLUME LABEL is a hard drive. You can search through the disk for bootable applications to add to the Boot Manager list of Boot options. •... -
Page 56: Manage Bootnext Setting
VenHw(D65A6B8C-71E5-4DF0-A909-F0D2992B5AA9) Boot0000 Manage BootNext Setting Use this option to run the selected boot option immediately upon entering the main Boot Manager menu. This option is useful for booting an option that only needs to be booted once, without changing any other setting in the main Boot Manager menu. This is a one-time operation and does not change the permanent system boot settings. -
Page 57: Select Active Console Output Devices
Acpi(HWP0002,700)/Pci(1|1)/Uart(9600 N81)/VenMsg(VtUtf8) * Acpi(HWP0002,700)/Pci(2|0) * indicates a currently selected device. This menu is identical to Console Error Devices. The hp Integrity rx1620 Server does not support different configurations for Output and Error console. For correct operation: • When changes are made to either Output or Error console menus, the identical change must be made in both menus. -
Page 58: Select Active Console Input Devices
• Each option is identified with an EFI device path. Not all options will be available, depending on the configuration of the system and the options purchased. Device paths may differ slightly on different product models. • On both serial device examples, UART 9600 indicates the current baud rate of the serial device (can be changed with the EFI shell baud command), VenMsg Vt100+ is the current emulation type (several different terminal emulation protocols are supported, see list above). -
Page 59: Select Active Standard Error Devices
Use this option to define the devices that display error messages from the system console. This menu is identical to Console Output Devices. The hp Integrity rx1620 Server does not support different configurations for Output and Error console. For correct operation: •... -
Page 60: Management Processor
Figure 3-2 Password Reset Jumper Plug in the AC power cord and wait for the BMC heartbeat LED on the system board to start blinking green. This should take about 5 seconds from the time you plug in the power cord. Unplug the AC power cord again and remove the jumper. -
Page 61: Interacting With The Management Processor
MP HELP: prompt.) You can return to the MP Main Menu by typing CTRL+B. NOTE: At publication, the current version of the Management Processor Revision is E.02.25. Check the HP website for the latest revision. MP Welcome Screen MP Welcome screen commands:... -
Page 62: Management Processor Commands
Use Ctrl-B to exit MP command interface and return to the main MP menu: Enter a command at the help prompt: OVerview : Launch the help overview LIst : Show the list of MP commands <COMMAND> : Enter the command name for help on individual command TOPics : Show all MP Help topics and commands HElp... -
Page 63: Reset Bmc Passwords
TRANSMIT CONFIGURATION STRINGS: Disable this setting whenever the modem being used is not compatible with the supported modem (MT5634ZBA). IMPORTANT: Do not mix HP and vt100 terminal types at the same time. Set up the remote serial port parameters as follows: •... -
Page 64: Certificate Generate
Example 3-19 HP-UX Applications that care about the terminal type (install, SAM, vi, and so on) running on HP-UX use three methods to determine the terminal type: The application takes the terminal information from the OS. This value is set in the CA command and takes effect for all MP ports. -
Page 65: Date
Forgotten passwords can be reset by pressing the MP reset button on the back panel of your HP Server. After the MP reboots, the local console terminal displays a message for five seconds. Responding to this message in time will allow a local user to reset the passwords. -
Page 66: Display System Id
and those commands displayed in the MP Main Menu, will be displayed. If executed in command mode, this command displays a list of command interface commands available to the user. It also displays detailed help information in response to a topic or command at the help prompt. Display System ID ID: Display/modify system information This command allows the user to display and modify the following:... -
Page 67: Return To Main Menu
Return to Main Menu MA: Return to MP Main Menu This command makes the MP return to the non mirrored MP Main Menu. This is the same as executing CTRL+B. Modem Reset MR: Modem Reset This command makes the MP send an AT Z command to the modem, which resets it. Any modem connections are lost. -
Page 68: Set Access
The timeout period is set with the IT command. On HP-UX, the SE command works on the local and remote ports.In HP-UX, use the System Administration Manager (SAM) to add modem device files for the session UARTS. -
Page 69: Security Options
Table 3-8 defines alert (or severity) levels. Table 3-8 Alert Levels Severity Definition Minor forward progress Major forward progress Informational Warning Critical Fatal Security Options SO: Configure security options and access control (users, passwords, and so on) This command modifies the security parameters of the MP, which include login time-outs and allowed password faults. -
Page 70: Transfer Of Control
NOTE: At the time of production of this guide, the firmware revisions were: FIRMWARE INFORMATION Firmware Revision: 1.10 [4341] PAL_A Revision: 7.31/5.37 PAL_B Revision: 5.37 SAL Spec Revision: 3.01 SAL_A Revision: 2.00 SAL_B Revision: 1.10 EFI Spec Revision: 1.10 EFI Intel Drop Revision: 14.61 EFI Build Revision: 1.10 POSSE Revision: 0.10 ACPI Revision: 7.00... -
Page 71: Virtual Front Panel
This command allows an administrator to add, modify, re-enable, or delete user logins. The administrator can also enable or disable security warnings and change passwords. Virtual Front Panel VFP: Display Virtual Front Panel The VFP command presents a summary of the system by using direct console addressing. If the terminal is not recognized by the MP, VFP mode will be rejected. -
Page 73: Troubleshooting
For questions on the operation of HP e-DiagTools, refer to the HP e-DiagTools Administrator Guide on the HP Web Site at http://docs.hp.com. • For general information on HP Server products, refer to the HP Web Site and search for “management” at http://docs.hp.com. Troubleshooting Methodology This is the entry point to the troubleshooting process. -
Page 74: Possible Problems
Possible Problems This section contains example HP Server problems and their possible solutions. The system will not power-up Review the installation procedures for the server. Refer to the hp Integrity rx1620 Installation Guide. Check all power connection cables. Verify that power is available at the AC power receptacle. Check the receptacle output with another device. -
Page 75: The System Has Intermittent Failures
12. If there are no obvious errors, reflash the BMC firmware. Refer to Chapter 3: Utilities, for instructions. 13. If the system will still not boot, it may be necessary to replace the base unit. The system has intermittent failures Examine the display panel LEDs for warning or fault indications. -
Page 76: Troubleshooting And Fru Identification
The critical conditions that may shut down the server are: • Critical temperature fluctuations or changes • Voltage problems (external AC line) • Power supply failure If the server powers off, and before you try a restart, do the following: Examine the display panel LEDs for warning or fault indications. -
Page 77: Problem Symptoms Repair Actions
Table 4-1 Problem Symptoms Repair Actions Problem or Problem Normal Functioning Troubleshooting Steps Potential FRUs Symptom Indicators Indicators No indication of • Standby LED • Power LED Off. 1. AC must be present. Check that • No AC present housekeeping is off when AC •... -
Page 78: Verifying Hard Disk Drive Operation
Each hard disk drive has an activity LED indicator on the front of the drive. NOTE: On the hp Integrity rx1620 Server only the Activity LED is used. The Status LED is disconnected. Figure 4-1 LED Apertures on Hard Disk Drive Lightpipes on the disk drive transmit light to these apertures from LEDs on the inside rear of the hot-swap mass storage cage. -
Page 79: Identifying And Diagnosing Hardware Problems
Check the SCSI bus for proper loading, Reconnect the AC power cords and any cables. Restart the HP Server to determine whether the LEDs now become illuminated during the boot. If not, contact your reseller. If the LED indicator on a single disk drive is not illuminated during boot, the disk drive may be installed incorrectly, or its lightpipes may be damaged. -
Page 80: Management Processor (Mp) Card Event Logs
Table 4-2 System LED States (continued) System LED State Blinking yellow (1/sec.) Attention indication: Alerts of levels 3-5 detected in the optional management processor logs. The LED will turn off once the event log has been read. Blinking red (2/sec.) Fault indication: System alert level 7 detected, LED will blink until the problem is resolved and the system boots successfully or until it is manually turned off. - Page 81 Log Name Entries % Full Latest Entry ------------------------------------------------------------------- E - System Event 29 Oct 2002 19:15:05 F - Forward Progress B - Current Boot P - Previous Boot L - Live Events C - Clear All Logs Enter your choice or [Q] to Quit: Select e to review the system events.
- Page 82 MP:SL (+,-,<CR>,D, F, L, J, H, K, T, A, U, ? for Help, Q or Ctrl-B to Quit) >a Alert Level Threshold Filter: : Major Forward Progress : Informational : Warning : Critical : Fatal Enter alert level threshold or [Q] to quit filter setup: 3 ->...
-
Page 83: Systems Without A Management Processor Card
Enter alert level threshold or [Q] to quit filter setup: 3 -> Alert threshold level 3 filter will be applied. Select v, then t to change the display to text mode: Display Mode Configuration: H - Hex mode Current -> K - Keyword mode T - Text mode Enter new value, or [Q] to Quit: To decode the blinking state of system LED, review the entire SEL and look at events with... -
Page 84: Diagnostic Leds
Table 4-3 Power and System LED States Power LED System LED State On (green) Solid green Running On (green) Blinking green Booting or running code other than operating system (boot or diagnostic). On (green) Blinking yellow (1/sec.) Attention indication On (green) Blinking red (2/sec.) Fault indication Diagnostic LEDs... -
Page 85: Warnings
Flashing Green Mismatched View the SEL for additional Yellow memory pairs. information. Review the information on installing memory in “Installing and Configuring” in the hp Integrity rx1620 Maintenance Guide. Flashing Green Green Memory View the SEL for additional Yellow thermal load information. -
Page 86: Faults
Replace the fan that is not Yellow (CPU) is not functioning. functioning properly Refer to “Removing and Replacing Components” in the hp Integrity rx1620 Maintenance Guide for detailed instructions on the maintenance action. Table 4-9 Processor Warnings System LED LED 1 LED 2... -
Page 87: Unknown Faults
Flashing Green Cooling Unit 3 Replace the fan that is not (CPU) fault functioning. Refer to “Removing and Replacing Components” in the hp Integrity rx1620 Maintenance Guide for detailed instructions on the maintenance action. Identifying and Diagnosing Hardware Problems... -
Page 88: Command Line Interface
Flashing Green Green No processor Verify that the processor or processors detected. are correctly installed. See “Installing and Configuring” in the hp Integrity rx1620 Maintenance Guide for installation procedures. Table 4-19 BMC Faults System LED LED 1 LED 2 LED 3... -
Page 89: Command Line Interface Menu
Command Line Interface Menu The command line interface (CLI) provides the following menu selections: • date: Date display • help: List available commands • ipmi: Send IPMI cmd • loc: System locator LED • passwd: Change password • pc: Power control •... -
Page 90: Lan Leds
0060 - SFW Boot start 00-1D:0A:00 2003-10-31 22:39:05 0070 2 CPU1 Boot start 00063 DT 04 0000000000000000 0080 2 CPU1 Boot start 00063 Time 2003-10-31 22:39:05 0090 - BMC LPC reset 00-12:70:02 2003-10-31 22:39:07 00A0 - SEL Time Set FD-C0:03:01 2003-10-31 22:39:15 00B0 - Fan 2 (Mem) Fail (crit) -
Page 91: Optional Management Processor Lan C Connector Leds
Table 4-23 1Gb LAN B Connector LEDs Link LED Output Activity Blinking Orange Link w/no activity Solid Orange No link Optional Management Processor LAN C Connector LEDs The optional 10/100Mb LAN C interface provides four LEDs on the rear panel if the management processor card is installed: Table 4-24 Optional Management Processor Card LAN C LEDs LAN LED... -
Page 92: Running Diagnostic Software Tools
• HP e-DiagTools Hardware Diagnostics Before you run the HP diagnostic software, take note of any LED error messages. To find out more about the error, note any event messages and use the tool appropriate for your system to determine what failed. -
Page 93: Starting Hp E-Diagtools
• Obtain a complete hardware configuration. • Provide precise information to an HP support agent so they can solve problems quickly and effectively. HP e-DiagTools provides a user-friendly interface to the Offline Diagnostics Environment (ODE), that enables you to troubleshoot a system that is running without an OS or cannot be tested using the online tools. -
Page 94: Producing A Support Ticket
If you still experience problems with your system, try the following: 1. Power off and restart your system. 2. Update the system's firmware. 3. Back up your data and contact your HP Support Agent for more advice. 1-Help 2-Advanced 3-Exit 4-Support Ticket Troubleshooting... -
Page 95: Offline Diagnostics Environment (Ode)
These may be accessed through the HP e-DiagTools hardware diagnostics menus or as separate applications. The offline environment is also useful for some types of testing in which it is not desirable to have to boot the system first. -
Page 96: Using Offline Diagnostic Tools
Ignore references to the SupportPlus Media in the Support Plus: Diagnostics User's Guide, Chapter 3: they do not apply to the hp Integrity rx1620 Server system. However, the conceptual and procedural information still applies to IPF systems. Any discrepancies have been noted and explained in the Support Plus: Diagnostics User's Guide, and elsewhere, as appropriate. -
Page 97: Offline Diagnostic Environment (Ode)
ODE is used to evaluate specific hardware components via a Command Line Interface. To access ODE, perform the following: Power on your HP Server and insert the IPF Offline Diagnostics and Utilities CD into the DVD-ROM tray. Do not permit the server to boot into an Operating System and at the EFI Boot Manager, select EFI Shell. -
Page 98: Online Support
The latest drivers and utilities • Additional documentation Phone Support To contact HP customer support by phone, go to the HP IT Resource Center (ITRC) near you, at http://www.itrc.hp.com. Local phone numbers are listed in your native language for help. Troubleshooting... -
Page 99: Specifications
HP Integrity rx1620. NOTE: For information on operating conditions (environmental requirements), see the hp Integrity rx1620 Site Preparation Guide included on the HP Server Documentation CD-ROM, or posted under the rx1620 Server at http://docs.hp.com. Hardware Specifications... -
Page 101: A Event, Error, And Warning Messages
A Event, Error, and Warning Messages This appendix contains event, error and warning information for the hp Integrity rx1620 Server system: • Extensible Firmware Interface (EFI) error and warning messages • System Event Log (SEL) and Forward Progress Log (FPL) Entries EFI Error and Warning Messages EFI error and warning messages are displayed on the console as part of the boot process. - Page 102 All CPUs were slated for compatibility deconfig Processor failure. Verify installation, then replace processor. Contact the HP Support center for assistance. Incompatible CPUs detected Check processor installation and match CPU part numbers. CPUs must be identical.
-
Page 103: Sel And Fpl Log Entries
EFI NVM cleared Information only, no action required EFI NVM failed Reboot the server. If the error message is repeated, contact the HP Support center for assistance. CPU deconfigured by SAL_B Check processor installation. (Verify installation.) Replace processor that was deconfigured. - Page 104 00000002 - BMC LPC reset 00-12:70:02 2003-10-31 22:41:30 00000003 - ACPI State S0 (on) FA-22:6F:00 2003-10-31 22:41:31 00000004 - Fan 1 (PSU) 11-0A:07:00 2003-10-31 22:41:31 00000005 - Fan 2 (Mem) 12-0A:07:00 2003-10-31 22:41:31 00000006 - SFW Boot start 00-1D:0A:00 2003-10-31 22:41:32 00000007 2 CPU1 Boot start 00063...
-
Page 105: Sensor Numbers
00D0 - BMC LPC reset 00-12:70:02 2003-10-31 22:21:35 00E0 - SEL Time Set FD-C0:03:01 2003-10-31 22:21:44 00F0 - SFW EFI boot mgr 00-12:6F:41 8F:-- 2003-10-31 22:22:08 0100 2 CPU0 EFI boot mgr 0020B DT 04 0000000000000006 0110 2 CPU0 EFI boot mgr 0020B Time 2003-10-31 22:22:09... -
Page 106: Accessing The Logs With Mp Commands
Accessing the logs with MP commands The SEL and FPL data can also be accessed from the MP logs using the MP card SL command. The vcommand (view mode configuration) determines the format of the display: • hex mode • text mode •... -
Page 107: Chassis Control Event Codes
Table A-2 Missing Components (continued) Data 2 Data 3 Missing Component 0x1E 0x01 Cooling Unit 2 0x1E 0x03 Cooling Unit 3 Chassis Control Event Codes For BMC rev 1.41+, an SEL event will be logged for each ChassisControl event, whether it’s generated by an IPMI request, or a sensor event. -
Page 108: Events Without Sensors
Table A-5 IPMI Origins (continued) Number Source 0x07 intelligent platform management bus (IPMB) 0x08 inter IC (I2C)1 0x09 I2C2 0x0F keyboard controller style (KCS)0 0x10 KCS1 0x11 KCS2 0x1F System Power Thread (Used by Power Restore Policy) For example: Data2 Data3 ipmi req from the CLI thd for CHASSIS_CONTROL_POWER_DOWN ( p 0”) ipmi req from the CLI thd for CHASSIS_CONTROL_POWER_UP ( p 1”) - Page 109 Table A-6 Events Without Sensors (continued) Triplet Event data 2 data 3 Notes 1D:70:01 BMC Warm Reset 1D:70:02 BMC Cold Reset after SDRR update EFI Error and Warning Messages...
-
Page 111: B System Information
B System Information Features Summary Processor • Two processor sockets • One or two Itanium 2 CPUs: 1.3 GHz or 1.6 GHz, 3.0 MB L2 cache • Front-side bus (FSB): 200MHz, double data rate, 6.4GB/s peak data bandwidth Memory • 8 memory DIMM slots •... -
Page 112: Enhanced Server Manageability, Provided By The Optional Management Processor (Mp) Card
• Hardware diagnostic status displayable on the front status panel • Locator LEDs and associated activation buttons—front and rear • Field Replaceable Units (FRUs) monitored by BMC • Wake-on-LAN capability from the 10/100BT LAN port Enhanced server manageability, provided by the optional Management Processor (MP) card •... -
Page 113: System Board Components
Figure B-1 System Block Diagram System Board Components The following sections describes the main components of the system board: • Intel Itanium 2 Processor (one or two processors supported) • I/O and Memory Controller • AGP/PCI Bus Controller • Processor Dependent Hardware (PDH) Controller •... -
Page 114: Processor Bus
The processor bus (Front Side Bus, FSB) in this product runs at 200 MHz. Data on the FSB are transferred at a double data rate, which allows a peak FSB bandwidth of 6.4 GB/sec. I/O and Memory Controller The hp Integrity rx1620 Server supports the following features of the I/O and memory controller chip: •... -
Page 115: Dimms
Figure B-2 Memory Block Diagram DIMMs The memory subsystem will only support DDR SDRAM (Double Data Rate Synchronous Dynamic Random Access Memory) technology utilizing industry-standard PC2100 type DDR SDRAM DIMMs, 1.2" tall. This is expected to be the standard height available at first release and is currently being used by high-volume products. -
Page 116: Serial Presence Detect (Spd)
cell, loaded in the same location in each memory cell). Each DIMM within a quad must be identical to all the other DIMMs in the quad. Using the DIMM loading order indicated in the Memory Block Diagram, chip spare can be achieved if 4 identical DIMMs are loaded in the slots DIMM0A/B and DIMM1A/B. -
Page 117: Field Programmable Gate Array
Field Programmable Gate Array The field programmable gate array (FPGA) provides ACPI and low pin count (LPC) support for HP Intel Itanium 2 platforms based on HP chipsets. This controller is connected to the PDH bus and provides these features: •... -
Page 118: 10/100 Bt Management Lan C
Linux supports all 1.1 USB devices • Windows supports USB keyboard and mouse Data Pathing Information The following table presents information about pathing in the hp Integrity rx1620 Server. Table B-2 Data Pathing - Part 1 PCI Slot PCI Card Information... -
Page 119: Data Pathing - Part 1
0/1/2/0 20:02.0 80:01.0 40:01.0 0/7/1/0 0/4/1/0 E0:01.0 0/7/1/1 0/4/1/1 E0:01.1 0/7/2/0 0/4/2/0 E0:02.0 Conflict with HP-UX ioscan vs. ODE Mapper 0/4/1/0 port 0 = “UPS port”, 0/4/1/1 port 0 = “Console port”, 0/4/1/1 port 2 = “Remote port” System Board... -
Page 120: B-4 Data Pathing - Part 3
Table B-4 Data Pathing - Part 3 PCI Slot Rope Number ACPI HID ACPI UID PCI Bus Address PCI Bus Number PCI Host Controller Number Core HWP0002 0x000 0x00-0x1F Core HWP0002 0x000 0x00-0x1F Core HWP0002 0x000 0x00-0x1F Core HWP0002 0x000 0x00-0x1F Core HWP0002... -
Page 121: Index
Index starting, 51 Extensible Firmware Interface acetone, 97 commands, 30 Activity LED, 78 Extensible Firmware Interface, EFI, 29 adapter slot number, determining withinfo command, 48 ammonia, 97 forward progress log example, 103 benzene, 97 BMC CLI commands Gigabit LAN, 90, 91 accessing, 103 Boot handle... - Page 122 path determining withinfocommand, 49 SCSI Port, 24 sensor numbers, 107 slot number of adapter, determining withinfocommand, system event log data fields, 105 example, 104 hex view mode, 106 keyword view mode, 106 text view mode, 106 view mode, 106 system information 10/100 Bt LAN, 118 1Gb LAN, 118 enhanced server manageability, 112...