Precor move beyond S3.15 Assembly Instructions Manual
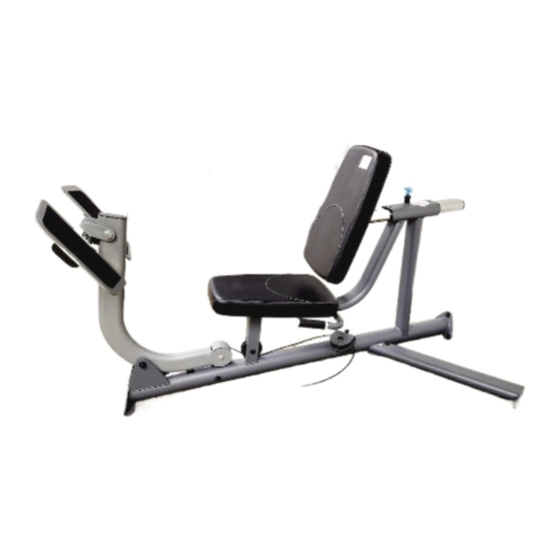
Leg press option
Hide thumbs
Also See for move beyond S3.15:
- Assembly instructions manual (16 pages) ,
- Assembly and maintenance manual (36 pages)
Table of Contents
Advertisement
Advertisement
Table of Contents

Related Manuals for Precor move beyond S3.15


Summary of Contents for Precor move beyond S3.15
- Page 1 S3.15/S3.19 Leg Press Option Assembly Instructions...
-
Page 2: Important Safety Instructions
• Never drop or insert objects into any opening. vous avez des étourdissements ou des faiblesses, or service, refer to the Precor web site at Keep hands away from moving parts. arrêtez les exercices immédiatement. www.precor.com. Should you need more •... -
Page 3: Table Of Contents
S3.15/S3.19 Leg Press Option Assembly Instructions Table of Contents Important Safety Instructions ............... 2 Personal Safety During Assembly ................... 2 Obtaining Service ........................2 Before You Begin ................... 4 Unpacking the Equipment ....................... 4 Preparations ....................5 Required Tools ......................... 5 Installation Requirements ...................... -
Page 4: Before You Begin
If any items are missing, contact the dealer from whom you purchased the unit. For more information, refer to Obtaining Service . The S3.15 is shown throughout these assembly instructions. Before You Begin page 4... -
Page 5: Preparations
S3.15/S3.19 Leg Press Option Assembly Instructions Installation Requirements • Most fasteners are -inch unless otherwise noted. To find out the length of a particular fastener, Follow these installation requirements when measure its shank (the long, narrow part beneath assembling the unit: the head). -
Page 6: Assembly Instructions
S3.15/S3.19 Leg Press Option Assembly Instructions Assembly Instructions Seat Bracket Assembly of the Leg Press Option takes professional Support installers about hour to complete. If this is the first time you have assembled this type of equipment, plan Footrest on significantly more time. -
Page 7: Attach The Leg Press To The Main Unit
2 -inch hex head bolts two flat washers Note: If the Multi-Hip is already attached to the S3.15 then, skip step C. You will need to remove two washers and locknuts to attach the Leg Press. 2 - 2 " bolts... -
Page 8: Assemble The Seat Pads And Handle
S3.15 Leg Press Option Assembly Instructions 2. Assemble the Seat Pads and 2 - 1" zinc bolts Handle 2 - zinc washers A. Thread the T-handle into the Seat Frame and T-handle wrench tighten. B. Determine which Seat Pad you want to use as the Back Pad Back Pad. -
Page 9: Install The Leg Press Arm And Footrest
S3.15 Leg Press Option Assembly Instructions 3. Install the Leg Press Arm and Footrest A. Attach the Leg Press Arm to the Leg Press using -inch x 3 -inch bolt Leg Press Arm two flat washers -inch locknut Tighten the fasteners so that the Leg Press Arm is secure and pivots easily. -
Page 10: Install The Leg Press Cable
S3.15 Leg Press Option Assembly Instructions 4. Install the Leg Press Cable A. Lower the Leg Press Arm and rest it on the floor. B. Attach the Leg Press Cable 130193 to the base of Lower the Leg the Leg Press using Press Arm. - Page 11 S3.15 Leg Press Option Assembly Instructions D. Attach the end of the Leg Press Cable to the S3.15 Cable using one 1-inch zinc hex head bolt one locknut E. Remove the 3 -inch pulley from the Leg Press Arm. Feed the cable around it and reattach it using...
-
Page 12: Warranty
Satisfactory proof of purchase is required in all cases. For any product described above that fails to conform to its warranty, Precor will provide, at their option, one of the following: (1) repair; (2) replacement; or (3) refund of the purchase price. Precor Limited Warranty service Conditions and Restrictions may be obtained by contacting the authorized dealer from whom you purchased the item. - Page 14 Please detach and mail in the warranty registration within ten days of purchase.
-
Page 16: Specifications
Precor is widely recognized for its innovative, award winning designs of exercise equipment. Precor aggressively seeks U.S. and foreign patents for both the mechanical construction and the visual aspects of its product design. Any party contemplating the use of Precor’s product designs is hereby...