Table of Contents
Advertisement
Quick Links
Advertisement
Table of Contents

Related Manuals for Fantec XMP600


Summary of Contents for Fantec XMP600
- Page 1 ENGLISH...
-
Page 2: Table Of Contents
Table of Contents 1. Introduction .......................... 3 1.1 Preface ........................3 1.2 Packing List ......................... 4 1.3 Cautions ........................4 1.4 Connection ........................6 1.5 Power On / Off ......................11 1.6 Menu Language ......................11 1.7 HDD Format ......................12 2. -
Page 3: Introduction
1. Introduction 1.1 Preface Thank you very much for purchasing XMP600. We hope you will enjoy using it as a great home entertainment partner. This player has the following functionality. A/V Output • HDMI V1.3 for high-definition video and digital audio •... -
Page 4: Packing List
The actual contents in the package might be different from the packing list in this manual. 1.3 Cautions The XMP600 design and manufacture has your safety in mind. In order to safely and effectively use this player, please read the following before usage. - Page 5 1.3.4 Repair If the player has a problem, you should take it to an appointed repair center and let the specialists do the repair, never repair the player yourself, you might damage the player or endanger yourself or your data. 1.3.5 Disposing of the Player When you dispose of the player, be sure to dispose it appropriately.
-
Page 6: Connection
1.4 Connection 1.4.1 Connecting the Power Supply (1) Follow the picture and connect the AC adaptor to the player’s DC IN jack; (2) Follow the picture and plug in the AC adaptor to the power outlet. 1.4.2 Connecting to a PC (1) Make sure the player is powered on;... - Page 7 1.4.3 Connecting a USB Device (1) Make sure the player is powered on; (2) Plug in the USB stick or USB HDD etc. to the USB HOST port of this player. In this way, you can browse contents on the USB device. 1.4.4 Connecting a Memory Card Memory card can be used by inserting to the card slot (1) Follow the picture to insert the memory card to the card slot properly;...
- Page 8 1.4.5 Connecting to a TV 1.4.5.1 A/V OUT (1) Follow the picture and plug in the 3 color connector to the player’s A/V OUT jack; (2) Follow the picture and plug in the 3 color connector to the TV’s A/V IN jack. In this way, you can enjoy the content in the player on TV or other display devices.
- Page 9 1.4.5.3 Y/Pb/Pr Component OUT (1) Follow the picture and plug in the 3 color connector to the player’s Y/Pb/Pr jack; (2) Follow the picture and plug in the 3 color connector to the TV’s Y/Pb/Pr jack. Audio Connection while using Y/Pb/Pr Video out: First method: use the audio output from the A/V OUT jack;...
- Page 10 1.4.6 Connecting to an Digital Amplifier (1) Follow the picture and plug in the Toslink connector on your optical fiber to the player’s S/PDIF Optical jack; (2) Follow the picture and plug in the other connector on your optical fiber to the digital audio device (digital amplifier or decoder).
-
Page 11: Power On / Off
1.4.8 Connecting to a WLAN (1) Make sure the player is powered on; (2) Plug the Wireless LAN USB Adapter (i.e. Wi-Fi USB Dongle) to the USB HOST port of the player. Note: The Wi-Fi Dongle is an optional accessory sold separately. (Please refer to ‘3.3 Changing Network Settings’... -
Page 12: Hdd Format
1.7 HDD Format For users who wish to install a new SATA HDD into the player, please refer to the following procedures to format the hard disk on the player before usage. Note: This page can be also accessed via Setup->System->HDD Format menu. Step 1: Select OK on the Warning page, press ENTER to confirm. -
Page 13: About The Player
2. About the Player 2.1 Remote Control All procedures in this manual can be carried out using the remote control buttons. See the following description for details on each button and its function: 1. STANDBY 2. MUTE 3. DVD 4. BROWSER 5. - Page 14 VOL-/VOL+ Press to decrease the volume. Press to fast rewind the current playback. Press repeatedly to select speeds. PLAY/PAUSE Press to begin playback or pause the current playback. HOME Press to enter the home screen. Navigational Press the arrow buttons to select menu options, and the ENTER buttons button to confirm.
-
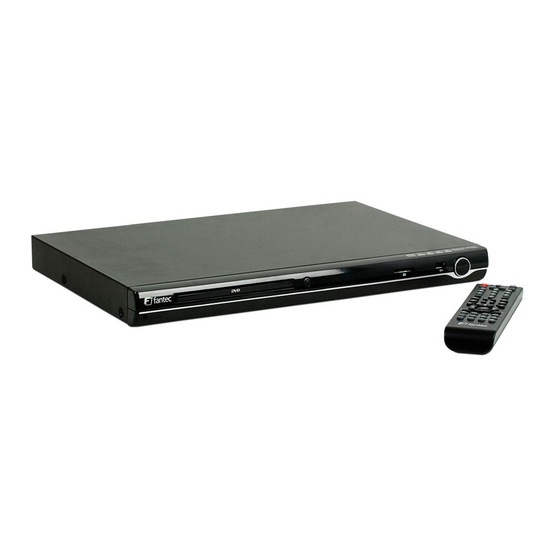
Page 15: Front Panel
2.2 Front Panel 1. Power indicator 2. DVD ROM tray 3. Eject button 4. Display 5. Memory card slot 6. USB Host port (A-Type) 7. Function key (PLAY-PAUSE/ PREV/ STOP/ NEXT) 2.3 Rear Panel 1. Y/Pb/Pr OUT jack 2. A/V OUT jack 3. -
Page 16: Setup Menu
3. Setup Menu The Setup menu allows you to personalize and configure the preferences for your player. To select a Setup option: Select the Setup icon on the home screen, or press the SETUP button on the remote control. Use the LEFT/RIGHT navigational buttons to select an option, and then press ENTER. There are five Setup options, including Audio, Video, Network, System, and MISC. -
Page 17: Changing Video Settings
3.2 Changing Video Settings Use this menu to configure video settings. Aspect Ratio Pan Scan 4:3: Display a wide picture on the entire screen and cuts off the redundant portions. Select when a standard 4:3 TV is connected. Letter Box 4:3: Display a wide picture with two black borders on the top and bottom of 4:3 screen. -
Page 18: Changing Network Settings
1080P 24FPS Choose this option to enable or disable 1080P 24HZ support. A TV set with 1080P 24HZ (24P) mode is needed. Screen Size Choose this option to change the display size. Seamless Playback Uninterrupted playback of video and audio files (the naming of the files should be alike “abc01.AVI”... - Page 19 Wireless Setup Selecting a connection profile This player can store up to three wireless network connections. Press ENTER to go to next step, press RETURN to cancel, and press PLAY to connect. Get Connection Mode Choose between Infrastructure (AP) and Peer to Peer (Ad Hoc). Press ENTER to go to next step, and press RETURN to cancel.
- Page 20 Get SSID Name Press ENTER to go to next step, press RETURN to cancel, and press SELECT to refresh the SSID list. Note: In the Security list, WEP (Wired Equivalent Privacy) and WPA (Wi-Fi Protected Access) means the network is encrypted, i.e. an encryption key is needed to access the network.
- Page 21 Test connection The testing process will take for a while, please be patient to wait. If the test is ok, the network information (Profile Name, IP address, Subnet Mask, Gateway, etc.) will be displayed on the screen. Peer to Peer (Ad Hoc) Peer to Peer mode, which is also called Ad Hoc mode or computer-to-computer mode, is used to connect wireless clients directly together, without the need for a wireless router or access point.
-
Page 22: Changing System Settings
3.4 Changing System Settings Use this menu to configure system settings. Menu Language Select to choose the OSD (On-Screen Display) language. (English, Espanol, French, German, Italiano, Dutch, Russky, Polski, Cesky, Slovensky, Romania, Portugees, Hebrew, Magyar, Slovenscina) Text Encoding Select to set the text encoding option (subtitle display). System Update Select Extension Package Upgrade to update extension files for BT download, NAS, and Web server. -
Page 23: Miscellaneous
Angle Mark Choose between Off / On to display/hide the DVD file’s angle mark. HDD Format Select to format the built-in HDD. Note: Please take care that all data on the hard disk will be removed after formatting. System Info Select to view system information (firmware version, HDD info, Mac address, etc.) Restore Default Select to restore factory defaults. -
Page 24: Browser Menu
Background Music Select to set the background music options while view pictures: Off / Folder / Playlist. Screen Saver Select to turn on / off screen saver. Movie Preview Select to turn on / off movie preview in the browser menu. Subtitle on-off Turn on/off subtitle 4. -
Page 25: Browsing All
4.1 Browsing All In this mode, all folders and supported contents (music, photos, and movies) will be displayed. Note: • Please refer to chapter ‘9.1 Specifications‘for more about the supported content formats. • Music tracks might not be able to played continously under All filter, please switch to the Music filter instead. -
Page 26: Browsing Photos
4.3 Browsing Photos In this mode, all folders and supported image files in current directory will be displayed. The following buttons can be used to control music playback. Button Function PLAY Begin playback. PREV / NEXT View the previous or next photo. LEFT / RIGHT Rotate a photo in any angle. -
Page 27: Dvd Playback
REPEAT Set repeat options: Title, Chapter, and All. ZOOM IN / OUT Zoom in / out the image. INFO Hide or display the information bar during playback. GOTO Display playback search menu. Set the beginning and end points of a section to repeat. ANGLE Change the view angle during DVD (with multi-angle) playback. -
Page 28: A/V Streaming Via Network
4.6 A/V Streaming via Network You can stream the media files shared on the home network (Ethernet or WLAN). Please refer to ’3.3 Changing Network Settings’ for details about network settings. There are two ways to locate media files shared on your local network in the Network menu. One is to browse through Workgroup;... - Page 29 4.6.2 Browsing through ‘My_Shortcuts’ You can also set ‘Specific File Server IP’ and access it from ‘My_Shortcuts’ in the menu. Press the MENU button and a popup menu appears. Select Add to open a popup menu where you can input Net User ID (Username), Net Password, Domain, Host Name, and Specific File Server IP of destination PC.
-
Page 30: A/V Streaming Via Upnp-Server
4.7 A/V Streaming via UPnP-server A built-in UPnP (Universal Plug and Play) client has been integrated on the system, which enables the player to auto-detect UPnP Media Servers on the network to browse and stream media files from them. 4.7.1 Installing UPnP Media Server on your PC There’re a lot of free and commercial UPnP Media Server software, such as Windows Media Connect, Windows Media Player 11, XBMC Media Center (Linux/Mac/Windows), MediaTomb (Linux), etc. -
Page 31: Renaming / Deleting Files
4.7.3 Streaming Media on your Player Connect your player to the home network (LAN or WLAN). Visit Browser - > UPnP menu on the player, select the UPnP-server, and press ENTER. Then you can browse the media library shared by Windows Media Player 11. Note: •... -
Page 32: Managing The Playlist
4.9 Managing the Playlist This player supports the playlist function, which allows you to add your favorite contents on local HDD to the playlists (All, Music, Photos, and Movies), and enjoy them at any time. 4.9.1 Adding files to the playlist Select the favorite file you wish to add, press the SELECT button, and the file will be marked. -
Page 33: File Copy Menu
5. File Copy Menu Select the File Copy icon from the home screen to enter the File Copy menu, which allows you to copy files between USB devices, Local HDD, Data DVD (read only), and Network. The following buttons can be used under the file copy menu. Button Function UP / DOWN... -
Page 34: Music Library
6.1 Music Library Use the left / right button on the remote control to select the Music tab. Press the up / down button to select from Update, Search, All, Artist, Genre, and Album. And press the enter button to confirm. Select to update and synchronize all the music stored on the internal HDD Update to the library. - Page 35 Artist Select to list all the music files by artist. Press the up / down button to select the artist, and press the enter button to confirm. Genre Select to list all the music files by genre. Press the up / down button to select the genre, and press the enter button to confirm.
-
Page 36: Photo Library
Quick-Search You can also press the right button to turn on a Quick-Search bar while browsing music files in the library. Press the up / down button to select characters on the Quick-Search bar, and press the enter button to confirm. The music files with the specific characters will be displayed. - Page 37 Select to update and synchronize all the photos stored on the internal Update HDD to the library. Search Select to search for photos by their names. Use the navigational buttons to select, and press the enter button to confirm. Select OK and press the enter button, and then the files you desired will be displayed on the screen.
-
Page 38: Movie Library
Quick-Search You can also press the right button to turn on a Quick-Search bar while previewing photos in the library. Press the up / down button to select characters on the Quick-Search bar, and press the enter button to confirm. The photo files with the specific characters will be displayed. - Page 39 Search Select to search for movies by their names. Use the navigational buttons to select, and press the enter button to confirm. Select OK and press the enter button, and then the files you desired will be displayed on the screen. Select to list all the movies in the library.
- Page 40 Year Select to list all the movies by year. Press the up / down button to select the year, and press the enter button to confirm. Quick-Search You can also press the right button to turn on a Quick-Search bar while previewing movies in the library.
-
Page 41: Internet Radio
7. Internet Radio This player integrates the SHOUTcast free Internet radio function. Select the Internet Radio icon on the main interface to enter this menu. Note: • Make sure the player is connected properly to a LAN or WLAN with Internet access, please refer to ‘3.3 Changing Network Settings’... -
Page 42: Downloads
8. Downloads Select the P2P Share icon on the main menu. You can see the status of torrents download progress and configure the BT download settings in this menu. Press LEFT/RIGHT button to enter into download menu and BT setup menu. Add a new torrent Locate your torrent file in Browser menu,then press MENU button to add the torrent to start downloading. - Page 43 PAUSE Press to pause the download. Press to start download. PLAY Press to stop the download. STOP RETURN Return to the previous menu. BT setup Menu In the BT Setup menu, you can configure the following settings. Use UP/DOWN and ENTER to change the settings.
-
Page 44: Nas Function (Samba)
9. NAS Function (samba) This player can be used as a NAS (Network-Attached Storage) device. It can be attached to the home network via either Ethernet or WLAN. This feature allows storing and retrieving large amounts of data more affordably than ever before. When the network connection is done correctly, please enable BitTorrent and SAMBA in the setup menu to use the NAS function (refer to 3.4 Changing System Settings for more details), and then type: \\IP Address in the Run window (click Run in the start menu) or the address bar... -
Page 45: Ims (Internet Multimedia Service) Menu
10. IMS (Internet Multimedia Service) Menu This feature is additional function. All contents and services under this feature are provided by third-party service providers, our company does not offer any contents and services of this feature and is not responsible for any contents and services provided under this feature. Our company is not responsible for any operational stability of the contents and services, for example, if you cannot access certain web site for video streaming or news broadcast, or the content of a web site has been changed etc, are all responsible and control by the third-party... -
Page 46: Appendixes
12. Appendixes 12.1 Specifications I/O INTERFACES SUPORTED: 3.5’’ SATA HDD USB 2.0 HOST port x 3 (compatible to USB 1.1) Memory Card slot (supports SD/MMC/MS/MS Pro) USB 2.0 DEVICE port (connecting to PC) Composite (CVBS) A/V jack Component Y/Pb/Pr jack Scart Jack HDMI V1.3 interface DVD Drive... -
Page 47: Frequently Asked Questions
12.2 Frequently Asked Questions Question 1. When I try to disconnect the USB device, I keep on getting “The device ‘Generic volume’ cannot be stopped right now. Try stopping the device again later.” message, what should I do? Answer: Close any program that might be accessing data on the player, including Windows® Explorer. If it does not work, close all programs and wait for another 20 seconds, then try the green arrow icon again. - Page 48 Question 7. Why is there no sound on movie or music playback when using Y/Pb/Pr component output? Answer: Y/Pb/Pr output is a video output only, and does not include sound signals. When using Y/Pb/Pr output, please plug the A/V OUT or the S/PDIF jack to output sound. Question 8.
-
Page 49: Copyrights And Trademarks
12.3 Copyrights and Trademarks Copyrights All rights reserved. No part of this manual may be reproduced, or transmitted in any form or by any means, whether by electronically or mechanically, without the express written permission from the copyright holder. Copyrighted materials, such as software, music files, or movies, are protected by local law, and may not be illegally copied or used without permission from the copyright owner. - Page 50 GNU GENERAL PUBLIC LICENSE Version 2, June 1991 Copyright (C) 1989, 1991 Free Software Foundation, Inc. 51 Franklin Street, Fifth Floor, Boston, MA 02110-1301, USA Everyone is permitted to copy and distribute verbatim copies of this license document, but changing it is not allowed. Preamble The licenses for most software are designed to take away your freedom to share and change it.
- Page 51 making the program proprietary. To prevent this, we have made it clear that any patent must be licensed for everyone's free use or not licensed at all. The precise terms and conditions for copying, distribution and modification follow. TERMS AND CONDITIONS FOR COPYING, DISTRIBUTION AND MODIFICATION 0.
- Page 52 are not derived from the Program, and can be reasonably considered independent and separate works in themselves, then this License, and its terms, do not apply to those sections when you distribute them as separate works. But when you distribute the same sections as part of a whole which is a work based on the Program, the distribution of the whole must be on the terms of this License, whose permissions for other licensees extend to the entire whole, and thus to each and every part regardless of who wrote it.
- Page 53 provided under this License. Any attempt otherwise to copy, modify, sublicense or distribute the Program is void, and will automatically terminate your rights under this License. However, parties who have received copies, or rights, from you under this License will not have their licenses terminated so long as such parties remain in full compliance.
- Page 54 such case, this License incorporates the limitation as if written in the body of this License. 9. The Free Software Foundation may publish revised and/or new versions of the General Public License from time to time. Such new versions will be similar in spirit to the present version, but may differ in detail to address new problems or concerns.