Table of Contents
Advertisement
Quick Links
Advertisement
Table of Contents

Related Manuals for Fantec 3DAluPlay


Summary of Contents for Fantec 3DAluPlay
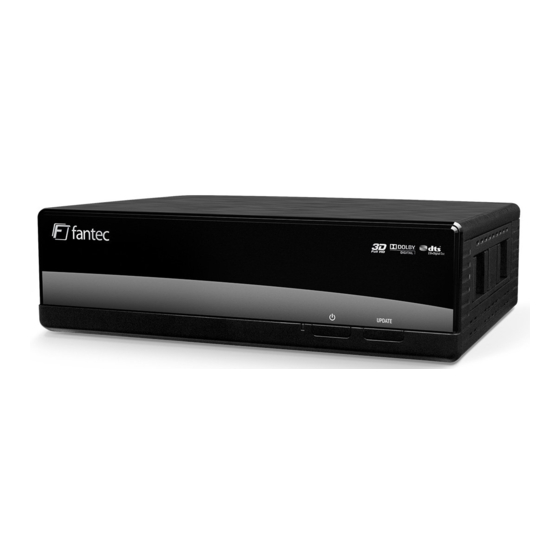
- Page 1 Fantec 3DAluPlay Manual...
-
Page 2: Table Of Contents
Table of Contents 1. Introduction .......................... 3 1.1 Preface ......................... 3 1.2 Packing List ........................4 1.3 Cautions ........................4 1.4 Connection ........................6 1.5 View ..........................9 1.6 First steps ........................10 1.7 HDD Format ....................... 10 2. About the Player ......................... 11 2.1 Remote Control ...................... -
Page 3: Introduction
1. Introduction 1.1 Preface Thank you very much for purchasing the FANTEC 3DAluPlay media player. We hope you will enjoy using it as a great home entertainment partner. This player has the following functionality. A/V Output HDMI 1.4 for high-definition video and digital audio ... -
Page 4: Packing List
Note: The actual contents in the package might be different from the packing list in the manual. 1.3 Cautions The FANTEC 3DAluPlay design and manufacture has your safety in mind. In order to safely and effectively use this player, please read the following before usage. - Page 5 1.3.2 Power The player’s power voltage: DC 12V. When using this player, please connect the supplied AC adapter or AC adapter cable to the player’s power jack. When placing the adapter cable, make sure it can not get damaged or be subject to pressure.
-
Page 6: Connection
1.4 Connection 1.4.1 Connecting the Power Supply Follow the picture and connect the AC adaptor to the player’s DC IN jack; 1.4.2 Connecting a USB Device (1) Make sure the player is powered on; (2) Plug in the USB stick, USB DVD or USB HDD etc. to the USB HOST port of this player. In this way, you can browse contents on the USB device. - Page 7 1.4.3 Connecting to a TV 1.4.3.1 A/V OUT / YPbPr OUT (1) Follow the picture and plug in the connector to the player’s jack; (2) Follow the picture and plug in the connector to the TV’s IN jack. In this way, you can enjoy the content in the player on TV or other display devices. Note: The A/V and YPbPr cables are optional accessories sold separately.
- Page 8 1.4.4 Connecting to a Digital Amplifier (1) Follow the picture and plug in the connector of your optical fiber / electrical coaxial cable to the player’s S/PDIF jack; (2) Follow the picture and plug in the other connector on your optical fiber / electrical coaxial cable to the digital audio device (digital amplifier or decoder).
-
Page 9: View
1.4.6 Connecting to a wireless network (1) Make sure the player is powered on; (2) Plug the Wireless LAN USB Adapter (i.e. Wi-Fi USB Dongle) to the USB HOST port of the player. Note: The Wi-Fi Dongle is an optional accessory sold separately. (Please refer to ‘3.1.4 Changing Network Settings’... -
Page 10: First Steps
1.6 First steps At the time if you connect the player to the TV, you can make first step settings: Note: You can adjust these settings at any time in the setup menu. 1.7 HDD Format For users who wish to install a new SATA HDD into the player, at first you have to format the hard disk. -
Page 11: About The Player
2. About the Player 2.1 Remote Control All procedures in this manual can be carried out using the remote control buttons. See the following for details on each button and its function: 1. Power 2. Numeric buttons 3. GOTO 4. Slow 5. - Page 12 Button Function Power Press to enter standby mode or wake up. Numeric buttons Press to enter channel numbers or numeric input when changing settings. GOTO Press to jump to a specific point on a title. Specify the point using Title, Chapter and Time. Slow Press to play back in slow motion.
-
Page 13: Main Functions
3. Main Functions The Setup menu allows you to personalize and configure the preferences for your player. 3.1 Setup Menu To select a Setup option: Select the Setup icon on the home screen, or press SETUP menu on the remote control. Use the UP/DOWN navigational buttons to select an option, and then press OK. - Page 14 Screen Saver Select to turn on / off screen saver. MiniKBD Language Select desired Keyboard layout. Scan storage Select to set the scan mode of media library and keep media library up to date. Resume Play Select to turn on / off Resume Play. Format Select to format your HDD BD Menu...
- Page 15 SPDIF Output Choose among LPCM and RAW. Surround Sound Choose among undefined, 5.1 Channel and HD Audio. Lip Sync Choose among Lip Sync Auto, Lip Sync Manual and off. Note: In raw mode, Dolby TrueHD, Dolby Digital Plus, Dolby Digital and DTS sound can be by passed to the HDMI TV or Digital amplifier.
- Page 16 1080p 24Hz Choose this option to enable or disable 1080P 24HZ support. A TV set with 1080P 24HZ (24P) mode is needed. Play the directory Playback DVD/Blu-ray with folder structure. Deep Color Help to perform more detailed level of color depth, make continuous color change smoother.
- Page 17 This player can store up to three wireless network connections. Press OK to connect, press Back to cancel, and press Zoom to modify the parameters of the connection, press Red button to choose WPS (AP). Infrastructure (AP) Infrastructure mode is used to connect computers with wireless network adapters, also known as wireless clients, to an existing wired network with the help from wireless router or access point.
- Page 18 Step 2: Enter WEP / WPA key. Press OK to input encryption keys via the virtual keyboard. Press the navigational buttons to select, OK to input, FF to move cursor left, FR to move cursor right, Zoom to switch between uppercase and lowercase, Stop to delete a character, Red to make more symbols available, Green to change the language of the virtual keyboard, OK to confirm and to start testing the connection.
- Page 19 PPPOE Setup Input the ADSL accountant and password in this menu, system will obtain IP address automatically from the server based on PPPOE protocol. Step 1: Select the connection interface, wired or wireless Step 2: Press Right button to input your ADSL accountant Step 3: Press Right button to input your password and start to test the connection.
- Page 20 3.1.5 Subtitle Settings to configure the display of subtitles 3.1.6 Miscellaneous Use this menu to adjust miscellaneous settings. Version Info This tab shows you information about the firmware installed and about the material components of your player. Network Info This tab shows you information about your network, MAC Address, IP address Gateway, Subnet.
-
Page 21: Movie Library
3.2 Movie Library Select the Movies icon on the main menu to enter into movie library interface. Only supported files will be displayed. Please refer to chapter ‘5. Appendixes’ for more details about the supported file formats. 3.2.1 Movie Library Options In movie library, press Option button to display the option menu, you can get following functions though the option menu. - Page 22 3.2.2 Movie Playback Control You can access the following functions during playback. Button Function Play/Pause Pause or resume the current playback. Prev/Next View the previous or next file/chapter. FR/FF Fast rewind or fast forward. Press repeatedly to select the speed. Slow Play back in slow motion.
-
Page 23: Photo Library
3.3 Photo Library Select the Photo icon on the main menu to enter into photo library interface. Only supported files will be displayed. This player supports HD JPEG, JPG, BMP, GIF, TIF and PNG files. 3.3.1 Photo Library Options In photo library, press Option button to display the option menu, you can get following functions though the option menu. - Page 24 3.3.2 Photo Playback Control You can access the following functions during photo playback. Button Function Prev / Next View the previous or next photo. Up / Down Rotate a photo in any angle. Option Display or hide the option menu during playback. Stop Stop playback.
-
Page 25: Music Library
3.4 Music Library Select the Music icon on the main menu to enter into music library interface. Only supported files will be displayed. This player supports MP3, OGG, WMA, WAV, AAC and FLAC audio files. 3.4.1 Music Library Options In music library, press Option button to display the option menu, you can get following functions though the option menu. - Page 26 3.4.2 Music Playback Control You can access the following functions during music playback. Button Function Play/Pause Begin/Pause playback. FR / FF Fast rewind or fast forward. Press repeatedly to select the speed. Prev / Next View the previous or next movie. Option Display or hide the option menu during playback.
-
Page 27: Movie Playback
3.5 3D Movie Playback This player supports real 3D movie playback and brings you into the world of 3D. Next to this player, a 3D television, a pair of 3D glasses and a HDMI 1.4 cable are required. To enjoy a 3D movie follow below steps: Step 1: Navigate to the file and press Play button to start movie playback. -
Page 28: File Manager
3.6 File Manager The file manager allows you to browse and play music, photo and movie files stored on an internal HDD, external USB device, or network. 3.6.1 File Manager Options In file manager, press Option button to display the option menu, you can get following functions through the option menu. - Page 29 3.6.2 A/V Streaming via Network You can stream your media files shared on the home network. Please refer to ’3.1.4 Changing Network Settings’ for more details on network settings. There are two ways to locate media files shared on your local network in the Network menu. One is to browse through workgroup;...
- Page 30 3.6.2.2 Browsing though ‘My_Shortcuts’ You can also set ‘Specific File Server IP’ and access it from ‘My_Shortcuts’ in the menu. Press the Green button and a popup menu appears. Select Add to open a popup menu where you can input Label, Net User ID, Net Password, Domain, Host Name, and Specific File Server IP.
- Page 31 3.6.3.1 Installing UPnP Media Server on your PC There’re a lot of free and commercial UPnP Media Server software, such as Windows Media Connect, Windows Media Player 11, XBMC Media Center (Linux/Mac/Windows), MediaTomb (Linux), etc. Please install one of them on your computer. In the following chapters, we will take Windows Media Player 11 on Microsoft Windows XP SP2 for an example.
-
Page 32: Playlist Management
3.6.3.3 Streaming Media on your Player Connect your player to the home network (LAN or WLAN). Visit Browser - > UPnP menu on the player, select the UPnP-server, and press OK. Then you can browse the media library shared by Windows Media Player 11. Note: Make sure your player and your computer are on the same local area network and subnet. - Page 33 3.7.2 Playback music playlist Enter the music library, press Option button and choose Playlists to show your music playlists. 3.7.3 Create album playlist To create an album playlist, please enter the HDD via File Manger. The press the green button on the remote control and select Multiple Select option. In the file explorer you can navigate by Up/Down/Left/Right/Next/Prev button and add or delete files to the File List by the Play/Pause button.
-
Page 34: Copy Und Delete Function
3.8 Copy und Delete Function 3.8.1 Copy under File Manager To start the copy function, please enter the HDD via File Manger. The press the green button on the remote control and select Multiple Select option. In the file explorer you can navigate by Up/Down/Left/Right/Next/Prev button and add or delete files to the File List by the Play/Pause button. -
Page 35: Internet Media
3.8.2 Delete under File Manager To start the Delete function, please enter the HDD via File Manger. The press the green button on the remote control and select Multiple Select option. In the file explorer you can navigate by Up/Down/Left/Right/Next/Prev button and add or delete files to the File List by the Play/Pause button. -
Page 36: Using The Auto Start Function
3.10 Using the Auto Start function The auto start function enables automatic playback of video, music or photo files directly after switching on the device. You can store the files on on an USB drive . The repeat mode for video playback (One file, All files, Repeat off) can be set or changed during the playback and is preserved even after rebooting the device. -
Page 37: Network Server And Client
4. Network Server and Client This player can be used either as a SAMBA Server or as a FTP client. 4.1 Samba (SMB) Server 4.1.1 SAMBA Client You can stream media files shared on the home network. Please refer to ’3.6.2 A/V Streaming via Network’... -
Page 38: Upgrading The Firmware
5. Upgrading the Firmware The firmware is the operating system (OS) installed on the device. Firmware upgrades can bring new features, improvements and bug fixes. Please refer to USB Upgrade in chapter ‘3.1.5 Miscellaneous’ for more details. You can also use the following method to upgrade the firmware: Copy ‘install.img’... - Page 39 AUDIO FORMATS SUPPORTED: MP3, OGG, WMA, WAV, FLAC (32 – 320 kbps) Stereo/Dolby Digital AC3 5.1 (pass-through & downmix to stereo), Dolby Digital 5.1 (pass-through & downmix to stereo), Dolby Digital Plus 7.1 (pass-through), DTS Digital Surround 5.1 & 7.1 (pass-through & downmix to stereo) PICTURE FORMATS SUPPORTED: ...
-
Page 40: Frequently Asked Questions
7. Frequently Asked Questions Question 1. When I try to disconnect the USB device, I keep on getting “The device ‘Generic volume’ cannot be stopped right now. Try stopping the device again later.” message, what should I do? Answer: Close any program that might be accessing data on the player, including Windows® Explorer. If it does not work, close all programs and wait for another 20 seconds, then try the green arrow icon again. - Page 41 Question 6. Why when I switch to Y/Pb/Pr 480p, 576p, 720p, 1080i, and 1080p, does the TV screen display an unwatchable picture? Answer: Please check if your TV supports Y/Pb/Pr 480p, 576p, 720p, 1080i, and 1080p output, if your TV does not support, please use the A/V signal display instead, press the TV SYSYEM button on the remote control, then switch the TV’s video input to NTSC or PAL.
-
Page 42: Copyrights And Trademarks
Question 11. I am using the 802.11n Wi-Fi dongle with an 802.11n wireless router, why the speed is still 802.11g 54Mbps rather than 300Mbps? Answer: The IEEE 802.11n Draft standard prohibits using high throughput with WEP or TKIP as the unicast cipher. -
Page 43: Gpl Statement
10. GPL Statement This product contains free software which is licensed under the GNU General Public License. After you purchase this product, you may procure, modify or distribute the source code of the GPL/LGPL software that is used in this product. To obtain a copy of our open source software, please contact our support center and we will provide you with a CD-ROM of the source code that is used, charging only the actual expense involved. - Page 44 To protect your rights, we need to make restrictions that forbid anyone to deny you these rights or to ask you to surrender the rights. These restrictions translate to certain responsibilities for you if you distribute copies of the software, or if you modify it. For example, if you distribute copies of such a program, whether gratis or for a fee, you must give the recipients all the rights that you have.
- Page 45 You may charge a fee for the physical act of transferring a copy, and you may at your option offer warranty protection in exchange for a fee. 2. You may modify your copy or copies of the Program or any portion of it, thus forming a work based on the Program, and copy and distribute such modifications or work under the terms of Section 1 above, provided that you also meet all of these conditions: a) You must cause the modified files to carry prominent notices stating that you changed the...
- Page 46 Sections 1 and 2 above on a medium customarily used for software interchange; or, c) Accompany it with the information you received as to the offer to distribute corresponding source code. (This alternative is allowed only for noncommercial distribution and only if you received the program in object code or executable form with such an offer, in accord with Subsection b above.) The source code for a work means the preferred form of the work for making modifications to it.
- Page 47 through you, then the only way you could satisfy both it and this License would be to refrain entirely from distribution of the Program. If any portion of this section is held invalid or unenforceable under any particular circumstance, the balance of the section is intended to apply and the section as a whole is intended to apply in other circumstances.
- Page 48 NO WARRANTY 11. BECAUSE THE PROGRAM IS LICENSED FREE OF CHARGE, THERE IS NO WARRANTY FOR THE PROGRAM, TO THE EXTENT PERMITTED BY APPLICABLE LAW. EXCEPT WHEN OTHERWISE STATED IN WRITING THE COPYRIGHT HOLDERS AND/OR OTHER PARTIES PROVIDE THE PROGRAM "AS IS" WITHOUT WARRANTY OF ANY KIND, EITHER EXPRESSED OR IMPLIED, INCLUDING, BUT NOT LIMITED TO, THE IMPLIED WARRANTIES OF MERCHANTABILITY AND FITNESS FOR A PARTICULAR PURPOSE.