
Related Manuals for Toro LX466 13AT61RH044


Summary of Contents for Toro LX466 13AT61RH044
- Page 1 LX466 Lawn Tractor Model No. 13RT61RH044 Model No. 13RT61RH244 Model No. 13AT61RH048 Register your product at www.Toro.com Original Instructions (EN) 769-03480 (11/27/07)
-
Page 2: Customer Support
Choose from the options below: Visit www.toro.com for many useful suggestions. Click on Customer Care in the Homeowners section of the Toro Solutions Center and help is immediately available. N}te Searc;h_... -
Page 3: Section 1: Important Safeoperation P Ractices
SECTION 1: IMPORTANT SAFEOPERATION P RACTICES WARNING: This symbol points out important safety instructions which, if not followed, could endanger the personal safety and/or property of yourself and others. Read and follow all instructions in this manual before attempting to operate this machine. Failure to comply with these instructions may result in personal injury. -
Page 4: Slope Operation
21. Never l eave a running machine unattended. Always t urnoffblade(s), place transmission in Mow up and down slopes, not across. Exercise neutral, setparking brake, s topengine andremove extreme caution when changing direction on keybefore dismounting. slopes. 22. Useextra carewhenloading or unloading t he Watch for holes, ruts, bumps, rocks, or other machine intoa trailer o rtruck.Thisunitshouldnot hidden objects. -
Page 5: Safe Handling Of Gasoline
CHILDREN Travel slowly and allow extra distance to stop. On slopes, the weight of the towed equipment may Tragic accidents can occur if the operator is not cause loss of traction and loss of control. alert to the presence of children. Children are often Do not shift to neutral and coast downhill. -
Page 6: General Service
12. For safety protection, frequently check components by an authorized Toro service dealer. and replace immediately with original equipment Check brake operation frequently as it is subjected manufacturer's (O.E.M.) parts only. - Page 7 SECTION 2: SAFETY ANDINSTRUCTIONAL LABELS Safety and instructional labels found on your lawn tractor are illustrated below (3/4 actual size). Always follow their instructions and heed their warnings. If you discover a safety label is scratched, damaged or missing, order a replacement immediately.
- Page 8 Part No. 112-1274 KEE PHANDS andFEET AWAY Pad No. 112-1266 Pad No. 112-5959 BUTTON EVERSE PUSH L KEEP SAFETY Part No. 112-1267 /_ DANGEPJPOISON Replace with Part No. 112-0865 SHIELD FLUSHEYES EYES. SULFURIC A CID IMMEDIATELY WITH CANCAUSE WATER. GETMEDICAL EXPLOSIVE BLINDNESS II1_ Upper Belt...
- Page 9 or a corner of a building... or a fence post 15 ° I,,IM...
-
Page 10: Section 4: Tractor Set-Up
SECTION 4: TRACTOR SET-UP Attaching theSteering Wheel NOTE: The positive battery terminal is marked Pos. (+). The negative battery terminal is marked Neg. (-). Tools Required • The positive cable (heavy red wire) is secured to (1) 1/2" socket wrench the positive battery terminal (+) with a carriage bolt The hardware for attaching the steering wheel has and hex nut at the factory. -
Page 11: Shippingbrace Removal
ShippingBrace Removal engine is off, set the parking brake and WARNING: Make sure the riding mower's remove the ignition key before removing the shipping brace. Locate the shipping brace, if present, and warning tag found on the right side of the cutting deck. See Figure 5. -
Page 12: Settingthegauge Wheels
SettingtheGauge Wheels Notethe position of the index hole used; then install the other rear gauge wheel into the Tools Required corresponding index hole of the other gauge wheel brackets. (2) 9/16" wrenches • If the gauge wheels have excessive clearance with Select the height position of the cutting deck by placing the surface below, lower the wheels to the index the deck lift lever in any of the six different cutting height... -
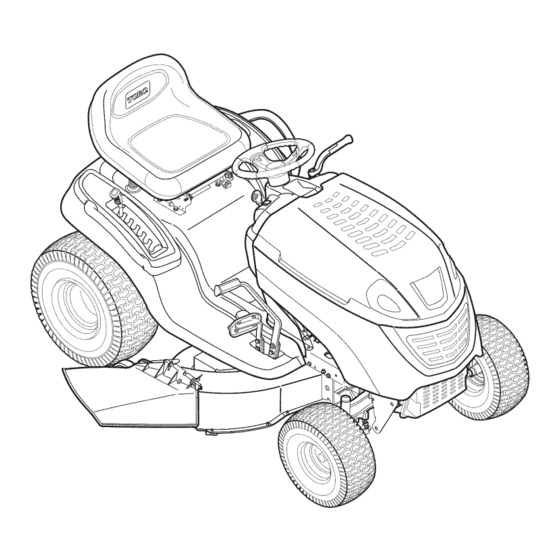
Page 13: Section 5: Know Your Lawntractor
SECTION 5: KNOW YOUR LAWNTRACTOR NOTE: Steering Wheel not shown for clarity, Figure 8 G Throttle Control A Systems Indicator Monitor/Hour Meter B PTO (Blade Engage) Lever H Ignition Switch Module Brake Pedal C Parking Brake Lever D Choke Control Drive Pedal E Cruise Control Lever K Deck Lift Lever... - Page 14 ThrottleControl L ever IgnitionSwitchModule The throttle control lever is WARNING: Never leave a running machine located on the left side of the unattended. Always disengage PTO, tractor's dash panel. This lever move the shift lever into Neutral, set the controls the speed of the engine. parking brake, stop the engine and remove When set in a given position, the the key to prevent unintended starting.
-
Page 15: Pto(Bladeengage) Lever
START position, the systems have the charging system checked by an authorized indicator monitor displays the battery's output, in volts, Toro service dealer. on its LCD for approximately five seconds, after which it displays an hour glass and the hours of tractor PTO(BladeEngage) Lever operation. -
Page 16: Cruise Control Lever
CruiseControl L ever ParkingBrakeLever The cruise control lever is located on To set the parking brake, fully press the brake pedal and push the parking brake lever down. Hold the lever steering wheel. Push the cruise control lever downward while the tractor dash panel, below the _i_1 down while taking your foot off the... -
Page 17: Section 6: Operating Y Our Lawntractor
(PTO) engaged. If the interlock system should ever malfunction, do not IMPORTANT: Mowing in reverse is not recommended. operate the tractor. Contact an authorized Toro service dealer. WARNING: Use extreme caution... -
Page 18: Starting The Engine
After resuming forward motion, return the key to the DrivingTheTractor NORMAL MOWING position. WARNING: Avoid sudden starts, IMPORTANT: The REVERSE CAUTION MODE will remain activated until: cessive speed and sudden stops. The key is placed in either the NORMAL WARNING: Do not leave the seat of the MOWING position or STOP position. -
Page 19: Driving On Slopes
DrivingOnSlopes Engaging the ParkingBrake Refer to the SLOPE GAUGE on page 9 to help determine To engage the parking brake: slopes where you may operate the tractor safely. Fully press the brake pedal and hold it while gently pushing the parking brake lever downward. Hold the parking brake lever down while removing slope in excess of 15 degrees (a rise of... -
Page 20: Moving Thetractormanually
UsingtheDeckLiftLever Moving TheTractorManually To raise the cutting deck, move the deck lift lever to the Your tractor's transmission is equipped with a left, then place it in the notch best suited for your hydrostatic relief valve for occasions when it is application. -
Page 21: Section 7: Making Adjustments
SECTION 7: MAKING ADJUSTMENTS Retighten the outer lock nut against the inner hex nut when proper adjustment is achieved. adjustments while the engine is running, ARNING: Never attempt to make any Sideto Side If the cutting deck appears to be mowing unevenly, a LevelingtheDeck side to side adjustment can be performed. -
Page 22: Steering Adjustment
Front tire toe-in can be measured as follows: Steering Adjustment Place the steering wheel in position for straight If the tractor turns tighter in one direction than the other, ahead travel. or if the ball joints are being replaced due to damage or In front of the axle, measure the distance wear, the steering drag links may need to be adjusted. -
Page 23: Section 8: Maintaining Your Lawntractor
Air cooled engines run hotter than engine repair establishment or individual. Warranty automotive engines. The use of repairs must be performed by an authorized Toro non-synthetic multi-viscosity oils (5W-30, service dealer. 10W-30, etc.) in temperatures above 40 ° F (4 °... -
Page 24: Changing The Engine Oil
Changing theEngineOil Changingthe 0il Filter After draining the oil, Change oil after the first 5 to 8 hours of use, and proceed as follows: every 50 hours thereafter. Change oil every 25 hours Before removing the when operating the engine under heavy load or in high old oil filter, clean temperatures. -
Page 25: Air Filter
Wash precleaner in liquid detergent and water to IMPORTANT: If leaks are present, have your engine clean. Squeeze dry in a serviced by an authorized Toro service dealer before clean cloth. Saturate with operating the tractor. engine oil. Remove ALL... -
Page 26: Spark Plugs
SparkPlugs Cleaning the Engine AndDeck Every two years or 100 hours of operation, remove the Any fuel or oil spilled on the machine should be wiped spark plugs, check condition, and reset the gap or off promptly. replace with a new plug as necessary. Do NOT allow debris to accumulate around the cooling fins of the engine or on any other part of the machine, Lift the tractor's hood by pivoting it forward. -
Page 27: Cutting Blades
SECTION 9: SERVICE Tires HexFlange Nut inflation pressure shown on the sidewall of the WARNING: Never exceed the maximum tire. The recommended operating tire pressure is approximately 10 psi for the rear tires and 14 psi for the front tires. Do not overinflate. Uneven tire pressure could cause the cutting deck to mow unevenly. -
Page 28: Cutting Deckremoval
IMPORTANT:When replacing the blade, be sure to install Leaving the tractor's parking brake engaged, the blade with the side of the blade marked "Bottom" remove the jumper cables, in reverse order of connection. (or with a part number stamped in it) facing the ground when the mower is in the operating position. -
Page 29: Changing Upper Deck Belt
11. Gently slide the cutting deck (from the right side) belt. See your Toro dealer to have this belt replaced. out from underneath the tractor. ©... -
Page 30: Section 10: Off-Season S Torage
SECTION 10: OFF-SEASON S TORAGE Clean and lubricate the tractor as instructed in Section 7: To empty the system, run the engine until the tank MAINTAINING YOUR LAWNTRACTOR on page 23 of this and system are empty. manual before storing for an extended period. WARNING: Drain fuel... -
Page 31: Section 11: Maintenance C Hart
SECTION 11: MAINTENANCE C HART Prior Before Every Every Every Every Every 10 Hours 25 Hours 50 Hours 100 Hours Each Use Season to Storing Check Safety Interlock System Clean Hood/Dash Louvers Check Engine Oil Level Service Air Cleaner Change Engine Oil & Filter Clean Battery Terminals Lube Front Axles and Rims Clean Engine Cooling Fins... -
Page 32: Section 12: Troubleshooting
SECTION 12: TROUBLESHOOTING Trouble Corrective Action Possible Cause(s) Engine fails to start PTO (Blade Engage) lever engaged. Place PTO (Blade Engage) lever in (OFF) position. Parking brake not engaged. Engage parking brake. Spark plug wire disconnected. Connect wire to spark plug. Throttle/choke control not in correct Move Throttle/Choke Control into CHOKE position. -
Page 33: Section 13: Specifications
43 in. (109.2 cm) Ground Clearance 4.5 in. (11.4 cm) Turning Radius 18 in. (46 cm) Weight (approximate) 498 lb. (225.9 kg) * Toro reserves the right to change product specifications, design, and standard equipment without notice and without incurring obligation... -
Page 34: Electric Schematic
ELECTRIC SCHEMATIC ,lll_ +--I ,>--I >Z ÷÷C >>Z +.-q _'-q -_< r3._, ',IIF ov- ] ',Ill-... - Page 35 CALiFORNiA EMiSSiON CONTROL WARRANTY STATEMENT YOUR WARRANTY RIGHTS AND OBLiGATiONS The CaliforniaAir ResourcesBoardandMTDConsumerGroupInc are pleasedto explainthe evaporativeemissioncontrolsystemwarrantyon your 2007 lawn mower.In California,new lawnmower mustbe designed,builtand equippedto meetthe State'sstringentanti-smogstandards.MTDConsumerGroupInc must warrantthe EECSon your lawnmowerfor the periodof time listed below provided there has been no abuse, neglector impropermaintenanceof your lawnmower. YourEECSmay includeparts such asthe carburetor,fuel-injectionsystem,the ignitionsystem,catalyticconverter,fuel tanks,fuel lines,fuel caps, valves, canisters,filters,vapor hoses,clamps,connectors,and otherassociatedemission-related components.
- Page 36 Damage resulting from the installation or impliedwarrantylasts,so the above exclusionsor limitationsmay use of any part, accessory or attachment not approved by Toro for not applyto you. use with the product(s) covered by this manual will void your warranty as to any resulting damage.