Advertisement
Model No. NTEL7906.1
Serial No.
Serial
Number
Decal
QUESTIONS?
As a manufacturer, we are com-
mitted to providing complete
customer satisfaction. If you
have questions, or if parts are
damaged or missing, PLEASE
CONTACT OUR CUSTOMER
SERVICE DEPARTMENT
DIRECTLY.
CALL TOLL-FREE:
1-888-825-2588
Mon.-Fri.,
6 a.m.-6 p.m. MST
Sat, 8 a.m.-5 p.m. MST
ON THE WEB:
www.nordictrackservice.com
USER'S MANUAL
CAUTION
Read all precautions and instruc-
tions in this manual before using
this equipment. Keep this manual
for future reference.
our website
aT
www.nordictrack.com
new products,
prizes,
fitness
tips,
and much
more!
Advertisement
Table of Contents

Related Manuals for NordicTrack AudioStrider 990 NTEL7906.1


Summary of Contents for NordicTrack AudioStrider 990 NTEL7906.1
- Page 1 6 a.m.-6 p.m. MST Sat, 8 a.m.-5 p.m. MST ON THE WEB: www.nordictrackservice.com CAUTION our website Read all precautions and instruc- tions in this manual before using www.nordictrack.com this equipment. Keep this manual for future reference. new products, prizes, fitness tips, and much...
-
Page 2: Table Of Contents
HOW TO USE THE ELLIPTICAL EXERCISER ..........MAINTENANCE AND TROUBLESHOOTING ........... CONDITIONING GUIDELINES ............... PART LIST ................EXPLODED DRAWING ..............ORDERING REPLACEMENT PARTS ..........Back Cover LIMITED WARRANTY .............. Back Cover NordicTrack is a registered trademark of ICON IP, Inc. -
Page 3: Important Precautions
IMPORTANT PRECAUTIONS Jt WARNING: To reduce the risk of serious injury, read the following important precau- tions before using the elliptical exerciser. Read all instructions in this manual and all Wear appropriate exercise clothes while warnings on the elliptical exerciser before using the elliptical exerciser. -
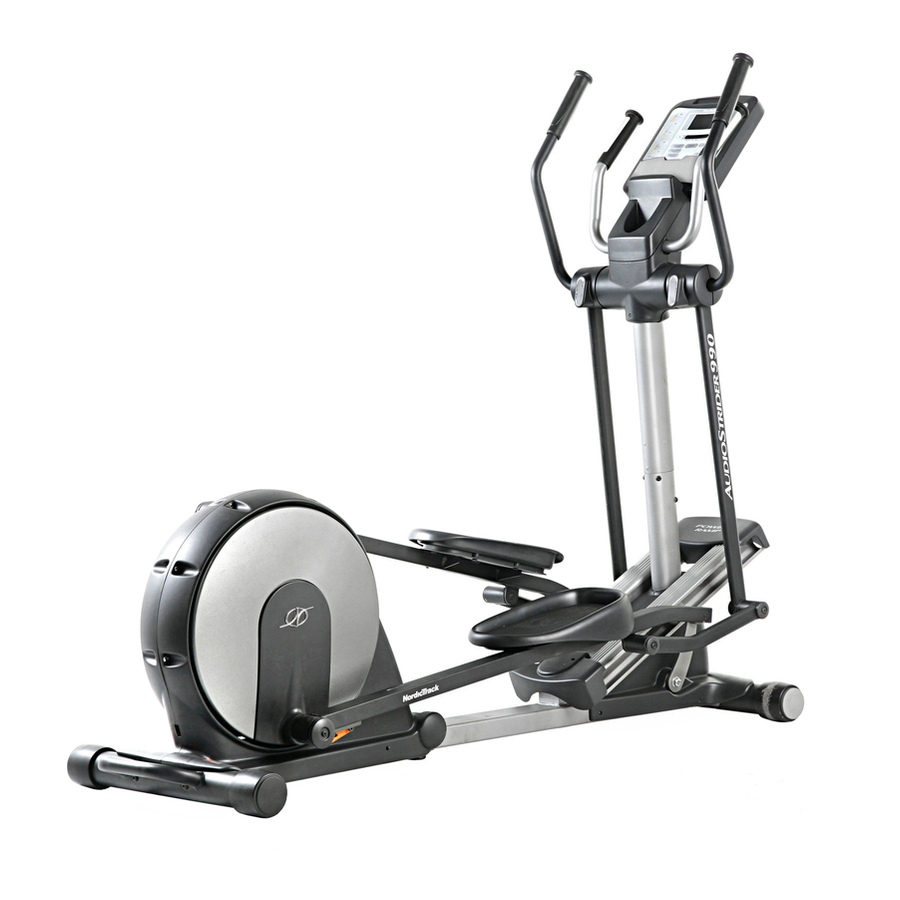
Page 4: Before You Begin
BEFORE YOU BEGIN Thank you for purchasing the revolutionary tions after reading this manual, please see the front NordicTrack ®AUDIOSTRIDER 990 elliptical exerciser. cover of this manual. To help us assist you, note the The AUDIOSTRIDER 990 elliptical exerciser provides... -
Page 5: Assembly
ASSEMBLY Assembly requires two persons. Place all parts of the elliptical exerciser in a cleared area and remove the packing materials. Do not dispose of the packing materials until assembly is completed. Assembly requires the included hex keys and your own phillips screwdriver and rubber mallet .. - Page 6 Whileanother p erson liftstheFolding Frame (2), attachtheRearStabilizer ( 3)totheFolding Frame withtwoM10x 93mmButton Screws (82) andtwoM10Curved Washers (99).Next, tighten theCenterFoot(95)intothe Frame (1). 3. Attach the FrontRamp Cover(6)tothe Ramp (5)withfourM4x 16mm Screws (116). SlideanM10x 25mmWasher ( 87)ontoan M10x 20mmButton Screw (111). T ighten the Button ScrewintooneendoftheRamp Axle(72).Applya smallamount o fthe included grease tothe Ramp Axle.
- Page 7 Identify the Left Pedal (34) and the Left Pedal Arm (32), which are marked with stickers. Attach the Left Pedal (34) to the Left Pedal Arm (32) with two M6 x 62mm Screws (108), two M6 x 35mm Screws (109), and four M6 Split Washers (102).
- Page 8 6. While another person holds the Upright (10) near the Frame (1), connect the Upper Wire Harness (65) to the Lower Wire Harness (64). Carefully insert the Upright (10) into the Frame (1); be careful not to damage the Wire Harnesses (64, 65).
- Page 9 Hold the Left Rear Upper Body Cover (26) and the Left Front Upper Body Cover (27) around the left Upper Body Leg (24). Attach the Upper 116, Body Covers with five M4 x 16mm Screws (116). Attach the Right Rear Upper Body Cover (28) and the Right Front Upper Body Cover (29) in the same way.
- Page 10 10, Attach the Left Link Arm (30) to the Left Pedal Arm (32) with an M8 x 15mm Button Screw (106), an M8.5 x 16mm x 1.5mm Washer (103), and an Axle Cover (66). Attach the Left Link Arm (30) to the left Upper Body Leg (24) with an M8 x 25mm Button Screw (110), two M8.5 x 16mm x 1.5mm Washers (103), two Axle Covers (66), a Link...
-
Page 11: How To Use The Elliptical Exerciser
HOW TO USE THE ELLIPTICAL EXERCISER HOW TO PLUG IN THE POWER CORD HOW TO FOLD AND UNFOLD THE ELLIPTICAL EXERCISER This product must be grounded. If it should mal- function or break down, grounding provides a path of When the elliptical exerciser is not in use, the frame least resistance for electric current to reduce the risk can be folded out of the way. - Page 12 HOW TO MOVE THE ELLIPTICAL EXERCISER HOW TO EXERCISE ON THE ELLIPTICAL EXERCISER To move the elliptical exerciser, first fold it as described at the left. Next, stand in front of the ellipti- To mount the elliptical exerciser, hold the upper body arms and step onto the pedal that is in the lowest posi- cal exerciser, hold the handgrip pulse sensors, and place one foot against the center of the front stabilizer.
- Page 13 CONSOLE DIAGRAM TIME REVOLUTIONS 25 ° RAMP CARBS Interactive Card Workout ?_echnology 15 ° OneTouch OneTouch Resistance Ramp FEATURES OF THE CONSOLE The console also features the new iFIT Interactive Workout System. The iFIT Interactive Workout System The advanced console offers an array of features enables the console to accept iFIT Cards containing designed to make your workouts more effective and workout programs designed to help you achieve specif-...
- Page 14 Follow your progress with the display, HOW TO USE THE MANUAL MODE While you pedal, the upper left corner of the dis- play will show the elapsed time. Note: During a Note: If there is a sheet of clear plastic on the face of program, except for heart rate program 1, the dis- the console, remove the plastic.
- Page 15 Measure your heart rate if desired. Turn on the fan if desired. If there are To turn on the fan at high speed, press the Fan sheets of clear Contacts button. To turn on the fan at low speed, press the Fan button a second time.
- Page 16 During the program, the program profile will show HOW TO USE A PRESET PROGRAM your progress (see the drawing above). The flashing segment of the profile represents the cur- Turn on the console, rent segment of the program. The height of the flashing segment indicates the resistance level for the current segment.
- Page 17 Follow your progress with the display. HOW TO CREATE A CUSTOM PROGRAM During the program, the display will show the pro- Turn on the console. gram profile, the time remaining in the program, and the distance you have pedaled. See step 1 on page 14. To view the profile, your pedaling pace, and the distance you have pedaled, press the Display but- Select a custom program.
- Page 18 As you exercise, you will be prompted to keep your pedaling Turn on the console. pace near the target pace setting for the See step 1 on page 14. current segment. When an upward-pointing arrow or the prompt Select a custom program, SPEED UP appears next to the pace information in the display (see step 4 on page 17), increase To select a custom program, press the Custom...
- Page 19 HOW TO USE A HEART RATE PROGRAM ollow your progress with the display. See step 4 on page 17. _lTurn on the console. Measure your heart rate if desired. See step 1 on page 14. See step 5 on page 15. Select a heart rate program, urn on the fan if desired.
- Page 20 If the resistance level for the current segment is Begin pedaling to start the program. too high or too low, you can manually override the setting by pressing the OneTouch Resistance Heart rate program 1 is divided into 40 one- buttons.
- Page 21 HOW TO USE AN IFIT PROGRAM HOW TO USE THE STEREO SOUND SYSTEM To play music or audio Turn on the console, books through the con- sole's stereo sound system See step 1 on page 14. while you exercise, first locate the stereo audio Insert an iFIT Card and select a program, cable in the center of the...
-
Page 22: Maintenance And Troubleshooting
MAINTENANCE AND TROUBLESHOOTING Inspect and tighten all parts of the elliptical exerciser Adjust the position of the Side Shields (14, 15) until regularly. Replace any worn parts immediately. the Discs (12) no longer rub against them, and then tighten the Bolt Sets (88) and the M4 x 16mm Screws To clean the elliptical exerciser, use a damp cloth and (116). -
Page 23: Conditioning Guidelines
CONDITIONING GUIDELINES During the first few minutes of exercise, your body J&WARNING: uses easily accessible carbohydrate calories for ener- gy. Only after the first few minutes of exercise does Before beginning this or any exercise pro- your body begin to use stored fat calories for energy. gram, consult your physician. -
Page 24: Part List
PART LIST--Model No. NTEL7906.1 RosozA Key No. Qty. Description Key No. Qty. Description Frame Clamp Folding Frame Large Axle Cover Rear Stabilizer Crank Bushing Front Stabilizer Crank Bushing Sleeve Crank Arm Ramp Front Ramp Cover Crank Arm Spacer Rear Ramp Cover Large Pulley Side Ramp Cover Crank Flange... - Page 25 Key No, Qty. Description Key No. Qty. Description M8 Split Washer Upright Brass Bushing M6 Split Washer Left Lift Arm M8.5 x 16mm x 1.5mm Washer Right Lift Arm M8 x 20mm x 2mm Washer Lift Bushing M8 x 16mm Button Screw Transformer M8 x 15mm Button Screw Control Box Cover...
-
Page 26: Exploded Drawing
EXPLODED DRAWING A--Model No. NTEL7906.1 Roso7A "r 6e )_ y'" 117 _... - Page 27 EXPLODED DRAWING B--Model No. NTEL7906.1 Roso7A i 131 7132 113 52...
-
Page 28: Ordering Replacement Parts
• the MODEL NUMBER of the product (NTEL7906.1) • the NAME of the product (NordicTrack AUDIOSTRIDER 990 elliptical exerciser) • the SERIAL NUMBER of the product (see the front cover of this manual) •...