
Related Manuals for First Alert HS-4700-S


Summary of Contents for First Alert HS-4700-S
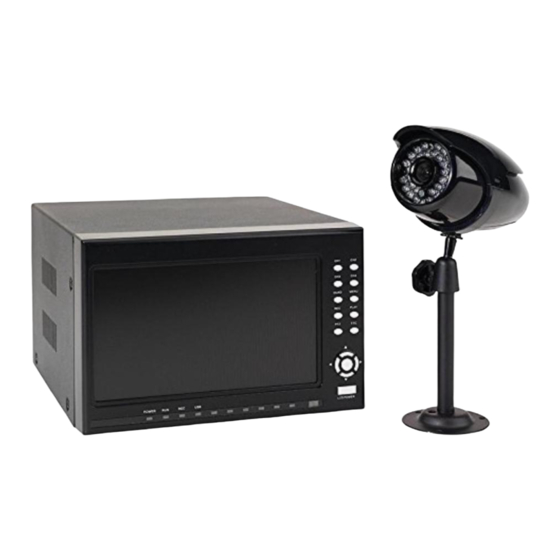
- Page 1 Indoor/Outdoor Analog Wired Cameras with 7” LCD Monitor and Built-In DVR Model HS-4700-S USER'S MANUAL...
- Page 2 ©2010 Lehigh Consumer Products, LLC All rights reserved. Distributed by Lehigh Consumer Products, LLC, Macungie, PA 18062. Due to continuing product development, the product inside the packaging may look slightly different than the one on the package. Lehigh Consumer Products, LLC is a subsidiary of Jarden Corporation (NYSE: JAH). To obtain warranty service, contact the Consumer Affairs Division at 1-800-323-9005, Monday through Friday, 7:30 a.m.
-
Page 3: Table Of Contents
Safety ... 1 Safety Precautions ... 1 FCC Compliance ... 1 Disposal ... 2 Getting to Know Your HS-4700-S System ... 3 Check Package Contents... 3 About the DVR ... 4 Front Panel Controls ... 4 Rear Panel Interface... 5 About the Remote Control... - Page 4 Select Backup File ... 33 Troubleshooting ... 34 Technical Information ... 36 General... 36 Camera... 36 DVR and Video... 37 Warranty... 38 Product Limited Warranty... 38 Warranty Exclusions ... 38 Obtaining Service ... 39 Table of Contents Model HS-4700-S User's Manual...
-
Page 5: Safety
AFETY RECAUTIONS Do not drop, puncture, or disassemble the camera or monitor. Never tug on the power adapter. Use the plug to remove it from the wall. Do not expose the camera or monitor to high temperatures. Use the device with care. -
Page 6: Disposal
Safety Model HS-4700-S User's Manual ISPOSAL These symbols indicate that it is prohibited to dispose of these batteries in the household waste. You can take spent batteries that can no longer be charged to the designated collection points in your community. -
Page 7: Getting To Know Your Hs-4700-S System
Congratulations on purchasing your First Alert Security Camera product. First Alert has been helping families and businesses stay safe for over 50 years. By having a First Alert Security Camera, you’re taking the first step in protecting your home or business from damage or theft. -
Page 8: About The Dvr
BOUT THE The Model HS-4700-S security system has a 7” LCD monitor with built-in 320GB MJPEG DVR. The features of the front and rear panels follow. RONT ANEL ONTROLS 10 11 12 13 Channel switch buttons (4) Four-screen display button... -
Page 9: Rear Panel Interface
DC 12V output power for cameras DC input power to DVR system quad-screen select camera select (1–4) menu select enter (select) escape video play controls * Cameras supplied with HS-4700-S system are not equipped with PTZ feature. DC12V picture-in-picture (separate from video play) -
Page 10: About The Cameras
Getting to Know Your System Model HS-4700-S User's Manual BOUT THE AMERAS The Model HS-4700-S security system includes four wired indoor/outdoor color CMOS security cameras, camera stands, mounting kits, and 60 feet of BNC cables. IR LEDs camera lens camera stand... -
Page 11: Setting Up Your Hs-4700-S System
Screw the camera onto the bracket. Tighten the lock nut to secure the camera on the bracket. lock nut thumb bolt Adjust camera to the proper view angle. Make sure the lens is upright relative to your subject. Tighten the thumb bolt. Setting Up Your HS-4700-S System AMERAS camera mounting bracket... - Page 12 Connect the power cable from the camera to the DC1 connector on the rear of the DVR. Connect the video cable to the VIN1 connector. Repeat connection for all four cameras. to camera video Setting Up Your System Model HS-4700-S User's Manual power supply video cable to camera power...
-
Page 13: Connecting The Dvr
Setting Up Your System Model HS-4700-S User's Manual ONNECTING THE Connect the mouse to the PS2 port on the DVR prior to plugging in DVR power supply. Connect the cable of the power supply adapter to the DC 12V connector on the DVR. -
Page 14: Operating Menus
Use the right/left arrow buttons to toggle between icons. Press the ENTER button on the DVR or click the left mouse button to select an option. Operating Menus * Cameras supplied with HS-4700-S system are not equipped with PTZ feature. -
Page 15: Hdd - Hard Disk Management
Operating Menus Model HS-4700-S User's Manual menu options PIP screen display HDD – H ANAGEMENT Access the HDD menu from the Main Menu. Use this menu to check hard drive status, capacity, available free space, and usage. The system supports hard drives up to a maximum of 1000 GB. -
Page 16: Record Menu
Click to save the System setup options and return to the Main Menu Click to keep the existing System setup options and return to the Main Menu Schedule Exit Operating Menus Model HS-4700-S User's Manual... -
Page 17: Record Parameters (Recpara)
Operating Menus Model HS-4700-S User's Manual ECORD ARAMETERS Channel Name Quality FrameNum APPLY TO Channel Name Quality Frame Num Brightness Contrast Saturation APPLY TO CANCEL Brightness Contrast Saturation CANCEL Select channel 1, 2, 3, or 4. User-defined channel name. Select one of five video quality options: minimum, low, medium, high, and highest. -
Page 18: Schedule Record
Select the channel number, and click the APPLY TO button. Click to save system options and return to Main Menu. Click keep existing system options and return to Main Menu. Operating Menus Model HS-4700-S User's Manual... -
Page 19: Manual Record
Operating Menus Model HS-4700-S User's Manual ANUAL ECORD To view the setup options, press the Manual Record button or the Record button on the front panel or remote control. Channel Channel Status CANCEL When the system is recording, the front panel REC indicator will be lit and a green dot will display in the right corner of the preview picture for this channel. -
Page 20: Playback And Search
In the search list, click PLAY to play the entire recording (based on the setup options selected). Click to keep existing system setup options and return to the Main Menu. Operating Menus Model HS-4700-S User's Manual... -
Page 21: Search Results
Operating Menus Model HS-4700-S User's Manual EARCH ESULTS NO. CH 001 01 Total 001 files 01 pages PLAY PLAY PREV NEXT CANCEL Note: The Search List can display up to 100 records starting with the earliest 100 records based on the search inquiry. If needed, select additional records by changing the search setup options. -
Page 22: Playback
(time fast) ×1/2 (time fast) ×1/4 (time fast) × 1/8 (time fast) > normal. Normal <2 (time fast) <4 (time fast) <8 (time fast) <1/2 (time fast) <1/4 (time fast) <1/8 (time fast) <Normal. Stop playback and return. Operating Menus Model HS-4700-S User's Manual video playback control tool bar... -
Page 23: Motion Menu
Operating Menus Model HS-4700-S User's Manual OTION Access the Motion Menu from the Main Menu. Use this menu to record video from any camera detecting motion or to schedule specific recording times. Schedule the time and day in Motion Menu to set when Motion Detection will be enabled. -
Page 24: Motion Schedule
23:00 o'clock. Press the Menu button on front panel or click left mouse buttons to select a day-hour box. Green indicates not selected; red indicates selected. Note: HS-4700-S system uses military time (24-hour clock). Operating Menus Model HS-4700-S User's Manual... -
Page 25: Ptz (Option)
The PTZ is an optional feature available on some cameras. This feature is not available on the cameras supplied with the HS-4700-S system, but the system software is PTZ-ready. Access PTZ (Pan Configure) from the Main Menu. Use this menu to select the address, protocol, and baud rate for each camera. -
Page 26: Ptz Control (Option)
The PTZ is an optional feature available on some cameras. This feature is not available on the cameras supplied with the HS-4700-S system, but the system software is PTZ-ready. Access the PTZ Control from the Main Menu. Use this menu to adjust the focus, zoom, and iris setting for a selected camera. -
Page 27: Search Logs
Operating Menus Model HS-4700-S User's Manual EARCH Access the Search Logs menu from the Main Menu. Use this menu to search logs for the type of log and the start/end times. Type 1 : Start Channel Type Start SEARCH CANCEL... -
Page 28: System Menu
NTSC. If there is video loss on any channel, the system will trigger the alarm buzzer. “X” indicates alarm is on. Display the interval time settings for the 4-channel preview auto circularity, 01-99 seconds. Operating Menus Model HS-4700-S User's Manual... -
Page 29: Modify Password
Operating Menus Model HS-4700-S User's Manual PIPConfig VGA Type Password Lock Time CANCEL ODIFY ASSWORD Access the Modify Password menu from the System Menu. Use this menu for password management. Old Password New Password Confirm Old Password New Password Confirm CANCEL Picture-in-Picture Configuration. -
Page 30: Date & Time
01 : 01 : 01 CANCEL System date format: year-month-date. System time format: hour-minute-second. Click to save system setup options and return to Main Menu. Click to keep existing system setup options and return to Main Menu. Operating Menus Model HS-4700-S User's Manual... -
Page 31: Default
Operating Menus Model HS-4700-S User's Manual EFAULT Access the Default Configure menu from the System Menu. Use this menu to return the system to the factory-set default configuration. Default Configuration? CANCEL ESET Access the Reset menu from the System Menu. Use this menu to restore previously set system options. -
Page 32: System Variation
Access the System Variation (About) menu from the System Menu. Use this menu to view product information, hard drive version, and software version. Product HD Ver. SW Ver. Model HS-4700-S User's Manual Alma-asia DVR HD-Ver. 02.00 SW-Ver. 01.23 Operating Menus... -
Page 33: Dvr Client
This chapter describes the DVR Client software that can be installed on a PC and used to record, playback, and search for video segments. NSTALLATION Connect the DVR unit to the PC using the USB cable (provided). Insert the DVR-Client CD and double click “DVR_Client Setup CHS”... -
Page 34: Playback Control
8 times faster, 2 times slower, 4 times slower, 8 times slower Click to pause playback and view a saved prompt. Select the directory and file type, then click OK to save. DVR Client Model HS-4700-S User's Manual... -
Page 35: Update
DVR Client Model HS-4700-S User's Manual PDATE Start the client software, and select the Upgrade menu. NPUT THE PGRADE To upgrade the software: 1. Browse to and select the hard disk area. Press the OK button to view the hard disk information, including hard disk model number, capacity, and connection type. -
Page 36: System Upgrades
Confirm button to view hard disk information, including: type, disk size, and connections. Click the Delete/Update File button to view the updated or deleted file. Open Client software, and press the Enter Playback menu. Model HS-4700-S User's Manual DVR Client... -
Page 37: Select Backup File
DVR Client Model HS-4700-S User's Manual ELECT ACKUP Select the backup file: 1. Click the Open button. Select the backup file to playback. 2. Open the Backup file directory. Drag the file to the client playback procedures. The backup interface has the following options:... -
Page 38: Troubleshooting
Problem Solution Make sure the cameras and receiver are plugged in. No picture. Make sure the TV/ VCR/ DVR is tuned to the correct input channel. The camera's infrared LEDs shine invisible light that reflects off surfaces such as glass causing white light. A white image appears at Place the camera on the other side of windows or place the night. - Page 39 Troubleshooting Model HS-4700-S User's Manual Problem Why is there no display on the monitor or computer VGA? Why does the video have "water waves"? Solution Check to make sure the power adaptor is working and the output is connected properly.
-
Page 40: Technical Information
ENERAL Operating Power Remote Control Mouse USB Connection PC Backup 4-Camera Multi-View AMERA Image Device Video System Resolution White Balance Lens Infrared LEDs Effective Pixels Signal/Noise Ratio Gain Control Backlight Compensation Night Vision Distance Operating Temperature Dimensions (camera & stand) Indoor/Outdoor Technical Information DC 12V... -
Page 41: Dvr And Video
Technical Information Model HS-4700-S User's Manual IDEO Video System Video In Video Out Display Resolution Compression Format Recording Resolution Recording Frame Rate Recording Modes HDD Interface / Memory Type NTSC BNC 4-channel inputs Monitor and BNC NTSC: 680 (H) x 480 (V) -
Page 42: Warranty
IMITED ARRANTY BRK Brands, Inc., (“BRK”) the maker of First Alert® brand products warrants that for a period of one year from the date of purchase (the “Warranty Period”), this product will be free from defects in material and workmanship. BRK, at its sole option, will repair or replace this product or any component of the product found to be defective during the Warranty Period. -
Page 43: Obtaining Service
Warranty Model HS-4700-S User's Manual other software that may be or may become resident on the users system as a result of installing the software provided. This warranty is in lieu of other warranties, expressed or implied, and BRK neither assumes nor authorizes any person to assume for it any other obligation or liability in connection with the sale or service of the product.